How to choose a needle roller?
The roller is widely used in modern construction for painting, plastering and finishing work and has different varieties. A needle roller is the same type of roller tool. This roller is indispensable for arranging self-leveling self-leveling and polymer concrete floors; it is needed for processing gypsum and cement solutions, and helps out when bending plasterboard sheets and removing wallpaper manually.
Why is it needed?
During the floor repair process, a special mixture is prepared. In most cases, when mixing it, air bubbles are formed, which can become a serious obstacle to performing quality work. If they are not promptly removed from the solution, after drying the screed will have micro-voids. Such deformations will subsequently lead to surface unevenness. Such a floor will not last long.
A needle roller is indispensable for removing air from a liquid polymer or concrete solution. The cylindrical base of the roller consists of a handle and a substrate, which is covered with a needle-like material. The handle, in turn, can be metal, plastic or wood. Metal rollers are heavier, they are strong and durable, convenient for bending drywall and working with old wallpaper. Manufacturers often equip such products with an extendable handle.
What is it needed for?
A needle roller is necessary for removing air bubbles from the self-leveling floor, stripping off old wallpaper and bending sheets of drywall. In the first option, it serves as a layer leveler, and the needles pierce air bubbles in the solution.
A self-leveling self-leveling floor spreads and levels well, but without the use of a needle roller, bubbles will remain in it, which will evaporate through the pores over time, and voids will remain, due to which the floor will become brittle, begin to crack and swell.
How to use?
Using a needle roller, you can easily bend drywall and give it the desired shape. For these manipulations, it is better to choose a roller made of plastic material with steel needles. The technology is as follows: it is necessary to wet the sheet of drywall on the side on which you plan to bend it. Then you need to go over the surface with a needle tool and make punctures with a diameter of 2 mm, after which it remains to bend the softened material. The longer the needles, the more moisture will penetrate into the surface structure, the easier the drywall will bend.
To remove old wallpaper, you must first moisten the wall covering with water , and then carefully remove it from the wall using a needle roller. This process is quite quick and easy. A needle roller is suitable for removing various wallpapers (paper, vinyl, non-woven, textile and others). In the processing of self-leveling and concrete coatings, a needle roller is used to remove oxygen bubbles and level the fill.
To eliminate voids, it is necessary to intensively roll the roller over the surface of the screed, which is already distributed over the floor.
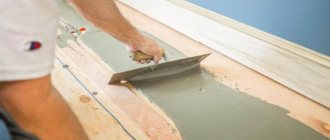
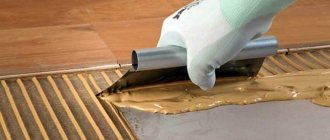
Before rolling with a needle roller, the floor is leveled with a spatula. Rolling is done without removing the roller from the mixture for 15-20 minutes. The time may depend on the composition of the mixture; before starting work, read the instructions in advance. It is necessary to work evenly and roll without pressure. It is better to move on special spikes for shoes so as not to deform the new floor.
It is advisable to treat the floor in this way at least three times. Such pumping reduces the porosity of the mixture and prevents its deformation, which is especially important for rooms in which industrial machines, massive objects and furniture are supposed to be placed on the floor. After work, it is recommended to thoroughly clean the roller from dirt and dry it.
The needle floor roller has a wide range of applications and is a multifunctional and useful tool. You can perform all of the above manipulations yourself, without calling a specialist, which will save time and budget. There is no substitute for a needle roller on the modern market; its use simplifies the process of arranging the floor and provides a guaranteed result. However, you shouldn’t rely on just one tool. A good result requires preliminary preparation of the base, the use of high-quality mixtures and materials, and following the instructions. Sufficient time is needed for the floor to dry.
Tips for choosing
Finding a needle roller today is not difficult; choosing a suitable and high-quality tool is a responsible matter. Needle rollers are available in construction stores, markets, and Internet sites. Needle rollers have found application in the field of beauty and health. An example of this is a magnetic or special needle roller for massage procedures. It is important not to confuse these products.
Construction magnetic brushes also exist, but they are designed for cleaning particles from the surface of the floor or sandy surfaces. They are quite voluminous and are produced in the form of trailers or varieties for manual rolling. When purchasing a regular needle roller, you must consider the following features:
Material of manufacture
The material of manufacture affects the service life. A metal tool is stronger and more durable, so you should give preference to it. Plastic deteriorates over time.
Roller width
Roller width, which varies from 150 to 600 mm. For a large area, it is more practical to buy a wide roller; a narrow model is convenient for processing narrow niches and hard-to-reach places. For processing drywall, a roller of any width is suitable; for removing wallpaper, you need a medium (400 mm) or maximum width (600 mm) option.
Needles
Needle clamping tools have needles ranging from 8 to 34 mm in length. This parameter is especially important if the tool is purchased for floor processing. The thicker the height of the tie, the longer the needles should be. They will penetrate deeper into the solution, which will ensure work efficiency and the desired result.
There are needles of several shapes: sharp cone-shaped, spherical and drop-shaped. Masters believe that spikes in the form of drops are less effective. Sharp needles are used for more viscous mixtures, for example, based on epoxy resin. These mixtures need to be pierced to remove any air pockets. For liquid self-leveling mortar, spikes with ball-shaped tips are suitable. It is better to choose the length of the needles slightly longer than the thickness of the floor being poured.
If the needles are too short, the roller body will contact the surface, creating tension and displacing the solution. As a result, irregularities will appear. Long spikes, if used incorrectly, will create more bubbles and splatter the mixture. It is important to match the length of the needles to the height of the floor layer. For mixtures of gypsum or cement, or bending drywall, you will need a roller with the maximum length of needles. For finishing coatings up to 5 millimeters thick, it is recommended to purchase rollers with the thinnest needles.
Pen
The roller handle can be simple or extendable. The second option can be adjusted in length, which is convenient to use (it relieves stress from your hands). The floor is processed in a standing position, so it is better to immediately purchase a roller with a special extension. When purchasing a product, pay attention to the length of the handle that is comfortable for you, so that you don’t have to work while bending over, otherwise your back will quickly get tired. Short rollers with a niche for installing a holder will have to be modified and a handle inserted. It's better not to choose this option.
Decorative putty
Putty rollers are very widely represented on the market. They vary in design, width, and material. Puttying drywall with a roller has many advantages:
- Saving. It takes much less time to cover the surface with putty with a roller than working with a spatula.
- Working with a curved roller is easy; no extra force is required.
- When working with a patterned roller, a beautiful patterned relief is created. Which, after drying, only requires painting.
This is what rollers for decorative drywall putty look like
. But there are also disadvantages:
- For decorative relief, special putty solutions should be used.
- There is an overexpenditure of material. To apply putty with a roller, a flat surface of drywall is required. To do this, all fasteners and joints are sealed with ordinary putty.
- The roller does not fit into the corner, so the design should be finalized with a regular spatula.
With all the pros and cons, the use of rollers when working with drywall and its surface after installation is irreplaceable. This saves not only time, but also with the help of these tools you can create unique decorative elements that have several shades of the same color. The video shows the process of puttingtying drywall with a roller.
Model overview
The photo shows a needle tool for drywall. Its needles are steel and have the shape of a cone. The handle is varnished, it is practical for long-term use and many manipulations. The roller width is 150 mm, which is convenient for applying notches to plasterboard sheets. It is also suitable for removing wallpaper.
Roller for self-leveling floor with a metal frame and a protective cover. After rolling, pores appear on the floor surface, but they will smooth out and disappear when completely dry. This option is suitable for rooms with a large area. To level the screed in a small room, it is enough to purchase plastic products with an optimal width of 250 - 300 mm.
If necessary, you can build a protective cover yourself.
A roller with a needle surface is a universal and necessary tool of its kind, helping to perform flawless work. You should not ignore the need to use it when pouring the floor: as a result, you can get a perfectly flat and load-resistant floor.
To learn how to make a roller for a self-leveling floor with your own hands, see the following video.
If there is no roller
A small sheet can be bent without using a roller. If the radius of curvature is large, you can simply wet the paper base by covering it with a wet cloth for a while. Paper on moisture-resistant drywall gets wet very poorly, so this method is only applicable for ordinary sheets. You can use an awl to pierce the paper. To ensure that the holes are the same depth, you need to put a limiter made of a tube of a suitable diameter on the awl or tape a limiter made of wood or plastic with electrical tape.
Very often, curved elements are made not from a bent sheet, but from a cut sheet. To do this, notches are made on the sheet to the depth of the paper layer. The distance between the notches should be the same as the cuts on the profile of the supporting frame, but not less than 2 centimeters. Otherwise, when screwing in the screws, the gypsum layer will crack and fall out. With this method, the surface will not be uniformly curved, but stepped. All irregularities will then need to be smoothed out with putty. To obtain the most uniform bending, the notches must be strictly parallel to each other.
Needle roller for self-leveling floor: tips for selection and use
Self-leveling floors have become very popular lately. They allow you to create durable and perfectly smooth surfaces using a minimum amount of force. However, to create such a coating you need to have a certain tool, one of which is a needle roller for self-leveling flooring.
It is worth noting that some masters consider the presence of this device optional. At the same time, claiming that there is no practical benefit from it, which is a serious violation of the installation process, especially when using quick-hardening mixtures.
Even small areas are subjected to this surface treatment
About important points, pros and cons
Having familiarized ourselves with the functions and purpose of the needle roller, let’s pay attention to a few more important points.
TOP best self-leveling self-leveling floors
How self-leveling floors are poured
We should also talk about the disadvantages of polymer floors. This includes, first of all, the fact that the surface must be seriously prepared. And not only clean it of debris, but also prime it and putty it (if necessary). In addition, the mixture for polymer floors in liquid form is poisonous and toxic - if it gets into your eyes or skin, you will probably need to visit a doctor. Finally, such mixtures are not cheap; the price can reach up to 6,000 rubles per 1 sq. m. m.
The floor must be properly prepared before pouring.
Prices for self-leveling floors "Starateli"
Operating principle and types
It is worth noting that the roller for self-leveling floors looks quite simple and cannot be called a complex technical device. However, its design can greatly affect the quality of the surface, and if selected incorrectly, even damage it. .
Purpose
- After stirring the pouring mixture, small air bubbles appear in it. Moreover, they remain there even after the floor of an apartment or house has been poured.
- There is a possibility that if you use a mixture that takes a long time to harden, the air will come out on its own. This is often an argument of inexperienced craftsmen who claim that rollers for self-leveling floors need not be used. However, if the consistency of the mixture is quite thick, then you should not hope for this.
It is better not to purchase a product with a short handle and without a seat for a long handle, since then they will have to be further modified
- The task of the roller is to walk over the surface with small needles to perform a kind of mixing of the layer, removing air bubbles from it.
- The fact that if such inclusions remain in the composition deserves special attention, then after solidification its structure will be greatly damaged. This will affect the surface strength and service life of the final product.
Advice! Do not neglect this device, as otherwise you can weaken the surface.
Correct installation involves first leveling with a special spatula, and then processing with a roller
Width
Currently, needle rollers for self-leveling floors are made in various widths.
At the same time, novice craftsmen face the question of what size of this product is needed.
- Wide rollers allow you to cover a larger area of the floor of an apartment or house in a short time. They are convenient to work with and the process takes little time.
- However, it must be remembered that there will always be hard-to-reach places in the room, and it is better to work on them with small rollers.
- Taking into account such features, the installation instructions recommend having both a wide and a narrow roller available in order to avoid problems in difficult areas and to facilitate work in large areas.
Advice! When purchasing a roller, you should immediately pay attention to the length of its handle. It should be large enough to allow you to work without bending over. Otherwise, when installing on large volumes, your back will quickly get tired.
Needle height
It should be noted that this product is equipped with needles of different lengths. On some rollers they are small, while on others their height is about 10 cm or more. At the same time, the price for them is almost the same, but the quality of installation depends on the right choice.
The fact is that if the needles are too small, then the roller will pass along the surface with its plane, which may not only not be beneficial, but also cause harm, creating surface tension and displacing the composition along the surface.
If the teeth are too large, then this is also bad, since the mixture will spread over them and splash, creating additional bubbles. That is why professionals recommend selecting this tool for a specific layer.
Separately, it is worth noting that there are devices on which a splash guard is installed on the back. You can also do it yourself, which allows you to use a roller with long teeth even on thin layers without the risk of damaging them.
Advice! After use, rinse the roller thoroughly to remove any remaining mixture. If this is not done, lumps will appear on its surface that will interfere with installation.
Using a product with small teeth on a surface with a large layer of fill is unacceptable, as this will only harm the quality of the floor.
Laying work
Beacons for self-leveling floors
The preparation of the working solution must be done strictly following the instructions. Be careful and use only as much water as the manufacturer indicates. So the quality of the solution directly depends on this - a solution that is too thin will not create a coating of the required strength, and a thick solution will not spread as it should.
The finished working mixture, prepared using a construction mixer, should be poured out of the bucket in strips. The distance between the strips is from 20 to 30 cm. The gap is needed so that there is room for the mixture to spread.
When pouring self-leveling mortar, it is necessary to level the mortar with rubber spatulas. And be sure to roll the poured mixture with a needle roller, removing air from it. It is better if there are two craftsmen, then one will pour out the solution and process it with a roller, and the second will prepare a new portion in the meantime.
Before laying the flooring, be sure to make sure that the solution is completely dry and only then cut off the excess pieces of damper tape.
What kind of needle-shaped beast is this?
Whether you like it or not, in order to competently organize the work of laying self-leveling floors, you will need to use some tools, and one of them is a special roller for leveling the self-leveling floor. It is this rather small tool that allows you to get a strong, beautiful and durable coating. By scrolling, this tool allows you to “roll out” the liquid mixture of the floor covering, which in turn leads to the elimination of air bubbles. The correct use of this much-needed device largely determines whether your coating will be perfectly smooth.
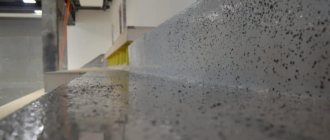
If we talk about self-leveling floors, better known in narrow circles as industrial, they are a type of screed with self-leveling mixtures. Their minimum thickness can be about 3.5 mm. If you do everything correctly, then such a floor will level itself in the plane to an almost ideal horizontal line. Well, the roller helps with this.
In addition, using rolling technology, you free the mixture from bubbles and porous structure, which saves the product from early destruction and wear. In fact, this particular procedure (rolling) is a mandatory part of the technology used to install such a coating. If you decide to ignore it, then such a poorly laid mixture on the base can lead to the failure of all further measures, make the floor uneven, and after some time the coating will become unusable.
The needle roller, as a tool for finishing work, is constantly used by work teams. If you decide to take on the task of applying self-leveling floors yourself, then you will also have to adhere to all the rules, including those related to the use of a specialized roller. You can use this tool both when working with self-leveling floors and with drywall. The device itself is covered with a special needle-shaped cover, and for convenience it also comes with a rigid frame in the form of a handle for gripping. The base of such a tool can be made of either metal or plastic.
The latter, of course, is lighter than its steel counterpart, but it will not be enough for working on large areas for a long time. Then it’s better to immediately buy metal.
Failure to comply with technological intervals
You cannot install a self-leveling floor 24-48 hours after a cement-sand floor, as it forms a crust on the surface of the first floor, which is why moisture does not leave it for a very long time when it cools. If you put a laminate on this surface, the release of moisture will lead to swelling and the appearance of fungus and mold. You need to wait until the cement-sand screed has completely dried (on average, 1 cm takes about a week to dry). From this the time for pouring the self-leveling mixture is calculated.
Following these simple but extremely important rules will help you make perfect and durable repairs, turning it from hard labor into pure pleasure.
Needle roller for self-leveling floor - what to look for?
A needle roller can be purchased at a specialty store. Remember that it comes in 2 types (as described earlier). You should buy one that includes a special universal handle. And for greater convenience, you can also use a telescopic extension. This type of device is convenient to use to remove air bubbles. And considering that you need to go over the surface with a roller every time after pouring the mixture, it is better to buy a good tool right away. By the way, a T-shaped strip will also help to distribute the solution over the surface. As for the roller, the handle and extension can be made not only of different materials (plastic or wood), but also of different lengths.
But the main difference is the size of the needles. They can be of different thickness and length, which means the effect of use will vary slightly. As experts advise, the length of the roller needles should be slightly greater than the thickness of the layer of your bulk solution. In construction supermarkets you can find such a tool with needles from 8 to 35 mm! But keep in mind that if the thickness of your future floor is minimal, i.e. the coating will be less than 5 mm, then you are better off immediately buying a roller with sharp needles. It can be successfully used in various works where mixtures based on cement, gypsum or polymers are used. And as mentioned earlier, the required size of the roller depends on the thickness of the layer, which means that with a gypsum or cement coating you will have to buy a large tool (at least 30 mm).
The width of this tool is also different and can vary from 20 to 60 centimeters. Of course, it would be more logical to buy a wider roller, since it is much more convenient for them to work on large areas. But do not forget that in the same room there may be hard-to-reach places (near the baseboards, doors, in the corners), and in this case your wide roller will only do a bad job - it will be difficult to solve this problem with it. So, if you do not have the opportunity to buy two products at once, it is better to stock up on a medium-sized tool. Of course, in this case it will take you more time to work, but you will not have a problem with how to deal with self-leveling flooring in corners or other inconvenient places.
The price of such a roller may vary if it is resistant to aggressive environments. If he is afraid of solvents, then it is better not to buy such a tool.
Where can I buy the tool?
Such a tool can be found in different places if necessary. If you want to touch and check the product before purchasing, you can go to a specialized store. This method is good for inexperienced finishers, who will likely benefit from expert advice.
Good options at lower prices can be found in any construction market. True, these rollers will not always be of high quality. However, the price will allow you to purchase several options at once.
For those who have already decided on the manufacturer and material, you can even choose a suitable roller in the online store. In this case, you don’t even have to go anywhere; you can make purchases while lying on the couch.
Briefly about the main thing: discussions on the topic
Enough has already been said about the ordinary instrument. Therefore, we will briefly dwell on the main points.
- A needle roller is one of the main tools in the process of pouring a polymer floor.
- The roller is made in such a way that it has spikes in the form of needles. This allows self-leveling floors to become more durable and uniform.
- Polymer floors have a seamless coating.
- The use of such floors is recommended where strict adherence to hygiene standards is necessary.
- A chemical composition with special components for self-leveling floors is sold in cans. Nowadays there are about 10 different shades.
- If desired, you can also apply a “decoration effect” (applied on top of the finished floor covering). Acrylic paint will help you achieve different designs and colors.
- The most popular pattern is the “wood effect” - an imitation of natural material.
- In recent years, self-leveling floors can often be seen in restaurants and offices. Previously, they were only in industrial premises (where there are heavy loads on the coating). Now self-leveling floors for garages and apartments are not uncommon.
- The composition of the self-leveling floor includes polymers, mineral mixtures and synthetic modifying additives.
- When mixed before use, the mixture for self-leveling floor can spread in a thin layer. It hardens quickly, is plastic and has high adhesion to the base.
- The drying speed of such a coating depends on the properties of your solution and external conditions.
- According to standards, the poured surface can withstand heavy loads - up to 800 kg per square centimeter!
- The base for a self-leveling floor is often a concrete floor or cement screed. If you chose the second option and have just started work, then you will also need to calculate the cement consumption for the floor screed.
- Industrial flooring often includes polyester resins, as well as liquid rubber. They are not contained in polymer floors of residential apartments.
Peculiarities
A roller with needles of modern production is a convenient device for performing interior finishing work. Today, several types of useful construction tools are produced - for plasterboard slabs and for self-leveling floors. The main part of the product is a movable shaft mounted on a handle, the entire surface of which is covered with needles. In appearance, this device resembles a magnetic massage roller.
Needle levelers are made from plastic or metal. Metal models are much heavier than plastic ones, are intended for large-scale work, and are designed for leveling the floor of large areas.
Almost all manufacturers provide a universal holder for a handy tool, into which a stick can be mounted without any effort. It makes working with bulk liquids easier and eliminates the need for additional physical exertion. Like the main part of the product - the cylinder, the handle with an extension can be made of wood or polyvinyl chloride.
In addition to the material of manufacture, needle rollers differ in thickness (shaft diameter), width and length of the needles.
The width of the working surface ranges from 150–600 mm.
Different widths indicate the use of the tool in a certain type of room:
- A device with a size of 15-25 cm and a diameter of 100 mm or more is intended for rolling out bulk mixture in hard-to-reach places.
- A cylinder 25-40 cm thick is used for self-leveling flooring in residential premises and offices with a room area of 10-20 m2.
- A shaft with a width of 400-600 mm is used for leveling screed in rooms with an area of more than 50 m2.
Needle roller for self-leveling floor: tips for selection and use
Self-leveling floors have become very popular lately. They allow you to create durable and perfectly smooth surfaces using a minimum amount of force. However, to create such a coating you need to have a certain tool, one of which is a needle roller for self-leveling flooring.
It is worth noting that some masters consider the presence of this device optional. At the same time, claiming that there is no practical benefit from it, which is a serious violation of the installation process, especially when using quick-hardening mixtures.
Even small areas are subjected to this surface treatment
Is there an alternative?
Unfortunately, there is no alternative to a needle roller on the modern market. Thanks to the use of this device, the process of installing the coating is noticeably easier and it is possible to achieve a high-quality final result. When pouring, the mixture is first spread using a special spatula, and then rolled with a spiked roller. In short, you can’t do without the tool that this article is devoted to.
Squeegee for self-leveling floor
Operating principle and types
It is worth noting that the roller for self-leveling floors looks quite simple and cannot be called a complex technical device. However, its design can greatly affect the quality of the surface, and if selected incorrectly, even damage it. .
Purpose
- After stirring the pouring mixture, small air bubbles appear in it. Moreover, they remain there even after the floor of an apartment or house has been poured.
- There is a possibility that if you use a mixture that takes a long time to harden, the air will come out on its own. This is often an argument of inexperienced craftsmen who claim that rollers for self-leveling floors need not be used. However, if the consistency of the mixture is quite thick, then you should not hope for this.
It is better not to purchase a product with a short handle and without a seat for a long handle, since then they will have to be further modified
- The task of the roller is to walk over the surface with small needles to perform a kind of mixing of the layer, removing air bubbles from it.
- The fact that if such inclusions remain in the composition deserves special attention, then after solidification its structure will be greatly damaged. This will affect the surface strength and service life of the final product.
Advice! Do not neglect this device, as otherwise you can weaken the surface.
Correct installation involves first leveling with a special spatula, and then processing with a roller
Width
Currently, needle rollers for self-leveling floors are made in various widths.
At the same time, novice craftsmen face the question of what size of this product is needed.
- Wide rollers allow you to cover a larger area of the floor of an apartment or house in a short time. They are convenient to work with and the process takes little time.
- However, it must be remembered that there will always be hard-to-reach places in the room, and it is better to work on them with small rollers.
- Taking into account such features, the installation instructions recommend having both a wide and a narrow roller available in order to avoid problems in difficult areas and to facilitate work in large areas.
Advice! When purchasing a roller, you should immediately pay attention to the length of its handle. It should be large enough to allow you to work without bending over. Otherwise, when installing on large volumes, your back will quickly get tired.
Needle height
It should be noted that this product is equipped with needles of different lengths. On some rollers they are small, while on others their height is about 10 cm or more. At the same time, the price for them is almost the same, but the quality of installation depends on the right choice.
The fact is that if the needles are too small, then the roller will pass along the surface with its plane, which may not only not be beneficial, but also cause harm, creating surface tension and displacing the composition along the surface.
If the teeth are too large, then this is also bad, since the mixture will spread over them and splash, creating additional bubbles. That is why professionals recommend selecting this tool for a specific layer.
Separately, it is worth noting that there are devices on which a splash guard is installed on the back. You can also do it yourself, which allows you to use a roller with long teeth even on thin layers without the risk of damaging them.
Advice! After use, rinse the roller thoroughly to remove any remaining mixture. If this is not done, lumps will appear on its surface that will interfere with installation.
Using a product with small teeth on a surface with a large layer of fill is unacceptable, as this will only harm the quality of the floor.
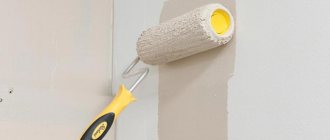
Soft roller for painting drywall
Rollers for painting drywall come in a variety of pile sizes, lengths and widths. Using a paint roller has a number of advantages:
- Speed. If a wide roller is installed on the roller, it can be used to paint a large square of plasterboard covering in a relatively short time;
- Ease. When working with a roller, no force is required. They are easy to work with;
- Economy. When painting a plasterboard surface with a roller, the paint does not splash in different directions, it is absorbed by the pile, and then evenly distributed over the surface.
But, before buying a roller for painting the surface, you need to understand the length of the pile. Each type of pile is applicable to a specific paint:
- Gloss paint – requires a 4mm nap roller.
- Matte type of paint - you need a roller with a pile of 4 to 8 mm.
- Textured paint – a roller with a long pile of 8 mm or more is required.
The rollers also differ by manufacturer:
| Brand/specifications | Manufacturer country | Pile length, mm | Roller length, mm | Roller radius, mm | Pile base | Pen | Price, rub. |
| ROS 02581 | Russia | 6 | 100 | 31 | polyacrylic | plastic | 90 |
| BISON EXPERT | China | 9 | 180 | 24 | velours | plastic | 236 |
| BISON MOHAIR | China | 4 | 180 | 24 | wool | plastic | 220 |
By choosing a suitable roller, the plasterboard surface can be perfectly painted in a single color scheme.
