Published on October 30, 2018 by Stroitel
Balconies and loggias are an integral part of apartment buildings and country cottages. The aesthetics of the finishing is important here; the type of extension affects not only the interior, but also the façade of the building. The room is specific, which means the materials must not only be beautiful, but also practical and withstand difficult operating conditions.
And then we will discuss whether textured plaster is appropriate on a balcony and loggia. We will weigh all the advantages and disadvantages of such finishing, show you how to make decorative plaster on a balcony with photos and video examples, and examine the physical, chemical and mechanical characteristics.
Types of decorative plaster
Decorative plaster differs in the composition of its basic elements:
- On silicone - moisture resistant, suitable for open spaces, including balconies and loggias, does not lose its characteristics when finishing external elements.
- Mineral base - plaster with high performance characteristics, not recommended for use with cold glazing on an unheated balcony or loggia.
- Lime – for closed and glazed balconies and loggias; when applied, a texture is formed that imitates natural stone.
- With the addition of plant fibers - moisture resistant, vapor permeable.
- Finishing the balcony with decorative plaster on a vinyl and acrylic base is not afraid of dampness, but does not allow air to pass through, making ventilation difficult.
Finishing the loggia with plaster and applying a finishing coat of paint will extend the life of the coating
Gypsum plaster on loggias and balconies is an excellent option for arranging insulated and glazed rooms, and cement mixtures can be used for painting in open areas.
Important: For finishing open balconies and loggias, it is better to choose plaster for external use; the corresponding mark should be on the label.
Decorative plaster goes well with wild and artificial stone, with natural wood, with PVC panels that imitate natural materials, which allows you to create the interior design of balconies and loggias in a variety of styles.
Balcony finishing with decorative plaster, antique plaster
Additional recommendations
To obtain a high-quality and reliable finish, it is important to choose the right material. When choosing, you should adhere to some rules:
- Buy goods from specialized outlets with the necessary quality documents;
- The quality of the product depends on the cost, so you should not trust manufacturers who offer too low prices;
- Before purchasing, you can look at reviews and photos of customers who purchased the product from this company.
Decorating a balcony or loggia with artificial stone has a number of advantages and disadvantages. It is worth noting the reliability, strength, and durability of the material, which has high resistance to high humidity and strong temperature changes.
Ease of installation is also an important aspect. Having the necessary tools and basic knowledge of the business, as well as patience and great desire, you can create a cozy and unique corner that will become a pleasant and beautiful addition to the room.
How to choose high-quality artificial stone (1 video)
Finishing options (38 photos)
Decoration methods
In terms of its composition, depending on the fractions of the components, decorative plaster on balconies and loggias can be small- or large-relief. While preparing the solution, it can be tinted to the desired color, and after the finish has completely dried, it can be covered with a protective transparent varnish, colored paints, and a patina can be applied.
Finishing loggias with decorative plaster, photo ideas for applying the composition
Coarse-grained is much easier to work with, it is easy to apply with your own hands, does not require perfect alignment of the walls, can be applied to brickwork and concrete, and after drying it resembles natural stone in appearance. Different application methods allow you to achieve interesting solutions:
- antique plaster;
- textured coating, here when applying different tools or improvised materials are used: sponges, crumpled paper, you can form a pattern with your hands.
Finishing balcony walls with decorative plaster with fine-grained filler requires careful leveling of the surfaces; the finishing layer is smoother. With the help of special devices: trowel, roller, brush, stamps, you can achieve interesting artistic effects.
Various designs on the plaster of balconies and loggias can be applied with special tools and rollers
Special abilities
Decorative plaster is a very plastic and pliable material to work with. Texture compositions include various fillers, which, when applied to the wall, allow you to achieve the effect of mosaic, shagreen, oak bark, etc.
Finishing the loggia, a combination of decorative plaster with stone and wood
Simulated plaster walls on balconies and loggias open up wide horizons for design:
- If the composition includes mineralized pigment, the coating will imitate crinkled fabric;
- Cracks and antique coating are achieved using different tools and methods of applying strokes; the technology for finishing a balcony with plaster is presented in the video below.
- Decorative plaster for loggias and balconies bark beetles is one of the most popular ways to decorate open and closed extensions; such surfaces are easy to paint and can always be renewed if necessary.
- “Soft gold” plaster contains bactericidal fillers - micro-sponges, which allow you to achieve high heat and sound insulation characteristics of the finish.
- Flock plaster for balconies and loggias has two stages of application: first, the adhesive composition is applied to the wall, then particles of dried acrylic paint are pressed onto it, they can be applied randomly or in a pattern, it all depends on your imagination.
- Venetian plaster is used in luxury interiors. This is one of the most expensive and beautiful ways of finishing surfaces. It can imitate marble, malachite, onyx and other stones. And various methods of applying and processing the composition make it possible to achieve the effect of wet silk, craquelure, etc.
In our galleries we have selected interesting ways of how decorative plaster can be applied to loggias.
The photo will help you choose an interesting decoration method to implement the idea in your interior.
Natural stone has been used in construction for several thousand years, but disadvantages such as high cost and significant weight limit its use (from the point of view of finishing the balcony, of course). And therefore, an artificial analogue was created, which in most cases can be considered a practical and reasonable solution. Artificial decorative stone is cheaper, easier to install and maintain, and it has several other significant advantages.
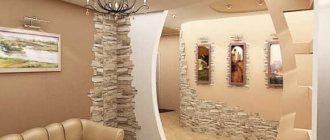
Decorating the balcony with decorative stone
Design option with decorative stone
Interior decoration of the loggia with decorative stone
Artificial stone and plaster for finishing the balcony
How to improve existing masonry?
The design of a balcony with a brick wall may involve upgrading the existing brickwork in different ways. It is important to bring the brick wall to a state of homogeneity . Therefore, first the wall is freed from existing debris, cracks and protrusions are removed using cement mortar or latex paint.
Only after this they begin to paint the brick.
Sometimes the surface itself is flat, but the brick is intact. This eliminates the need for pre-sanding. In addition, sometimes the texture is self-sufficient, which makes it possible not to color it at all.
In other cases, you have to use water-based or latex paint for facade work. You can cover a brick wall with polymer, silicate and even cement mortar.
Before carrying out work, it is necessary to remove any deposits, dust and mold (if any) from the base. Paint the brick wall of a balcony or loggia with a brush or roller.
The paint is applied in 2 layers, using hardeners for quick drying. Latex and acrylic coatings do not smell, and in addition, they do not interfere with repairs and allow the damaged area of the painted surface to be painted over.
Painting process
The task that any painter faces is often quite simple: to bring the brick wall on the balcony to a uniform state. Therefore, any brick wall will first need to be cleaned of any debris that may get into it.
You will need to find all the cracks and protrusions, which will subsequently need to be sealed with ordinary cement or latex paint. Balcony design with panoramic glazing. Balcony with panoramic glazing, interior. This will bring it to a perfectly even state. You can start painting only after preparing the surface on the loggia.
May be interesting Pyrolysis boilers
If the masonry is smooth and the brick has a normal appearance, then such masonry can not be plastered, but simply used as a self-sufficient texture that will decorate the surface.
It is important to pay attention to the condition of the brick. It should not be moldy, dusty or smell damp. Interior design of a room with a brick wall. After the base is in proper condition, you can begin to think about what will be used to paint the brick wall on the loggia. However, before this you need to decide whether it makes sense to paint.
If the masonry is smooth and the brick has a normal appearance, then such masonry can not be plastered, but simply used as a self-sufficient texture that will decorate the surface.
Old masonry using bricks of unusual colors and shapes can look quite interesting.
Old masonry using bricks of unusual colors and shapes can look quite interesting.
List of elements that will be needed to complete the finishing:
- cement or latex paint;
- dye;
- sealant;
- primer composition;
- hardeners;
- brush;
- roller;
- plaster.
Artificial or natural?
As for natural stone, due to its traditional appearance and increased strength characteristics, it is even today valued for finishing houses. At the same time, natural stone is a very heavy and expensive material, which is certainly not suitable for a standard balcony.
And artificial stone, which can be used to decorate a balcony, is made on the basis of concrete and consists of the following components:
- cement;
- expanded clay;
- plasticizers;
- sand;
- water-repellent and reinforcing additives;
- coloring components;
- ceramic chips.
Artificial stone - photo
Artificial stone "Camelot"
What is typical is that the recipe is improved every year, as well as production technologies. In terms of environmental friendliness, artificial stone is completely safe.
Gypsum stone
Note! In terms of strength, such a stone is very close to natural, and in appearance they are almost identical.
Artificial stone is also characterized by deep coloring, therefore, even if a piece breaks off or has to be cut off, the color of the material will not change because of this. Finally, this finish – when compared to its natural counterpart – is smoother, making it much easier to clean.
Some types of natural stone for finishing
Table. Comparison of options
| Weight | If you use natural stone, you will need to further strengthen the slab. Upon completion of the finishing work, the maximum load (and the mass of the walls) will increase two to three times. |
| Strength and performance indicators | In this regard, natural material is superior to artificial material, but only slightly. |
| Laying | Cutting decorative stone is not difficult, and the technology for laying it is almost the same as in the case of ceramic tiles. Yes, and there is no need to build a sheathing. Therefore, it is quite possible to do the finishing yourself. It is unlikely that it will be possible to lay natural stone without the help of specialists. |
| Price | This is another advantage of artificial material. For example, 1 m² will cost approximately 900-2000 rubles (the specific figure depends on the manufacturer and texture). |
As you can see, artificial stone is the only right solution when it comes to cladding a balcony. Let's get acquainted with the main types of this material.
Benefits of use
Even on a glazed and insulated balcony, the best conditions for finishing materials are not created. If we talk about an artificial analogue of stone, then the technical characteristics and features of the material allow it to be used in this zone, while it retains its strength and reliability.
The use of artificial stone has a number of advantages, including:
- beautiful and attractive appearance;
- wide range, variety of colors and textures;
- reasonable cost;
- quick installation, the material is easy to cut and install;
- heat resistance and fire resistance;
- resistance to changes in humidity levels and temperature changes;
- high level of thermal insulation;
- endurance to mechanical stress;
- durability of the material;
- environmentally friendly and hypoallergenic;
- light weight compared to natural stone;
- easy to maintain (the composite does not require periodic updating, and it can be washed with any cleaning agent).
Related article: Design and finishing of walls on a balcony: possible options and non-standard solutions
Based on the above, we can assume that decorative stone will be an excellent addition to the overall design of the balcony, while you can save significantly and benefit in other aspects.
Types of artificial stone
Different types of decorative stone in the interior
Artificial stone can be made from gypsum or concrete
Today, the material is distinguished primarily by its texture. The assortment is large, so we will consider only the main types.
These include:
- imitation of polished stone;
- fake natural stone (uneven chipped panels);
- imitation of a material not found in nature (colorful patterns, non-standard color combinations);
- sawn material with smooth edges;
- imitation brick;
- rubble stones (imitate coarse-grained pebbles).
Artificial stone agglomerate
Artificial stone goes well with almost all finishing materials; you can even decorate PVC panels with it. In general, the combination of two materials is one of the fashionable trends in the current design of balconies. It is possible, for example, to decorate not all surfaces with stone, but only part of them. And here the possibilities are truly endless.
Artificial acrylic stone Tristone
Artificial acrylic stone Bienstone
Note! Decorative stone goes well with green plants. For this reason, arranging a winter garden can be a great idea.
You can also line all the corners with stone (along with the windows and doorway), and paint over the rest of the area. But here, of course, the main thing is the right combination of colors.
Balcony finishing
What is good about this material?
Artificial decorative stone on the balcony will be the ideal solution. It comes in the form of small tiles that are easy to install.
In addition, there are a number of other positive features:
- They weigh less than natural stone.
- Their cost is lower.
- They are noticeably easier to install.
- There are options with different thicknesses.
- They are easy to saw and cut.
- They are easy to care for.
- These products have thermal insulation properties.
- Corner elements are also produced, which are the most difficult to install.
In terms of fire resistance, durability, and environmental safety, they are almost equal to their natural counterparts.
Decorating the balcony with decorative stone. Step-by-step instruction
To complete the finishing you will need the following equipment:
- level;
- spray;
- metal brush;
- mixer;
- roulette;
- grout syringe;
Applicator - brushes;
- wedges of the same size (made of wood or plastic) for laying between the slabs.
Tools for laying decorative stone
Supplies you will need:
- actually, a stone;
- special glue intended for decorative stone;
Glue for stone "Extra" - water repellent;
G-84 water repellent - grout of the appropriate color;
Stone grouts - primer mixture for concrete.
Primer Betonkontakt
Now that everything you need has been prepared, you can proceed directly to installation. The procedure consists of several stages; let’s look at each of them in more detail.
Stage No. 1. Preparing the walls
First you need to examine the walls for any irregularities. If surfaces need leveling, you can use one of two possible methods.
How to check the evenness of walls
Small unevenness
The surface must meet the same requirements that apply when laying tiles. If there are deviations of 10 mm, the surface must be plastered. In this case, the work should be carried out on top of a pre-filled mesh, because artificial stone weighs a lot (albeit less than natural stone) and may well come off with a piece of plaster. In addition, work along the beacons - this way the corners will be smooth, and subsequent installation will be noticeably easier.
Reinforcing mesh for plastering walls
Applying plaster
Big changes
Applying a layer of plaster 50 mm thick is not only uneconomical, but also a serious violation of GOST requirements. If the unevenness on the walls is very large, then use drywall (GK) for leveling. In the case of a balcony, the drywall must be moisture resistant (usually green).
The procedure is performed as follows.
Step 1 . First, set the UD guide profile. Try to secure it around the perimeter.
Guide profile
Fastening the guide profile
Step 2: Next, calculate the CD profiles. Under normal conditions, the fastening step often does not exceed 60 cm, but when using decorative stone it is recommended to leave only 40 cm.
Drywall frame diagram
Scheme of wall covering with plasterboard on a metal frame
Step 3. Attach the profile using U-shaped fasteners.
Frame assembly
Frame for attaching drywall to the balcony
Sew HA sheets on top of the constructed structure.
Attached drywall
Note! The advantage of using plasterboard sheets is that you can simultaneously insulate the walls by laying expanded polystyrene or mineral wool between the profiles.
What to do if the walls are made of wood?
As noted earlier, decorative stone can be laid on almost any surface. The only exception is wood - it has low adhesion, which means that the described material cannot be laid on wooden walls. But sometimes the balcony design includes wooden inserts or even entire walls made of wood. What to do in this case? There are two possible solutions to the problem.
Option one
You can stretch the mesh and use it to plaster walls or individual structural elements. For this, a simple solution of cement and sand is suitable, to which liquid glass or PVA glue is often added for greater reliability. Pre-treat all wooden surfaces with an antiseptic, and lay the finished solution along the beacons.
Procedure for plastering wooden walls
Option two
You can also attach CBPB sheets on top of the wooden surface. In this case, use special adhesives to lay artificial stone.
Fastening the DSP with self-tapping screws
Note! Before installation, you will also need to prime the surface, for which a deep penetration primer is more suitable. Apply the material in two or three layers, be sure to wait for each of them to dry.
Warm plastering of the balcony
The finishing method allows the use of mixtures on any basis. But before plastering the balcony, it is necessary to carry out a number of works to prepare the surface. Choose the right material and fix it on the walls, while the decorative coating is applied to the reinforcing mesh, which increases the adhesion of the plaster layer and insulation.
For your information! All stages of the work can be completed independently, which will help save money on hiring a construction team.
Installation of insulation under plaster
To insulate balcony surfaces, it is recommended to use dense materials that are not afraid of moisture and do not allow the spread of mold. Expanded polystyrene has these qualities; it is easily glued to the wall using special foam, and is subsequently used to seal cracks between sheets.
The joints of the material have a locking connection, which prevents the blowing and penetration of moisture into the decorative cladding. For better waterproofing, not only the surface of the insulation, but also the joints are treated with polyurethane foam.
Base reinforcement
To ensure the strength of the layers when applied to the wall, you will need a fine-mesh fiberglass mesh, which is attached to the insulation with a special adhesive composition. The canvas does not have much weight and does not require the use of hardware during installation. But before applying the decorative coating, the glue must dry completely, and the mesh must form a relief surface, which guarantees good adhesion of the finish and insulation.
You can make a glazed balcony warm by covering it with sheet insulation
Stage No. 2. Deciding on the finishing method
The balcony can be decorated using decorative stone in two ways.
- Facing with jointing.
The best option for beginner builders. Using the thickness of the seam, you can even out small irregularities that arise during installation. The gap between the tiles of the material is adjusted using spacers and can range from 5 mm to 10 mm. But there are also finishing options in which the gap can be large. Joining after laying decorative stone - Seamless styling.
Only experienced craftsmen can do it. Particular attention is paid to ensuring that excess adhesive mixture does not fall on the seams and does not contaminate the front surface of the stone. The fact is that it is extremely difficult to clean this porous material from glue. Seamless styling in the photo
Regardless of the chosen method, installation must begin from the corner.
Disadvantages of stone cladding
The disadvantage of stone balconies is the need to strengthen the working surfaces, which significantly complicates the work as a whole and contributes to an increase in its cost.
In addition, stone finishing cannot boast of environmental friendliness, unlike wooden ones.
Stage No. 3. Laying down the material
Interior wall decoration, diagram
The main thing here is not to rush. Start each next action only after you finish the previous one.
Step 1. Lay out the tiles to select a suitable pattern that is as attractive and natural as possible. Try not to repeat the pattern and color variations. You can number the products from the end - this will make it easier to maintain the sequence.
Step 2. Strike a zero around the perimeter, install a support (you can use a profile as such). Lay the first row away from the floor - calculate it so that whole tiles are on top. You need to cut the products to the bottom, for which, in fact, you will need a support - it is on this that you will lay out the first row.
Step 3. Dilute the glue, preferably on white cement. After thoroughly mixing the mixture, leave it for 10 minutes and then mix again. Use a mixer or drill with adjustable speed.
Step 4. Using a comb, apply the adhesive mixture to the work surfaces.
Applying glue
Leveling the mixture with a spatula
Step 5. Using a spatula, apply a thin layer of the mixture to the first tile, trying to rub the glue into the surface.
Step 6. Glue the tile, pressing it down lightly. After finishing the first row, start the next one. Do not rise higher than 150 cm each working day. Remove any remaining glue immediately with a spatula.
Laying stone
Finishing work
Laying decorative stone with your own hands
Note! Cladding with jointing is performed in one of the following ways:
- the row is carried out from the bottom up - the glue often slips and gets on the stone;
- the row is started from the ceiling - here glue should be used with a maximum tile subsidence of 0.5 mm to 1.5 mm.
Upon completion of installation, wait until the glue has completely dried. As a rule, it takes 12-48 hours (it all depends on the composition). Then start grouting.
Stage No. 4. We rub the seams
This is one of the most difficult tasks required when using the jointing method. Prepare a construction syringe and the grout itself, then proceed according to the algorithm below.
Step 1 . Remove the gaskets. Be careful not to tear off the artificial stone.
Step 2. Clean the seams from any remaining adhesive mixture.
Step 3. Dilute the grout according to the manufacturer's instructions, then fill the syringe bag.
Step 4: Fill the joints at least 5mm deep. Don’t be distracted by various irregularities just yet, the main thing is to ensure that the seams are filled without gaps.
Filling joints with grout
Step 5. After 10 minutes, when the grout begins to harden, clean the seams with a spatula or a small iron rod of appropriate thickness.
Decorative stone jointing
Complete drying takes about 24 hours, after which the work can be “handed in”.
Note! To give the cladding the effect of wet stone, you can coat it with a clear varnish after installation.
Stone-lined wall
Video - Cladding the balcony with artificial stone
Natural stone has been used for construction and decoration for hundreds of years. Many of its advantages (strength, hardness, excellent aesthetics) are difficult to overestimate. However, it also has certain properties that can significantly limit its use for decorating balconies in residential buildings - weight and price. The way out of this situation is to use decorative stone of artificial origin.
Advantages and disadvantages
Artificial stone is a mixture of cement, sand, binding additives, various fillers and plasticizers. Its physical, mechanical and operational characteristics directly depend on the composition of the material. Externally, the artificial analogue is very similar to a stone of natural origin.
Advantages of decorative stone:
- Strength, hardness, reliability, durability.
- Affordable price.
- Wide range of colors and textures.
- Quick and easy installation (no professional tools or extensive experience required, just a high-quality adhesive mixture is sufficient).
- Resistant to temperature changes.
- Corrosion resistance, waterproof.
- Excellent thermal insulation properties.
- Resistance to chemical reagents.
- Eco-friendly, hypoallergenic.
- Excellent decorative properties.
- Resistant to mold and mildew.
- Non-flammability.
- Simplicity and ease of maintenance and care.
Such excellent characteristics make decorative stone an almost ideal material for cladding a balcony. However, there are several disadvantages that you should also pay attention to when choosing a suitable finishing option.
- Shorter service life compared to natural stone (a conditional disadvantage, since the service life is several tens of years).
- Some types of stone are very unstable to mechanical stress.
Which one to choose – artificial or natural?
When choosing a suitable material, you must carefully weigh all its advantages and disadvantages. Of course, it is difficult to find a material that is stronger, more reliable and more beautiful than natural stone, but its weight and high cost can be decisive factors in favor of choosing an artificial analogue.
In addition, modern materials almost completely imitate the surface of natural stone, although they weigh and cost significantly less.
Comparative characteristics of natural and artificial stone:
- Artificial material is much cheaper than natural material.
- The artificial analogue is available in a wide range of sizes and thicknesses. This greatly simplifies the installation process.
- No additional strengthening of the balcony is required.
- No sheathing is required during installation; artificial stone is easy to cut.
The range of decorative materials of artificial origin is very wide and diverse. Here are some of the most popular and used options:
- panels imitating natural marble, granite, quartz (the material has raw edges, natural chips, a convex, curved surface);
- panels imitating sandstone, limestone and other materials (smooth edges, flat surface);
- imitation of boulders and pebbles (rubble stone);
- imitation brick;
- imitation polished stone;
- material with patterns and combinations of shades not found in the natural environment.
Modern technologies for creating and processing artificial stone have made it possible to create a wide range of beautiful and affordable options for cladding balconies. Among them: porcelain stoneware, acrylic stone, conglomerates, artificial quartz and gypsum.
Porcelain tiles are the most durable of the options presented. It consists of minerals, several types of clay, feldspar, and dyes. Outwardly, it resembles a tile made of very durable and high-quality glass, its surface is so smooth and even.
The composition of conglomerates includes granite chips, marble, lime chips, quartz, and dyes. This material is characterized by increased strength and wear resistance, resistance to temperature changes.
Acrylic has a low specific gravity, so it is easy to process and install. Available in a wide range of colors.
Quartz is suitable for indoor and outdoor use. Withstands heavy loads and sudden temperature changes.
Gypsum is the least durable material. It has a low coefficient of water resistance, so it is not recommended for use on balconies without additional waterproofing.
Where should I place it?
One of the advantages of decorative stone is its excellent compatibility with other finishing materials. This gives almost unlimited possibilities for creating interesting, complex, original balcony designs.
Decorative stone can be used to cover the entire interior space. In this case, it is best to choose the most lightweight materials in light, warm shades, otherwise a small balcony room will look very heavy.
The most common interiors are those that combine stone and other materials (wallpaper, decorative plaster, paint).
The option when the stone covers part of a painted or plastered wall looks very interesting. It creates the feeling of unfinished brick or stonework.
A more strict option is to decorate the internal corners with stone. The masonry can be symmetrical or create the feeling of a raw corner with torn, uneven edges.
Decorative stone can be used to decorate window or door openings, one or more walls. When combining materials of different textures, it is very important to choose the right color scheme.
Finishing stages
Decorative stone can be laid on wood, metal, foam block, brick, concrete and other types of surfaces.
The entire process of decorating the interior space of a balcony can be divided into several stages:
- Preparatory work. Before starting the main work, it is necessary to carefully examine the condition of the walls: eliminate unevenness, seal cracks, plaster or level out differences using gypsum plasterboard. Then it is necessary to prime the surface in 2-3 stages.
- Balcony decoration . The main part of the work can be done in two ways: with jointing and seamless method. The first option is quite simple and even beginners can do it. Small seams between the panels allow you to disguise and hide small irregularities that arise during the work.
- The seamless option requires much more effort and professional training. During work, you must carefully ensure that excess glue does not fall on the outside of the tile, otherwise it will be very difficult to clean the porous, uneven material. But the finished surface will look like a smooth, solid, monolithic canvas without a single seam. Work on laying the slab begins from the corner of the room.
- Laying. The most responsible and lengthy stage. There is no rush here. Before starting the actual installation, experienced builders recommend first laying out the panels on the floor in order to choose the most optimal pattern and play with the shades of different panels. It is necessary, if possible, to avoid repeating patterns and color variations too often. To avoid confusion, you can number the tiles on the reverse side.
- Then a zero level is struck around the perimeter of the room and a support is installed (for this, you can use, for example, fragments of a metal profile).
- Laying begins from the bottom up so that there is a whole slab under the ceiling . All trimming is done near the floor.
- For cladding, it is best to use white cement-based adhesive. The composition is applied to the wall using a comb and a spatula in a thin layer on each tile. Then the tile is glued, pressing it firmly against the wall for a few seconds. After finishing the first row, laying the next one begins. It is recommended to lay tiles no more than 1.5 meters in height per day. Excess glue is immediately removed.
After completing the work, it is necessary to give the tiles time for final fixation (12-48 hours, depending on the composition of the adhesive). Only after this do they begin to grout the joints.
Reviews
Owners of balconies who have used decorative stone as a partial or complete finish willingly share their impressions on the pages of thematic websites. They note the magnificent aesthetic advantages of such a material, which is in no way inferior to the beauty of natural stone. Lightness and simplicity of installation, as well as the light weight of the panels are the undeniable advantages of artificial stone.
A wide selection of textures, colors and affordable prices make the choice in favor of this material almost obvious.
In addition, buyers note the excellent compatibility of decorative stone with wood, plaster, paint, wallpaper and other finishing materials. The interior, made in a combination of these materials, looks truly expensive, sophisticated and noble.
Design examples
A wonderful combination of materials of different textures in the interior of a balcony decorated in Provence style. One of the walls is decorated with decorative stone and decorated with flower arrangements. Delicate pastel colors help create a very cozy and warm environment.
The combination of decorative stone and plaster looks unusually original thanks to the asymmetrical cladding pattern. A design method in which a room looks artificially aged with a stone wall destroyed over time is especially popular today. An additional highlight of the balcony is its unusual shape - a sector.
Even a very small room can be beautifully decorated using such a relief and voluminous material as decorative stone. For example, as in this case. The walls are finished with richly colored decorative plaster, and the window and door openings are lined with stone. The result was a very modern and beautiful interior.
Similar articles:
There are no similar articles.
Stone finishing
Brick colors in the interior
Today, color solutions for finishing balconies and loggias with brick can be very diverse. In this case, the desired tone is selected based on various nuances. For example, white color is appropriate in a neutral interior where white, gray and black colors are used.
You can also decorate a wall in white where there is not sufficient lighting for the balcony space.
It may be interesting How to get rid of the smell of smoke
Some people prefer natural tones, which is why the brick can be reddish, terracotta, or gray. Often it is made in so-called wood tones. Moreover, the texture of veneers or tiles can be different.
For example, shades can be mixed, which gives the interior a special look, depth and aesthetic appeal. Cool beige tones are popular. This is a sandy, cold beige, gray-beige color.
Types of material
To decorate a balcony or loggia, decorative stone from different materials is used. It is a relief tile, the front surface of which resembles a brick.
Tiles for finishing the internal walls of a balcony (loggia) are glued to a prepared base and are called clinker. It is made of clay; the principle of installation does not differ from standard technology.
However, despite all its beauty, this material also has its drawbacks. In addition to the fact that facing raw materials are not cheap, they have the ability to absorb moisture.
In view of this, it is better to use this cladding on a balcony or loggia that is well insulated from dampness and moisture.
Along with the use of brick tiles, finishing the balcony space with brick veneers is gaining popularity today. They are made from a variety of materials. For example, clay, glass, leather and wood are used in the production of this cladding. Veneers can be used to finish “ragged stone”, accenting a small area of a balcony or loggia.
They weigh less than brick, have a small thickness and the necessary relief. This type of brick cladding is not afraid of temperature changes and does not create problems during installation. It looks very stylish and can decorate any wall of the balcony space.
When facing, you can also use plastic panels that imitate the texture of brick. If you skillfully select such a finish, it will look very appropriate in the interior of the balcony. Installation of this material is extremely simple; such panels weigh less than other facing products.
The advantages of plastic panels include their durability, resistance to dampness and moisture, and temperature changes.
The least durable type of raw material is brick print wallpaper . Often the design of such paintings is made voluminous, making the finished walls appear brick. Gluing wallpaper is not difficult, especially if you prepare the base and choose larger width options.
Compared to installation, gluing is a less messy step in creating an interior. The price of the panels will not hurt your pocket, and you can finish this kind of finishing in a day.
What styles is it suitable for?
A brick wall on a loggia or balcony perfectly emphasizes the interior of different styles. At the same time, a lot depends on the resources of interior styles, through which the desired atmosphere is created. Depending on how you decorate the brickwork, it can look completely different.
For example, this is an excellent choice for decorating a balcony or loggia area in industrial glamor or the so-called loft style.
If you choose the right color scheme and design the lighting, then a brick wall can also decorate the Art Nouveau, high-tech, and art deco styles. In such an interior, it is important to rely on technology: if the lighting devices are modern and technologically advanced, and the furniture is ergonomic, the furnished space will become the favorite corner of all household members.
An excellent solution would be to embody a rustic style, for example, country or French Provence . The design of a balcony and loggia with a brick wall in this case can be emphasized with white brick, since these interior styles gravitate towards everything light.
You can add the right atmosphere by including fresh flowers and looped textiles in the interior, which will be decorated with a simple floral print. It is better to complement the furniture with woven covers to match the colors of the curtains.
