Types of damage
Before starting floor screed repairs, it is necessary to determine the type of damage.
This can be done by removing the floor covering. A visual assessment of defects will help identify the specific type of damage, which will allow you to quickly select the necessary means and begin repairs. The main types of damage include:
- detachment of the screed (in whole or in part) from the base of the floor;
- unevenness, potholes, cracks and holes on the surface;
- excessive dust formation, which means weakening of the screed material.
The reasons for the appearance of defects can be very diverse.
It is necessary to pay special attention to them in order to avoid similar mistakes and further destruction of the screed in the future.
The most common reasons are:
- Violation of mixing technology. Most often this happens when using a ready-made mixture. It is recommended to strictly follow the manufacturer's instructions, as incorrect proportions will lead to deterioration in the quality of the mixture. Also, you should not mix the solution by hand - for this purpose it is better to use a special attachment on an electric drill or a construction mixer so that the existing substances are mixed evenly.
- Fast drying. When working with concrete, you should always remember that its durability and strength directly depend on contact with water. The cement floor should not dry too quickly; periodically it should be sprinkled with a small amount of water and covered with polyethylene so that the top layer does not become dry before the concrete has completely hardened.
- Excessive amount of water in solution. Excess water in the concrete mixture, firstly, deforms the concrete itself and reduces the strength of the screed. Too much water eventually causes the screed to crack and the surface to become loose. To avoid this, after the concrete has dried, the screed must be covered with deep penetration soil, which will entail new costs and increase the repair period.
No expansion joints. Incorrectly laid expansion joints or their complete absence most often cause the surface to crack. It is recommended to fill the wall seam with an elastic material like polypropylene foam. It is located along the thickness of the screed, and this reduces the influence of the wall load on it. Intermediate seams divide the screed into equal parts, running along half of its thickness.
No damper tape
It is especially important to have an edge tape when pouring screed for heated floors. Concrete tends to expand when heated, thereby creating additional pressure on the walls
Thus, the absence of a pressure-compensating tape can cause the destruction of not only the screed, but also the walls themselves.
Poor quality reinforcement. The main rule when installing reinforcement is its location in the concrete, and not under the screed.
There are many other factors that lead to the destruction of the screed. Most often, this is poor quality of the solution, low-quality cement mixture used in construction, or violation of the pouring stages. Detachment of the screed can be caused by local impact loads or improper preparation of the surface for pouring concrete.
Why does floor screed crack?
It is better to prevent the appearance of cracks in advance than to deal with them later. Therefore, before starting work, you need to study the possible causes of their occurrence and take action. The following can lead to the formation of cracks:
- Violation of the temperature regime at which concrete hardens. The optimal temperature for the process is from +15 °C to +25 °C.
- House shrinkage . Builders do not recommend pouring screed in a new building; it is better to wait at least a year.
It is almost impossible to influence these factors. But there are a number of reasons that directly depend on the skills of the master performing construction work.
No edge tape or expansion joints
After laying the concrete screed, a monolithic slab is formed. During operation, the slab contracts in cold weather and expands at elevated temperatures, which leads to cracking. Expansion seams help avoid such troubles.
An expansion joint is a cut that divides a concrete slab into blocks. For each case, the required number of seams is calculated taking into account future loads on the slab, the materials used and other factors. The screed is definitely divided into blocks if the length of one wall exceeds 6 meters and the area of the room is more than 20 square meters. m.
A common cause of cracking is missing edge tape. It is laid along the entire perimeter of the room between the wall and the screed. Sometimes damper tape is used as an expansion joint, separating large masses of screed. The purpose of the damper tape is to compensate for the pressure on the walls when concrete expands, as well as to provide thermal insulation and sound insulation.
The width of the edge strip must be greater than the height of the screed being laid. After the concrete has dried, excess tape is cut off with a construction knife.
Failure to comply with coating thickness requirements
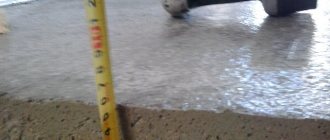
The thickness of the coating for a high-quality and durable screed must be optimal. A layer that is too thin will not withstand loads, and an excess one, which is usually used to equalize the height difference, is destroyed due to the evaporation of excess moisture.
When using ready-made mixtures, the maximum and minimum layer thicknesses are indicated by the manufacturer.
The thickness of the screed is determined taking into account the following factors:
- The presence of unevenness and height differences on the base.
- What kind of coating is it prepared for?
- What the screed is laid on (floor slab, pipes or insulating layer).
- Features of the room (humidity, temperature, load).
The proportions when mixing the solution were not met
Typically, a classic mixture of cement and sand is used for work, which is mixed with water. The proportions depend on the required strength of the screed and are also determined by the grade of cement. To form a strong surface, high-quality but expensive Portland cement M400 is used.
Sometimes inexperienced builders think that more cement guarantees better screed performance. But this opinion is wrong - strength is ensured only by the correct ratio of all components. Excess cement is a common cause of reduced strength.
Lots of water in solution
The most common cause of concrete cracking is poor water to dry ratio. This usually applies to ready-made mixtures that are used by beginners in construction. The manufacturer indicates the exact ratio of the mixture and water, but it is much easier to work with a liquid mass. As a result, the solution does not fully possess its properties, which leads to the appearance of defects.
To obtain the most homogeneous mass, concrete is mixed using a construction mixer.
No reinforcement
Another reason for the appearance of cracks is the lack of reinforcing elements. When drying out or moving on an unstable base, the floor screed cracks under tensile loads. To prevent this situation, fiber is introduced into the thickness of the solution. Reinforcement is necessary when making a thick layer of fill (more than 5 cm thick) when forming multi-layer floors, as well as in places with significant load (under machine tools, fireplaces, stoves).
Reinforcement can be carried out with meshes: polymer, metal or fiberglass.
Drying rate too fast
Some property owners, wanting to speed up the pace of renovation, create a draft or simply open the windows. Such actions are unacceptable.
To ensure uniform and proper drying of the concrete, it is better to cover the surface of the screed with polyethylene and periodically moisten it with water. In this case, the outer layer will retain moisture until the lower one completely hardens.
These measures to prevent cracks are especially relevant in the summer, when concrete dries too quickly.
Causes of cracks in screed
Cracks usually appear in areas of stress concentration. Next, we will consider in detail each cause of cracks in the screed.
Weak, low-rigid base
The concrete from which the screed is made can withstand high compressive loads. When using grade 300 cement, the strength exceeds 300 kgf/cm2. But the bending and tensile strength is tens of times less and depends on the design of the screed, the shape and number of expansion joints, the composition of the concrete and the reinforcing mesh.
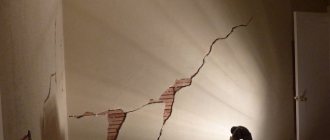
Deviation from the recommended GOST and SNiP (collection of building codes and regulations adopted in the Russian Federation) technologies reduces the strength of concrete. If the base of the screed is movable, for example, an old worn-out wooden floor, or is insulated with polystyrene foam that is not suitable for its hardness, the concrete will become covered with cracks because it does not tolerate bending loads well. The answer to the question why the floor screed cracks lies in calculation errors or violations of the floor construction technology.
Incorrectly arranged expansion joints
Concrete has a rigid structure, so the absence or incorrect calculation of seams leads to the appearance of cracks. When the temperature in a room changes, the concrete heats up unevenly, so different areas are affected by different thermal expansion. These processes cause stress in the concrete, because the more heated material expands, while the less heated one remains the same size.
Expansion joints help relieve stress. They divide the screed into sections of 2-6 square meters. In such an area under room conditions, the temperature differences in the concrete are not sufficient to damage the screed and cause cracks in the floor. The screed is also fenced around the perimeter with a damper tape, which provides a thermal gap between the concrete and the walls of the room. Failure to comply with temperature gaps will destroy the screed due to temperature changes.
Excess or lack of water in solution
Concrete is an aqueous solution of cement, sand and crushed stone. The amount of water affects the mobility of the mixture. Thick mortar does not fill voids well and adheres to the base. The liquid solution fits well on the base, but when it hardens, it becomes covered with cracks. Such concrete has less strength than necessary, so during the operation of the floor, cracks will increase and deepen.
For each type of concrete work, including screed, the amount of water for concrete is determined individually. For pouring onto a flat concrete base, a thicker solution is used; for an uneven base, a thinner one is used. This issue is covered in more detail in GOST 7473-94.
Small layer thickness and weak reinforcement
The greater the thickness of the screed, the higher the fracture resistance. Therefore, in screeds less than 3 cm thick, made from ordinary concrete, and not self-leveling mixtures, cracks appear 2-3 times more often than in thicker ones. Pouring such a screed onto an old wooden floor will lead to cracks appearing after 3-5 months of use. To prevent cracks from appearing, pour self-leveling screeds and self-leveling floors onto wooden floors. These materials withstand fracture forces better, so cracks appear less frequently.
When pouring the screed in a warm, dry, ventilated room, moisten it every half hour for 10-12 hours. Excessively rapid evaporation of water from concrete will lead to the fact that the bottom of the screed, full of water, will shrink less than the top blown by ventilation. This will lead to tension in the concrete, which will form cracks. As the floor is used, the cracks will increase and deepen.
How to repair cracks?
The types of deformation described above lead to the screed starting to crack. This is bad because over time, even the smallest recesses expand, and because of them, major repairs of the floor will have to be done. Cracks are one of the most severe types of destruction, requiring emergency removal, so they must be eliminated in a timely manner. Cracks can be small or deep.
Small-diameter cracks are considered to be damage up to 2 mm wide.
You can repair the screed yourself as follows:
Use a grinder to widen and deepen the crack
Particular attention should be paid to the fact that after expansion, the edges of the crack should not crumble, but should be absolutely solid. If you can’t use a grinder, you need to stock up on a hammer and chisel. After expansion, the cracks need to be cleaned
Only a construction vacuum cleaner is used for this purpose. The cleaned areas are coated with epoxy primer. This must be done several times until the mixture is completely absorbed into the concrete. After the primer has completely dried, the damaged areas are filled with a mixture of Rizopox 3500 and quartz sand. The mixture should fill the crack just above the surface level. After the mixture has hardened, the repaired areas are sanded and cleaned.
Repairing minor damage takes little time and allows you to do without special tools.
If large cracks have formed in the screed - more than 2 mm in width - the repair process will proceed according to the following scheme:
- As in the first case, the cracks must be cut to their full depth.
- After expanding the crack across it, it is necessary to make several grooves.
- Small repair seams (1.5 cm long) are made along the grooves at intervals of 2 cm.
- The prepared recesses should be cleaned using a construction vacuum cleaner, treated with a primer and left to dry.
- After the primer has dried, the repair joints will need to be filled with pieces of reinforcement, metal staples or wire.
- Next, the cavities are filled with liquid mortar made from a mixture of sand and cement. The surface is leveled with a lath and sanded after drying.
Reinforcing the screed helps protect it from stress and extends its service life. There is also a little trick that will help you find out whether the cracks are expanding over time or not. To do this, you need to glue a paper strip to the edges; if it breaks after a while, then the forecasts are disappointing. If the piece of paper remains the same as it was, then everything is in order. But this method requires a lot of time.
Reasons and solution
[hana-code-insert name='yandex' /] The most common reasons that the floor screed cracks immediately after or during the drying process:
- improperly prepared cement mortar;
- drying too quickly or unevenly;
- too thin or uneven layer;
- installation of beacons on gypsum-containing mixtures.
[Show slideshow]
All the above cases can be ignored if there are few cracks and they are very thin. Typically, such defects appear immediately after drying and do not change over time. For most decorative coatings they are not critical.
Deep cracks that spread over time can form when installed on an unreliable or soft base without additional reinforcement. Cracking is also very likely if the substrate is porous. It “pulls” moisture out of the solution. In this case, echoing areas may appear (determined by tapping) - this means that the screed has peeled off in some places. Ragged and deep cracks can also appear when using a “greasy” mortar – with a large amount of cement. Unfortunately, such damage is very serious, and simply sealing the cracks will not solve anything. In this case, you will have to do everything again.
It will help to seal cracks in the screed if we are talking about an old coating, or if cracks have appeared in problem areas: this is the border of different base materials, pipes or communications, cracks above beacons.
For repairs, a mixture of 6 parts clean sand and one part cement is prepared and mixed with PVA glue. The cracks are opened to the base, and everything that can be crumbled is taken out. The surface is primed and puttied with a repair mixture. It is very important to level it before it hardens. It is worth noting that repairing cracks in the screed is just an opportunity to get a smoother surface, and it does not guarantee its integrity and strength in the future.
Causes of cracks in floor screed
There may be several reasons, but let’s start with the solution in order – by preparing the solution.
Poorly prepared solution
For cement preparation, the so-called “hard mortar” of grade 100 - 200 is used. The preparation of the mortar for the screed is carried out in compliance with the proportions of ingredients prescribed by SNiP standards - sand, cement, water. Sand should be used washed with large or medium grain size. The presence of clay inclusions in sand can cause cracks in the screed.
The brand of cement and its quantity determine the brand of mortar composition. The consumption of components for preparing 1 m3 of solution can be found in the article thickness of the screed, as well as the requirements for it.
Caring for cement screed
The screed is covered with plastic film
Proper care of its surface after installation is of great importance when installing a coating. To avoid cracking, curing must take place under moisture conditions to prevent cracks from occurring and therefore avoid sealing cracks in the floor screed.
To do this, there are a number of measures, such as moistening the screed, starting from the second day of its installation, filling it with a layer of wet sawdust, which is kept moist for a week, you can cover the wet surface with plastic film to prevent moisture evaporation and other measures.
The thickness of the screed does not correspond to the design
The thickness of the preparation is provided for by the design in each specific case, but sometimes it is carried out in violation of the design. A layer that is too thin, for example, 20 mm, if there is an increased load on it, can lead to cracking of the base.
This is especially pronounced if the preparation is made over a layer of waterproofing or insulation (for example, polystyrene foam boards). In this case, there is no high-quality adhesion to the base of the floor.
From personal experience I can say that the most optimal thickness of a floor screed, at which sufficient strength is achieved, is 35 - 45 mm. With these parameters, cracking is least likely and, accordingly, there will be no need to seal cracks in the floor screed.
Floor screed without damper tape
Despite the fact that the temperature regime in the room is generally constant, processes of temperature compression and expansion also occur here. This is especially true during weather temperature changes at the junction of preparation and external wall structures.
For example, if thermal expansion of the external walls occurs, they will put pressure on the screed. This will cause cracks to appear. Therefore, a gap (at least 10 mm) is left between the preparation and the surface of walls, partitions, columns, into which a damper tape is laid around the perimeter.
Damper tape
The damper tape serves as a kind of “compensator” for thermal compression and tension. This event is sufficient for small areas.
For large room sizes and appropriate instructions in the design, in order to extinguish the processes of compression and tension and not cause the formation of cracking of the surface, expansion (expansion) joints are formed.
In it, seams are cut to a depth of 2/3 of the thickness of the preparation layer a day after the installation. On large areas, not single seams are made, but the entire area is cut into squares with a step of 6 meters. There may be several such cards.
Methods for repairing cracks in screed
Repairing cracks in the floor screed will depend on the reasons that caused them to appear.
Expansion seams
So, we’ll tell you how to repair cracks in the screed due to the lack of seams.
The repair includes the following stages:
- In the screed you need to cut a mesh of expansion joints in increments of 5 m and a depth of 1/3 of the coating thickness.
- The resulting holes should be sealed with polyurethane sealant. In this case, it is worth taking into account the strength of the coating, which should match the parameters of the sealant. Otherwise, either the soft sealant will burst from pressure, or the screed will crumble due to too hard seams.
- The cracks themselves need to be slightly widened using the strobing method.
- After this, the surface of the groove must be cleaned of dust and primed.
- If you are puzzled about how to repair cracks in the floor screed, then there is a special non-shrinking substance on sale. It is applied with a spatula very carefully.
- The final stage will be to grout the cracks to the level of the general surface.
Other technology violations
If, due to an incorrectly prepared solution, a violation of the thickness of the coating or uneven hardening, the floor screed is cracked - what to do can only be decided after the scale of the damage has been assessed
In addition, it is important to consider how such a subfloor will be used in the future.
For example, if tiles are laid as a finishing coating, and the extent of the damage is insignificant and is not in a visible place, they can be neglected. In this case, the tile adhesive will serve as a binder, and the tile itself will prevent unnecessary external loads. And replacing tiles is not difficult and does not require redoing the entire masonry.
The situation looks somewhat different if the room is large and the floor is under significant load. When, due to a very thin layer of fill or excess liquid in the solution, it turns out that the screed is cracked, quite often it has to be completely redone.
If the deviations from the norm are insignificant, but the screed is still cracked, we have already described what to do above.
If you want to prepare a solution for filling cracks in the floor yourself, a mixture of the following ingredients is quite suitable:
The ratio of glue and cement is one to two. You need to add enough water so that the mixture is liquid, but does not spread. It is necessary to pour the mixture into the gap above the floor level, since it will shrink as it dries. Once everything is dry, excess cement can be removed with a grinder.
With the help of our photos and video materials, you can understand how to repair cracks in the floor screed, if any arise. However, it should be remembered that it is much easier to prevent a problem than to eliminate the consequences later.
To avoid problems
[hana-code-insert name='yandex' /] To avoid problems and repairs are not needed, just follow the filling technology. First of all, quality largely depends on the proportions of the composition. Excess water or cement is guaranteed to cause cracks. The foundation is equally important. If it strongly absorbs moisture or is unreliable, the screed must be reinforced.
Another important point is the drying of the solution. Many people try to speed it up by creating drafts or heating the room. Because of this, moisture evaporates unevenly and too quickly, which also leads to cracking. Cement-sand mortars must dry gradually at normal humidity and temperature; moreover, in hot and windy weather they must be moistened and protected from rapid drying (for example, covered with damp burlap).
The main causes of screed cracking
A cracked screed can be the result of even professional floor filling, since defects can appear after dismantling the guides (beacons) or for a number of the following reasons.
Incorrect proportion of kneading components
Most often, this problem arises precisely because of ready-made concrete mixtures that are sold in the store. The fact is that during the production of such compositions the exact ratio of components and water added to them is calculated. But every novice builder knows that the easiest way is to apply a liquid solution to the surface, which is why many do not follow the strict proportions specified in the instructions.
An excess of water in the solution leads to shrinkage and deformation of the concrete, which in turn causes a cracked screed.
No expansion joints
If the area of the room is more than 30 m2, then it is necessary to make expansion joints, which are filled with polyurethane foam (if we are talking about outdoor areas, the joints are filled with silicone). Thanks to them, it is possible to significantly reduce the load from the walls. The absence of such seams in large rooms leads to deformation of the screed.
Incorrect reinforcement
Speaking about why floor screed cracks, it is worth paying attention to a fairly common mistake - poor-quality reinforcement. The fact is that some novice builders lay a reinforcing layer under a heavy concrete base, at a time when the reinforcement should be placed precisely in the “body” of the screed
In addition, it is worth considering that the use of reinforcing mesh does not allow achieving the best effect, so experts recommend using cheaper fiber fiber, which is added directly to the cement-sand mortar.
In addition to the main mistakes, in the process of making and drying a concrete base, a lot of other mistakes are made that lead to no less serious consequences.
Causes of cracking after pouring
One of the main reasons: shrinkage. When drying, the cement-sand mortar decreases in volume; when converted to length, it is about 1 mm. per 1 m long (highly depends on the solution). Any screed shrinks, but why are cracks not always noticeable? When a lot of cracks appear on the floor screed, sometimes even before drying, as a rule, this is a violation of the filling technology.
To be more objective, there are cracks on any screed, they are just not always visible. But as soon as you prime or wet the floor, they appear. Shrinkage cracks are an integral phenomenon during the drying process of any cement or gypsum mixture. It is worth noting that if the technology is followed, these cracks are visible only if the floor is wetted or primed - they are so small. If pouring work is carried out without understanding the properties of the material, shrinkage cracks increase in size until they are clearly visible, there are many of them.
On a well-filled screed, using standard wet technology, cracks are practically absent upon visual assessment. Rare, the size of a hair, are considered normal. On a screed using semi-dry technology, cracks are not visible at all until the entire surface is wetted. Even on the wetted surface of a semi-dry screed, there are very few microcracks - this is subject to high-quality work.
Another reason for the appearance of cracks is an insufficiently rigid base and lack of reinforcement, which is much less common. This statement applies to the so-called “floating screeds”. This happens when the screed is poured onto insulation or bedding - the insulation does not fit tightly to the base, the bedding is poorly compacted. Because of this, the load is unevenly distributed over the floor area and cracks form.
It also happens that both of these reasons have an impact - this is a screed from an unscrupulous developer. Quite often you see floor screeds poured from a concrete pump directly onto construction waste. The result is very large shrinkage - since the solution is very liquid, the frozen mixture is very porous and not durable. And due to construction waste, local voids appear under the floor. This screed is covered in numerous cracks, absorbs water like a sponge, and in some places you can hear knocks on the concrete floor when walking.
Causes of cracks
Most often, cracks and defects occur when the screed pouring technology is violated
There are often cases where even experienced builders have to throw up their hands, since all the work was carried out in accordance with building codes, but the result was negative (the floor screed was cracked).
This shouldn’t happen; it means that some small nuances were not taken into account, which, as it turned out, are of great importance. Therefore, you should carefully and efficiently carry out the work on constructing the concrete cover and select the appropriate material so that cracks do not appear in the floor screed.
Reinforcement is an important part of the concrete foundation
Today, there are a number of things that can lead to cracking of the floor:
- Lack of reinforcement in the flooring. When making a cement-sand screed using additional materials that enhance the heat-insulating and sound-proof properties of the room as a whole (expanded clay and expanded polystyrene flooring), it is necessary to make additional reinforcement (metal and fiberglass rods, steel mesh). If this process is neglected, there is a possibility that the floor may crack.
- Displaying beacons using a different solution. When forming the floor, you must remember that it is not always worth fixing the beacons with alabaster or gypsum mortar, since the incompatibility of the solutions “can play a cruel joke.” Materials have different indicators of moisture conductivity.
- Incorrect solution.
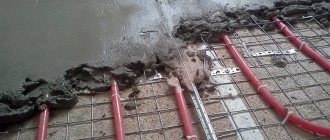
The main drawback in the formation of the solution is considered to be an excessive amount of water. After the moisture dries, cracks often appear in the screed in the places where it was released. Damper tape softens the impact of concrete on walls - Inappropriate screed thickness. Such a violation often leads to cracks in the heated floor screed. It is with the introduction of this modern heating device that the thickness of the screed, which should be 3-4 cm, is not observed.
- The absence of a damper tape around the entire perimeter of the room leads to cracking of the screed near the walls.
Since the coatings may not interact, and an air gap will form between them, which can lead to cracking of the screed.
Why does the screed crack after drying?
The thickness of the screed must be at least 3 cm
Quite often it happens that the screed cracks during drying. Many builders, having created the flooring, believe that the job is already completed and cease to control the drying process of the concrete cover, which cannot be done.
Also, before creating a floor, it is necessary to thoroughly calculate the load. To do this, you need to know how much traffic there will be in the room, and whether massive and heavy objects will be placed.
Cover the drying surface with film
You should know what can cause cracks to form on a drying concrete floor:
- Violation of temperature and humidity when drying the flooring. There are certain rules for drying the screed, according to which the process must take place at an ambient temperature from +150C to +250C; if the indicators are exceeded, then there is a need for additional watering of the cover laid on the ground (within 20 days).
- Covering with polyethylene. When filling the screed in the summer, after watering it with water, the entire area of the flooring should be covered with plastic film. This process is done to prevent moisture from evaporating.
- Movement on the ceiling during hardening is not allowed. The laid screed should not be loaded; only on the 3-4th day can wooden platforms and boards, preferably 1 cm thick, be laid down.
- Limitation of ventilation in the room. To prevent builders from having to repair cracks in the screed, after pouring it in the room, it is necessary to close all windows and limit the air flow.
- House shrinkage. Construction professionals strongly recommend that in a new private house (even with a well-established foundation) the floors should be poured no earlier than six months, and preferably 11-12 months. So that you don’t have to repair the screed and seal cracks that form as a result of subsidence of the house.
After watering the screed and covering it with film (3 days after installation), wet sawdust or sand should be poured on top, which will prevent moisture from escaping. The screed should remain in this condition for 11-14 days. To learn how to make a beacon screed, watch this video:
How to repair cracks in a floor screed?
Elimination of minor defects
Small cracks for repair are opened with a hammer and chisel
Restoring a screed with your own hands if there are small cracks is quite easy; for this you need:
- Using an angle grinder with a diamond disc, slightly widen the crevice;
- Remove loose pieces of concrete along the edge of the crack;
- Prime the resulting cracks;
- Fill the cracks with tile adhesive.
Renovating an apartment involves some difficulties that are worth mentioning. If the concrete surface is cracked in the bathroom, it is impossible to repair the defects with ordinary tile adhesive. In just a couple of months it will peel off due to high humidity in the room.
If the microclimate in the room is specific, a mixture with water-repellent properties should be used to fill the defects. You can see how to repair a screed in a bathroom in the video below.
Elimination of large cracks
Repairing an old screed with large cracks in the technique differs little from the previous version. And yet, in this case, a mixture of cement and epoxy is used to fill the cracks. Large-area defects cannot be sealed with tile adhesive due to the low adhesion of the adhesive solution. What to do if the screed is cracked?
- First, the crevice needs to be grooved;
- It is desirable that the crack has a smooth edge on both sides;
- The resulting dust is removed with a vacuum cleaner so that the adhesive mixture has good adhesion to the concrete;
- After this, several deep cuts must be made across the gap to reduce the load on the seams;
- Then the prepared areas of the coating are primed;
- At the final stage of repair, a mixture based on epoxy resin is applied.
Conclusion
What should you do if the screed is cracked? The first step is to determine the nature and extent of damage, as well as the causes of their occurrence. Depending on the size of the defects, tile adhesive, mixtures based on epoxy resin or cement mortars, the price of which is quite reasonable, are used to eliminate them.
We determine the nature of cracks and the reasons for their appearance
At this stage it is important to determine the nature of the cracks. If they are small, that’s one thing, and the reason is more likely to be the quality of the mixture or improper care after pouring (here protection from rapid drying is necessary: the screed is covered with a film and wetted with water every 1-3 days), such cracks are practically not dangerous and can be easily sealed with liquid mortar
Also, such cracks can appear at the joints of the screed with beacons or at the junction of an already dried part with a new one.
Another option is cracks to the base (floor or insulation). Here you need to take the issue more seriously and seal the cracks with epoxy. If there are a lot of cracks, about 50% of the area is cracked, it is better to dismantle the screed and lay it again (which is sometimes not possible), following the recommendations for the device (reinforcement, maintenance, etc., this is discussed at the end of the article).
Small cracks, not to the base, not particularly scary
Coiling screed
A cracked screed may buckle, that is, vibrate under shock load. This is possible when laying on sand or polystyrene foam. If you have a piece of screed that is buckling, then it is best to seal the crack with epoxy resin. You can leave such a screed only if you are planning repairs for 10-15 years, no more. Perhaps it will need to be changed later, or maybe not - depending on your luck.
The vibrating screed must be strengthened
Do cracks need to be sealed?
An important question: is it necessary to repair cracks in the screed at all? Well, in general, the screed cracks “all the time” (that is, quite often) and there shouldn’t be any special problems with cracks.
I recommend: Is waterproofing necessary when insulating a house made of timber?
How do you know if it needs to be sealed? Try jumping along the edges of the crack or tapping it with a rubber mallet. If the screed vibrates strongly (often happens when laid on a soft base), then you should take care of sealing the cracks, preferably with epoxy. If no dust comes out of the crack during impacts and the screed does not vibrate (that is, most likely it is laid on a solid base), then you can seal the crack with a liquid solution.
Small cracks in the screed can be repaired simply with mortar
When laying tiles, small cracks (not all the way to the base) can be sealed directly with glue.
There are a lot of situations in which a screed cracks, and only a specialist can decide whether the crack really needs to be repaired or can be left as is. The article describes many situations, but the technological aspect is not the only one. There may be deadlines, circumstances, and so on... The main thing is to do it conscientiously, so that there are no problems later.
#Promised bonus: Calculation of solution for self-filling screed
If you plan to independently prepare a solution for pouring screed, then all responsibility for the correct dosage of components, that is, for the quality of the future concrete, rests entirely with the master himself. To avoid making mistakes, use our online calculator.
Explanations for calculations
The calculator will calculate, firstly, the total amount of solution required to fill the entire room.
- To do this, of course, you should indicate the area of the room.
— The difference in the base level is indicated (the difference between the highest and lowest points). That is, the unevenness (distortion) that will be eliminated with a screed.
— Finally, the minimum planned thickness of the screed is indicated.
— When planning, it is customary to include a supply of construction materials. In our calculator, the user can choose to leave a “net” result or take into account a reserve of 5 or 10 percent.
Secondly, it is possible to carry out calculations taking into account the capacity of the existing concrete mixer (which should be indicated in the calculator).
The program will calculate both the number of batches and the “recipe” for each batch.
This means that the user will be shown how much cement, sand, water and plasticizer is required for one batch. Moreover, it is shown in units of measurement convenient for practical work - liters and buckets.
Cracks in the screed. Repairing cracks in screed
As mentioned above, cracks in the screed may appear if the floor is filled with liquid mortar in very hot weather. If cracks in the screed occur on an already used floor, then there may be much more reasons for the appearance of cracks. The most common reasons that can cause cracks in the screed on an already working floor base.
What can cause cracks in the floor screed?
Do not use small crushed stone when pouring the screed. Crushed stone is used when pouring floor screed not only as a filler. It perfectly serves as a reinforcing material that prevents the floor screed from cracking and collapsing during use.
The technology for producing cement mortar for screed was violated
Often, in order to save money, many people try to save on such an important material in floor screeding as cement. As a result, the floor screed turns out to be insufficiently strong, loose, and as a result, cracks may form on it
Therefore, in order to avoid the appearance of cracks in the screed, you should not skimp on the main components of the cement mortar. Cracks on the floor can easily occur due to the lack of waterproofing.
How to repair cracks in a screed with your own hands
The formation of cracks in the screed may be due to high load on the floor screed. If during the process of pouring the floor, the thickness of the screed was not maintained, and it turned out to be too small in the end, then cracks on the floor screed will appear in any case.
Cracks in the floor can also appear due to heating and water supply pipes being laid in the floor. Putting Merilon (insulation) on heating pipes hidden in the floor screed can lead to the appearance of cracks in the end. However, we should immediately make a reservation and say that cracks in the floor screed in this case can only appear if the thickness of the cement layer is insufficient.
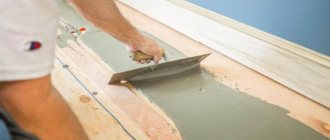
If it is necessary to repair floor cracks after recently pouring mortar, this must be done as quickly as possible. To do this, liquid cement mortar is diluted, which ultimately fills the cracks in the screed. After this, it is advisable to additionally iron the cement floor, thereby adding some strength to it.
Solution for sealing cracks in floor screed
If it is necessary to eliminate cracks in the screed on a ready-made concrete floor, then it is better to pour a thin layer of cement mortar on top of the cracks in the screed.
To be on the safe side, it is better to place a metal mesh for reinforcement on the broken floor screed before pouring.
So, as can be seen from all of the above, eliminating cracks in the floor screed is not so difficult, it all depends on how badly the cement floor was damaged and, of course, as a result of what this happened.
Why does cement-sand screed crack?
The reasons for cracking in → cement-sand screed (how to make such a screed is described in the article at the link) can be different. The first and most basic is a violation of technology. The second is the poor quality of the mixture, which is rare, especially if you do not buy the mixture at the door.
You can violate the screed laying technology and contribute to the appearance of cracks on it in different ways:
Violation of screed thickness
Violate the thickness of the screed, it should be at least 2 cm. In some places it is impossible to do even 1 cm, so it may crack. If it cracks a little, then often there is nothing particularly terrible. You can simply seal the crack with the same solution and wait until it dries. Such places may be above heating pipes and electrics (in corrugation), which you hide under the screed.
This also happens if you save on materials or such a layer thickness is dictated by circumstances, for example, when the difference in the slab is large and in one corner the screed appears 4-5 cm, and in the other it may be slightly less than 2 cm. If the base is strong (that is, laying is not made for insulation), this is often acceptable, it all depends on specific circumstances, and there are many, many of them. According to SNiP, the thickness of the cement-sand screed must be at least 2 cm when laid on a solid base. For insulation (soft base) at least 3 cm with mandatory reinforcement (if you don’t want the screed to crack).
Screed on insulation without reinforcement
Screed on insulation without reinforcement. When laying a cement-sand screed on the insulation, it should be reinforced. Sand also refers to insulation, and → when laying a screed on it (the link describes how to lay a screed on sand), sometimes the reinforcement is neglected. The sand settles a little and the screed cracks (even though sand is an incompressible soil, but so that it does not shrink at all, it should be compacted as much as possible with water poured in layers, which is very difficult to do in an apartment without flooding the neighbors below). The same applies to other insulation materials - for example, expanded polystyrene (including extruded polystyrene, such as Penoplex).
Reinforcement of screed on insulation
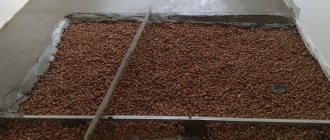
Another insulation option is expanded clay. It can also be used as a bedding under the screed to reduce the load on the floor slab from the heavy cement-sand screed and reduce the cost and/or ease of labor (yours or the workers) and the entire structure in general.
I recommend: How to make a fence from corrugated or smooth asbestos cement sheets?
First, a layer of expanded clay is laid, followed by a layer of screed. Expanded clay screed must be either reinforced with a metal mesh or laid with expanded clay (the first layer) mixed with the same solution (sand concrete). Such a cake is laid either in pieces, in 2 layers at once, or first, the first layer is made with expanded clay over the entire area, after drying (1 day is enough), the second layer is laid on it. With this installation method, when the first layer is a solid base of expanded clay with sand concrete, it is not necessary to reinforce the screed, cracks (for this reason) will not appear. The thickness of the sand concrete layer with this method is from 3 cm. This method is used when it is necessary to cover large differences of 5-6 cm.
The screed on the insulation needs to be reinforced
Failure to comply with drying conditions
Failure to comply with drying conditions. For example, in hot weather, the screed must be covered with plastic film and even moistened every day. If you lay screed in your apartment in the heat of the summer and open the windows wide, it will definitely crack. The screed should dry evenly, there is no need to rush here, don’t get carried away anyway, cement-sand mixtures gain full strength in 28 days, but in general, if really necessary, you can start cladding after half this period. If the period is reduced, you should check whether the screed is releasing moisture by covering it with plastic film and see after a day whether condensation has formed under the film. If not, you can start cladding.
In any case, it is advisable to cover the screed with film (the next day after installation, of course, not immediately), this way you will remove one of the factors of crack formation in the screed and prevent it from getting dirty if you carry out further work.
It is highly advisable to cover the screed with film
Work on installing a finishing coating on a screed that has been standing for 2 weeks (half the time) can only be done if you are convinced that it will not crack under the coating. Cracks may appear after 3-4 weeks. If you have followed the technology and are confident that cracks will not appear, finishing can be done. It is better to wait the allotted time and make sure that everything is in order, but this is not always possible.
In general, small cracks are not a big deal. The screed will lie as a weight on the floor slab, and no forces will be able to move it. In addition, the laminate distributes the load on the screed. As for tiles (or porcelain stoneware), there is a nuance - the seams (grout) may crack if the screed under the tile cracks, so the choice is yours. But for this to happen, you either need to completely disrupt all the technology, or call the person who is laying the screed for the first time. Be carefull.
It’s another matter when the ENTIRE screed has cracks, and the cracks are wide enough for a little finger to fit through, then it is necessary to dismantle it or strengthen it. Depending on the situation.
Cracks in lighthouses and breaks
On lighthouses and on breaks. The screed often cracks where the fresh layer adjoins the already dried one. This can happen on lighthouses if they are laid on a cement-sand mortar. To avoid this, try to pour the mixture continuously. If this does not work, prime (with the same solution) and wet the already dried areas in the areas adjacent to the new layer. Try to make piles on which you install the beacons so that the layer of subsequent screed on them is as thick as possible. Or better yet, install beacons on self-tapping screws.
The screed often cracks on lighthouses
Too much water
Too much water (solution too thin). If the solution is too liquid, then most likely your screed will crack or cracks have already appeared, since you are reading this article. Here it is better to get ahead of this process rather than deal with the consequences. The solution must be made thicker and a very deep puddle must not be allowed to form in the solution after leveling. Not only does the cement become less durable when a large amount of water is added, but it will also settle, and the water will come to the top: there will be differences, not just cracks.
The normal option is when there is no puddle in the solution
Crack repair
Repairing cracks with special care
No matter how strong the screed is, during operation or due to violation of the coating technology, various defects may appear on it: cracks, potholes, pits.
This can be discovered after the old coating has been removed.
Why the floor screed cracks, how to fix it yourself without calling specialists - this worries everyone who has decided to replace the old floor covering with a new one.
The following tools will help you make repairs: a hammer drill, a hammer, a grinder, a hacksaw, a marker, a metal rod with a diameter of 12 mm, and a construction syringe.
To seal cracks, you need to stock up on epoxy resin for concrete, quartz sand, primer and repair compound. There are separate repair recommendations for different sizes of cracks.
small crack
First of all, you need to clean the area where the defect is supposed to be eliminated. Here you should widen the crack with a chisel and hammer to a depth of 1 cm. The crack should look like a groove, narrowed at the bottom.
Clean the area and remove dust from it with a vacuum cleaner or sandblaster. The entire prepared surface is treated with epoxy resin mixed with solvent in a ratio of 1:10.
After work, the surface is allowed to dry. This is required for the strength of the bond between the repair mortar and the base. Then you need to fill the crack with a solution, let it dry, clean and sand.
Large crack
The order of actions is presented as a list:
- Prepare the area for repair and use a grinder to deepen the crack to 5 cm.
- Then you need to make deep grooves on both sides of the crack and use a chisel to gouge out all the concrete.
- Remove dust and coat with epoxy resin solution.
- Since the crack is large, the repair solution is applied in several passes.
To repair large cracks, metal staples are used: make cuts across the recess 1.5 cm wide and 2 cm deep, put the repair solution and the staple into them.
Fill the entire crack with mortar in this way, let it dry, clean and sand.
Pothole Repair
Initially, use a grinder to clean out the pothole to a depth of 2 cm. Concrete is removed from the cavity using a hammer drill, after which it is necessary to remove dust. Next, prime the pothole with epoxy resin.
After the primer has dried, you can fill the pothole with repair mortar and level it with the floor. After the solution has hardened, it is cleaned and sanded.
Repair of coiled areas
The section of the screed that is movable under load is called the bouncing section. Repair of such areas begins with removing the coating until the surface is in a stable condition.
Having removed the coiled fragments, you can carefully examine the concrete base underneath - there may be a fault on it. Next, you should remove moving areas on the concrete floor, dust and prime everything.
After the primer has dried, fill the crack with a material similar to concrete and allow it to dry. Repairing a pothole begins by removing debris and dust, then priming it and allowing it to dry.
Subsequently, the movable section of the screed is re-filled with a cement-sand mixture, and the solution is leveled flush with the floor with a wide spatula.
Repair of movable screed by injections
Injection is the most progressive method
Spilling areas can be strengthened using injections.
To do this, you must first determine the area of detachment and mark it with a marker.
Using a drill or hammer drill, drill holes with a diameter of 7-10 mm and at a distance of 25 mm.
Fill a construction syringe with low-viscosity epoxy resin and fill all holes.
Let the resin dry and go through all the holes again with a syringe.
Gradual filling with repair compound gives time for the concrete to soak and fill the peeling area completely.
As soon as the level of epoxy resin in the holes stops decreasing, stop pouring.
The resin will harden within 24 hours, so it is better not to walk on the site.
It is important to know that if the area with defects makes up more than 30% of the area, then the screed must be completely replaced. Repairing and filling do not require much skill, the actions are simple and even beginners in construction can do them
The main thing is to adhere to all the rules and recommendations for filling.
Learn more about screed repair in the video:
Noticed a mistake? Select it and press Ctrl+Enter. to let us know.
Screed repair
Now about how to repair a floor screed with your own hands. For this you will need: a hammer drill, a hammer, a grinder (grinder), a construction syringe, a hacksaw for metal processing, and 12 mm metal staples. The materials you will need are: epoxy grout, quartz sand, primer, as well as the composition from which the screed solution was made. Depending on the nature of the damage, repairing cracks in concrete occurs in different ways.
Microcracks
The first step is to clean the area that will be processed, remove everything from the floor and carefully inspect it. It is recommended to circle places with cracks with a marker so that you don’t have to look for them again later. Using a hammer and chisel, you need to widen and deepen the crack, the result should be a gap that narrows downwards. Remove dust and small stones from the crack with a vacuum cleaner. Next, you need to mix epoxy resin with solvent in proportions of 1:10, apply the composition to the surface of the groove and let it dry. All that remains is to cover the crack with cement-sand mortar and, after drying, sand the area.
Relatively shallow cracks can be repaired quite simply and quickly
Large cracks
To repair a floor with such defects, it is necessary to prepare the surface and make the crack deeper to the full thickness of the layer using a grinder. With the same tool you need to make two cuts on both sides, and then remove all the concrete with a chisel. Next, remove dust and debris and apply epoxy to the groove surface. In some cases, metal staples are used to increase the strength of the treated area. To do this, you need to make cuts across the crack to a depth of 2 cm, place a metal bracket in the resulting gap, pour in a cement-sand mortar, wait for it to dry, and then grind it.
Steel staples are used to repair cracks up to 5 – 7 cm deep
Potholes
If the surface is cracked so badly that a pothole has formed, you will have to use a hammer drill. With its help, you need to expand the pothole to a depth of 2 cm. Further actions are the same as in previous cases: dust and debris are removed, the walls of the crack are treated with epoxy, and the defect is covered with a solution.
Before applying epoxy compounds, the base is primed, and only after the primer has dried, the mixture is poured
Movable areas
In this case, it will require more than just sealing with epoxy resin and then sealing with mortar. The first step is to outline the boundaries of the moving surface with a marker and make cuts using a grinder according to the markings; sometimes at this stage you can remove concrete fragments. If it sits firmly, you need to remove it with a hammer drill, removing the entire screed to the base. After this, remove the dust and check the base for defects. If they are not there, then the surface is primed and poured with concrete again, level with the floor. If there are potholes on the base, then you first need to seal them, wait until they dry, and only then fill the pothole.
Deep defects expand several centimeters on both sides
Repair of moving concrete by injection
Injection of building composition is one of the newest methods of repairing surfaces after concreting. For this process, it is necessary to locate the moving area, outline its boundaries with a marker and drill holes to a depth of about 1 cm over the entire area every 2.5 cm. After this, you need to pour the epoxy composition into a construction syringe, fill all the holes with it, wait for the material to dry and repeat procedure.
The composition will gradually penetrate into all internal cavities and simultaneously impregnate the concrete, which will significantly increase the strength of the coating. After the operation is completed, you should not walk on the floor for 24 hours so that the epoxy resin has time to harden. After this time, you need to check the result: if the mobility cannot be eliminated, you will have to completely remove the concrete layer.
The injection method of repairing a concrete monolith is available only with special equipment and professional knowledge
Important! If the defect occupies more than 30% of the surface, it is necessary to completely remove the coating and refill it.
Thus, there are a variety of methods for sealing cracks depending on their type and size.
To summarize, we can say that defects are easier to prevent than to eliminate. Therefore, it is strongly recommended to mix the solution correctly, carefully prepare the surface and never speed up the concrete drying process. If you follow all these recommendations, there will be no cracks in the concrete screed.
Screed repair: what to do if the screed is cracked, and how to repair the cracks?
If you are faced with cracks that appear after the concrete solution has dried, then you should not be upset right away. There is a simple and proven way to repair floor screeds, which does not require expensive materials or the involvement of specialists. Let us describe its main stages.
First, it is necessary to identify and mark all emerging defects, and these can be not only cracks in the screed, but also small chips, hidden cavities, which can subsequently lead to their appearance.
The cracks must be widened with a hammer drill or grinder, and hidden cavities must be opened. Along the course of each of the resulting grooves, transverse cuts 15-20 cm long and about 1-2 cm thick are made at an equal distance (20 cm).
The next step is to remove debris and dust from the treated areas. To increase strength, metal wire is placed in the made channels, which will play a reinforcing role. Next, you need to fill the grooves with repair cement mortar. You can use regular tile adhesive instead.
Repair work is completed by leveling the outer surface. It is worth remembering that if damage exceeds 30% of the total floor area, the best option would be to dismantle and carry out all the work again.