Each of us went to school. There a person receives a huge amount of knowledge that may later be needed in life. Not everyone, of course, can fully appreciate the significance of the knowledge acquired at school, but this is not the point now.
Mathematics. This is a scary word for many , which frightened quite a number of schoolchildren at one time. Numbers, formulas and calculations were amenable to only the most inquisitive. And every year this complex subject became more and more difficult.
In high school, geometry appears and everything becomes even more complicated and incomprehensible. Perhaps many at least once in their lives, but in their hearts, cursed a science they did not understand and wondered why it was needed at all, and whether it would be needed in life.
Perhaps it was not possible to apply the knowledge acquired at school in everyday life. It was hardly necessary to calculate logarithms and quadratic equations in broad daylight or prove that two parallel ones would never converge. But where knowledge of geometry and mathematics may certainly be needed is in construction and when carrying out repairs.
This article will focus on calculating the right angle, which is required during the construction of buildings. Accuracy in the construction of buildings must be observed without fail , because only accurate calculations can eliminate distortions and instability in the organization of the entire building. Calculating a right angle during construction is not such a difficult process, which will require knowledge and application of some simple rules of mathematics and geometry. This will be discussed in more detail below.
Where you need a 90 degree angle between walls
90 degree angles are generally not displayed everywhere in the apartment. In economical repairs, and in most euro-renovations, 90-degree angles are needed only in two places:
- in the corner where the kitchen furniture will hang/stand,
- and in the bathroom, where the bath itself will be located, in two adjacent corners (or in one if the shower stall is in the corner). Or in all 4 corners of the bathroom, since there will be a sink, washing machine, etc.
In other cases, everything is at the request of the customer or the person carrying out the repairs on their own.
How to check and set angles
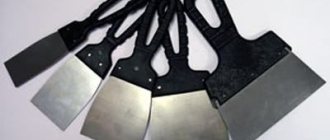
It’s easy to check the angle with a construction square; you can buy it at the store; if you’re going to cut out the corners, you’ll need it.
A construction square is needed to check angles
Just lean the square against the inner corner. We will not consider external corners for now, for the sake of understanding the process itself. After understanding how to align internal corners at 90 degrees with your own hands, external corners will not be a problem for you.
Checking the internal corner
Let's see what happens. If everything is fine, there are no gaps between the square, then relax. If the gap exceeds 5 mm, then you should be wary and find out how to align such an angle in a straight line so that both the bathtub and cabinets hang well. The fact is that a gap of 5 mm under a small, even half-meter (the length of at least one edge) square, for the entire length of the wall turns out to be quite large and at the end of the wall can reach 5 cm.
Making a square yourself
You can build a square yourself, and of any size. It is most convenient to make such a square from 27*28 mm plasterboard profiles (rigid or semi-rigid).
We use the rule of the Egyptian triangle, in which: if the legs of an angle are equal to 3 and 4 parts, and the hypotenuse is 5 parts, then the angle will be rectangular (a right angle between the legs).
We cut and bend the profile in the middle to the required length (the sides of our square do not have to be equal to the 3 and 4 parts we have defined, the rule is only needed to make a right angle). We bend it and take it as 1 part, for example, 30 cm. The larger you make the part, the “straighter” the angle will be.
I recommend: Is it necessary to plaster foam blocks before cladding?
We measure 3 parts on one leg - 90 cm, on the second 4 parts - 120 cm. We make marks with a marker. Next, bending the corner, we measure the hypotenuse strictly from the marks - 5 parts - 150 cm. Our angle is right, all that remains is to fix it with the same profile using self-tapping screws. Here you should be careful not to knock the corner, check the correctness of the markings several times.
The video below clearly shows how to build such a square.
Checking the angle using a laser plane builder
Laser plane builders allow you to easily check verticals, horizontals, deviations of entire areas, as well as angles, if such a function is provided on it.
Laser plane plotter, with function of constructing right angles
Not all plane builders are suitable, but those that project two perpendicular vertical planes. It makes work much easier, but such a device costs from 15 thousand rubles. You can find cheaper ones, especially in China, but they may also have deviations, although often not significant, they are at least written in the device’s passport, and on cheap models the deviations may not at all coincide with the passport ones. Check this before use using a large square, as described above, or on known right angles.
Such devices allow not only to draw right angles, but also → plaster planes and → floor screed (the links tell you how to make beacon plaster and cement-sand screed).
The laser plane builder (level) just needs to be turned on, placed at the corner and drawn lines on the floor that it has projected. Next, I will tell you how to check the angles and build a rectangle on the area of the room using a square and a rule, and how to work with a laser plane builder will become clear from this story.
Pythagorean theorem
The theorem is based on the statement that in a right triangle, the sum of the squares of the lengths of the legs is equal to the square of the length of the hypotenuse
. This is written as a formula:
Sides a and b are legs, between which the angle is exactly 90 degrees. Therefore, side c is the hypotenuse. By substituting two known quantities into this formula, we can calculate the third, unknown one. Therefore, we can mark right angles and also check them.
The Pythagorean theorem is also known as the “Egyptian triangle”. This is a triangle with sides 3, 4 and 5, and it does not matter in what units the lengths are. Between sides 3 and 4 is exactly ninety degrees. Let's check this statement with the above formula: a²+b²=c² = (3×3)+(4×4) = 9+16 = (5×5) = 25 - everything converges!
Now let's put the theorem into practice.
Making markings to align right angles
Since the work of making all the 90-degree angles with your own hands is quite labor-intensive and resource-intensive (plaster-intensive©), we will first look at the geometry of the room and then decide which corners we will make straight and which we will leave as is (two corners or all), if this decision has not yet been made. In any case, 4 corners will be more difficult and more expensive than 2.
Let's take the bathroom as an example and first check the corners with a square over the entire area and see approximately what kind of picture emerges.
Using a square to check the corners
Our picture is not at all happy; one corner (lower left) is completely gone. With the other corners everything is more or less, but the bathroom will not fit opposite the door, or rather, it will fit, but gaps will form between the bathroom and the wall. Small gaps can be covered with bath skirting boards (3-5 mm, even up to 1 cm), but nothing else can be used to cover them. More precisely, more is possible, at least 3-5 cm, but the quality... the quality will not be the same.
Let's now do the same thing, only we will lengthen our square using the rule and from corner to corner we will eventually draw a rectangle inside our room.
We start marking from the first wall
First of all, let's check our first wall for verticality and plane. If we align 2 corners, then this is a wall parallel to the bathtub, if we align 4 corners (the entire area), then it is a wall with an opening. If the wall is blocked, it will need to be leveled first, but take your time, because we have not yet checked the entire area.
I recommend: Installing a wooden window in a panel house yourself
To begin with, let’s simply cut a straight line parallel to the first wall, as close as possible to it.
Let's draw the first line parallel to the first wall
Next, between the first wall and the second wall, we will install a square with one edge parallel to the first line, and apply a rule to the second edge of the square. We combine the edge of the rule and the square, thereby “lengthening” our square. Draw a line on the floor to the end of the wall as close as possible to the wall. We adjust and combine our enlarged square so that:
- the line was straight
- minimum distance to the wall,
- the second edge of the square was parallel to the first line.
This is how we get the first right angle.
From the first line we will beat off the second one, perpendicular to it
Next, we go to the next corner to which we drew the line, and align the square with one edge parallel to the second line. We repeat the procedure with the rule (combine it with the square) and draw a third line perpendicular to the second, again as close as possible to the wall.
It requires some skill to combine the rule, the square and make a right angle with the lines as close as possible to the wall (this is done so that when plastering you don’t “eat up” the extra space). If the rule is not enough, we draw as far as there is enough, rearrange the rule, combining it with the line, and draw it to the end of the wall.
Draw a third line perpendicular to the second
We draw the fourth line, by analogy. As a result, we should end up with a rectangle
inside our premises. We check it along the first edge - along the wall with the opening, also by applying a square and a rule.
We check the resulting rectangle along the 1st edge
If everything is smooth, you can relax a little. If not, we repeat the procedure and/or look where we made a mistake.
Design
I started drawing the kitchen in AutoCAD because I wasn’t trained in any PRO100, and I didn’t set myself such an initial goal. Although I will not hide that if you master this specialized program, then in the future it will, based on your finished dimensions of the cabinets, itself carry out their detailing and even suggest the optimal fastening element. My AutoCAD drawing turned out to be much simpler, but at the same time quite visual.
So, what did I have at the start of this whole event? A kitchen with an area of 6.2 m2 (according to the technical passport), which has not had any, not even cosmetic, repairs done for many years. The kitchen set has generally been like this since the time the house was commissioned, and this is already almost 40 years. The window frame is old, wooden. The refrigerator is old and needs replacing. The gas stove is relatively new, but does not meet the wife’s requirements.
More homemade products: Why water drips from the water heater safety valve - steps with photos
Before I move on to the large table with ready-made parts for my kitchen, I’ll explain a few more points about what comes from where and how.
As it turned out later, the machine not only started this inevitable process, but also became, perhaps, the main element that influenced the design and choice of design for the future kitchen.
To perform an angular joining of two parts of the tabletop, the following fittings and consumables are required:
Applying sealant to the end. Screwing the connecting strip.
How to create corners in a bathroom: all corners are 90 degrees or just two
Now that we know what threatens us, we can try to make markings at 2 angles and see what threatens us in this case. We do everything the same, only for the main, first wall we take the one opposite the opening (the wall parallel to the bathtub).
- Draw a line parallel to the first wall.
- We set the square and the rule at two corners.
- Draw lines to the wall with the opening.
Let's see what happens if we align 2 corners
This is what happened. We place the wall with the opening and the wall opposite only in the vertical and 2 corners of 90 degrees, where the bathtub is. The consumption of plaster and labor costs is less. The corners adjacent to the wall with the opening are not so scary. If there is a gap, it is small.
Deciding on the angles
Let’s decide whether we will draw right angles only where the bathtub is or in all corners. We pay attention to the other side of the wall, which is in the corridor. If the wall with the opening is blocked, then the second side of the wall will need to be plastered in the same way and brought vertically, otherwise the door will not be able to be installed smoothly.
I recommend: How to properly organize a construction site for a country house
Important point
, if you start from the wall with the bathroom, then it will no longer be possible to bring out the corners with the wall with the opening, because starting from the wall with the bathroom, all the irregularities will “crawl out” onto the wall with the opening and it may turn out that on one edge of the opening the thickness of the wall will be 10 cm, and on the other 15 cm. And how to install a door in such an opening is completely unclear...
You need to start leveling the walls from the wall with the opening, if you are leveling all the corners, and if only two corners, then the wall parallel to the bathtub should be leveled first.
Work technology
First of all, we cut the aluminum corners to the required height of the corners, and then prepare the plaster mixture. The resulting mixture must be applied directly to the inner part of the corner along the entire length, if we are talking about an outer corner, and then pressed against the one being leveled, removing any protruding excess.
In the case of leveling internal corners, it is necessary to apply the plaster mixture to the corner itself in height and press the perforated corner into it, removing excess and carefully smearing the protrusions. Also, to securely fasten the corner, before applying the plaster mixture to the corner, you can secure it with self-tapping screws.
After the corners have been installed and the mixture has completely dried, it is necessary to level the corners with the wall. In this case, leveling should be done with a wide spatula. After the plaster layer has dried, the entire surface of the walls must be treated with a primer. Next, continuous leveling is carried out, which will additionally hide small irregularities and transitions.
Important: using aluminum corners is more practical than metal ones, since they do not rust and are more flexible when used.
Source: diy.sndimg.com
The corner alignment method used greatly simplifies the repair process and helps to level out the most complex irregularities. The main thing is to correctly set the level during installation and fix the perforated corners in the desired position.
Minimum effort - maximum results!
In some rather complex cases, a combined alignment method can be used. One of the walls (the most problematic) is leveled with sheets of plasterboard, after which the corners and corner joints are leveled with starting plaster using a perforated corner. At the end of the work, apply finishing putty.
We are sure that our recommendations will help you save money and time and, of course, complete all work with the most positive result!
Share your impressions of articles on social networks. See you!
Checking the verticality of the walls
Now that we have built our rectangle, let's check the walls. The point here is that the resulting square may not work out due to the curvature of the walls and you will have to move its edges away from the wall. We check using a rule with a bubble level or a rule with a bubble level or plumb line leaning against it, which is not entirely convenient. Let's see how to check a wall with a rule and a bubble level.
From the edges of the rectangle we look at the possibility of vertically aligning the walls
The bottom edge of the rule is placed on the edge of the rectangle. The rule is set vertically, the bubble level is closely adjacent to the rule. It is important that the rule and level are clean, that there are no layers of dry plaster - this is a priori.
We walk along the walls, especially in the corners, and look at the possibility of leveling them. If somewhere it is impossible to set the rule vertically from the edge of the rectangle, because a wall is in the way, the edge of the rectangle must be moved to the distance required to level the wall and install the beacons.
It should be remembered that the beacons are 6 mm thick. Look through the walls based on the fact that beacons will need to be placed on it.
The edge is moved away from the wall parallel to the opposite edge by the same distance at both ends.
What is a level?
A laser level (level) is a device that allows you to build vertical and horizontal planes. This is an indispensable assistant when building a house and during interior decoration.
The level consists of LEDs and prisms that create visible vertical and horizontal lines. With its help, you can both build smooth walls and level beacons, level the floor, ceiling and all other surfaces, quickly and evenly lay tiles, laminate and do many other works.
Installation of beacons and plastering of walls
Then everything is simple (relatively) and comes down to → installing the beacons and → plastering the walls along the beacons, with one condition that when installing the beacons, the angle of 90 degrees is also checked.
The bottom edge of the beacon is placed on the line of the rectangle and the beacons are positioned vertically according to the rule. When installing beacons, you should check the corners using a rule and a square. The only thing is that the wall from which we “danced” is displayed first, that is, for four corners - a wall with an opening, for two - a wall with a bathroom. First, you should bring it vertically, paying attention to whether the edge of the rectangle has moved from the wall, which is generally not a big deal, but you need to understand that your bathroom will become the size of a rectangle and everything you have in mind will fit there or not , must be foreseen in advance. You also need to take into account that the room will be reduced by the thickness of the tiles and mortar (if tiles) by at least 0.8 cm on each side of the wall.
This article can be completed here, since further work boils down, as I already said, to the installation of beacons and plastering on the beacons.
Also, if you have a bathroom with an external corner, then you can easily measure it and draw it out, using the example described above. If you level a corner in the kitchen, then everything happens the same way, just one corner is leveled. If you have a larger room, not a bathroom, then it is better to draw a rectangle using a laser plane builder, but as a rule it is also possible (2-2.5 meters). Good luck! Leave your tips and comments below. Subscribe to our newsletter. Good luck to you and good luck to your family!
Conclusion
Here's how easy it is to calculate a right angle without using any construction tools or instruments. You can use the simplest, but at the same time very effective tool , which, coupled with the use of existing knowledge and simple calculations, can help make measurements.
When using the suggested values, the key is the final measurement between the two marks that were made earlier. The distance, which will be exactly 5 meters, will seem to be straight. If the value is more or less than 5 meters, this will mean that it is not straight.