Oil putty
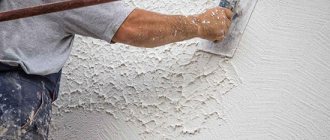
This putty is made using oil, chalk and water. It is very durable and will last a long time, but this type takes a very long time to dry. The thick consistency of the material makes it easy to apply it to the required areas.
It is worth noting that you can prepare the putty yourself. To do this you need the following components:
- drying oil (500 g);
- animal glue (100 g);
- turpentine or kerosene (125 g);
- liquid drier (25 g);
- chalk, liquid soap.
Homemade wood putty is prepared as follows: heat up the glue and add soap. All this is kept on fire and mixed well. Drying oil, drying agent and kerosene are added. In order for the wood putty to be white, chalk is added to the mixture last. The consistency of this putty resembles sour cream. When using it, you need to know that the mixture should not be cold. For convenience, you can put it in a container with hot water and keep it warm the entire time you are working with the mixture.
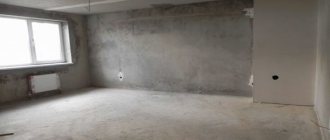
Evaluation of completed work
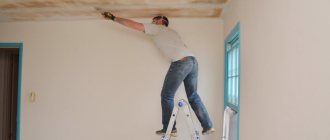
After puttying, you need to look at the wall and understand how smoothly you managed to apply the solution, because then the process of sanding the wall will follow, which consists of grinding off excess micro-protrusions on the wall, see How to sand walls. If you are a beginner, then it is quite possible that you may not be able to apply the solution evenly the first time. Don't worry, the next wall will definitely be smoother! However, if you understand that you have putty the wall poorly, that during the sanding process you will definitely have multiple pits and grooves (traces from the sharp corners of the spatula), then it makes sense to apply a second layer of putty after the first layer has dried.
IMPORTANT!
Remember! A new layer of putty can be applied only when the first layer is completely dry. And this will happen approximately in 24 hours.
Of course, wall putty is not limited only to Veber Vetonit. We have a whole separate section dedicated to well-known construction brands that produce dry building mixtures, where you can read about them, get acquainted and gain a little confidence in them if you have never putty before in your life.
This is where the article ends. Today we learned how to putty walls. I’m curious, what difficulties did you experience during your work? What was your main problem: with the spatula or with the incorrectly prepared solution?
Rating of the best putty manufacturers
Today there is a large selection of finishing materials on the market, so before purchasing it is worth familiarizing yourself with those from the manufacturer that have proven themselves well.
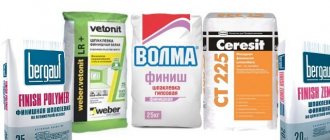
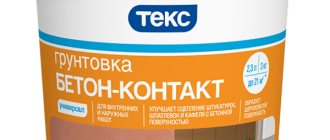
- Knauf is a German company and a leader in the production of high-quality and affordable products. Putties are available in polymer, gypsum and cement compositions. The company also produces gypsum putties with X-ray protection.
- Tikkurila is a well-known Finnish manufacturer that offers a wide range of high-quality products and even putty without the need for sanding, that is, the surface itself becomes smooth.
- Volma is a domestic supplier that characterizes itself only on the good side. The company supplies various products, including polymer and gypsum putties with different particle fractions.
For reference! The ranking of the best manufacturers should also include Ceresit, Kreisel, Vetonit and Prospectors.
It is necessary to putty the base before painting, because only this way will the painted walls look beautiful and attractive. Therefore, it is important to know which putty is best suited for paintwork. Before purchasing, be sure to study the composition of the material, its shelf life, and it would not be amiss to ask the seller for a certificate of conformity.
Post Views: View statistics 1,149
How to do the job correctly?
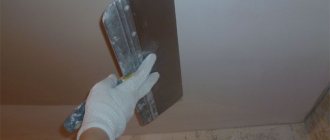
After puttying and sanding, the wall needs to be primed, and only then painted. This must be done to strengthen the top putty layer, otherwise dust will settle on the roller and interfere with the repair.
- After the walls have dried, the main work begins.
- They mix the paint and apply color to the entire volume of the room at once, so that there is no difference in color.
- The roller for work is selected according to the thickness of the paint and its composition. Foam rubber is suitable for water-based emulsion, but the thicker the solution, the longer the pile is needed. The mixture should not flow from the roller.
- The paint is rolled out with smooth movements, starting to move from the left side of the wall to the right.
- The composition is applied in two layers, the first one must be allowed to dry completely, and only then the next one must be applied. Otherwise, there is a risk of getting a surface with drips and sagging.
- Don't forget to paint the corners.
- To preserve the geometric pattern on the base, use masking tape during repairs.
Help Velor rollers are universal: they are suitable for all types of paintwork materials. It is easier for a non-professional to work with them.
The video clearly demonstrates how to paint a wall:
Types of putty mixtures
The choice of the right material directly affects the final result.
Leveling mixtures for interior and exterior work are divided into three types:
- Cement;
- Plaster;
- Polymer.
You should choose one or the other based on the purpose of your premises. So, when choosing materials for the bath and kitchen, the main criterion is moisture resistance, and for the bedroom and children's room - safety. The mixtures can be purchased dry or ready-made.
Cement putties are often used for finishing in rooms with high humidity, due to its moisture resistance. The cement base fits well on concrete and does an excellent job of leveling walls. But further tiling is limited to laying tiles, since cement putty is not suitable for painting.
Gypsum mixture is more versatile. It is more often used when renovating apartments. It comes in three types: starting, finishing or universal. The starting mixture is used for rough finishing for leveling. Depending on the unevenness of your wall, the thickness of the layer can reach 5 centimeters or even more.
The finishing putty is applied in a thin layer to the starting putty to mask all minor imperfections that could have formed during the application of the starting layer for leveling.
Universal putty is suitable for both types of work, but more often it is used to close joints on gypsum board sheets or seal cracks and holes. However, it can also be used instead of the starting and finishing mixture for further painting.
The most famous manufacturers of gypsum putties. They make any kind of mixtures. Other manufacturers provide specialized mixtures: Fugenfüller, Perlfix, Rotband and others. Polymer-based putty. The binder in such mixtures is polymer additives, such as acrylic resins or latex.
Most often they are sold ready-made, without the need to prepare them at home. Like gypsum mixtures, polymer mixtures come in three types. Putties of this type are of higher quality; they will strengthen your walls and create a moisture-resistant coating that will be suitable for painting later. But there are two significant disadvantages. First of all, this is the price.
Polymer putty will cost much more than its counterparts. And the composition cannot be stored for a long time. Ready-made mixtures do not have a long shelf life.
Principles of leveling walls for painting - how to take into account all the nuances?
Correctly puttingtying any walls is not so difficult if you know the specifics of such an operation in advance. First of all, we stock up on the necessary tools:
A set of spatulas of different sizes. The set must contain both large (up to 50 cm) and small tools. The latter are needed for processing hard-to-reach areas of walls. Electric drill with mixer attachment. This tool allows you to mix dry starting or finishing putty in water. We will not be able to mix a high-quality composition manually. There will probably be lumps in it. If we work with ready-made putties, a drill will not be needed. Brush and roller. They are necessary for applying primer to the walls. Please note! Priming is not a mandatory step in preparing walls for painting. But it’s better to do it. Then the wall will have high adhesion to paint
In addition, priming increases the strength of the surface being decorated, which is important. Level – laser (ideally) or regular alcohol level. Without this tool, we will not be able to properly level the wall surface. Rule
The main working tool in situations where walls have serious differences in height. The rule ensures fast and high-quality application of large volumes of leveling (starting) mass. It is optimal to carry out such work with a long metal rule. Hand sander, sandpaper. Grouting of the leveled surface is carried out with coarse (starting putty) and fine (finishing) sandpaper. The process of using them becomes much easier if you have a manual skinner - a simple device with clamps for installing and fixing the skin.
The puttying operation begins with preparing the walls. We remove stains of soot, old paint, and grease from them. We tap the plaster. If the old layer does not hold up very well, we completely clean the wall. In cases where only individual plastered areas are coming off, we knock down only them. Then we vacuum the wall and apply primer to it. It is most convenient to do this with a roller. One layer of soil is enough. The main thing is that it completely covers the wall. We begin work on filling the surface for painting at normal room temperatures. Do not putty on frozen walls.
After preparing the surface, you can begin the main operation. Puttying in most cases is carried out in two stages. First we level the wall with the starting mixture, then with the finishing mixture. When using universal compositions, puttying is also performed in two stages.
The nuances of puttying walls depending on their material
When preparing surfaces for further painting, the characteristics of various substrates should be taken into account.
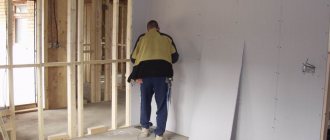
Drywall
The plasterboard base has a perfectly flat plane, but puttying the plasterboard before painting the walls is a mandatory requirement. It is especially important to seal the seams between individual sheets.
Before finishing work begins, the edges of the sheets that form the seam are cut at an angle of 45 degrees to obtain a convenient recess for sealing the seams with putty. Then the entire surface is primed.
To process the joints you will need a serpyanka and a special putty such as Knauf fugen. Serpyanka is glued to the seam, after which the putty is carefully rubbed into it with a narrow spatula.
Puttying of the entire surface is carried out using standard technology. Other nuances of puttying drywall are described here and here.
Loggia or balcony
Finishing external walls for painting requires the use of materials that are more resistant to external influences. Thus, for loggias and balconies, façade putty containing cement is recommended. When using inexpensive brands, you should remember that when leveling the finished surface with sandpaper, individual fragments of putty may be chipped.
Plastered base
Before filling, the plastered surface is cleaned with a wide spatula, cutting off all sagging. If the plaster crumbles in any place, this place should be cleaned and leveled with a plaster mixture.
The old coating is removed, the surface is leveled - then you need to saturate the finished base with primer.
When working with a plaster base, three leveling operations are carried out:
- For the first time, chips and dents are removed.
- The second layer achieves final leveling.
- The third layer eliminates all minor defects.
All layers are up to 1 mm.
Concrete base
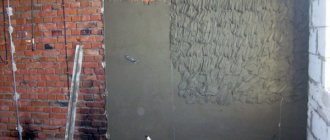
It is not recommended to lay putty solutions on an unprepared base. Before puttying, it is advisable to treat the walls with plaster solutions.
When the wall is smooth, the putty is applied in three layers, with mandatory pre-treatment of the surface with a deep penetration primer.
Master's comment
Unfortunately, it is impossible to do without surface putty.
Many people do not pay attention to the rough work, but they are the key to a neat and beautiful cladding. Without completely leveling the walls, the paint will lie unevenly, forming cracks or lumps, and such a surface will not bring joy.
The puttying process is a long and labor-intensive procedure. If you have never done this type of work, it may be worth calling in a specialist. Of course, the work is not difficult, but it requires extreme concentration and complete dedication, otherwise the walls will later end up with defects and all the work will be done in vain. When choosing a composition, be guided by the humidity level and temperature of your room. So for the bath and kitchen you need mixtures that are not afraid of water and temperature changes. But for the rest of the room this does not play such an important role. Putties are made from natural materials and are absolutely safe for health; they can be used in residential areas.
How to choose putty
The answer to the question of which putty is best for putty will depend on various factors. For example, from the base, because the walls can be concrete, wood, cement, plasterboard, etc. And also on the degree of humidity and temperature in the room.
Gypsum is suitable for puttying walls in living rooms, bedrooms, children's rooms and any rooms with normal humidity levels, and acrylic for the bathroom. The acrylic composition also has good adhesion to the wooden base. For drywall - acrylic and if we are talking about dry rooms, then gypsum.
If you listen to the advice of experts, then it is best to use a polymer or gypsum composition for paint. This putty will allow you to get a perfectly flat and smooth surface.
Choice of putty
The construction market can provide many varieties of mixtures. According to the scope of use, they are divided into two categories: facade (for external work) and internal. According to functionality and purpose, putty can be starting and finishing.
The starting one, also called the base one, allows you to eliminate all surface imperfections and is used for rough work. However, painting the room is allowed only when the final puttying of the walls has been carried out. The layer is applied on top of the start; it is thinner, more even and beautiful. The finished result will depend on the quality of the finishing coating.
If we consider the composition of the putty, it is divided into 3 main types:
- Cement-based composition.
- Gypsum-based putty.
- Polymer based.
Each of the materials has its own advantages and materials, as well as scope of use. This must be taken into account before choosing wall material for painting. For example, cement compositions are not afraid of moisture, they are strong and reliable. They can be used in the bathroom, kitchen and outside. However, they are not suitable for painting, only for laying tiles.
As for children's rooms, safety and environmental friendliness are important here. Gypsum mixtures are afraid of moisture, so they are not suitable for rooms with high humidity. The best option is to use acrylic putty. It is protected from moisture and is suitable for painting. This is a universal composition.
Which putty to choose: types for each stage
Currently, there are quite a lot of putties, differing in composition and scope of application:
- Oil-based drying oil contains chalk and catalysts that stimulate drying for leveling floors, doors, window sills, window frames, and other surfaces exposed to water before painting. It is distinguished by significant moisture resistance, but takes a long time to dry.
- Adhesive on drying oil has higher strength.
- Oil-adhesive with acrylates and plasticizers is elastic.
- Polyester mainly for metal processing.
- Latex is an analogue of oil-adhesive, only for interior work.
- Gypsum is white in color and is used for finishing in dry rooms.
- Putty can be used to fill cracks, baseboards, and with a more liquid dilution, whitewash. Some sites indicate that tiles can be glued to putty, but this should not be done.
- Epoxy is most often used for wood processing, but there are varieties for other surfaces.
- Acrylic can be universal and façade. Universal is the most popular mixture for interior finishing (with the exception of metal processing). The facade is resistant to atmospheric influences and moisture, and therefore is excellent for outdoor work when finishing any surfaces except metal.
- PVA-based putty has antiseptic properties and prevents the spread of fungus. It is used for interior work to level drywall or concrete surfaces, as well as seal cracks and joints.
Each of these varieties can be used on its own, but some masters use several types to achieve the ideal result.
What's the best way to start?
For initial leveling of walls, it is cheaper to use ordinary plaster, but if desired, you can also use acrylic. When leveling the plaster, a starting layer is not needed: the finish is applied immediately after the joints and screws are putty.
Important: before starting leveling, it is necessary to remove old paintwork, lime, falling pieces of plaster or concrete, and also clean the surface of dust, and then apply at least 2 layers of primer. Otherwise, the putty will fall off after drying.
The best finishing putty
It is difficult to say which finishing putty is the best, since all types of mixtures are intended for different types of surfaces, depending on the intensity of use and humidity level. The best option for finishing putty inside dry rooms is a gypsum or acrylic universal mixture. By the way, when using this variety, a topcoat is not required: it is applied immediately as a base and finish at the same time.
Putty for grouting joints
It is possible to use putty instead of a special compound for grouting joints between tiles, but it is highly undesirable, since in this case it will quickly fall off.
The same applies to the treatment of joints between sheets of gypsum or fiberboard, which is best done with plaster. If you still decide to use putty, then you should choose a mixture with the highest elasticity coefficient, for example, based on PVA. For bathrooms, it is also important to take into account high humidity and the risk of fungus formation, therefore the composition must contain special antiseptics and waterproofing components, which is always indicated on the packaging.
Here are some sample instructions:
- Before starting work, it is imperative to prime the surface. Photo of a wall to be painted in the interior photo of a hallway? For these purposes, deep penetration primers should be used, specially designed for walls and other surfaces.
Today there are many brands of such primer, produced by almost all global brands. Primers for walls come in both regular and anti-fungal primers.
We prime the surface before filling.
- When asking: how to putty walls for painting, it is worth taking into account the specific case, since the surfaces are different, and to putty a wall with deep unevenness, a starting putty mixture is used, and for minor flaws and final putty, a finishing mixture is used.
Stir the starting putty composition.
- When putting plasterboard walls, first of all it is necessary to close the seams between the sheets, as well as the recesses from the screws (photo). The primer solution can be applied using a roller or a wide brush.
- After the soil has completely dried, which is about 3-5 hours, you can begin applying putty.
Plastering of the plasterboard surface is completed.
We lay the serpyanka reinforcing mesh.
Please note: When sealing seams, it is important to prevent the formation of voids and gaps; a special “serpyanka” reinforcing mesh is inserted into the joints joining the plasterboard sheets, which is covered at the top with the next layer of putty. When sealing joints between sheets of drywall, a medium-sized spatula should be used to apply the putty mixture, and a special corner spatula should be used for corners.
Stage two. Let's get started
So, how to putty walls for painting. The first layer of putty mixture can be applied after 24 hours, when the joints are completely dry.
The process of applying the solution to the surface is as follows:
- First, prepare the putty mixture by mixing the dry mixture with water.
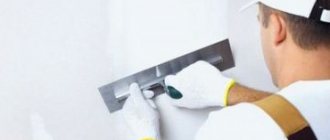
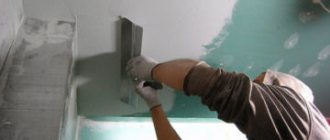
- Then, using a small spatula, it is applied to a large one, and applied evenly to the surface to be treated. When performing this work, the spatula used to apply the mixture to the wall must be held at an angle of 30 degrees. When applying, you need to take into account the force of pressing it, since the quality and evenness of the initial surface depends on this.
- Depending on the type of surface, in order to properly putty walls for painting, there may be a need for additional reinforcement. This reinforcement is carried out by inserting reinforcing mesh between layers of putty; it should also be taken into account that strips of reinforcing mesh must be laid overlapping.
- After applying and drying the first layer of putty, the surface is sanded. It is made using sandpaper or sanding mesh.
Advice! We check the evenness of the resulting surface using a bright lamp; under its light, all irregularities and defects will be visible. If necessary, apply a second layer of putty, similar to the first, while a primer must be applied to the first layer of putty.
We putty ourselves. What do we need
Sand with sandpaper.
It is quite possible to putty the walls yourself. Despite the apparent complexity of the process, even a beginner in construction and finishing can do it.
To do this you will need the following tools, devices and materials:
- putty mixture directly;
- mixing container;
- mixer and drill for mixing;
- sandpaper or mesh for sanding;
- a set of spatulas, including wide, narrow and angled spatulas.
Tools needed for puttying.
It is necessary to ensure the cleanliness of the instrument, namely:
- Do not leave any remaining mixture in the mixing container or on the spatulas;
- Carry out timely rinsing to remove any remaining putty mixture;
- The hardened putty residues form lumps, which leave streaks during the work process; they subsequently add unnecessary hassle when sanding the surface. When performing puttying, you need to take into account that the putty mixture tends to harden, as a result of which you need to have time to work out the putty before it sets, so it is not recommended to mix too large a volume;
- Also, when choosing a mixture for puttying, it is necessary to consider the conditions under which it will perform its functions.
Required materials and tools
Before you putty the walls for painting, you need to acquire tools and purchase material.
You need to purchase or rent the following tools:
- roller, 200 mm wide, for working with primer;
- brush, 100-150 mm wide, for working with primer in awkward corners;
- capacity 20-30 l for mixing putty;
- hand mixer or electric drill equipped with a suitable attachment;
- main spatula 500-600 mm wide;
- several spatulas with a width of 100 to 250 mm;
- spatula for forming corners and hard-to-reach places;
- sandpaper with grit from 0 to 4, for grinding the treated surface.
The following materials will be required:
- putty mixture suitable for the operating conditions of the surface;
- primer;
- water.
Calculation of putty consumption
When puttingtying walls for painting, it is important to correctly calculate the volume of material. There is no universal payment system, because... When calculating, it is necessary to take into account the base material. So, for porous plastered walls, more putty will be required than for smoother gypsum board walls.
The average consumption can be calculated according to the following standards:
- The first (starting) layer is applied with a thickness of no more than 3 mm. Based on this, manufacturers recommend calculating material consumption as 1.2-1.3 kg per m2 of surface to be finished;
- for the second (finishing) layer, the thickness of which does not exceed 1 mm, less material will be required - approximately 0.5 kg per m2.
The given example of calculating material consumption should be adjusted upward if there are significant vertical deviations of the surface or if a beginner gets down to business - puttingtying walls for painting with your own hands requires a certain skill.
The calculation result is usually rounded to whole packages. The standard weight of the dry putty mixture is 25 kg.
Final wall putty
After completing the starting or lighthouse putty, proceed to the finishing putty. It is done with finishing putty mixtures. It is this putty that gives the wall surfaces perfect smoothness. Tiny cracks or pores are eliminated
It is important that the finishing putty completely coincides in plane with the previously prepared surface, so it must be applied in a very small layer. If the starting or beacon putty is performed poorly, you will not be able to correct the situation with the help of finishing putty
Therefore, first try to make the surfaces of the walls perfectly smooth. Only then proceed with the finishing putty. Its main goal is a beautiful smooth wall surface.
The finishing putty is carried out under special lighting, this allows you to see the smallest irregularities. Photo — vipconstruction.kiev.ua
Ready-made putty mixtures
These types are used, as a rule, for finishing surface coating.
The main disadvantage of this type is that the solvents that are in the mixture evaporate when applied to the wall, which causes shrinkage.
Putty - finishing
Based on their composition, there are 3 types:
- specialized;
- finishing;
- universal.
To putty joints between drywall without using reinforcement tape with your own hands, leveling putties are required.
One of the most popular types of putty, thanks to which you can level the surface. Main requirements:
- so that it is compatible with the putty base;
- high adhesion to it;
- the defects in the base of the plaster were filled.
A set of tools for performing work
To prepare and apply putty on the walls with your own hands you will need:
- dry putty;
- bucket for preparing the solution;
- poppet, for applying primer;
- construction mixer or hammer drill/drill with a whisk attachment;
- 3 metal spatulas: it is better to choose a wide one for applying the solution to the surface, a narrow one for supplying the solution, and a corner one for correctly forming the corner;
- reinforcing tape;
- grout block with mesh;
- cotton or rubber gloves;
- lamp for lighting.
Application technology step by step
Before applying putty to the wall with your own hands, you need to prime the surface. It is cleaned of fine dust, so the adhesion to the base will be more stable, of higher quality, and stronger. When carrying out work on priming walls, it is better to use a wide roller; for hard-to-reach places and joints - a brush. The applied layer of soil is thoroughly dried.
Next, the surface is sanded, for example, with sandpaper, then the first layer of starting putty is applied. The solution must be prepared before use. The dry mixture is poured into a container with water, mixed and water is slowly added until the solution reaches the desired consistency. The solution cannot be too thin or too thick. When applying putty, use a special spatula. The layer of starting putty is thoroughly dried and the primer is applied again. The dried primed coating of the wall surface is sanded again.
At the next stage, the finishing composition is applied. Sometimes the finishing solution is applied twice with an interval of 12 hours. After proper drying, the surface must be thoroughly sanded.
Applying putty is a very labor-intensive process that requires skills and experience.
To do the job better, it doesn’t hurt to remember some useful tips:
- You should not prepare a large amount of the mixture at once. It tends to dry out. Better little by little, but more often.
- To prepare the composition, you need to use only clean dishes and water.
- The solution should be taken with a small spatula, transferred to a larger spatula and only then onto the wall surface.
- You can putty using different methods: horizontally, vertically, as well as in such ways as “bouquet”, “herringbone”, “zigzag”.
- You can choose the angle of the spatula yourself; the most important thing is to cover up all the cracks, crevices, and visible defects.
- To check the level of coating, you can use a metal rule by applying it to the surface. All irregularities can be easily cut off with the angle of a spatula.
- When puttying, the tool used sometimes leaves barely noticeable grooves; after applying the last finishing layer of putty mixture, they will disappear.
- Sanding the surface of walls is much more convenient to do using a sanding machine.
- Be sure to sand the raised areas.
- To be on the safe side, you can finally coat the wall with water-based paint. This oil mixture will fix the composition.
- After finishing filling the wall surfaces, wash construction tools and utensils thoroughly with running water and wipe dry.
How to make putty from a dry mixture
Ready-made putty will cost more than dry putty, which requires mixing before use. There are detailed instructions on the packaging of the powder product. However, there are subtleties that building materials manufacturers are silent about.
It’s better not to prepare a lot of ingredients at once. Some putties harden quickly. If you do not have experience in such work, you will not be able to use up the entire mixture. The remains of the solution and the dishes for its preparation will have to be thrown away. It's best to practice on small quantities and small areas first to experiment with the thickness of the composition and how to apply it. They depend on the desired surface evenness.
After mixing the putty, you need to pour water, filling the bucket 1/4 full. It is necessary to add the dry mixture to obtain the desired consistency, mix thoroughly with a mixer. If the composition is being prepared for decorative wall decoration, it is recommended to use color. Pour water into the mixture, mix and add dry suitable product. The use of color allows you to save on paint in the future.
After preparing the mixture, rinse the mixer attachment in a container of water. Then he will always be clean. After mixing the solution, let it sit for 10 minutes and use the mixer again. The composition will become more homogeneous and more flexible.
Features of working with putty
Specialists work with putty using a special tool - a spatula. It is very convenient for them to apply and rub the mixture, filling the necessary cracks and holes. If the surface to be treated is shallow, then only one layer of putty can be applied. But if the cracks or cracks are deep, it may be necessary to reapply the mixture. Wood putty is always applied to a clean and dry surface. After it dries, you need to sand it with sandpaper and paint or stain it. Sometimes the putty is not painted or covered with anything, but is selected to match the color of the product. This is generally done when processing any carved handicrafts.
Putty work
The plaster on the wall surface is a layer of fairly large particles, and the putty consists of smaller ones. When puttying, several layers are made, each of which must dry well after work. After applying each layer, the surface is sanded, primed, and then the next one is applied. This work may take several days.
Puttying walls for painting is done in order to create a flat surface on which the paint will adhere well. The standard number of layers to create a smooth surface is three, but some experienced craftsmen do 5-6.
When performing the puttying process, it is recommended to use a serpyanka mesh with 2 mm cells, which is glued to the surface before the puttying procedure.
Preparing tools
To putty the walls with your own hands, it also matters what you use to putty the walls for painting, i.e. tools:
- for primer: wide brush and roller;
- To mix the putty mixture, it is better to stock up on a special mixer;
- spatulas and grout mesh (preferably fine-grained).
It is necessary to select the main tools (spatulas) of several sizes at once. The large one is 50-60 cm wide, the medium one is 25 cm (used for working in corners), the small one is 5-10 cm wide (for accessing inconvenient places and for filling in errors).
A corner spatula is sometimes used to handle corners. It is convenient for them to putty, and the planes turn out to be quite even.
Starting putty stage
The first stage is applying basic putty, i.e. gypsum, with the addition of special additives. To understand how to properly putty walls for painting, we will tell you in more detail:
1. The technology for puttingtying walls is as follows: using a wide spatula, apply the base putty with a layer of such thickness as to hide the depressions and bulges on the surface (usually 3-12 mm).
2. After applying and spreading the putty on the wall, the excess should be removed with another small spatula. As a rule, the speed of work depends on the size of this tool - the wider the spatula, the faster the process will go (30-40 cm).
3. To save effort and time, it is better not to make layers between a fresh layer of plaster and an already dried one. It is not necessary to wait for complete drying; the next layer can be applied to slightly damp putty walls. In this case, there is also no need to prime each layer. How many layers of putty need to be applied depends on the number of uneven spots on the wall.
4. After the starting layer has dried (this usually takes 6-8 hours), it is grouted with coarse coarse sandpaper or sanded.
On video: how to properly putty walls.
Finishing
The finishing putty for painting is done on top of the base putty to create a completely smooth and ideal surface, ready for painting. The finishing layer is usually thinner (2 mm) and the technology itself for puttingtying walls for painting is slightly different:
1. The mass that is smeared on the wall must be cleaned off almost completely, leaving a very thin layer that will fill small irregularities.
2. The number of finishing layers depends on how well the initial wall putty was done. One way to check how smooth the surface is before painting is to use a bright spotlight, which is positioned so that the beam of light falls at an angle.
3. Irregularities on the wall are cleaned off using an abrasive fine mesh, after which it is necessary to remove dust (with a vacuum cleaner or a rag), cover with a primer and leave the wall to dry.
4. After puttying, you can already paint the walls.
You should know that all layers must dry naturally. The use of heaters and fans can cause cracking and shedding.
In the video: final alignment of walls and ceiling.
Preparing the wall surface for putty
The main thing is to make sure that the surface of the walls is absolutely clean. Be sure to remove stains of grease, paint or soot. Of course, there should be no falling layers of plaster, residues of scale, wax or parts of the formwork. Don’t even start puttingty on frozen ceilings and walls. This is strictly not recommended.
Before applying putty, coat the walls with a primer. This will ensure good adhesion (connection) of the putty solution to the walls. Prime the surface using a special roller. Try to apply the primer solution evenly, avoiding gaps. One layer is enough.
There are the following types of putty: finishing, lighthouse, starting. Let's look at the properties and scope of application in detail.
How to properly putty with your own hands: step-by-step instructions
Any puttying begins with preparing the working surface:
- Remove old coating mechanically.
- Remove paint that cannot be removed manually using a special remover or a drill with an attachment. If a water-based emulsion was applied, it is first soaked and then washed off with a soap solution. In this case, it is necessary to wipe the walls of the soap itself, as it has strong repulsive properties.
- Remove as much as possible all falling off pieces, break off those that may fall off in the near future.
- Remove dust with a wet cloth.
- Apply 2 or more coats of primer.
- Level the walls with plaster, gypsum or boards (depending on the situation), if there is a large deviation from the vertical (according to the instructions, more than 4 centimeters, according to the experience of the craftsmen - one).
- Use primer again before applying actual putty.
Starting layer
You can distinguish the starting putty from the finishing putty by its coarse fraction. The work is also simplified if you use a universal mixture that is suitable for both start and finish.
Initial puttying is carried out to eliminate visual defects of the walls, such as cracks, gouges or other irregularities. This may require laying several layers, each of which is applied after the previous one has dried.
Important: the putty must be applied in thin layers up to 5 mm, since its fraction is too fine. Another plus in favor of using plaster for leveling is a significant saving of time and money, because 1 layer of putty dries for at least a day, and before applying the next one, you must prime the surface (by the way, the primer also does not dry immediately).
To ensure that at the end of the work the mixture does not shrink after drying, and therefore does not crack, it is advisable to use a painting mesh that is attached to the wall.
If the deviation of the surface is large, then it is leveled and puttied along the beacons. However, almost no one does this, since it is difficult to imagine how much time and money it will take to apply a few centimeter layer of putty.
After drying, it is necessary to smooth out small irregularities with sandpaper and prime them for further work.
Finishing putty
The finishing putty is applied in a thin layer (up to 2 mm) to the leveled surface to achieve ideal smoothness due to its finest fraction. After drying, the wall is brought to perfection by mechanical sanding with fine-grained sandpaper, and then primed again for painting or wallpaper.
Reinforcement of seams or the entire surface with web
Reinforcement with cobwebs or painting mesh is required. It is carried out in order to avoid peeling of the putty or plaster from the wall, and also to prevent cracks from occurring or the composition falling out of the seams due to shrinkage of the mixture after drying.
The mesh sticks to the surface with a small adhesive layer, and then is simply covered on top. In some cases, it can be further strengthened with a construction stapler.
If it is necessary to putty with plaster, then the web is laid only on the seams between the sheets, but in cases where a starting layer is required, it is applied to the entire surface of the wall.
Grinding: the right technology
Sanding after puttying is done to remove unwanted grain and perfectly align the joints of the mixture.
It is best to carry out sanding by hand using regular fine sandpaper or a special block on which it is attached. In this case, the result will be more ideal, and the risk of accidentally rubbing the hole is minimal.
Grinding should be carried out in good lighting, constantly assessing the result from four sides. What kind of rubbing movements: circular or longitudinal is not so important, but the pressure should be controlled so that pits do not form, otherwise the finishing layer will have to be applied again.
In addition to the sandpaper, a special mesh is sold for grouting putty, which leaves less dust and does not clog longer, which increases its service life.
Final putty “clean” for painting or gluing
Finishing putty “clean” for wallpaper or painting is carried out with a very thin layer of any finishing or universal mixture, depending on the room, followed by sanding. No matter how thin the applied layer is, before and after its application it is necessary to prime the surface well
How to treat walls when fungus appears
Black spots on or under the wallpaper indicate the presence of a problem such as fungus. It cannot be removed using detergents. Even if you wash the stains, the fungus will appear again. If the walls are infected, it is necessary to get rid of the finishing and treat the entire surface with a special antibacterial composition. To do this, you can use a regular brush or roller. There are products on sale that come with a spray bottle for ease of application. During processing, protect your respiratory tract with a respirator. After cleaning, the walls need to be thoroughly dried, and only then can the repairs begin.
Important points in work
When applying putty yourself, it is very important to follow the following rules:
- It is necessary to putty only in good lighting, otherwise it will be impossible to achieve a perfect result.
- Before and after applying each layer, the surface must be thoroughly primed. It is important to wait until both the putty itself and the primer are completely dry.
- It is advisable to putty the entire surface at the same time and dilute the amount of mixture required for work at once, but remember that it hardens quite quickly (depending on the type).
- If the mixture is finished, but work needs to be continued, then the already applied layer must be moistened with water at the joint for greater adhesion. When it dries, it is better to use a primer.
- When joining, it is worth applying the mixture overlapping.
- It is necessary to reinforce with cobwebs, otherwise cracks will appear. The exception is finishing puttying of drywall.
- For a large area, you can check whether the layer is even or not using a regular thread, which is pulled diagonally.
- After drying, diluting and using the mixture again will not work.
You should also note that dry putty is cheaper, but sets much faster, which is important when planning the scope of work.
When puttying, it is necessary to take into account the characteristics of the selected mixture depending on the purpose, and carefully follow the manufacturer's recommendations. It is also worth using putty only for the final coating of walls before painting or wallpaper, and they must be leveled with plaster. This will significantly save time and money
Main stages in detail
If this job were as simple as washing floors, for example, then no one would even think about finding good finishing specialists. But both the process itself and preparation for it involve significant physical effort and require certain knowledge. Therefore, even if the main repairs are done with your own hands, craftsmen are usually invited for “wet” work.
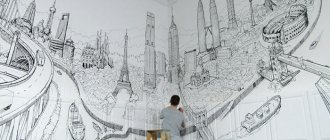
Highly qualified specialists are able to make even such masterpieces from putty
This is the most correct option if you do not have enough experience. Putty is not the cheapest material, you need quite a lot of it, and it would be a shame if the price you paid for it was lost due to your incompetence and “crookedness.” But don’t give up if you have no other choice but to putty the walls yourself. We will try to describe this process in as much detail as possible so that you do not have any difficulties when choosing materials and determining the sequence of work. And the video in this article will help you better understand the technology of applying putty.
Preparing the walls for putty
The algorithm for preparatory work depends on the condition of your walls. Carefully examine their surface:
- If the base is uneven, it should be leveled with plaster before puttying;
- If there is some old coating on it that does not hold firmly and is crumbling (plaster, paint, varnish, etc.), it will have to be removed;
- If there are cracks on the surface, they need to be puttied separately before treating the entire area.
Old crumbling coating must be removed
A separate story is walls lined with plasterboard or other sheet materials. Make sure that no self-tapping screw protrudes beyond the plane of the surface by running a clean spatula over the heads. Screw the protruding hardware deeper using a screwdriver or screwdriver. The next mandatory activity, which is required by the instructions, is priming the surface (see Primer for drywall - why is it needed). It is produced in any case, regardless of the material and strength of the base, but the primer is selected in accordance with these factors. The purpose of the primer is to strengthen crumbling surfaces, protect them from moisture absorption, remove dust, and improve adhesion with the applied putty solution.
Advice. The quality of subsequent work depends on the correct choice of primer. Carefully read the information on the purpose of the compositions on the packaging, take into account not only the material of the walls, but also the climatic conditions in which they will be used.
The primer is applied with a brush or roller; it is also possible to use a spray bottle. If plastered or concrete walls are primed entirely at once, then plasterboard walls are treated differently. First, only the joints between the sheets are processed, and after they are sealed, the entire surface is treated. But more on that later. You can start puttingty directly after the primer layer has completely dried.
Choosing putty
Conventionally, putties are divided into two types:
- Starter - coarse-grained, intended for the initial leveling of surfaces with small defects - cracks, depressions, etc.
- Finishing – fine-grained, intended for final leveling and making the walls smooth.
When deciding how to putty the walls for painting, keep in mind that this is done in at least two layers. Therefore, the first layer can be the starting layer, the second – the finishing layer. The exception, again, is plasterboard walls: after sealing the seams, it is enough to putty them once with the finishing compound.
Note. Each layer is primed again after drying.
There are two types of putty on sale: ready-to-use and a dry mixture that requires dilution with water:
- Ready-made formulations are supplied in plastic buckets of various sizes. They have an optimal consistency, do not require time to prepare, are easy to apply, but are more expensive than dry mixtures.
- Dry putties are sold in paper bags. To prepare the working solution, you need a special tool - a construction mixer or a drill with a special attachment. It is very difficult to manually mix the putty until it is homogeneous.
Mixing the solution with a mixer
Take this information into account when choosing a leveling mixture. As for the tools, the set is small: you only need a few spatulas of different widths and a construction float with a sanding mesh or fine-grained sandpaper.
Types of putties according to degree of readiness
When considering the question of which putty is best to putty on walls for painting, it is worth noting that such material is sold in two types.
Dry mixes
This material is in greatest demand because it is inexpensive and has a long shelf life. To get a paste-like putty, you simply need to dilute the dry mixture with water according to the instructions. But the mixture must be mixed immediately before puttying and in small batches, since the composition sets quickly. Dry putty is supplied in bags weighing from 5 to 25 kg.
Ready-made formulations
Putty is supplied in buckets or large tanks. It is not difficult to guess that such material can be used immediately without any preliminary preparation. The shelf life is shorter than that of the dry composition and the price is higher.
Technology of puttying walls for painting
The process of applying putty occurs in three stages: leveling the walls with the starting mixture, applying the finishing putty and grouting the surface.
Starting layer of putty
Leveling the walls with starting putty occurs by applying a thick layer. Beacons are installed on the surface using a level. Remember, the more beacons, the better the quality of future work.
The mixture is prepared by diluting the powder in water. Mix the composition thoroughly and let it sit for about 15 minutes. And then mix again. If you use gypsum putty, do not spread it all at once. It dries quickly, so you need to make it little by little. But cement takes a long time to infuse, so it needs to be made as much as possible at once.
Work is carried out from top to bottom. The putty is applied with a wide spatula. Using a small spatula, scoop up a small amount of the mixture and apply to the larger one. The spatula should be held at an angle of 45 degrees, this way you will achieve the most even installation.
On a very large depression the composition is laid in several layers. They are applied in several approaches. Before applying the first layer, you need to lay a fiberglass reinforcement mesh. Once the surface is completely covered, the wall should be left to dry completely. The time is indicated on the package.
Finishing putty
The technology for applying the finishing layer is similar to the starting layer. The same tools are needed. After work, they must be washed thoroughly so that no dried composition remains.
The layer must be perfectly smooth without visible flaws. After application, the surface must again be left to dry for several days.
Grout
After the putty has completely dried, the surface needs to be sanded. You need to rub thoroughly, there should be no protrusions or roughness left. You can check for flaws using a lamp, point it at the walls and look at the shadows. Now the surface is ready for painting. Depending on how carefully you treated the walls, it will be easier to work with when painting
The slightest irregularities and cracks will be visible after painting, so when applying putty, proceed with caution and extreme care.
Preparing the walls
Cleaning the work surface is important before applying putty. If you approach this issue carelessly, then I am afraid that you will not get the desired result and will have to repeat everything after a certain time. But remember that it’s not so easy to remove paint from a surface; it’s better to do it right away and not go back to re-repair for many years to come. First, clean the base from old decorative material: wallpaper or paint. When cleaning wallpaper, use plain water; saturate the material with it; it will easily be removed from the surface.
Related article: How to fix a lambrequin on a cornice with your own hands
For old paint, it is better to use a drill with a metal attachment, which will help you deal with the paintwork with ease. After the final cleaning of the base from the decorative coating, carefully examine the surface for cracks, dimples and nails in the plaster. Remove nails and other foreign materials from the surface. Fill cracks and dimples with plaster solution. If there are fungi and mold on the surface, treat the walls with a special antifungal solution. After all, we don’t want this dirt to then multiply under the plaster. Then apply one coat of primer mixture and let it dry for at least 6 hours. The product will help you firmly fix the putty on the walls and prevent it from quickly falling off.
Take a good look and tap the entire surface with a small hammer. If the condition of the old plaster is critical and it is all falling off in pieces, then replace the material by completely removing it from the surface. Do not risk leaving such a product, as the old plaster will one day crumble all your new repairs. After applying the primer and drying it completely, spread the starting putty over the surface, which will help remove all significant flaws and level the base before applying the finishing putty before painting .
You don’t have to apply much of the starting putty, as it only removes large flaws. For more durable work, I use gauze or nylon mesh, which perfectly fixes the starting putty. After distributing and drying the product, thoroughly clean off the stains left after work with a stone with an abrasive mesh. Do not forget to work in a respirator, special clothing and in a well-ventilated area.
How to calculate how much material is needed to level the walls?
On the packaging in which the putty is sold, the material consumption per 1 square meter is written. To make a rough estimate:
- calculate the square footage of the walls you are going to putty (multiplying the length by the height)
- subtract the area of window and door openings from the result obtained
- multiply the number of square meters obtained by the weight of the dry mixture per square (according to the data on the packaging)
It should be borne in mind that manufacturers always indicate average values. If the wall is curved and a thick layer of mixture will have to be applied to level the surface, then the material consumption will increase.
How and with what can you paint surfaces after puttying?
The putty for painting must be of high quality, and the walls must become smooth and flat. While wallpaper can cover some defects, paint cannot do this. Unlike plaster, putty has a finer structure.
Preparation for painting is carried out in two stages:
When preparing, it is important to estimate the amount of work. Material consumption depends on the quality of the wall
A rule is applied vertically to each of the corners to understand how much the wall deviates from the vertical: the difference must be corrected. To save money, the procedure is best performed with two compositions - starting and finishing. Both are applied with a spatula. Putty the base for painting from top to bottom. The spatula is held at an angle of 30 degrees, and the mixture is collected in small quantities. The difference between the starting layer and the finishing layer is thickness. These are 50 mm and 2 mm, respectively. The finished base will need to be rubbed down. After grouting, there should be no defects or flaws left on the surface.
Advice If the differences are more than five centimeters, then before puttying it is worth leveling the wall with plaster to reduce this figure.
Polymer compositions
Polymers are better suited than other materials for applying the finishing layer. This solution easily makes the surface smooth and makes painting easier. The only drawback is the high price. The material is unprofitable when working on large areas. The thin structure of the composition makes it possible to perfectly eliminate even minor defects during puttying. The mixture binds firmly to the wall surface; the risk of detachment simply disappears.
Plaster
When working with gypsum-based mixtures, skill is required: the solution sets easily. The material is used for interior work: sealing cracks, joints, eliminating minor defects.
Advantages:
- acceptable price;
- economical consumption;
- environmentally friendly material;
- ease of grinding.
Gypsum has poor contact with concrete, and it is not suitable for treating rooms with high humidity and for facade work.
Cement
Cement for painting is a durable, reliable material. Resistant to high temperatures, not afraid of moisture. In addition to cement, the composition includes lime, which provides high plasticity, or gypsum, which accelerates drying. Builders love this mixture for its low price and ease of application: even a beginner can handle the job. The composition has a coarse-grained structure.
Types of putties and their features
There is a wide range of putties with very different sets of characteristics. Let's look at each in detail. 1. Gypsum putty. The advantages are environmental friendliness, no shrinkage, high drying speed, excellent heat and sound insulation. It is plastic and has good fire resistance. Disadvantages: not suitable for rooms with high humidity, relatively expensive, difficulties in preparing the solution (since it dries quickly, you have to mix the solution often, and in small portions).
2. Cement. Ideal for puttying concrete, stone or brick walls. Quite cheap. When choosing this type of putty, you should not think about humidity levels. Good resistance to temperature changes. Disadvantages: low elasticity and possible shrinkage. 3. Polymer putty. The advantages include ideal strength, resistance to various temperature conditions, and lack of shrinkage. It is quite elastic and has a high level of adhesion to any type of surface. The only negative is the high cost. If you imagine yourself as a specialist for a moment, then you need to choose polymer putty. It is very easy to work with, and the adhesive properties are quite attractive.