Painting walls requires perfectly smooth and even surfaces, since any, even minor, defects can ruin the appearance.
Plastered bases have a coarse-grained structure. The paint not only does not hide flaws, but also emphasizes the rough surface of the plaster.
Putties can level the walls and make the surface suitable for applying any painting compositions.
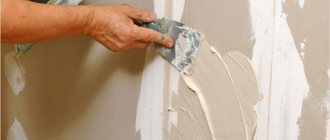
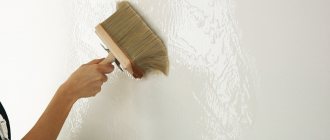
Figure 1. Puttying walls for painting.
Differences between finishing putty and other materials
Compared to conventional putties, finishing putties have high performance characteristics. This is due to the fact that special requirements are placed on it.
Basic performance properties:
- Fine grain. Thanks to fine grains, the surface becomes more even. Plaster can also achieve the desired result, but it contains large particles.
- Plastic. It is achieved through the inclusion of plasticizers in the composition, which make the liquid mixture mobile. Thanks to this, it is possible to fill all the voids on the walls, including pores and cracks. Plasticizers allow you to level the walls without much effort, so the quality of the finish increases. However, with strong pressure it is difficult to apply the material evenly.
- High adhesion. Thanks to this property, the mixture adheres better to the wall. The putty must be resistant to shock, temperature and humidity changes, as well as other external factors.
The finishing putty used for final finishing must have excellent adhesion, plasticity and environmental friendliness.
In the process of choosing a mixture, all these properties must be taken into account in order to qualitatively finish the walls for painting or wallpaper.
Composition of finishing putty for painting walls
The finishing putty contains the following ingredients:
- a powdery substance that is commonly called a binder. Helps harden within a short period of time;
- filler. It can be chalk, calcilutite, marble;
- substances to improve the composition;
- water is used as a solvent.
The main characteristic difference of the finishing putty is the smallest volume of its particles and a snow-white tone with gloss.
The finishing putty must adhere firmly, not fall off and meet the other conditions:
- do not form lumps;
- do not flow down the walls;
- carefully hide all kinds of defects;
- prevent the appearance of cracks;
- have a uniform white tone.
Basic requirements and quality standards
A high-quality putty for painting should be:
- Soft and elastic.
- Elastic. It should not flow when applied.
- Resistant to cracking. Should shrink slightly as it dries.
- Homogeneous. There should be no lumps in the structure of the solution.
- White. Other shades may show through light paint. Stains on the treated surface are also unacceptable.
Considering all these properties, you can purchase high-quality putty for wall finishing.
The finished putty solution must be homogeneous, plastic and pliable when applied to the surface
Features of the puttying process
Putty for painting refers to painting work. Their result is the elimination of small cracks and shallow recesses, smoothing out visible and invisible plaster deposits. After puttying, the walls can be painted in any color: from light to dark. This is possible because the putty has a white tint, invisible under light paint.
Before starting work, it is necessary to assess its volume. To do this, you need to measure the area of the walls, taking into account the existing protrusions and niches, as well as vertical deviations and “propeller”. Measurements are made not only with a tape measure, but also with the help of a level and a rule. Sometimes, to identify humps and holes, nails are hammered in the corners or screws are screwed in and the cords are pulled on them clearly one above the other. By moving sequentially along the wall with the rule, you can identify irregularities.
It should be borne in mind that the consumption of putty depends not only on the area of the walls, but also on their condition. In Soviet houses, rough finishing was done using coarse-grained plaster, therefore, in order to cover the protruding sand, it is necessary to carefully putty the entire surface. The number of layers required is determined by the quality of the composition.
Even a novice repairman can handle puttying walls for painting; the main thing is to choose the right material, select the necessary tools (spatulas - stainless steel, “spatula”, external corner, internal corner, rubber, as well as trowels, brushes, sanding floats for replaceable mesh) , be patient and follow instructions carefully. The quality of the finish depends on the combination of these components.
Types of putties
Putties are divided according to many parameters, with each mixture intended for specific types of work. All types of putties have certain pros and cons, so it is necessary to analyze all types of mixtures in detail. Thanks to this, it will be possible to choose a good material for finishing the walls and facade.
By purpose
According to this criterion, putties are:
- For interior finishing work.
- For external finishing works.
They produce putty mixtures for interior and exterior work.
In addition, according to operational parameters and purpose, they are divided into 3 groups:
- Starters. They have a coarse structure, which consists of large particles. Allows you to eliminate various defects on the walls. The thickness of the applied layer is up to 2 cm. Thick in consistency.
- Finishers. They have a fine-grained composition, which allows you to make walls even and smooth. They are applied to the starting layer, after which a high-quality base for paints and varnishes is obtained.
- Universal. They are distinguished by a dense, fine-grained structure. Manufactured on the basis of polymers.
According to their purpose, putties are divided into starting, finishing and universal.
Universal putty is better for walls because it is suitable for the starting and finishing coat.
By degree of readiness
According to this parameter, putties are:
- Dry. These mixtures are produced in bags and bags. To use, they must be mixed according to the manufacturer's instructions. Pros: inexpensive; composition is optimally selected.
- Ready to use. These mixtures are more convenient to work with because they do not need to be stirred. Packaged in containers.
Both types of putties contain components that allow for quick finishing.
The putty can be dry or ready to use
By composition
There are several types of putties based on their composition.
Gypsum mixtures
The binding component of these putties is natural gypsum, so they are harmless to people. Allows you to make the walls even. This material dries quickly and practically does not shrink.
Without some experience, applying gypsum mixture is difficult because it hardens quickly.
In damp rooms, it is undesirable to cover walls with these mixtures, because gypsum swells from moisture. Because of this, they also cannot be used for finishing building facades.
White gypsum putty is often used to prepare walls for painting.
The main advantages of gypsum putties:
- fire resistant;
- dry quickly;
- have antiseptic properties;
- There are no harmful substances in the composition.
Gypsum is a natural material, therefore it does not cause allergies and does not harm human health.
Cement mortars
They are made on the basis of M400 and M500 cement. Due to this they have greater chemical activity. True, due to this they shrink during the drying process, but this is compensated for by special additives. When applying the material, cracks may form, so it is advisable to apply several layers of putty to the surface.
The advantage of cement putty is moisture resistance
Main advantages:
- Moisture resistant. They can be used to decorate facades and walls in any room.
- They fit well on walls and dry slowly.
The filler in them is fine-grained sand, which increases the strength of the coating.
Polymer-based compositions
Polymer-based mixtures are characterized by increased strength and ductility, although when choosing between a high-quality cement mixture and polymer putty, it is better to give preference to the former.
Made from acrylic and latex. Main advantages:
- Allows you to make walls smooth.
- They do not shrink. Due to this, cracks do not form during the drying process as a result of uneven deformation of the material.
- Due to good adhesion, they reliably adhere to the walls.
- Elastic even during the hardening process. The applied layer is not destroyed even from impacts and friction.
- Fireproof - they do not burn and do not emit harmful substances when heated strongly.
- They have a universal composition, so they are suitable for all rooms.
Polymer putty allows you to finish high quality walls
The main disadvantage is the high price.
If you need to cover the facade or walls inside the house with material, it is better to do it with gypsum and cement mixtures.
Adhesive
These mixtures are made from glue, chalk and drying oil. The amount of glue is up to 10% of the total mass of putty. They are easily applied to walls, do not smear and create a very durable finishing layer. Grain size no more than 0.05 mm. Sold in liquid or dry form.
According to their composition and purpose, they are polymer-adhesive (for exterior work) and oil-adhesive (for interior decoration).
Adhesive putties are characterized by excellent adhesion to most substrates
Oily
Mixtures based on drying oil, driers and chalk are characterized by a dense consistency. They are used to treat indoor walls and house facades. Apply evenly when laying in 1-2 layers up to 2 mm thick.
The composition includes drying oil, acrylates, plasticizers, hardeners, coloring pigments, fillers (more often ground chalk is used for these purposes) and water. Thanks to plasticizers and other additives, it is possible to make the mixture fireproof, explosion-proof, frost-resistant and moisture-resistant.
Oil putties are an excellent base for water-based paints and enamels.
Oil putties are intended for both external and internal use.
Homemade
Wooden walls are often covered with the following homemade putties:
- Based on PVA glue and chalk. The components are mixed to a creamy consistency. If the walls are very uneven, then sawdust should be added to the mixture. The main disadvantage of these mixtures is the long hardening time (you need to wait more than a day for the surface to dry).
- Based on chalk and nitro varnish. Chalk and sawdust are mixed with nitro varnish. If necessary, you can give the material the required color by adding gouache or building pigment to it. In addition, you need to add a little solvent No. 647 to the composition. Due to the use of nitro varnish, the putty dries quickly, but it is toxic and has a specific odor.
- Based on chalk and acrylic varnish. The varnish is mixed well with the chalk until it becomes paste-like. If necessary, it is allowed to dilute the mixture with water to make it more mobile. The color of the putty is changed by adding a color for acrylic paints. The varnish makes the putty elastic and moisture resistant. If there are cracks on the walls, then sawdust must be added to the mixture. Dries within 2-6 hours.
Homemade putty mixtures consist of simple components
Concrete walls are prepared for painting or wallpaper using the following homemade putties:
- Wood glue mixture. Ingredient ratio: chalk - 10 kg, 15% wood glue - 1 kg, turpentine, ordinary laundry soap and drying oil - 25 g each. These components are mixed well until a not very thick paste is formed.
- Acrylic putty. It is made from the following components: chalk - 10 kg, acrylic primer - 10 l, 10% wood glue - 2 l. These substances are also mixed to form a paste.
- A mixture based on casein paint. Ingredients: paint - 10 kg, water - 7 l. It is diluted with ordinary water, after which the putty is heated to 60 °C. Next, the heated solution is filtered through a sieve, then 300 g of drying oil is added to it. The last thing to add is moistened chalk - 23 kg.
- Casein glue putty. The binding component in it is glue, and only 30 g of drying oil is added to it. Otherwise, the process of preparing putty is the same.
Components for making plaster using wood glue
Components for making acrylic plaster
Components for putty on casein paint
Components for casein glue putty
It’s not difficult to prepare homemade compositions; you just need to follow the proportions of materials and the preparation technology.
Choice of putty
The modern construction market offers a large assortment of ready-made putty pastes and dry mixtures that need to be prepared immediately before starting work.
Ready-made putties are easy to use, can be stored for a long time in a closed container, but are much more expensive than dry compounds. They are good for beginners to use, as the pastes are more flexible and have an easy-to-apply consistency. It is better to choose them for small volumes of work.
Putty compositions are divided into:
- Starting leveling putties that create the basis for applying finishing layers. They contain coarse components with a coarse-grained structure, creating good adhesion to the finishing layer.
- Finishing compositions from powder mixtures for the final layer for final finishing, allowing to obtain perfectly even and smooth substrates for the subsequent application of any painting materials.
- Universal putties, suitable for applying starting and finishing layers.
By composition:
Plaster
Designed for use in dry, heated rooms, since gypsum loses its performance properties in humid conditions. They are characterized by good plasticity and ease of application. An environmentally friendly mixture made from natural gypsum creates a vapor-permeable surface that can regulate humidity and natural air exchange.
The fine-grained structure of the putty forms a perfectly smooth surface, suitable for any decorative painting or artistic painting.
Figure 4. Gypsum putty.
Cement
The cheapest mixtures can be used in damp and unheated rooms. They are made on a cement base, with the addition of modifying additives to improve performance properties and reinforcing small fibers to increase strength and shrinkage resistance.
Suitable for initial leveling of walls with significant differences and unevenness. Subject to shrinkage and cracking. Can be applied in layers up to 20 millimeters. If it is necessary to apply thicker layers, it is necessary to use a reinforcing fiberglass mesh. Not suitable for finishing leveling due to coarse grain structure. In addition, the gray color of the final coat may bleed through the light colors of the decorative finish.
Figure 5. Cement putty.
Polymer
Modern, high-quality, non-shrinking putties, ideal for finishing leveling. They form a perfectly smooth and even surface for any decorative finish. They can be applied in a minimally thin layer, up to 0.5 millimeters thick. They are characterized by good adhesion, resistance to moisture and increased elasticity. Easily fits onto any base.
Polymer putties are divided into latex, acrylic and polymer cement.
Despite the similarity of technical and operational characteristics, they have significant differences:
- Acrylic mixtures are the strongest and most durable; they are not afraid of moisture and temperature changes. The recommended layer is from 1 to 3 millimeters.
- Latex putties are made on the basis of rubber resin and are very elastic and plastic. Suitable for working on wood, plasterboard, brick and concrete. Can be applied in a minimal layer to scratches. Acceptable thickness is from 0.5 to 4 millimeters.
- Polymer-cement mixtures made from larger components are suitable for starting leveling. Can be applied in layers up to 30 millimeters. In case of significant unevenness, it is allowed to apply two or three layers, each of which is reinforced with fiberglass mesh. They do not lose their qualities under the influence of moisture and atmospheric influences. Suitable for leveling walls of facades, basements and unheated rooms.
Figure 6. Polymer putty.
I recommend!
When performing work on your own, choose ready-to-use polymer putties. They have a more plastic consistency and are easy to apply and process.
What is superfinish putty used for and where is it used?
Superfinish putty has a uniform structure, so it allows you to quickly fill cracks and eliminate other defects on the walls, as well as level them. Thanks to its unique texture, the material is easily applied to the surface; after finishing leveling the walls, the paint and wallpaper lie smoothly on them.
You should not expect that putty will hide gross defects. This mixture is applied in a thin layer, so it can only eliminate minor problems.
Super-finish putty helps correct defects and make walls or ceilings snow-white
Thanks to the white tint, the paint applied to the putty layer does not change its color.
When choosing a mixture, you need to pay special attention to:
- Its structure. It should be homogeneous (there should be no lumps or large particles in it).
- Plasticity of the material. The mixture should fit easily on the wall.
- Shrinkage of the material during the drying process. It should not crack or collapse during drying.
- Shade. It must be white.
If you follow these recommendations, you will be able to select and buy high-quality finishing putty for walls.
A good putty for painting should have a number of important properties.
Types of bases and nuances of their putty
In the article I will talk about three types of materials: concrete and plastered surfaces, drywall, as well as wood and wood-based materials. All jobs have similar actions, but there are also certain differences that you need to know.
Therefore, choose the necessary section in which I will share my work experience, there will be no complex technologies here, only the most simple solutions taken from practice.
Plaster and concrete
These are approximately the same bases in terms of their performance, therefore the technology for finishing them is the same. I won’t tell you how to level the surface with plaster or how to seal the joints between slabs; this is all in separate articles.
We will start from the stage when the surface is leveled and differences do not exceed 3 mm (more significant irregularities are allowed if there are few of them).
First of all, let's look at the materials needed for the work.
"Vetonit" is the best solution for those who work with their own hands
| Material | Description |
| Putty “Vetonit LR+” | This composition has simply a huge number of advantages: from high ductility and long hardening time, to a simple grinding process and a fine-grained structure. I’ll say right away - if you don’t know how to putty, then you definitely need Vetonit, and if you do, you should know that this option is one of the best. The price of a bag weighing 25 kg is approximately 650 rubles, the mixture is also sold in 5 kg packaging |
| Primer | Necessary for preparing the surface for putty. If you have plastered bases, then you need to use reinforcing compounds, and if you have a smooth and dense concrete wall, then it is better to use a “Concrete-Contact” type adhesive compound to make the surface suitable for finishing. The price tag varies widely and depends on the brand and capacity |
Contact soils are necessary when working with concrete foundations
If you need to prepare surfaces in rooms with high humidity: in the kitchen, bathroom or bathroom, then you should take the moisture-resistant version of Vetonit VH putty, which is excellent for such purposes. Please note that the composition can be either white or gray; for painting it is better to take the first option.
For wet rooms you need to take this type of putty
Let's look at the tool, the set is quite simple:
- To apply putty on walls, I personally use wide (300 mm) and narrow (100 mm) spatulas, but for some it is more convenient to work with a metal trowel. Decide for yourself what is more convenient for you to apply the composition, the main thing here is convenience, and every master uses what he is used to working with;
When purchasing, be sure to check whether the blade is straight, as bending occurs very often.
- The primer is applied with a roller and brush, here again you need to decide what is more convenient for you. Personally, I use a roller on smooth surfaces, and a brush on joints and other difficult areas; this ratio ensures the highest work speed;
- To grind the surface, purchase a grater in advance, and sandpaper or an abrasive mesh for it. Since we are preparing the bases for painting, the sanding must be perfect, so options with P180 grit are perfect.
You should not carry out the work in two passes, starting with coarser sandpaper and ending with finer sandpaper; “Vetonit” rubs in just fine;
Mesh is better than paper in that it clogs much less
- The easiest way to control the plane when grinding is with a flashlight or light bulb . And the most convenient way to check the base and the result of the work is with a rule; it will show the general plane and reveal all the flaws, if any;
- It is best to prepare the mixture using a drill and a mixer; in this case, excellent mixing quality is achieved and a minimum of effort is required for the work. You can buy a container, or you can use improvised options.
The order of work in this case is as follows:
If the whole process is broken down into small steps, then it’s easy to understand.
- First, you need to check how smooth your walls or ceilings are. To do this, take a rule and apply it in different places and in different directions, you will immediately see all the flaws if they are present, if the differences do not exceed 3 mm, then this is excellent. All bases should be cleaned of dust and dirt; if there are wet spots on them, then you should wait until they are completely dry;
Checking the plane allows you to clearly understand the scale of future work
- The primer composition is prepared as recommended in the instructions, sometimes it needs to be diluted, and sometimes it is enough to simply shake it. The primer is applied to the surface very carefully; you must cover the entire area, but do not allow smudges to form on it. After finishing the work, you need to wait for the surface to dry, this usually takes up to a day;
The primer should cover the entire surface
- If there are individual irregularities and damaged areas, they must first be repaired . Despite the fact that manufacturers of mixtures claim that they can be applied in a layer of 5 or even more millimeters, it is better not to apply more than 3 mm at one time, so that the surface does not subsequently crack or shrink. Therefore, you will eliminate all such defects in advance if they exist; simply apply putty in the required places to reduce level differences;
First, all significant irregularities are leveled out
- Next, the surfaces are completely puttied, this is done from the corner of the base and over its entire area. It is important that the composition is distributed evenly; for this, the spatula is held at an angle of 30 degrees to the surface and applied with moderate pressure; if you press too hard, the layer will be very thin. The question often arises - how many layers of putty should be applied before painting, everything is simple: if it was not possible to level the base in one pass, you need to apply another layer;
It is important to hold the spatula correctly when working
- Grouting of putty for painting is carried out one day after its application, during which time the surface dries. The tool is pressed tightly to the surface and leveling is carried out using spiral movements. You need to move in a certain direction; during work, the plane is checked with a light bulb; if necessary, individual sections are modified until they become perfectly level;
Sanding allows you to give the surface a perfect smoothness
- The last thing you need to do is clean the base from dust, a lot of which is formed during rubbing, after which another layer of primer is applied. It helps strengthen our finish and improve the adhesion of paint that will be applied later.
A primer is applied over the putty to strengthen the material.
Drywall
This option is more complicated than the previous one for the simple reason that you will have to take care of the strength of the joints. But the plane of such walls and ceilings is almost always ideal and putty for painting will not take much effort. Let's look at the necessary materials, especially since their list is wider than in the previous case.
Knauf Fugen is excellent for strengthening joints between sheets
| Material | Description |
| Putty composition | We figured out which putty is better above, so there is no point in repeating the description here. Exactly the same compositions are suitable for us, the main thing is to consider in which room the work will be carried out: in normal or damp |
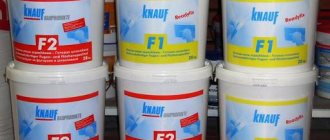
| Composition for joints | We will use the proven Knauf Fugen solution; this composition allows us to ensure high strength of the joints and prevent their cracking. I do not recommend using this mixture for continuous finishing, because, firstly, it hardens in half an hour, and secondly, it is much more difficult to sand. The cost of a 25 kg package is approximately 430 rubles |
| Primer | Here you can use any deep penetration strengthening composition. There are a lot of options, I haven’t seen any particularly bad ones, so choose something that is sold in your region |
| Serpyanka mesh | Self-adhesive reinforcing mesh is ideal for strengthening joints. Its quantity is determined by the length of all connections; it is easiest and most convenient to use the 45 mm wide option |
Mesh is a mandatory attribute for preparing drywall for painting.
To work with plasterboard you will need the following set of tools:
- Two spatulas, as in the case above;
- Brush and roller for priming and subsequently painting the surface;
- Grater for grinding putty surfaces;
- Construction knife for cutting chamfers;
A knife is needed to process joints before puttying.
Let's figure out how to putty this type of base before painting:
- First, you need to check whether all the screws are recessed into the surface; to do this, run a spatula along the plane, and if it bounces in some places, then you need to tighten the fasteners. Also, do not forget to clean the bases from dust, which inevitably settles during installation work;
- If there are joints on the surface of the ends of the sheets, as well as cut elements, then be sure to chamfer the joint at an angle of 45 degrees with a depth of approximately 5 mm. This is necessary to strengthen the seams; without this simple operation, the reliability will be much lower;
The chamfer allows you to strengthen the connection
- The next stage is priming the joints and fastening points, simply apply the compound to the joint with an indentation of approximately 50 mm in each direction. The easiest way to work is with a wide brush or paint brush; it is important that the composition gets onto all the surfaces that we will subsequently finish;
Maklovitsa is excellent for priming
- After the soil has dried, you can begin sealing the joints; to do this, you first need to secure the sickle mesh, since it is self-adhesive, the process is very simple. The material is unwound as it is used and pressed tightly against the drywall, the mesh should be located in the middle of the joint. If the screws are located next to the connection, then it is also advisable to cover them with a mesh; in the end it should look something like the photo below;
It is necessary to position the mesh evenly and press it well over the entire gluing area.
- The preparation of the Knauf Fugen composition is carried out according to the instructions, which are always on the package. The main thing here is to thoroughly mix the ingredients and prepare as much of the composition as you can use in half an hour , otherwise it will harden and you will just have to throw it away;
Prepare as much ingredients as you can use in half an hour
- The joint compound easily penetrates through the mesh into the joint; try to fill all voids with putty to ensure maximum reliability. I advise you to first press the mixture with transverse movements with a narrow spatula, and then use a wide spatula to remove all excess, running it along the joint. The main thing is to level the surface and cover the reinforcing mesh;
Use a wide spatula or grater to remove excess and distribute the composition evenly over the surface.
- After the mixture has dried on the seams (and this takes 1-2 hours), you can begin the continuous finishing. For this we are already preparing “Vetonit”; you can make a lot of it, since it will not harden after half an hour, and you do not have to rush while working. It is important to stir the composition as best as possible, then leave it for 5-10 minutes and stir again, after which it is ready for use;
In a closed container, the finished Vetonit putty can be stored for 2 days; if you do not have time to use all the mixture, just close it tightly in a container with a lid.
- Putty is done from one side to the other, and in the middle of the walls you need to apply the composition from bottom to top, and level and smooth it from top to bottom, this will allow you to achieve the most uniform layer possible . Since the surface is flat, if you are careful, you can get by with just one layer of putty, so try to do everything well the first time;
The composition is evenly applied to the spatula, and work begins from the edge of the wall or ceiling
- The question is often asked: how long does putty dry before painting? At a temperature of about 20 degrees, the process takes about a day; if the room is cooler, it may take longer. Just run your hand over the surface; a white coating should remain on your fingers;
- Grinding is carried out in exactly the same way as described above, so we will not dwell on this aspect in detail. After leveling, the surface is dust-free and treated with a primer; this strengthens the putty layer and reduces its absorption, making the paint adhere much better.
Wood and wood-based materials
Now let's figure out how to prepare wooden bases, these can be floors, lining or other parts of structures. For fiberboard, chipboard and wood, different compositions are used than for drywall and plaster, so first we need to figure out what materials we need.
First of all, I will tell you which putty to choose, there are many different specialized options, but if we need to prepare the surface for painting, then we can use simpler and more convenient solutions:
- The Maxi Dulux compound is used most often on drywall, but it can also be used to treat wood, but only on surfaces that you will not walk on. The advantage of this option is the simplicity and ease of application and ease of rubbing; it is also important that the composition can be given any shade using pigments. Putty is not suitable if you will be using water-based paints, as it is water-soluble;
Good composition for preparing wooden elements
- Acrylic universal putty “VGT” is distinguished by the fact that any paint can be applied to it, even without priming. After drying, a very durable layer is formed that is easy to rub over and paints over perfectly. The composition hardly shrinks and can be used on floors where surface loads are high;
This is the composition I personally use most often.
We will also need a primer, with its help we will strengthen the surface and reduce the absorption of the material, which is especially important for wood and other similar materials . There are many options on the market, but I usually give preference to compositions from the Alpina brand; they are of the highest quality and give the base additional strength and resistance to adverse influences.
An excellent solution for both external and internal structures
From the tool we need the following:
- A spatula for applying putty, there may be two options. The first is to use a small-width tool to seal cracks and minor damage. The second is a wide spatula, which is excellent for continuous putty, when you need the composition to fill all the unevenness;
Small irregularities are smoothed out with a narrow spatula
- To apply the primer, a brush is used, its width depends on the volume of work performed;
- To level the surface and clear the cracks, we will need sandpaper, and we will work with it manually, without a grater, so as not to damage the entire surface.
Sheet sandpaper is what you need for the job
The workflow looks like this:
- First you need to carefully inspect the surface; if there are burrs and burrs on it, go over it with sandpaper, as shown in the photo above. All cracks should be cleaned of dirt; if folded sandpaper can be inserted into them, then use it to prepare the material. Lastly, the surface is wiped so that it is dry and clean;
- Be sure to prime all damaged areas, this will strengthen the wood and ensure stronger adhesion of the putty to the surface. The composition is simply distributed with a brush, after which you need to wait for the surface to dry completely;
When completely puttying the floor, the surface is primed completely
- The putty is prepared for use as recommended on the packaging. Most often, the composition needs to be mixed and, if necessary, add a little water; it is important to achieve the optimal consistency so that the composition is easily applied to the surface and fills all the unevenness;
The composition must be mixed thoroughly
- Next, you can begin applying putty; if you are treating the floor, then take a wide spatula and use it to distribute the composition over the entire surface. You need to press the tool firmly to remove excess and leave a perfectly flat surface. You should work from the farthest corner to the door so that you can leave the room;
This is how you can seal all the cracks on the floor
- If you have small cracks on the floor or need to repair damage to the lining and other finishing materials, then it is better to use narrow spatulas. With their help, the composition is carefully applied to all damaged areas and leveled; it is important to fill all the voids with putty and remove the excess, so as not to waste time sanding large deposits later;
Small problems can be eliminated with a narrow spatula
- After the surface has dried (the time is always indicated on the putty package), you can begin leveling it. To do this, take sandpaper with P150 grain and use it to remove all excess composition. If you need to process flat bases, you can attach the sandpaper to a small wooden block, this will simplify and speed up the work process;
It is important to carefully level the putty surface
- If you find flaws during sanding, they are puttyed, after which final leveling is carried out. Lastly, a primer is applied to the entire surface; this will even out the characteristics of the materials and make the absorbency of the material uniform in all areas, so that the paint will lay down evenly.
I am often asked how to paint putty lining inside a house? The same goes for floors, doors and sheet materials. Everything is simple here: choose a composition that is suitable for your purposes, the putty itself does not affect the choice of paint, and if you did everything correctly, then any composition will work perfectly.
Which putty to choose and how the finishing location influences the choice
The putty is selected taking into account the material used to make the walls. It is also necessary to take into account the type of finishing work (external or internal), because the material will be affected by a certain temperature and humidity:
- You can finish the walls with any putty. If you need to level the walls in an apartment with a normal level of humidity, it is better to cover them with a gypsum mixture. Walls in bathrooms can be decorated with cement or acrylic mixture.
- It is best to level ceilings with an acrylic mixture, because it allows you to make their surface very smooth. Gypsum putty is also suitable for this.
- It is better to putty wooden walls with acrylic compound.
- To process drywall, it is advisable to use an acrylic or gypsum composition; in the latter case, the room should be dry.
- To finish the facade, it is better to buy a cement or acrylic mixture.
Before painting, you need to buy gypsum or polymer putty, because with their help you can quickly level the walls. It is better to buy an inexpensive cement composition for wallpaper.
For walls to be painted, gypsum or polymer putty is best suited.
What kind of putty is there?
Different types of putties are available. To understand the intricacies, familiarization with the classification of mixtures, which differ from each other according to the following characteristics, will help.
By purpose
Putty: all about the material and wall putty | Secrets, tips and experience of a professional
There are compositions:
- starting (for leveling surfaces);
- finishing (to give smoothness and decorative properties);
- universal (combining the qualities of start and finish).
They differ in the grain size of the material.
By degree of readiness
Putty mixtures are produced in dry form and ready for use. The first option has an affordable price and a long shelf life. It is dissolved with water before starting work. To obtain a plastic solution, you must strictly adhere to the dosage.
The finished mixture is packaged in polyethylene containers. It doesn’t last long, the cost is higher, but you don’t have to waste time preparing the solution.
By area of application
Putties are produced specifically for indoor and outdoor use (facade). The scope of application is determined by the composition of the mixtures. For example, gypsum-based products are suitable only for interior work, while cement-based ones can be used inside and outside the house.
By composition
Where to use this or that putty is determined by the basis of the composition. The following types are available:
- plaster;
- cement;
- acrylic;
- latex;
- polymer.
Latex is more suitable for wet rooms, as its characteristics include increased resistance to moisture. The polymer composition can be used on any substrate indoors and outdoors.
Taking into account the properties of a particular type of putty, a suitable option is selected.
| For what kind of work? | Type of putty |
| For walls | In dry rooms it is better to use a gypsum composition; for wet rooms, cement and acrylic are suitable. |
| For the ceiling | On a gypsum and acrylic basis. |
| For wood processing | Acrylic composition. |
| For drywall | In dry rooms, gypsum and acrylic bases are used. |
| For facades and exterior work | Mixtures based on cement and polymer materials. |
| For painting | It is recommended to choose an acrylic or gypsum base. |
Consumption
Depends on the thickness of the applied layer, the brand of putty, the type of work performed, etc.
Basically, the putty consumption is related to the type of work, and it is approximately as follows:
- 0.5 kg per 1 m² – gluing wood elements to plaster.
- 0.9 kg per 1 m² – sealing gaps between sheets of drywall.
- 1.1 kg per 1 m² – leveling walls for paint and wallpaper.
- 1.7 kg per 1 m² – facade finishing.
These standards must be taken into account during the purchasing process so that the purchased putty is enough to level the walls and finish the facade.
Leveling walls for putty
Leveling the walls for putty is done if the surface deviates from the vertical by more than 4 cm, but experienced craftsmen advise not to apply the mixture in a layer thicker than one, since due to the fine fraction, the following points are observed when applied thickly:
- the composition may leak;
- it is difficult to level the soft mass on a vertical surface;
- The work is expensive.
Therefore, before applying putty, the walls are usually leveled with plaster or drywall, and the mixture is used at the last moment before the finishing coat.
Important: when leveling walls with plasterboard, the seams between the sheets and the heads of the screws are covered with plaster to prevent cracks.
Rating of the best
The ranking of the best included materials from both domestic and foreign manufacturers.
Finishing
Allows you to bring the starting layer to a smoother state.
Correctly selected finishing putty improves the technical characteristics of the base
Sheetrock Super Finish
Suitable for walls made of concrete and plasterboard. It's inexpensive. It does not shrink during the drying process, so the mixture applied to the walls will not crack.
Consumption for a layer thickness of 1 mm – 0.7 kg per 1 m².
Main advantages:
- fine-grained;
- does not shrink.
Flaws:
- not identified.
If you are wondering which finishing putty is best for finishing walls, then Sheetrock Super Finish mix works great for this purpose.
Weber Vetonit LR+
The mixture is intended for rooms with normal humidity levels. Allows you to prepare the surface for painting and wallpaper. In the latter case, the wall must first be coated with a primer so that when replacing the wallpaper the plaster does not peel off. Has great plasticity.
Layer thickness 1-5 mm. Consumption for a layer thickness of 1 mm – 1.2 kg per 1 m².
Popular brands of finishing putties
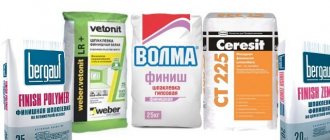
"KNAUF-Rotband Paste"
This mixture with good adhesion allows you to level walls inside buildings.
White color. Layer thickness 0.1-2 mm. Consumption for a layer thickness of 1 mm -1.7 kg per 1 m².
CERESIT CT 225
A cement-based composition that includes reinforcing additives. Allows you to level cement surfaces. It comes in gray or white. May be used in damp areas.
Layer thickness up to 3 mm. Consumption for a layer thickness of 1 mm – 1.2 kg per 1 m².
"Knauf NR Finish"
The mixture is popular among plasterers. It has high performance and is inexpensive. Designed for the general population.
The thickness of the applied layer is 0.2-3 mm. Consumption for a layer thickness of 1 mm – 0.9 kg per 1 m².
Putties: “Knauf NR Finish”, “Yunis Premium”, “CERESIT CT 225”
"Unis Premium"
Designed for concrete, gypsum, plasterboard and gypsum fiber walls. It has a white color with a “mirror” effect.
Ideal base for paint. Basic properties:
- dries completely within 3-6 hours;
- in a diluted state, the solution is suitable for use for 16 hours;
- The thickness of the applied layer is no more than 3 mm.
Consumption for a layer thickness of 1 mm – 1.1 – 1.5 kg per 1 m².
"Finish Gypsum"
Allows you to hermetically seal the seams between drywall and level the walls. Designed for finishing living rooms, as well as kitchens and bathrooms. In addition, it is used in the decoration of educational and medical institutions.
- White color;
- the main component is gypsum;
- layer thickness 0.5 – 5 mm.
Consumption for a layer thickness of 1 mm – 1 kg per 1 m².
Finishing putties “Prospectors” and “Finish Gypsum”
Finishing putty “Prospectors”
Manufactured in the Russian Federation. Allows you to level walls. It's inexpensive. It has high adhesion, which allows the plaster to be used for a long time and prevent cracking (delamination) of the material.
Basic properties:
- dries within 2-6 hours;
- can be easily sanded using a mesh or fine sandpaper;
- high degree of hygroscopicity - the surface to be coated “breathes” well;
- thickness of the applied layer 0.3-5 cm;
- Abrasion resistant.
Consumption for a layer thickness of 1 mm – 0.9 kg per 1 m².
Universal
Allows you to form a starting and finishing layer.
"KNAUF-Fugen"
Has good adhesion. The diluted mixture is very plastic. Designed for processing drywall and sealing seams between it, as well as gluing gypsum board sheets to walls.
Main characteristics:
- grain size up to 0.2 mm;
- compressive strength – no less than 2.0 MPa, bending strength – no less than 1.0 MPa;
- may be of different colors, which is due to the presence of natural impurities in the gypsum.
Layer thickness 1-5 mm. Consumption for a layer thickness of 1 mm – 0.8 kg per 1 m².
Plasters: “UNIS BLIK”, “VGT acrylic universal” and “KNAUF-Fugen”
VGT acrylic universal
This acrylic-based plaster allows you to finish the facade and walls inside the house. Suitable for wooden, brick and concrete walls. It comes in white and gray.
Characteristics:
- used at temperatures from 7 °C;
- layer thickness 1-7 mm.
- drying time – 24 hours;
- shelf life – 3 years.
Consumption for a layer thickness of 1 mm is 0.5-1.4 kg per 1 m².
UNIS BLIK
Allows you to bring walls and ceilings to a perfectly smooth state, seal shallow cracks and potholes up to 8 mm deep, as well as seams between gypsum boards and gypsum fiber boards. Therefore, the walls can be covered with high-quality paint, wallpaper and other finishing materials.
Main parameters:
- used at temperatures 5-30 °C;
- filler size up to 0.2 mm;
- thickness of the applied layer is 1-8 mm;
- Drying time – 6-7 hours.
Consumption for a layer thickness of 1 mm – 1 kg per 1 m².
Surface preparation
The painting process includes the following work:
- Cleaning the walls of the room from old plaster.
- Surface leveling (puttying) before painting, consisting of a starting and finishing procedure.
- Directly painting the walls.
The first stage of cleaning involves removing the old plaster. Everything that was on the wall (tiles, paint, wallpaper, etc.) needs to be cleaned off with a hard spatula in selected places. If there are large uneven spots, cracks or bulges on the wall, then it is better to re-upholster and re-plaster such areas.
When cleaning walls, you should be careful in areas where electrical wiring may run to avoid electrical shock.
For better adhesion to the surface, it is recommended to pre-treat the wall with a primer with good penetrating ability and antibacterial additives. Sometimes special antifungal compounds with fungicides are used. This is easily done with a roller or brush. The drying time is usually indicated on the package with the primer solution (about 6 hours). Next, we proceed directly to plastering the walls: we need to tell you in more detail how to putty all the unevenness.
Is it possible to paint the walls after the starting putty?
You can also apply paint to the starting layer if you rub it well. The maximum layer of starting putty is 2 cm. When drying the material, you need to take into account the temperature in the room; the lower it is, the longer it will take to dry.
The thickness of the starting putty is 2 cm
Tools and materials for working with finishing putty
Before applying the finishing putty, you should prepare all the necessary tools. When carrying out work you will need:
- protective respirator;
- spatulas: narrow (10 – 20 cm) and wide (40 – 60 cm);
- a plastic container for preparing the solution, if you choose a dry mixture;
- large brush;
- rag or soft sponge;
- spray;
- a large lantern or other lighting source;
- pumice or sandpaper;
- construction mixer for preparing mortar from a dry mixture. It can be replaced with a special attachment for a drill or screwdriver;
- rule;
- corner spatula.
For convenience, collect all the necessary tools and materials in one box and place it on a stepladder so that you have everything at hand. This will save time and effort that you will spend on descents and ascents for the necessary materials and tools.
Putty technology
The process of puttying walls before painting is divided into stages, which are described in detail below.
Tools for puttying and sanding walls
To perform finishing work you will need the following tools:
- Putty knife. It is advisable to prepare spatulas of different sizes.
- Builder level.
- Plumb.
- Construction mixer or electric drill with attachment.
- Sandpaper and sander for smoothing walls and painted elements.
- Container for preparing the mixture.
- Tray for dosing and producing solution.
Tools for plastering work
Grinders allow you to quickly sand large areas. Moreover, walls are treated with surface grinding devices, and ceilings are treated with models with special attachments that create a vacuum, due to which they are suctioned to the surface, which greatly facilitates the work.
It is not advisable for non-professionals to use grinding machines, because during the final leveling the excess will be removed from the wall.
Starting layer
Starting putty allows you to eliminate visual defects on the walls (cracks, bulges, etc.). Often, this requires covering the walls with several layers of putty, each of which is applied only to a completely dry surface.
The starting layer of putty eliminates serious defects on the surface
The starting putty is applied in small layers up to 5 mm. By pre-leveling the walls with plaster, you can significantly save time and money, because 1 layer of the mixture dries within 24 hours, and before applying each layer, you need to treat the surface with a primer.
To prevent the mixture from cracking due to shrinkage after installation, it is necessary to glue a painting mesh to the walls. If the differences on the walls are significant, then they need to be puttied along the beacons. True, many do not do this, because it requires a lot of time and money.
After the putty has hardened, it is necessary to remove small bulges on the walls with sandpaper and prime these places for further finishing work.
Reinforcement
Using a painting mesh allows you to avoid peeling of the putty from the walls, as well as the putty falling out of the seams and cracking of the material as a result of shrinkage.
Using a painting mesh will help avoid local peeling of the putty
When laying the starting layer, the mesh is glued to the walls, after which it is simply covered with mortar. Sometimes, for reliability, it is fixed to the surface with a construction stapler.
If drywall is puttied, then the mesh is laid on the seams.
Finishing putty
Since the walls will be covered with paint, it is necessary to apply finishing putty to the starting layer, which is stretched over the surface in a thin layer (up to 2 mm) so that the wall becomes smoother. Using a small spatula, the solution is applied to the wall, and with a large spatula, it is evenly stretched over the surface. When applying putty, the tool must be held at an angle of 25° relative to the surface being treated.
The spatula is positioned at an angle of 25° to the base of the surface to be treated
Next, you need to let the applied layer dry. Drying time depends on the type of composition and thickness of the plaster.
Then the surface of the wall is brought to a perfectly smooth state with fine-grained sandpaper and primed for paint or wallpaper.
Correct grinding technology
Sanding the walls after leveling with putty is necessary to make it smoother and eliminate unevenness at the seams between sheet plasterboard.
The grinding stage involves processing the coating with sandpaper or a block onto which it is fixed. Due to this, it will be possible to make the surface smooth and minimize the risk of removing excess from the wall.
Sanding the walls will eliminate minor unevenness after puttying
Grinding must be carried out under high-quality lighting, and it is necessary to regularly visually evaluate the result from all sides. What movements to use: circular or longitudinal - is not so important, but the pressing force must be controlled so that pits do not form on the wall, otherwise you will have to level the surface again with putty.
You can rub the putty with a special mesh, which is sold at any building materials store. During operation, it generates less dust.
Final putty “clean” for painting or gluing
This stage of work involves applying a finishing or universal mixture to the wall and then sanding the surface. Regardless of the thickness of the applied layer, the entire wall must be treated with a primer before and after its application.
You can achieve a perfectly smooth and even surface using finishing putty.
Important points in work
When plastering walls, you must adhere to the following rules:
- It is necessary to cover the walls with putty under high-quality lighting, otherwise it will not be possible to obtain the desired result.
- Before applying any layer, the surface must be treated with a primer. Moreover, only after it has completely dried can you continue to putty.
- It is advisable to putty the entire wall at once and mix the mixture in the optimal volume for the job, because it hardens quickly.
- If the solution has run out, but the entire wall is not covered, then you need to moisten the joints on the applied layer with water to improve adhesion to the new portion of the solution. When the applied material dries, it is best to treat the joints with a primer.
- It is necessary to reinforce the putty with mesh, otherwise it will crack. The exception is puttying drywall.
- When covering a large area, you need to check the evenness of the layer with a simple thread, which must be pulled diagonally.
- After hardening, it is prohibited to dilute and use the putty again.
After the solution has hardened, it is not recommended to use the putty again.
When planning a large amount of work, it is necessary to take into account that the putty hardens quickly. In addition, when puttying, it is necessary to take into account the parameters of the selected mixture and the manufacturer’s recommendations. It is best to level the walls with plaster and smooth the surface with putty. This will significantly reduce costs.
It is very difficult to independently select the optimal composition for leveling walls if you do not understand the properties of putties. In addition, in order to cover the walls with this mixture yourself, you need to study putty technology. The main thing is to adhere to all points of the instructions.
Additional recommendations
The technology of puttying walls for painting requires skills and experience, so a beginner who putsty walls with their own hands is unlikely to be able to do it perfectly. But you can increase the quality of work if you know some nuances:
- When preparing the mixture, it should be taken into account that it dries quickly (45-60 minutes), therefore it is not advisable to dilute more than 5 kg at once.
- The mixture is diluted only in clean containers.
- First, take the putty composition with a small spatula and apply it to the large one, then to the surface of the wall.
- There are several methods of puttying: horizontal, vertical, “bouquet”, “herringbone”, “zigzag”.
- We select the methods of tilting the spatula for a more even layer on the wall ourselves; the main goal is to cover all the depressions.
- To check the plane of the surface, use the attached metal rule, which can be illuminated with a flashlight for accuracy. It will highlight all the errors that can be cut off with the sharp edge of a spatula.
- Scratches from the spatula must subsequently be puttied with a finishing layer.
- The corners should be leveled with a corner spatula.
- Sanding the surface is done either with a sanding machine or with a net, after which it is better to vacuum the wall and prime it.
- All tools and utensils must be washed and wiped dry after work.
Reviews
What do you think is the best putty for certain types of work? Share your opinion in the comments.
Voting for the best putty
Which putty would you choose or recommend?
Weber Vetonit VH
3.45 % ( 1 )
KNAUF-Fugen
17.24 % ( 5 )
VGT acrylic universal
6.90 % ( 2 )
Weber Vetonit JS
0.00 % ( 0 )
UNIS BLIK
0.00 % ( 0 )
Sheetrock SuperFinish
17.24 % ( 5 )
Weber Vetonit LR+
6.90 % ( 2 )
Knauf Rotband Pasta
27.59 % ( 8 )
Ceresit CT 225
6.90 % ( 2 )
Volma Standard
6.90 % ( 2 )
Founds Ekonsilk
0.00 % ( 0 )
Features of the material
The material is a mixture or dry powdery mass of white color prepared for application.
The main purpose of finishing putty for painting is to level the wall surface and mask defective areas.
In addition, putty material for finishing increases the strength of the previously applied layer. The finishing composition has improved plasticity because it has special plasticizer additives.
The quality of the finishing mixture is determined by:
- increased adhesion rate;
- absence of lumps;
- ease of application;
- the ability to effectively hide defective areas on the treated base;
- no shrinkage;
- the ability to maintain the integrity of the layer after the final drying of the mortar mass;
- snow-white uniform shade.
White putty gives brightness and uniformity to the wall covering. Today, manufacturers offer ready-to-apply solutions or dry mixtures, the choice of which is determined by the developer’s skills and wishes.
What are we planning to paint?
Before you learn how to putty the ceiling and walls for painting, you need to determine the type of future surface that you want to get in the end and only then start work.
- Even and smooth.
This option is used in most cases, but the requirements for it are increased. To hide all irregularities, starting putty is used. Next, the finishing putty is applied and, after drying, it is sanded until a perfectly smooth surface is achieved and painting is performed. Before applying each layer, the base is treated with a primer. - Textured.
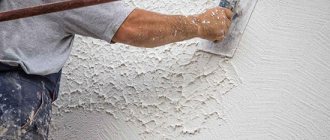
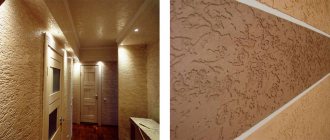
The first stage is no different from the previous version, but the goal of finishing is to give the surface one or another texture. A special tool is used for this. This technology allows you to create an original relief texture, which after painting takes on an unsurpassed appearance.
