Ideas for inspiration
Designers and skilled craftswomen are ready to share interesting ideas with beginners:
- An unusual frame can be decorated with plates with staples for staplers. The shiny product can be painted with spray paint in any color.
- A beautiful and budget-friendly frame made of clothespins looks stylish and expands the functionality of the mirror. You can leave messages for household members.
- Decoupage in oriental style - original and fashionable frame design.
- Decorate the frame with pieces of broken dishes.
- You can make a frame from newspaper tubes or magazines and then paint it to look like wood.
How to make a chic frame for a mirror with your own hands, see the following video.
Cutting parts and gluing the product
The first step is cutting out the base for the future frame. The parameters depend on the size of the photograph or painting that will be framed using a homemade frame. The cardboard rectangle that will serve as the basis should be slightly larger than the image being designed or match it in size.
- In the rectangle you need to cut a window that will be slightly smaller than our picture, so that its edges will disappear under the frame.
- We cut out a second cardboard piece of the same dimensions, but with a smaller window, each side of which will be 5 mm smaller than the first.
- Both cardboard pieces are glued together to form a place to insert the image. If the frame for a mirror or for a picture will be attached to a thick base, the previous paragraphs of the instructions are omitted.
- Now you need to use a ruler to measure 4 pieces of plinth that will be on the sides of the frame. Using a miter box, the panels are cut at an angle of 45 degrees. If there is no such device, the required slope and cut line are drawn on paper, applying the plinth to it. A mark is made with a marker, then the baguette is carefully cut off.
- Check the fit of the sides by placing the individual parts of the workpiece next to each other. Glue the pieces of plinth onto the cardboard blank. If cardboard is not used, simply attach the pieces of foam panels to each other by applying glue to the ends of the planks and pressing them tightly. It is most convenient to use a glue gun for these purposes.
How to make frames: step-by-step instructions
To create a decent frame for your images, you must follow the following sequence of actions:
- Strengthen the rear wall of the structure.
- Prepare blanks for the future frame.
- Glue the finished parts together.
- Finish the corners.
- Paint the finished product.
- Glue the frame to the base.
Reinforcing the frame with cardboard
The backing will give rigidity to the structure and also allow you to change pictures or photographs.
- Cut a rectangle out of cardboard the size of the future frame.
- In a white sheet of paper, make a window 5 mm smaller than the image (on each side).
- Insert a picture between two parts.
- Glue the edges of the cardboard and sheet.
The white sheet can be replaced with a second cardboard with a window. The frame is glued onto posters and canvases without a backing.
An image is inserted into such a window so that the glue does not damage it
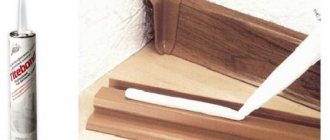
Preparation of skirting boards and gluing
Cutting and gluing skirting boards must be done carefully. The design result depends on this.
- Measure 4 pieces of plinth.
- Using a miter box and a hacksaw, cut 45 degree angles.
- Straighten the cut.
- Glue the parts together.
- Mask defects with putty or sealant.
- Sand the joints with fine-grit sandpaper.
- Dry at room temperature for at least 24 hours.
A miter box is a carpentry tool that is used for precise cutting of workpieces at the required angle.
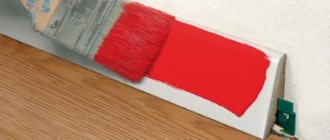
Painting
When the frame is completely dry, it can be decorated. This process requires care and creative imagination.
- Prime with diluted glue.
- Dry.
- Cover with your chosen interior paint.
- If desired, decorate with other shades.
- Let it dry.
- Cover with clear quick-drying varnish.
Coating with metallic paint that imitates gold, silver, bronze or copper looks very professional.
A well-decorated baguette will decorate your interior
Video: master class on making a frame from plinth
Connecting the frame to the base
When the frame is ready, it can be attached to the base.
- Distribute the adhesive composition (liquid nails or polymer glue) on the substrate.
- Carefully attach the frame to the base.
- Press the details.
- Mask the gaps between the parts with thin strips of foam.
- Apply putty to the joints between the baguette and the substrate.
- Make a bracket or loop on the back to hang the picture on the wall.
A support made of thick cardboard, fixed at an angle, will help you place the photo on a table or shelf.
By decorating the walls with a gallery of paintings and photographs, you can make your apartment more comfortable with your own hands.
Baguettes from plinth can be made in both classic and avant-garde styles. They are easily updated, allowing you to change the color scheme of your apartment.
https://sdelaysam-svoimirukami.ru/1595-ramka-iz-potolochnogo-plintusa.htmlhttps://postroika.biz/21192-ramki-dlya-kartin-svoimi-rukami-iz-plintusa.html
Choice of skirting boards, there are four types
1. The well-known and cheap foam plinth is distinguished not only by its affordable price, but also by its ease of processing. Cut the baseboard with a regular knife? Please, nothing could be easier! Change the color of the material? There will be no problems with this either. You can use acrylic or other paints. But be careful, paint and aerosols for cars cannot be used - they simply corrode the material. If you are making a frame from plinth with your own hands for the first time, you won’t find a better material to start with.
2. Do you want to bend the plinth in different directions, creating unusual frames? Expanded polystyrene is ideal for this. A plinth made of this material is more durable and strong than foam, but it also costs a little more. But you can use it to make not only picture frames, but also other crafts. Expanded polystyrene, like polystyrene foam, can be painted and decorated with whatever your heart desires.
3. Do you want a high-end and rich frame? Then your choice will undoubtedly fall on a tree. The type of material depends only on your imagination and financial capabilities: oak, aspen, chestnut, mahogany, cherry and so on. Unlike the two previous materials, wood is more durable and fire-resistant, and will last longer. But you will have to work hard on processing.
4. The fourth type of plinth is metal. It will be more difficult to work with it - you will need additional tools, certain skills and special paint for metal. Of course, metal skirting boards are the most durable, but also the most expensive.
So, to get down to the fun part, you need to stock up on some tools and available supplies.
Making a photo frame from wood
A wooden photo frame looks even more solid. Moreover, you don’t always have to go to the construction market to get the material - the original frames are made from branches. But the processed planks, of course, look great. Materials and tools:
- wooden planks of arbitrary size (to the author’s taste);
- PVA glue (but carpenter's glue will also work);
- hammer, nails;
- glass;
- blowtorch;
- a wooden block wrapped in sandpaper.
Making a wooden photo frame yourself is not difficult.
- You need to prepare 4 strips with notches in the connection areas. These planks must be well sanded.
- Glue is applied to the recesses of two planks, then they are folded into the shape of a frame, and small nails are nailed.
- The joints and end sides should be treated with a blowtorch. This type of work is recommended to be performed in the fresh air.
- The front side of the photo frame is also processed with a blowtorch.
- Now you need to take the glass and make markings on it for the future photo. According to this marking, glass is cut out for an almost finished product. The cuts are secured with sandpaper, which is fixed on a wooden block.
- The glass is secured on the reverse side with self-tapping screws. To ensure that the frame hangs securely on the wall, string is fixed in the right place.
- The finished frame can be coated with stain or varnish.
A frame made of twigs can turn out even more cute. The easiest way to make it is a thick cardboard base, to which the same base will be attached, only with a cut out core (as in the example above). Prepared branches are fixed to the side and horizontal cardboard edges of the frame using hot glue. They should be approximately the same diameter and length. If the making of the frame is timed to coincide with the New Year, the twigs can be made snow-covered (ordinary salt, which is sprinkled on the base of the twigs on the glue, will help).
DIY photo frames made of paper, cardboard and scrap materials
Photographs... They store the most interesting moments of our lives. How to save the pictures themselves? It is best to frame them and place them in a visible place.
But unusual accessories that match the stylistic design of the room can cost a lot of money. And finding a truly exclusive framing model will most likely not be easy. Is it possible to assemble a photo frame with your own hands?
Undoubtedly! And from the most incredible materials. And rest assured, such a thing will not end up on the shelf, it will be put on public display.
Ceiling plinth frame
We will need:
- plywood or other board approximately 4-8 mm thick; - ruler; - pencil; - jigsaw or saw; - ceiling plinth; - knife; - yacht varnish and brush; - gypsum putty; - artistic acrylic paint; - sponge for acrylic paints; - glue; - pushpins; - newspapers.
Robot stages:
1. The first thing you need to do is measure what size frame you need. To do this, you need to add a few centimeters to the size of your product, photograph or painting (depending on the width of the plinth).2. On the plywood, draw the perimeter of the future frame with a pencil.
Using a jigsaw (saw), cut out the base for the frame. It is best to do this job outside or cover the floors with newspaper, as there will be a lot of sawdust flying around and it will be difficult to clean it from the carpet and other surfaces in the room.
3. Cut the ceiling plinth into 4 sections, which will correspond in size to the cut frame. Be careful and careful, the baseboard is made of quite fragile polystyrene foam. The cut should be made with a sharp knife on a flat surface, without pressing hard on the surface of the baseboard.
4. Place all the cuts on a plywood base and mark on the plinth how much needs to be cut so that the corners meet evenly and without large gaps.
5. Place the prepared sides of the future frame together and check whether they correspond to the size of the base and the picture.
6. For ease of use, the plywood base should be coated with several layers of yacht varnish. This will protect your product from dust and deformation.
7. Cover a table or other surface with newspapers. Lay out the plinth as it will be located on the future frame.
Popular articles Good congratulations on March 8
Cover areas where the baseboard does not meet with gypsum putty. This will also help to firmly secure the baseboard together.
8. You need to work with putty very carefully
It is important not to damage the pattern of the plinth itself and at the joints (at the corners) try to connect and continue the pattern. Leave the baseboard with putty to dry overnight
Don't worry if the putty appears a little yellowish at first; dry gypsum putty will turn pure white.
9. We proceed to the coloring stage. Prepare for yourself acrylic paint of the required color, a sponge (a sponge is the best choice for painting ceiling plinths with various patterns, as it does not leave streaks and simplifies painting) and a palette (instead of a palette, you can use a small lid or saucer).
If you have a limited amount of paint and you are worried that there may not be enough of it, then acrylic paint can be diluted with regular PVA glue in a 1:1 ratio. To achieve the best effect and brightness, it is best to paint the frame in two layers. The paint will dry in no more than 2-3 hours.
10. Secure the picture to the base using glue or pushpins.
11. Glue the finished frame to the plywood base and leave to dry.
12. Make a loop on the back wall and... Voila! The painting on the wall is ready!
Putty, painting and decoration
Most often, gaps form at the junctions of the baseboards, but they can be easily masked with putty and painting.
- After the glue has dried, fill the corner cracks, the junction of the baseboard with the cardboard base and the back side of the frame. This will not only hide defects, but also make the structure solid and more durable. The ends of the product will have to be puttyed in several layers or strips of foam plastic must be glued between the cardboard and the baseboard before puttying.
- Wait for the putty to dry and start painting. It is best to use acrylic or water-based paint. Other types of compositions can spoil the foam, so before using them you need to cover the surface with PVA glue in several layers.
Advice. A dark frame painted in a shade obtained by mixing black and red or dark brown will look impressive. The light milky shade is obtained by combining white with ocher. An antique product can be gilded using acrylic gold paint or water-based construction enamel. Gilding is applied with a semi-dry brush in a circular motion onto the completely dry previous layer.
- After painting, the frame is coated with water-based varnish.
If necessary, a fastening is made on the back side. To do this, take a piece of twine and cut out a rectangle from thin cardboard, the length of which will be slightly shorter than the width of the product. Place the string on the back of the frame and glue the cardboard so that it presses the ends of the string.
USEFUL INFORMATION: Scandinavian style hallway design (9 photos)
Types of ceiling plinths
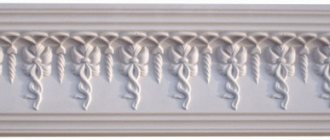
Before you start making a beautiful frame for a panel, picture or mirror, let's figure out what materials fillets are made of.
Styrofoam
A frame for a panel or picture made of foam ceiling plinth is the cheapest option. This material is light in weight and easy to process (it can be cut with a regular knife).
Polyurethane foam
This type of material is a more rigid and plastic analogue of the previous version. Regarding its fireproof quality, we can say that there is no definite answer, however, this material does not ignite so quickly. Polyurethane foam is much stronger than polystyrene foam, which makes it possible to bend it at the required angle.
Tree
Products made from this material are considered elite due to their high cost and attractive appearance, in comparison with other materials. The price of wooden skirting boards entirely depends on what type of wood the product was made from, for example, oak, ash, mahogany.
This material is the most difficult to process and is not particularly durable or fireproof. But even despite all these obvious shortcomings, frames for panels and paintings made of wooden baguette are distinguished by their expensive and unsurpassed appearance.
Recommendations
When purchasing glue for ceiling plinths in Moscow, be sure to focus on the place of sale. The seller must ensure proper storage of products to maintain their performance qualities. Also, check product reviews online before purchasing. This way you will be able to find out what professionals glue ceiling plinths to, and what specific compositions are preferred by repair professionals.
Carefully study the features of each product before purchasing to avoid making mistakes and not wasting your money. After all, foam ceiling plinths are glued exclusively using specially developed mixtures.
If you are not sure that you can glue the moldings to the ceiling yourself, then it is better not to risk it. In this case, it would be wiser to resort to the services of qualified specialists.
We also recommend watching a video tip on how to properly attach ceiling moldings. A professional’s answer will allow you to cope with the task yourself much faster:
Tools and materials
Before you start working, think about the design of your crafts. Skirting boards or moldings can be purchased at any hardware store. Trimmings and pieces are also suitable for work, but novice craftsmen are better off buying new ones.
Suitable materials
You can choose a molding decorated with a textured pattern or smooth. Any materials from which skirting boards are made are suitable. But their different properties must be taken into account.
- Styrofoam is cheap and suitable for beginners, but it crumbles and breaks easily.
- Expanded polystyrene is one of the types of foam plastic. Its reliability is better and its price is higher.
- Polyurethane is durable, wear-resistant and cuts well. Flexible skirting board options allow you to create products of any shape. But it has a high cost.
- Wood is also an expensive material. Working with it requires professional training.
The choice of material for creating baguettes depends on their purpose and your imagination
The choice of material for a baguette depends on what kind of picture you are going to place. Fragile foam plastic is suitable for small and light photographs, and polystyrene foam, polyurethane and wood are suitable even for oil paintings.
Frames for creating style
Molding in the interior is used for various tasks - creating a decorative surface, framing pictures, complementing an existing composition, dividing a room into functional zones or, on the contrary, combining the space into a single whole. Frames also effectively change the height of the ceiling, visually expanding or narrowing the room. It all depends on the purpose of their use and the choice of the appropriate type. Among the most important tasks of molding is the creation and addition of a certain style in the interior:
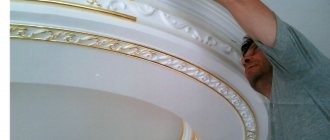
- Baroque. It is difficult to imagine this style of style without numerous skirting boards and baguettes, frames with rich stucco molding and gilded corners. Floral ornaments and relief carvings are harmoniously combined with panels of wallpaper and decorative plaster. All these elements are framed with light light strips.
Baroque direction Source stylingroom.ru
- Provence. This style is characterized by simple, straight lines, there are no elaborate shapes, you can see a relief molding at the junction with the ceiling and floor. There are no unnecessary elements here, the walls are free of stucco and other details. Light shades predominate as the general background; white, as well as pastel gray and cream tones are most suitable.
Direction Provence Source walldeco.ua
- Scandinavian style. In this direction, the walls are not decorated with moldings, only occasionally they use frames near window and door openings, and also mark the transition zone to the floor and ceiling. The shades are light, white and beige tones predominate, which do not stand out against the background of the general colors of the room.
Interior in Scandinavian style Source walldeco.ua
Mediterranean. In such interiors, you can use various design options using moldings - decorations for cornices, ceiling moldings, highlighting windows, doors and arches with decorative details with stucco. Curved shapes and lines predominate, and there are often many small carved elements. The brightest accent of the interior is usually a large painting depicting the seashore, a garden, or an exit to a balcony or porch. For such an element, photo wallpaper in a beautiful carved frame is used. Columns in antique style will complement the design of the room.
Interior in Mediterranean style Source decoretto.ru
- English. The most important thing here is to decorate the fireplace correctly; this can be done with the help of decorative decorations. Planks separate the joints of the wallpaper, and also place a cornice along the entire perimeter of the ceiling. The fireplace is decorated with the same elements. At the same time, the details should have a simple geometric relief and calm pastel shades.
- Classical. Some apartments in old buildings are designed in this style. They are distinguished by high semicircular window openings, arches, columns and various options for moldings. All interior elements are decorated, and the ceiling is also separated using baguettes. The classic allows for the decoration of walls with wooden panels, so here you can use various carved decorations in all sorts of variations.
Useful tips
Helpful tips when creating a frame:
- Instead of paint, you can buy special powder and varnish from a hardware store so you can control the shade of the paint.
- There is one advantage of such a material as polystyrene foam; in case of any inaccuracy or unevenness, everything can be corrected with putty.
- For a long service life, the frame can be coated with white water-repellent paint before painting it in a certain color, so our frame will last longer.
Having completed this design, the mirror will not go unnoticed. It will perfectly decorate the interior and will be pleasing to the eye. And always, looking in the mirror, will warm your soul.
Useful tips and tricks
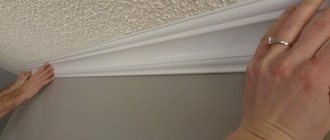
If you have never worked with ceiling skirting boards before, it is better to practice before you start creating a frame. The most difficult thing in this matter is to cut the baseboard correctly. It is important to do this evenly and at the right angle so that the joint is not noticeable.
It is better to start with simple frames and use foam or polyurethane baseboards. They are easier to work with and inexpensive. Therefore, if something goes wrong, it is easy to buy a new baseboard and start over.
Making a frame for a mirror with your own hands from ceiling plinth is quite simple. To do this, you will need simple tools and materials that are found in many homes, and can be easily purchased if necessary. Ceiling plinths are made of foam, plastic, and metal.
Choose based on your preferences and means. In any case, a successfully decorated frame will harmoniously fit into the interior and will look neat and expensive. With a little effort, you will have a unique mirror that will decorate the room and add personality to it.
What will you need?
During the work, you may need different materials and available tools. This depends on the type of frame being made. The main material will be ceiling plinth made of polystyrene foam. The foam plastic analogue is not suitable for frames; it is not dense enough and can break under light load.
Good frames are made from polyurethane plinth. It is wear-resistant, has optimal flexibility and cuts perfectly. Its only drawback is the high price.
In addition to the baseboard itself, you may need:
- cardboard, ruler, sheet of A4 paper;
- universal polymer glue (PVA, “Moment”, “Dragon”, hot);
- sharp stationery knife (scissors or hacksaw);
- construction (gypsum or acrylic) putty and spatula;
- brush, varnish, acrylic (water-based) paint;
- nylon thread;
- pencil or marker for marking.
Frames can only be made from ceiling plinth. Some products are glued to wooden frames and mounted on a thick cardboard base. Therefore, not only the necessary tools and materials differ, but also manufacturing technologies.
Some people use plywood or boards 4-8 mm thick in their work. It makes a practical basis for framing photographs or paintings. When working with this raw material, you cannot do without a jigsaw or saw. Other available materials include a sponge (foam rubber sponge) for paints and newspapers.
How to choose?
When choosing an adhesive composition for installing a baguette on the ceiling, you need to consider the product that is best suited for the material from which this decorative item is made. There is no point in saving on the quality of the adhesive composition, since the finished result may ultimately be unsatisfactory. In various cases provided for by the design project, the ceiling plinth can be fixed from above to the wall directly on vinyl wallpaper, fixed directly to the stretch ceiling, it can be glued to the tiles in the kitchen or to the tiles in the bathroom. Experts advise you to first select and buy a plinth, and then buy the glue that can be used for it.
Assembly adhesive intended for foam fillets, polystyrene baguettes, PVC moldings, as well as compounds for joining joints come in different price categories. Products from European brands tend to be slightly more expensive than domestic options. When choosing from a price point of view, you should be guided by your financial capabilities and preferences, as well as the quality of the product.
To select the right installation adhesive, some recommendations may be useful to you.
First of all, pay attention to the expiration date of the product. If this period has already passed, then the adhesion of such a composition may be low, and therefore unsuitable for high-quality installation work. Carefully study the glue label, which indicates its composition and purpose.
You should know that waterproof compounds are marked accordingly on the packaging. Products intended for use in unheated rooms or outdoors have an image of a mercury thermometer or an icon in the form of a snowflake. Pay attention to the integrity of the glue packaging. Minor scratches or damage may cause the adhesive to thicken or dry out. If air gets into a tube of glue, it means that the polymerization process has already begun inside - such a product is not suitable for installation work.
When choosing an adhesive composition, take into account the decorative material. For example, polystyrene foam baseboards can be glued with any universal composition that does not contain organic solvents. It is best to choose transparent glue for such fillets, which does not contain additional fillers. As for wooden moldings, liquid nails are best suited for their installation. The adhesive is applied in a well-ventilated area, since it contains organic solvents, and before applying the adhesive composition, the working surface must be thoroughly cleaned of plaster and primed. Therefore, in addition to glue, you will also need to purchase a deep penetration primer.
Tools for work
The first question asked by people who are planning to install the plinth themselves is how to cut it? The tool is selected depending on the material from which the fillet is made. For example, products made from polyvinyl chloride have a hollow structure. Therefore, to ensure that the cut edges are as smooth as possible when cutting them, you need to use a hacksaw with fine teeth. Otherwise, cracks and chips may form on the finish.
The best option is to use a metal saw - its teeth are small, and their opening width is suitable. However, the use of a hacksaw is limited to products with a rigid structure, that is, it is not suitable for thin-walled fillets. The fact is that the teeth can severely damage the surface of the baseboard.
Popular articles How to draw a horse step by step with a pencil - three easy master classes for beginners
You can also use a hand jigsaw to cut fillets. When cutting products with this tool, the corners are as smooth as possible. But this device has several disadvantages. Due to the short length of the cutting blade, using a miter box (a special tool for cutting skirting boards) becomes very problematic. In addition, the cutting process is slow.
What is a miter box?
High-quality cutting of a product is possible only with strict adherence to geometric shapes
When installing a plinth, fulfilling this condition is extremely important, because to obtain a neat connecting seam between decorative elements, it is necessary to have an even cut. If you carry out this procedure “by eye”, then a gapless connection of two skirting boards will not be possible, because the ends will not correspond to each other. The highest quality cut can be made using a special carpentry tool called a miter box.
Its design may be different, but the principle of operation always remains the same. There are devices with manual adjustment of the cutting angle, but often builders use a standard variation of the tool, which is a wooden or plastic tray with vertical grooves in the walls for inserting a saw. Thanks to the miter box, you can easily perform vertical trimming of skirting boards at an angle of 45 and 90 degrees
The highest quality cut can be made using a special carpentry tool called a miter box. Its design may be different, but the principle of operation always remains the same. There are devices with manual adjustment of the cutting angle, but often builders use a standard variation of the tool, which is a wooden or plastic tray with vertical grooves in the walls for inserting a saw. Thanks to the miter box, you can easily perform vertical trimming of skirting boards at an angle of 45 and 90 degrees.
In addition to cutting tools and carpentry equipment, when installing a fillet you may need: a pencil, a protractor, a self-tapping screw, assembly adhesive and sealant.
Features of interior design work with moldings
When planning to do interior decorating work with your own hands, take into account the important features and nuances of this process in order to ultimately obtain a completely satisfactory result. This will not only get rid of common mistakes, but also give the room originality, and also extend the life of the products.
Interior in a classic style Source walldeco.ua
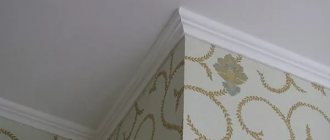
Wallpaper sticker
The color of the molding must be chosen not only based on the shade of the wallpaper on the wall, but also depending on the overall design of the room. As a result, the entire interior should look like one whole, without unnecessary irritating elements.
In a spacious room, light shades of wallpaper will match the same light shades of planks. This combination will be very appropriate and harmonious.
If the interior contains dark shades of furniture or other objects, they can be emphasized by a contrasting combination of light wallpaper and dark planks.
Wallpapering
After all the finishing work is completed, it’s time to glue the wallpaper. 24 hours after the plank has been glued, it is painted in the required shade and left to dry. Then they grout and remove all excess. And only in the next step can you glue the wallpaper directly. The work is done very carefully to get into the joint with the frame. It is imperative to ensure that the edge of the canvas is smooth and does not go beyond the bar. Otherwise, the appearance of the product will be damaged.
Volumetric vintage design
Ceiling plinth blanks are cut at an angle of 45 degrees; after gluing the frame, it can be painted with acrylic dyes and varnished.
How to make a three-dimensional frame? You can make a vintage design with your own hands. Skirting boards can be angular, which are attached between the wall and the ceiling, and wall-mounted, flat on the reverse side.
They come with or without patterns. You can combine different types to make a voluminous vintage frame.
Materials and tools:
- ceiling plinth;
- miter box;
- hacksaw;
- polymer glue;
- acrylic paint.
You need to take a corner copy. The tip is sawed off and the first corner is formed. It lies in the miter box in this way: one part is located horizontally, the other vertically.
Measure the required length from the first corner and cut at an angle. The second plank of the same dimensions is made in the same way. You must work very carefully and try to accurately observe all dimensions.
Then two smaller strips are cut out. The parts are glued together. Each corner is smeared with glue, aligned and held for a long time for better gluing.
The corner specimen turned into a kind of cup. Now you need to make the edging of this cup from a wall copy.
https://youtube.com/watch?v=E0-q49RQiFA
Take a wall plinth and cut it on a miter box. At the same time, it lies in the same plane.
Cut off the tip of the part and form an angle. Measurement is taken from the corner. During the work process, all blanks are constantly tried on the cup. Cut off the opposite corner. This is how 4 sides of the cup edging are made.
Apply glue to the upper side of the cup. A border is placed on top. All elements are carefully adjusted to each other so that there are no gaps.
After this, all the elements are glued together. The result is a voluminous stained glass frame. Its depth is 4 cm.
Then the product is painted with gold acrylic paint. The picture can be attached to your product using small screws or the structure can be glued to the picture.
Decor features
A great idea to decorate both a large and medium-sized mirror is to build a frame for it. And an excellent material for the frame is the ceiling plinth, or the so-called fillet. With this cheap material you can turn an ordinary mirror into a work of art.
You will need:
- roulette;
- marker or simple pencil for marking;
- knife or hacksaw for metal;
- miter box;
- wood glue or “liquid nails”;
- special putty for wood;
- varnish or acrylic paint.
Work process:
- We measure the mirror.
- We make marks with a marker on the corresponding parts of the baseboard.
- We place the fillet in order in the miter box and cut it according to our marks at an angle of 45 degrees.
- We check the symmetry of the cuts by applying the fillet to the mirror.
- We glue together all the parts of the structure.
- When the glue has completely dried, you need to apply a little glue along the mirror edges and connect it to the structure.
- The gaps formed between the joints are filled with putty.
- We cover our frame with varnish or paint.
A frame made from ceiling plinth is suitable for both a mirror in the hallway and other rooms.
Making a frame
So, we seem to have figured out the types of skirting boards and now we can safely proceed to the question - how to make a frame for a picture from a skirting board. If you are an artist, cross-stitch, sculpt various miniatures from mosaics, or are interested in photography, then you will probably need a lot of frames so that you and your guests can admire the result of your work.
But the modern trend is such that not everyone can afford to spend a lot of money on a dozen different frames.
Not happy with the color? Let's paint!
Designers took this problem seriously and came up with a cheaper and simpler solution - a DIY frame made from plinth boards.
I would like to pay tribute to the various design of frames - you can not only paint them, but also glue all sorts of decorative elements to them, from decorative flowers to buttons and other small details. But this question is more suitable for women - the technical component of the work is mainly required from men, and therefore we will immediately get down to business.
Let's get started
The resulting product can be decorated with various decorative elements
In order to begin work, you will need to purchase the following tools and material:
- Ceiling plinth (as has already become clear from the article, it comes in three types);
- Any glue that will be able to tightly glue the material you have chosen. For skirting boards made of polystyrene foam or expanded polystyrene, adhesive for ceiling tiles, which is applied through a special gun, is perfect;
- Stationery or construction knife;
- Small miter box;
- Marker with ruler;
- Acrylic (or any other) paints.
Execution of work
This is what a frame made from aged wooden baguette looks like
To be honest, many home craftsmen will probably be somewhat skeptical about this kind of product. In general, polystyrene foam and polystyrene foam are somewhat different materials that have high strength indicators. But if you think a little, then in general it turns out that a frame is not a structure into which nails are driven, but one that simply dangles on the wall.
It turns out that we do not need high strength of products - the main factors here are durability, ease of processing and, of course, low weight. If we consider the design according to these parameters, then these materials are simply ideal.
To make a frame you will need a minimum of materials
Below are step-by-step instructions to help you:
- To begin with, we take the baseboard in our hands. In our case, we will consider a product made of polystyrene foam, since it is the most popular. Such material can be easily cut, glued, and like polystyrene foam it does not have a fine-grained texture that crumbles;
- The next step is to take measurements from a photograph, painting or embroidery. In our case, it uses the usual A4 format, so the dimensions are 210x297 mm. Now we measure these dimensions on the baseboard and make marks with a marker. Then, using a miter box, cut the baseboard at an angle of 45°.
Attention! Particular attention should be paid to the fact that the frame will be the same size as the sheet. This is necessary so that you can then glue the frame itself to your work of art. Before gluing, you will need to check the conformity of all sides - to do this, you need to lay out the parts on the table and attach them to each other (see
Popular articles Wishes for March 8, 2021
photo);
Before gluing, you will need to check the conformity of all sides - to do this, the parts must be laid out on the table and attached to each other (see photo);
The photo shows that the frames can be completely different
- We glue the product. For these purposes (as mentioned above), we use a glue gun. He will glue the individual parts of our product tightly together. To do this, you will need to warm up the gun and apply a little adhesive to the end of the part, and quickly, before the glue dries, attach another part to it;
- The products are pressed tightly together for a few seconds. Next, according to the same scheme, we should complete our frame;
- Now all that remains is to paint this thing. For this we used acrylic enamel - it looks quite nice;
- After drying, all we have to do is glue the frame to the picture and that’s it, the job is successfully completed!
Attention! Glass cannot be inserted into frames made of polystyrene foam or polystyrene foam!
Basic installation methods
Many people think that they can glue the plinth without carefully measuring the details and clarifying the nuances. The result will be crookedly laid, poorly aligned, disconnecting elements. To avoid problems, you need to carefully read the installation methods. There are two options for attaching skirting boards - with glue and putty, they are slightly different from each other.
We use putty
Before or after the rest of the repair, attach the skirting boards, depending on the type of glue. So, laying on a putty mixture is suitable if the wallpaper has not yet been pasted. Professionals prefer this type of installation, since the untreated surface has the most reliable adhesion.
For installation you need baseboards and putty - a common product sold in every store or left over after repairs. Sold ready-made or in dry powder form. The latter must be crumbly, without lumps. If you have the skills, you can use gypsum compounds; they are strong, but set very quickly. They are bred in small portions. You should also buy a deep penetration primer to improve adhesion. From the tools purchased:
- a hacksaw for wide cornices, a stationery knife for narrow ones (up to 20 mm);
- miter box for forming corners (you can work without it);
- small spatula;
- fine-grit sandpaper if the back side is too smooth.
The work is carried out in several stages, the first is preparatory:
- Carefully inspect the entire perimeter along which the cornice will be laid. Remove defects and unevenness. If the baseboard is thin, perfect alignment is required. For grinding, use a block onto which fine sandpaper is nailed.
- Apply primer to the walls and wait until it dries completely. Of course, it is better to do such work during initial preparation, in advance.
- Perform markup. The easiest way is to place the individual panels in the right place, mark the joint line with a construction pencil or a simple pencil. You can calculate the fragments at the stage of purchasing the material by drawing a diagram on paper.
- Trim parts. This stage is the most difficult for beginners, especially when working with foam baseboards. The latter tends to crumble, cut out unevenly, with jagged edges. Joints should be cut in a straight line, corners should be cut at an angle of 45 degrees. It’s better to practice on small pieces in advance; you can buy an extra plinth for this purpose.
Then you can start gluing it onto the putty. It is diluted according to the instructions - poured into a bucket, poured in water, kneaded by hand or with a mixer. It is better to dilute a little of the mixture first, then add powder and water. The process then proceeds like this:
- take a small amount of solution;
- Apply to the underside of the baseboard, spread in a thin layer;
- immediately wipe off any remaining mixture that gets on the front part with a cloth or sponge;
- start installation from a corner (any);
- carefully press the part into place according to the marking lines, evaluate the correct installation;
- There is no need to press the cornice too hard, it will still adhere normally to the surface;
- remove the mixture that has come out, but if there are uneven spots, try to distribute it under the edge;
- when attaching the second plinth, lubricate the end with a small amount of putty, then combine it with the previous one;
- continue work until completion, then leave the skirting boards until completely dry - for 24 hours;
- After a day, clean up all the blemishes and paint the baguettes (if necessary).
We recommend: Replacing the matrix on a TV: tips and step-by-step instructions
Glue mounting
Typically, glue is used if there is already wallpaper in the room, and the ceiling plinth has to be attached on top. Although it can also be glued to bare walls in a similar way. It is important that the wallpaper is of high quality, otherwise it may fall off after the fillets are installed.
Preparation of tools, surfaces and markings are carried out in the same way as before using putty. Then the following actions are performed:
- apply glue according to the rules (depending on width, severity, type of material);
- be sure to distribute the product in the center, where the main support will be;
- attach the plinth to the wall, press firmly, hold for as long as the instructions indicate (some compounds require tearing off and re-gluing, others must be pressed to the wall as quickly as possible);
- repeat the process for other parts according to the markings, carefully combining the cut products;
- do not forget to thoroughly coat the ends of the joints, and immediately remove excess glue;
- leave the fillets until they are completely fixed (usually up to a day);
- Cover the gap with white sealant.
If you had to cover up a lot, then it is recommended to paint the baseboard with white paint. This action will help hide visually noticeable imperfections. The cornices are first primed.
Beginners often fail and the baseboards come off. The reasons may be:
- dirty walls - if the surface is not cleaned, dust will seriously reduce the adhesion rate;
- too smooth, glossy surface of the plinth - this is rare, but when purchasing such a product it must be sanded from the wrong side;
- poor-quality, unsuitable glue - thick, wide panels often come off when gluing with a “weak” agent;
- drafts – the room cannot be ventilated for 24 hours; if there is an unpleasant odor, it is recommended to close the room tightly.
Polyurethane foam frame
For women, “polyurethane foam” sounds threatening, but there is no need to be afraid, because it is ordinary polystyrene foam, only stronger. Ceiling plinths are made from it, which are now used to renovate apartments. Their price is low, but the variety of patterns is impressive. There is no difference in manufacturing with wooden baseboards. But don’t forget that this is not wood, so you should handle polyurethane foam more carefully. Any blow can lead to dents, or even break the entire structure.
What you need:
- Ceiling plinth.
- Hacksaw or sharp knife.
- Glue.
- Ruler.
- Plywood or cardboard (depending on the size and strength of the catrina).
Framing materials
It is quite possible to make a small picture in a frame from photo wallpaper yourself, using available materials. Of course, an easier way would be to buy a finished product, into which the image is simply inserted and secured from the inside. A baguette frame is suitable for this; such options are available for free sale. If you need a more accurate match between the size of the frame and the wallpaper, you will have to think about a hand-made product. It can be made from the following materials:
- Polyurethane plinth for ceilings;
- Wooden baguette;
- Wooden multi-colored slats;
- A strip of wallpaper that is already on the wall;
- Fake diamond;
- Parts of small twigs;
- Gypsum or decorative putty.
The selection of material is carried out depending on the overall style of the interior. Artificial stone is perfect for the country style, and the elegant wooden frame looks decent in the classic design of the room.
Natural materials require a corresponding picture plot. Products made from branches and wood will harmoniously combine with landscapes and rustic motifs.
Bed with photo wallpaper Source izhevsk.ru
If you plan to create a frame from plaster and putty, you should think in advance about the method of performing the work. Not everyone can make a neat outline and apply a drawing in the process, so you should calculate your capabilities and skills. If in doubt, it will be easier to take a plywood frame and distribute the material over it, and then fix the resulting picture on the surface.
Hallway with photo wallpaper Source otdelka-expert.ru
DIY picture frames from baseboards: a practical guide
It’s easy to decorate your walls with paintings, photographs or reproductions. But the room will be even more elegant if you decorate the images with hand-made frames from the ceiling plinth.
Tools and materials
Before you start working, think about the design of your crafts. Skirting boards or moldings can be purchased at any hardware store. Trimmings and pieces are also suitable for work, but novice craftsmen are better off buying new ones.
Suitable materials
You can choose a molding decorated with a textured pattern or smooth. Any materials from which skirting boards are made are suitable. But their different properties must be taken into account.
- Styrofoam is cheap and suitable for beginners, but it crumbles and breaks easily.
- Expanded polystyrene is one of the types of foam plastic. Its reliability is better and its price is higher.
- Polyurethane is durable, wear-resistant and cuts well. Flexible skirting board options allow you to create products of any shape. But it has a high cost.
- Wood is also an expensive material. Working with it requires professional training.
The choice of material for creating baguettes depends on their purpose and your imagination
The choice of material for a baguette depends on what kind of picture you are going to place. Fragile foam plastic is suitable for small and light photographs, and polystyrene foam, polyurethane and wood are suitable even for oil paintings.
In addition to the basic material, you will have to purchase:
- sharp construction or stationery knife;
- miter box;
- hacksaw;
- universal quick-drying glue;
- ruler;
- pencil for marking;
- cardboard;
- acrylic or water-based paints;
- putty.
To obtain a high-quality product, you need to properly organize your workplace
How to make frames: step-by-step instructions
To create a decent frame for your images, you must follow the following sequence of actions:
- Strengthen the rear wall of the structure.
- Prepare blanks for the future frame.
- Glue the finished parts together.
- Finish the corners.
- Paint the finished product.
- Glue the frame to the base.
Reinforcing the frame with cardboard
The backing will give rigidity to the structure and also allow you to change pictures or photographs.
- Cut a rectangle out of cardboard the size of the future frame.
- In a white sheet of paper, make a window 5 mm smaller than the image (on each side).
- Insert a picture between two parts.
- Glue the edges of the cardboard and sheet.
The white sheet can be replaced with a second cardboard with a window. The frame is glued onto posters and canvases without a backing.
An image is inserted into such a window so that the glue does not damage it
Preparation of skirting boards and gluing
Cutting and gluing skirting boards must be done carefully. The design result depends on this.
- Measure 4 pieces of plinth.
- Using a miter box and a hacksaw, cut 45 degree angles.
- Straighten the cut.
- Glue the parts together.
- Mask defects with putty or sealant.
- Sand the joints with fine-grit sandpaper.
- Dry at room temperature for at least 24 hours.
A miter box is a carpentry tool that is used for precise cutting of workpieces at the required angle.
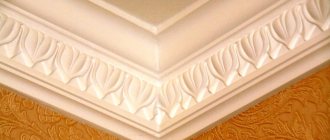
Painting
When the frame is completely dry, it can be decorated. This process requires care and creative imagination.
- Prime with diluted glue.
- Dry.
- Cover with your chosen interior paint.
- If desired, decorate with other shades.
- Let it dry.
- Cover with clear quick-drying varnish.
Coating with metallic paint that imitates gold, silver, bronze or copper looks very professional.
A well-decorated baguette will decorate your interior
Connecting the frame to the base
When the frame is ready, it can be attached to the base.
- Distribute the adhesive composition (liquid nails or polymer glue) on the substrate.
- Carefully attach the frame to the base.
- Press the details.
- Mask the gaps between the parts with thin strips of foam.
- Apply putty to the joints between the baguette and the substrate.
- Make a bracket or loop on the back to hang the picture on the wall.
A support made of thick cardboard, fixed at an angle, will help you place the photo on a table or shelf.
By decorating the walls with a gallery of paintings and photographs, you can make your apartment more comfortable with your own hands.
Baguettes from plinth can be made in both classic and avant-garde styles. They are easily updated, allowing you to change the color scheme of your apartment.
- tisson
Decor ideas
How to make a frame for a mirror from a ceiling plinth to suit a certain interior style? Decor will help you cope with this task. If you already have an idea of what the future mirror should look like, great. But sometimes there are no ideas, but you want to decorate the room.
You can make a frame of any color.
Then you need to carefully consider the space in which you plan to place the mirror. Pay attention to the prevailing colors, textures, or maybe, on the contrary, there is some item that you really like, but it does not yet fit with the rest of the space.
Modern trends in interior design allow the use of bright colors and rough textures. It is better to paint the ceiling plinth frame in your favorite shade or leave it without decoration if it is made of metal. An additional decoration for the mirror for a child or teenager will be a variety of bright stickers with characters from popular films, comics and cartoons.
For a large floor mirror, you can make a massive, heavy frame.
A classic interior is characterized by pretentiousness and pomp. A white or black frame with a pattern highlighted in gold paint, artificially aged and worn, will fit perfectly here. A plain frame will fit into any interior, the main thing is to choose the right color. It can be an inconspicuous part of the decor or a bright accent.
For rectangular and square mirrors, make a frame from wood or ceiling plinth.
For more experienced craftsmen, complex frames made from ceiling plinths are suitable. They can be multi-level, made using additional parts. For example, mosaics or sea stones and shells.