The need for cladding
The base is the lower part of the external walls, which are located at the foot of the house and protect the space under the floor from the influence of the external environment. In some buildings this is a separate element that rises above the foundation, in others it is one whole. Cladding the foundation of a house solves two problems at once - decorative and practical.
Taking into account the nature of their location relative to the plane of the facade, plinths are divided into:
- Falling ones are the easiest option to use. There is no need to install drains; exposure to mechanical factors is minimal. Visual characteristics are good.
- Protruding – coming out from under the walls, they are the best choice for buildings with thin walls. The basement often has a warm, heated room. The presence of a drain is necessary, otherwise melted snow and water will begin to penetrate the foundation and destroy it.
- Flush with the wall is the most rare type of structure due to the lack of normal waterproofing.
You will find out further how you can finish the foundation of a house from the outside. Options are available in a wide price range. The ideal solution from a practicality point of view is natural stone, baked brick or monolithic concrete, but they are expensive.
Types and applications
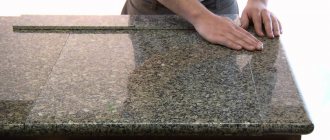
The use of stain to coat concrete improves the performance characteristics of the surface and gives a pronounced decorative effect. A beautiful surface, similar to aged natural stone or marble, looks impressive instead of ordinary concrete, and this solution is very cheap. At the same time, the wear resistance and strength of the base increases.
Stains are widely used for treating floors in premises for various purposes: industrial, utility, residential. On the street, such compositions allow you to decorate any concrete base:
- paths;
- fences;
- pool bowls;
- stairs;
- parapets, etc.
Depending on the purpose and desired result, several varieties are used:
- Epoxy stains provide maximum water protection and are effective in conditions of high humidity. They are highly toxic and therefore can only be used in well-ventilated areas.
- Acrylic stains are non-toxic and can be used for both exterior and interior work in poorly ventilated areas. They have high heat resistance and work well in areas exposed to weather conditions.
- Glossy stains for concrete - decorative compositions for interior work. The surface treated with this material looks very attractive, but its performance characteristics are low. Due to its fragility and susceptibility to mechanical damage, glossy stain is recommended for interior work under conditions of low loads on a base painted with this composition.
- Acid is a relatively new material on the market, which quickly burst into one of the leading positions among analogues. Can be used indoors and outdoors.
In modern conditions, predominantly harmless acrylic and acid compounds are used to treat concrete surfaces with stain. The latter contain inorganic salts dissolved in weak acids; penetrate well into the surface of the base and enter into chemical reactions with concrete components; can create the complete illusion of a marble surface and give a deep translucent color.
Water-based stains contain acrylic components and pigments for a decorative effect. Polymers will fill the pores and surfaces in concrete, creating a film that is resistant, but does not interfere with the vapor permeability of the base, with original uneven coloring or transparent. When using such compositions, there are no chemical reactions, the material is absolutely safe for people, animals and the environment.
What material to choose for cladding the foundation
Different materials are used to finish the foundation - there are many options
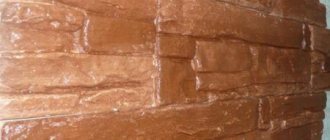
At the moment, there are many different options - all of them, to one degree or another, are suitable for cladding the foundation (its visible part). But stone is, without a doubt, the most preferable solution. This applies not only to natural material, but also to its artificial counterpart. That's right: today, facing the foundation with stone can also be done with artificial material, many do so.
What is good about natural stone?
Why should you choose it? There are reasons for this:
- Natural stone in finishing the foundation of a house is the optimal solution for suburban structures built of brick;
- Also, this option is suitable for houses whose external design will be ideally combined with stone finishing;
- Before buying a stone for cladding the foundation of a house, you need to know something about this material.
- Of course, the cost of such slabs is far from modest (not every family will be able to afford such expenses), but this solution is for developers who want to do the job once and no longer worry about the foundation of their home (at least in the next fifty years) ;
- When finishing the foundation with stone, it is necessary to have auxiliary materials so that the work is done efficiently. For example, a special glue is perfect as a fastener;
- Its peculiarity is that it responds well to shrinkage of the house structure - which cannot be said about other possible methods of fastening;
- If you choose a stone that is heavy to finish the foundation, you need to think about the supporting frame - it will serve as an additional fastening.
Covering the foundation with natural stone is a rather expensive solution, but the result is worth the investment
Why should you use artificial stone?
If natural material is not suitable, you can always use artificial material to cover the foundation
Artificial stone is often used to cover the foundation of a house. This option is more profitable in terms of cost, but compared to natural material it is less preferable.
What advantages are worth noting? They are:
- The material has an impressive range of textures and colors (the range is much more extensive than that of natural stone);
- It’s also nice that the pattern, which is an imitation of the structure of the stone, is almost impossible to distinguish from the pattern on natural material;
- Another undoubted plus: the mass of products. Artificial products do not require additional fastenings: you just need to level the surface of the foundation. Plaster will always help in this matter;
- Afterwards, the finishing material is glued without any problems - a special adhesive will help with this work.
Performing priming
All surfaces that need to be protected from plaster, such as window frames, must be covered with masking tape.
A durable and high-quality plaster coating can be obtained only with the correct use of a deeply penetrating primer in two layers. If the base part is to be painted, then only a façade primer with maximum drooping properties is used for processing. Only the use of high-quality materials and compliance with technological requirements for the preliminary preparation of the base for applying plaster can significantly increase the service life and improve the appearance.
Silicone quartz primer ST 15 Ceresit
If you plan to further perform decorative finishing work, then it is advisable to give preference to a façade adhesive or acrylic-based primer.
Type of primer composition
Features and Specifications
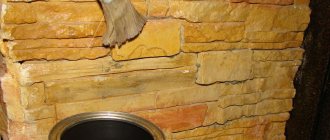
Decorative plaster of the basement of a house to look like wild stone
To decorate the base, you can use plastering to look like natural stone. For the work you will need a mixture of river sand and cement in a ratio of 1:3. The composition is diluted with water to a paste-like consistency. The thickness of the plaster coating is determined taking into account the size of the bricks and concrete blocks of the facade masonry. To reproduce the imitation of untreated stone, a dense layer of up to 3 cm will be required.
The work is performed in the following sequence:
- The base is cleaned and leveled.
- The surfaces are treated with plaster in the required number of layers.
- Screen prints are applied to the base and tapped.
- The screen mesh is removed and the seams are unstitched.
- The base is left to dry for a day.
- A primer is applied to the façade.
- Painting is carried out in natural tones.
Stages of work on the plaster foundation
- the entire area of the concrete base (on the bricks do not require) a sharp metal object (solid screwdriver) incisions are made;
- are aligned and primed surface;
- crack (masonry joints) and recesses are wetted with water and filled with cement-sand mortar;
- with dowels or staples “shoot in” chain-link fencing with a fine mesh;
- Beacons are installed. To do this in every corner of the basement and through the 1.5-2 m between them, the following work:
Driving the various forms of the cap.
- With gidrourovnya find and is drawn on the ground along the wall of a flat strip. It should go almost right up to the base, at the same time aligning it, but no closer than 2-3 cm to the most protruding part of it.
- At the point of intersection of the angle (the wall) and the strip vertically mounted peg length equal to the height of the plinth.
- The distance (gap) between the peg and the foundation “thrown” solution so as to obtain a vertical hill, attached to a building level to align it. At the same time it shall be verified vertical. Along the wall should be several of these lighthouses.
- The pegs in the corner beacons are driven by 3 nails, between which stretched lace. It will be a guide for plastering. You should now have 3 lines of shoelaces: the bottom of the cap at the top and in the middle. By the cords and beacons should be a gap of 1 mm.
- after cement mounds beacons dry, produced obryzg foundation. First, the surface is moistened with water, then with her ladle, trowel, brush with long bristles sprayed creamy mortar. The layer thickness - 5.9 mm;
- on the dried up (not dried) “scratch coat” applied primer. It consists of the same cement slurry, but a liquid;
- after “curing” the primer proceed to the next stage of plaster and a covering layer is applied. He performed more dense and plastic mixture. In this composition the ingredients are added waterproofing;
- completion - rubbing surface to give it optimum flatness and smoothness. To do this, use a grater to set them fine mesh, special float concrete with a relief surface, the usual foam. It is important to choose the right moment to wipe: I must have “grab”, but its surface should be still quite wet.
Finishing materials used
Popular materials for finishing plinths:
- plaster;
- flat slate;
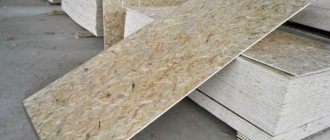
- siding (cladding panels);
- tile;
- brick;
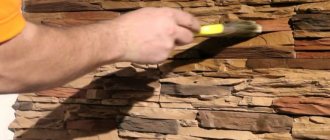
- stone (natural, artificial).
Which material is better can only be said by comparing their characteristics.
| Material | Advantages | Flaws |
| Plaster | low price, easy to use | the surface will first have to be leveled |
| Siding | light weight, work with any surfaces | need mounting frame |
| Clinker | attractive finish, durability, strength | labor-intensive preparation |
| A natural stone | labor-intensive finishing, high cost | significant weight |
| Brick | strength, durability, beauty | labor-intensive work, a sharp increase in loads on the foundation |
Which solution is needed to plaster the foundation
If indoors, you can use the compositions with the addition of gypsum, lime or clay, it is unacceptable for external works.
The circuit finishes plinth plaster.
The solution is allowed to enter only waterproofing components or plasticizers. Trade network offers many compositions for the exterior. For example, a manufacturer Knauf mixtures there are several options for the foundations. By and large, they are not much different from each other: only the percentage of the components and the admixture.
However, in this sense it is: a plastic composition is much easier to plaster the foundation for the subsequent butchering it “under a rock” or apply a decorative layer. Dry wipe with optimal sealing effect in regions with humid climate and in conditions of frequent flooding of the site. If you decide to prepare a solution on their own, in a water-repellent component can be used “Latex Professional”. This aqueous dispersion of synthetic resin is well compatible with the cement compositions. This liquid is discharged in containers of 11 liters and a weight of 10 kg is added to water when mixing the solution.
There is an opinion that the plaster is enough to cap 1: 5, but it is wrong. Such a composition quickly “fall down”. The optimum proportion for cementitious compositions is 1: 3. The sand must be sifted and certainly a career, not a river. The amount of water in the process is selected. For the layer of soil can be used more grout than a covering. The latter should resemble in consistency and cream so as to be flexible, but non-flowing.
Preparation grout
The proportions of materials in the preparation of the cement slurry.
- through a large sieve or metal net with fine mesh sieved sand, freed from stones, mud and dirt;
- if a cement brand M400, the percentage of sand - 1: 3, if the marks M500 - the 1: 4;
- a mixer (or container in which the solution will get involved) first laying the dry ingredients, mixing them;
- in water, prepared for mixing, add liquid formulations: waterproofing and plasticizing. Not so long ago, very popular for outdoor plasters used PVA glue. His was added in a small amount in the water and cement slurry took on plasticity and better adhesion.
- water is added gradually, constantly controlling the density of the mixture. If necessary, add a colored pigment.
What solution is needed for plastering the foundation?
While compositions containing gypsum, lime or clay can be used indoors, this is unacceptable for external work.
Scheme for finishing the plinth with plaster.
It is permissible to introduce only waterproofing components or plasticizers into the solution. The retail chain offers many compounds for outdoor use. For example, the manufacturer Knauf has several options for foundation mixtures. By and large, they differ little from each other: only in the percentage of components and the additives introduced.
However, there is a point in this: with a more plastic composition it is much easier to plaster the base for subsequent cutting it “to look like stone” or apply a decorative layer. Dry mixtures with a waterproofing effect are optimal in regions with a humid climate and in conditions of frequent flooding of the site. If you decide to prepare the solution yourself, then you can use Latex Pro as a water-repellent component. This aqueous dispersion of synthetic polymer is highly compatible with cementitious compositions. This liquid is produced in 11 liter canisters weighing 10 kg and is added to water when mixing the solution.
There is an opinion that 1:5 is enough for plastering a plinth, but it is wrong. This composition will quickly crumble. The optimal proportion for cement compositions remains 1:3. The sand must be sifted and certainly from a quarry, and not from a river. The amount of water is selected during the work process. For the primer layer, you can use a more liquid solution than for the covering layer. The latter should have a consistency similar to sour cream and be just as plastic, not runny.
Preparation of cement mortar
Proportions of materials when preparing cement mortar.
- sand is sifted through a large sieve or metal mesh with a fine mesh, freeing it from stones, clay and dirt;
- if M400 grade cement is used, then the percentage ratio with sand is 1:3, if M500 grade is used, then 1:4;
- First put the dry ingredients into the concrete mixer (or the container in which the solution will be mixed) and mix them;
- Liquid compounds are added to the water prepared for mixing: waterproofing and plasticizing. Not long ago, PVA glue was especially popular for exterior plaster. It was added in small quantities to water, and the cement mortar acquired plasticity and better adhesion.
- water is added gradually, constantly monitoring the thickness of the mixture. If necessary, add colored pigment.
Painting concrete: how best to do it when making garden products
Painting concrete is a very important stage for DIYers, and many of them want to learn how to beautifully and reliably paint a self-made concrete figurine, flower vase, decorative stone (short video) and other garden products.
The issue of painting concrete products was partially discussed on the pages of kamsaddeco.com in the manufacture of a two-color flowerpot (short video) and a small vase for a fountain.
Once again, it should be noted that painting concrete (short video) and concrete products is mainly carried out in three ways: introducing a colored pigment into a dry concrete mixture, painting the finished product, and combining the two previous methods.
First method: painting concrete by introducing a colored pigment into a dry concrete mixture
In this case, mineral pigments are usually used, which are oxides or salts of various metals.
For paving slabs and decorative stones on paths, inexpensive iron oxide pigments (FeO, Fe2O3, Fe3O4, etc.) are mainly used, having brown, black, red and yellow colors.
There are organic pigments and dyes (for example, aniline), but they are less resistant to ultraviolet radiation and alkali in concrete. Their advantage is that they give the product a more intense color with low dye consumption.
Since for homemade ones the most important criterion (when making concrete decor) is the minimum cost of the product, we will dwell in more detail on the use of iron oxide pigments.
Iron oxide pigments for concrete
Pigment manufacturers recommend not to exceed a dosage of more than 5%. A larger amount of introduced pigment will lead to a significant deterioration in the characteristics of concrete; it becomes less durable.
To make paving slabs last longer, 2-3% of the pigment by weight of cement is added to the solution. At the same time, it is difficult to obtain a bright color of the product and usually tiles, curbstones, and paving stones have a pale color tint.
Before introducing the pigment into the concrete solution, experts in the production of paving slabs recommend diluting it in a 1:1 ratio and leaving the pigment in a deep penetration primer (such as Ceresit) for 2 hours. There are now a very large number of primers, the choice is up to the master.
In their opinion, this makes it possible to obtain a more uniform color of the product.
In some cases, for example, when using black soot as a pigment, it is necessary to dilute it in the primer, since otherwise, due to its low weight, the soot will float in the concrete solution. If you add it without diluting it into a dry mixture, as many do with iron oxide pigments, then when stirred, the soot becomes very dusty and flies through the air.
Additional foundation sheathing tips
What else does a craftsman need to know and take into account during work, so that finishing the foundation of a house with stone (or directly with this material) not only looks perfect, but also successfully performs a protective function?
It's time to pay attention to some tips:
- Experienced craftsmen recommend working only from left to right. It is recommended to lay the stone from the corner (or from some specific element that divides the foundation) - and this is quite logical;
- To achieve maximum reliability, it is better not to abandon the use of reinforcing mesh. It is customary to attach it to the base of the house - due to such an element, the adhesive base acquires additional strength, the stone will now last an order of magnitude longer: this has already been tested several times;
- Before attaching the reinforcing mesh and finishing material, you can lay a thermal insulation layer - this will provide protection from the cold;
- Sometimes steel reinforcement is used in the work (you should choose only thin rods). Also, during the selection process, you should make sure that there are no traces of rust or corrosion on these elements;
- There are different types of plinths; there are a number of types: there are protruding ones (used for structures where the walls are thin), there are also sinking ones (thanks to these, moisture is guaranteed not to end up under the facing stone);
- A protruding plinth is an excellent solution for a house located in a cold region;
- This type of base needs protection. A special metal canopy is usually installed for it;
- You should always remember about ventilation of the foundation - if it is being finished. You don’t need to try hard for this – a couple of holes are enough (ideal diameter is 130-180 mm). But, such “windows” are made on all sides of the house at once - then the base can be used for a very long time (it’s also worth reading about how to decorate the base with stone).
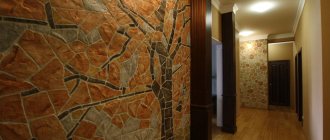
The facing stone can be different - you can choose a material that fits perfectly into the overall concept of the landscape
- A very important point: you need to choose high quality material for the work. Especially if you decide to finish with artificial stone. In this matter, much depends on the manufacturer and his integrity;
- If the price of a product is too low, you should not draw premature conclusions and immediately make a purchase. It is quite possible that there is a discount on the facing material precisely because of its low quality;
- Can good finishing materials be cheap? This is quite possible - but it happens rarely. If there is some kind of marketing campaign going on;
- That's all the advice. There are very few of them, but each is very important in its own way. If you follow these simple recommendations, the foundation will last a long time, and repairs will not be needed soon.
Results
Finishing the foundation with artificial stone is a good option today
Now every reader can imagine how to finish the foundation of a private house or a luxurious country cottage.
What material is suitable for this, why it is worth using stone, what advantages do natural and artificial stone have.
Today it is not necessary to work with your own hands - especially when there are no difficulties in terms of finances. You can always contact some construction company whose specialists will do everything you need in the shortest possible time, with a quality guarantee.
Technology
Necessary painting tool
Before painting a concrete fence, you need to prepare materials and tools for this. To work you will need:
- paint ditch;
- roller with a large fur coat;
- convenient brush for treating hard-to-reach areas;
- spray gun;
- individual protection means;
- solvent and the paint itself.
After cleaning and processing is completed, it’s time to paint the fence surfaces. But first you need to study the attached instructions and the composition of the material. This will avoid problems with its application. It is better to paint a new fence after its shrinkage has passed, that is, approximately next year. The principle of work is the same both for painting with an unnatural color and, for example, to imitate stone or brick.
First you need to carefully paint hard-to-reach places with a brush. Then the main surfaces are treated with a roller or spray gun. A sprayer, of course, will allow you to complete the job faster, but will significantly increase paint consumption. Therefore, it is recommended to use the roller for the first time. Depending on the composition, the drying time of the paint lasts from 12 hours to a day.
Then it is necessary to re-treat the surface. This time it is better to use a sprayer, it will make the coating more uniform and smooth. This is enough to obtain a high-quality protective layer. But if necessary, you can apply several more layers.
It takes several days for the paint to dry completely. It is better if the weather is clear and dry at this time. When working with a spray gun, it is necessary to keep it at one not too great distance from the surface being treated. This will allow you to get a homogeneous, even layer and avoid drips.
The protective coating of concrete fences must be renewed regularly. This will significantly increase their service life. In addition, painting a concrete fence will make it more attractive in appearance and allow you to hide minor defects. If you have the desire and imagination, with the help of paint you can get a structure that is not similar to your neighbors’ fences of the same type. It will delight you and attract the attention of passers-by.
How to prepare the foundation for the application of the plaster
Driving insulating plaster.
- if the foundation is laid of blocks or bricks must be cleaned seams. The narrow spatula or other suitable instrument from each well is removed cracked cement-sand mortar. After this brush with stiff bristles to be carefully “sweep” fragments, sand and dust;
- if the house is on a concrete ribbon that during its operation on the foundation can be formed small and rather deep cracks. Here the preparation for the application of the plaster is somewhat different: all clearances should proshtrobit, that is, to destroy the edge of the slots as far as it lends itself to concrete. Thus, all the loose places will be eliminated and will be a solid foundation. Next, carefully crack “swept” dry brush;
- preparation of any foundation assumes obligatory priming deep penetration of the composition. These liquids are available in containers of different sizes and are inexpensive. But if you can not buy a primer for the treatment of all of the foundation, will be enough to put structure on the slit and place chips. Make it a must as more reliable plaster “grab” to the surface of the base;
- if over time the foundation was deformed and there were projections (small, not requiring radical measures - tightening and installation of concrete cages), the tape using the plaster can be leveled. But first protrusions are required to remove as much as possible.
How to prepare the foundation for applying plaster
Scheme of thermal insulation plaster.
- If the base is made of blocks or bricks, the seams should be cleaned. Using a narrow spatula or other suitable tool, remove the dried cement-sand mortar from each recess. After this, you need to carefully “sweep out” the fragments, sand and dust with a brush with stiff bristles;
- If the house stands on a concrete strip, then during its operation small and rather deep cracks may form on the foundation. Here, the preparation for applying plaster is somewhat different: all the gaps should be grooved, that is, the edges of the cracks should be destroyed as much as the concrete can be done. In this way, all weak points will be eliminated and a strong foundation will remain. Next, the cracks are carefully “swept out” with a dry brush;
- Preparation of any foundation requires mandatory priming with a deep penetration compound. These liquids are available in containers of various sizes and are inexpensive. But if it is not possible to buy a primer to treat the entire foundation, it will be enough to apply the composition to the cracks and chipped areas. This must be done, since the plaster solution will “grab” more reliably on the surface of the base;
- if over time the foundation has deformed and protrusions have appeared (small ones that do not require radical measures - tightening and installing concrete frames), then the tape can be leveled using plaster. But first you need to remove the protrusions as much as possible.
Composition of a cement mixture for finishing a wall with a stone look
In order for a stone wall to be formed, it is necessary to apply at least two layers of cement mixture to its surface.
Similar work was performed in the manufacture of concrete sculptures. For comparison, you can find this information in the article. They are also based on metal reinforcement and various meshes attached to it.
Prepare the composition of the cement mixture. It includes M400 cement (1 part) and 2 parts sand. Liquid detergent (Fairy type) – 1…2% by weight of cement. Add water to the dry mixture in such an amount that the solution resembles medium sour cream. But at the same time it did not spread on the trowel.
Since the mesh has a large cell, fine crushed stone or granite screenings can be added to the solution of the first layer. This is for those places where there are dips and large uneven areas.
This additive will save cement and increase the strength of the first layer.
Don’t forget to clean the old surface from dust before starting to decorate the wall with stone. We use acrylic or latex primer with its loose, porous structure.
Plastering the basement of a house with your own hands
The basement is the lower part of the building down to the floor of the first floor. As a rule, it protrudes beyond the plane of the load-bearing wall, forming a step. Often it acts as an enclosing structure for basements or semi-basements.
In cottage construction, the base is assembled from reinforced concrete foundation blocks, monolithic concrete or red ceramic bricks. These materials need protection from rain, snow, seasonal temperature changes, and they should not stand out against the background of the facade. Therefore, in most cases, plastering the foundation of a house is done with your own hands.
Painting concrete to look like stone
Modern fashion trends are widely visible not only in the construction of houses, but also in their decoration. So recently, stone-like painting has become very popular. At the same time, you can paint not only decorative stamped concrete, but also the most common building concrete.
Recently, painting to look like stone has become popular. Decorative stamped and most ordinary concrete can be painted.
You don't need to be a wizard to turn your house into a stone one. All you have to do is pick up a brush or roller and use the tips offered by experts.
In the same way you can decorate the fence and garden path. You can do this yourself.
Stages of foundation plastering work
- notches are made over the entire area of the concrete base (this is not required on bricks) with a sharp metal object (a strong screwdriver);
- the surface is leveled and primed;
- cracks (masonry joints) and recesses are moistened with water and filled with cement-sand mortar;
- using dowels or staples, the chain-link mesh with a fine mesh is “targeted”;
- beacons are installed. To do this, the following work is performed in each corner of the foundation and 1.5-2 m between them:
Diagram of various plinth shapes.
- Using a hydraulic level, an even strip is found and drawn along the ground along the wall. It should go almost close to the foundation, simultaneously leveling it, but no closer than 2-3 cm to its most protruding part.
- At the point of intersection of the corner (wall) and the strip, a peg with a length equal to the height of the plinth is installed vertically.
- The distance (gap) between the peg and the foundation is “filled” with mortar so that a vertical mound is formed, to which a building level is applied to level it. At the same time, the vertical is verified. There should be several such beacons along the wall.
- 3 nails are driven into the pegs at the corner beacons, and a string is pulled between them. It will serve as a guide for the plaster. There should be 3 lines of laces: at the bottom of the base, at the top and in the middle. There should be a gap of 1 mm between the cords and the beacons.
After the cement mounds-beacons have dried, the foundation is sprayed. First, the surface is moistened with water, then a creamy cement mortar is sprayed onto it with a ladle, trowel, or brush with long bristles. Layer thickness – 5-9 mm; A primer is applied to the dried (but not dried) “spray”. It is the same cement mortar, but more liquid; After the primer has “set”, proceed to the next stage of plaster and apply a covering layer. It is made with a thicker and more flexible mixture. Waterproofing ingredients are added to this composition; the final work is rubbing the surface in order to give it optimal evenness and smoothness. For this purpose, graters with a fine mesh installed in them, special graters for concrete with a relief surface, and ordinary polystyrene foam are used.
It is important to choose the right moment for rubbing: it should already “set”, but its surface should still be sufficiently wet.
you can do it in different ways: embroider it “like a brick or stone”, make the surface embossed (decorative), leave it smooth. You can lay tiled or porcelain tiles on a concrete surface. All these technologies are worthy of attention and are selected depending on the aesthetic compatibility of the facade. But each of them is able to give the house individuality and decorate it.
Water based paints
Let's return to painting the surface of a concrete product. Most often, water-based acrylic paints are used for this purpose.
To ensure that the paint penetrates deeper into the pores of the concrete, 10-15% acetone is added to the paint. This coating lasts longer on paths. If there are bright artificial stones somewhere in the photographs, then most likely they are painted that way.
In other cases (when there is no abrasion factor), an ordinary aqueous solution is sufficient for painting. Some artists use oil paints, but they are inconvenient to use because they take a very long time to dry.
If you impregnate a stone for a protective purpose, then you cannot use a deep penetration primer, as well as paint it with nitro paint. A thin, non-breathable film forms on the surface, which will gradually peel off with changes in temperature and humidity, sometimes with the top layer of concrete.
There are also acid dyes. They penetrate into the surface, react with calcium salts and create a unique color pattern on the surface. Depending on the composition, concentration and exposure time of the dye, different colors and shades can be obtained. A peculiarity of the use of such dyes is that the surface after treatment must be thoroughly rinsed with water, eliminating acid residues and efflorescence. It is advisable to treat the surface with a water-repellent agent after the surface has completely dried.
Plaster cladding of the plinth: advantages and disadvantages
The base of the house is regularly moistened by rain, melt water and snow. Finishing with plaster makes this part of the building as resistant to negative factors of this type as possible. Here we can talk about resistance to chemical corrosion and direct exposure to ultraviolet radiation.
A thick layer of plaster provides additional thermal insulation. The cement base makes the coating moisture resistant, and the reinforcement eliminates the possibility of cracking during subsequent use. Multi-layer finishing guarantees that this coating can be used for a very long time.
Characteristics of plastering plinth
no need to use special equipment for installation;
wide selection of colors and textures;
ease of installation;
high maintainability of the coating;
affordable price.
insufficient degree of insulation;
moisture permeability;
insufficient strength (compared to other finishing options);
gradual decrease in strength level.
Important! To ensure the maximum service life of such a coating, it is very important to follow the established rules for installation work
Concrete paint manufacturers
The main difference between paints is their chemical composition. All the characteristics of the paint coating depend on it. Nowadays there is a huge selection of paints of all colors and textures on sale.
Mizar Rezolux Profi-52
This enamel is intended for painting concrete floors and stairs. It is characterized by increased frost resistance - the minimum permissible operating temperature reaches -15°C. While similar products (which include, for example, the popular Tikkurila Betolux Aqua) are not recommended for use at temperatures below +5°C.
Mizar Rezolux Profi-52 is suitable for painting concrete surfaces inside residential and non-residential premises (warehouses and garages), as well as interfloor and street stairs. For example, one of the largest housing developers in Russia uses Rezolux Profi-52 to paint public areas and staircases.
Enamel can be used not only for painting concrete, but also furniture, doors, wallpaper for painting and other surfaces. It has excellent wear-resistant, water-repellent and strength properties. The cost of 1 kg of “Mitsar” Rezolux Profi-52 is 220 rubles. And this is four times cheaper compared to the popular Tikkurila Betolux Aqua enamel.
The St. Petersburg manufacturer - the Mizar company - is notable for its vast experience in the development and production of coatings with increased wear and weather resistance (exposure to high/low temperatures, precipitation, etc.).
For example, Mitsar enamels with anti-corrosion and acid-resistant properties were used in the construction of the Leningrad and Kola nuclear power plants. Also, the manufacturer’s materials have the lowest (up to 5 times!) price among competitors with the same or higher parameters.
Therefore, paint and varnish materials of the Mizar company regularly win tenders and are actively supplied to enterprises within the framework of the State Defense Order.
Dufa Betoplast
Dufa Betoplast – polymer paint for concrete. The price is about 900 rubles. per liter, consumption: 10 m 2 /l. Apply with a brush or roller. It withstands mechanical stress well, is plastic, and can withstand high temperatures (up to 50 degrees).
Euro 3 Matt (Tikkurila)
Price: 300 rub./l. This is a frost-resistant paint for concrete. Apply to the surface to be painted using a sprayer, roller or brush. It is universal, used for painting not only concrete, but also wood, brick, and plaster surfaces. Consumption: 10-12 m 2 /l.
Master Good
Highly elastic paint. Average consumption – 190-250 g/m2. Not recommended for covering concrete floors. It is best to apply this paint in two layers.
Tex Pro
This is a washable paint that is used in rooms with high humidity. Creates a permeable protective coating. The paint consumption is 9-11 m2/l, it dries in one hour at normal humidity and room temperature. Its color is white, but you can add color if you wish. Able to withstand constant moisture.
Novbytkhim
Cost: 1500 rub./l. Paint with good resistance to chemical and mechanical damage. It is usually used in warehouses and garages. Retains color well. Can be applied in 1-3 layers.
Etapi robot on plaster foundation
- all over the entire area of the concrete plinth (nothing is needed at all) using a sharp metal object (a screwdriver) to make notches;
- the surface is verified and primed;
- cracks (seams of masonry) and grooves are wetted with water and filled with cement-stained soil;
- with the help of dowels and staples, the chain-link mesh with a split edge is “adjusted”;
- Beacons are installed. For which steps are placed in the skin foundation and 1.5-2 m between them:
Scheme of different forms of the base.
- For additional hydraulic levels, find out and climb along the ground along the walls and along the smudge. You must walk right up to the foundation, immediately checking it, but not closer than 2-3 cm to the most protruding part.
- At the point of the webbing of the corner (wall) and the smudge, a pin is installed vertically, equal to the height of the plinth.
- The space (gap) between the joint and the foundation is “filled” with a split so that there is a vertical mound, before which heavy rhubarb is applied for its alignment. The vertical suddenly vibrates. There must be a handful of such lighthouses.
- At the pin of the heel beacons, 3 pins are hammered in, between which the lace is stretched. This will serve as a reference point for plastering. There may be 3 lines of laces: at the bottom of the base, at the top and in the middle. Between the cords and beacons there is a gap of 1 mm.
- After the cement hump-beacons dry out, the foundation is sprayed. Wet the surface of the surface with water, then sprinkle creamy cement grit on it with a ladle, trowel, or brush with long bristles. Thickness of the ball - 5-9 mm;
- primer is applied to the dry (not dry) “brush”. Vin is of the same cement grade, but more rare;
- After “flashing” the primer, proceed to the next stage of plaster and apply a paintball. The wine turns out to be thicker and more plastic. Hydroisolating ingredients are added to this warehouse;
- The final steps are to rub the surface to achieve optimal evenness and smoothness. For this purpose, vikorist graters with a fine mesh inserted into them, special concrete graters with a relief surface, and standard polystyrene foam are used. It is important to choose the right moment for grinding: you are guilty of “shopitis”, but the surface is guilty of buty sche dosit voloyu.
can be carved: embroider it “under the whole or stone”, make the surface embossed (decorative), make it smooth. Behind the concrete surface you can lay tiles or porcelain tiles. All these technologies are carefully chosen and selected in accordance with the aesthetic appearance of the façade. They can also be used to add individuality and beautify your home.
Advantages and disadvantages
Finishing the base with plaster is the most popular method, but like any construction technology, it has a number of advantages and disadvantages:
Advantages
- Plaster can be applied both on a clean base and on insulation.
- The plaster mixture is easy to prepare at home; you can buy it ready-made in bags. Application does not require special and expensive tools. All work can be done with your own hands.
- Huge selection of dry textured plaster mixtures. The finished surface can be painted in any color, which allows you to create a unique facade for each home.
- High coefficient of vapor permeability. The walls breathe without accumulating moisture in the thickness of the building structure.
- Affordable price. Reasonable prices for materials and work per square meter.
Flaws
- The service life of a plastered plinth is much shorter than that of a stone one.
- In some cases, the plaster layer is not strong enough. It can be destroyed or damaged. Even a small chip or crack gets water, which gradually destroys the plaster layer.
- Ordinary cement-sand mortar absorbs moisture. Ready-made complex plaster mixtures have a lower moisture absorption coefficient, but still not sufficient. Therefore, the finished surface is painted with special façade water-despresion paints.
- In its pure form, plaster freezes. There are heat-insulating types of plaster mixture, but they do not give a good result without the use of sheet insulation.
What is the best plaster for the plinth. There is no direct and unambiguous answer to this teenager. Plastered mixtures can be divided according to composition and texture of the finished surface.
Example of textured plaster
They are divided according to their composition:
- Plaster based on Portland cement and sand. An inexpensive material that is used for the first leveling layer, exclusively on a clean stone or concrete base. It is also possible to plaster the base using a mesh and then apply a second finishing layer or paint it with façade paint. You can buy a ready-made mixture or mix the solution directly at the construction site.
- Portland cement-based plaster with additives that allow it to be applied to surfaces lined with basalt mineral wool or polystyrene foam. Used to obtain a base layer or as the only finishing material.
- Plaster based on acrylic resins. It can be applied either to a clean concrete or brick surface or used for “wet facade” technology. It is moisture resistant and does not crack due to seasonal temperature fluctuations. Due to the presence of mica, small stones or flax fibers in the composition, it is suitable for creating a decorative textured surface.
- Silicone plaster. The most expensive and high quality material. It is elastic and durable, does not collapse due to shrinkage deformation and seasonal temperature fluctuations. It has a high coefficient of vapor permeability, which allows the base to “breathe”. Used only for the final decorative coating of the facade.
Classic smooth
The first base leveling layer is made of cement-sand plaster or plaster with additives. The second layer of finishing facade putty. Then the base is painted.
Decorative
A more effective option. Due to additives in the solution or mechanical action on the surface, a relief pattern is obtained. There are several types:
- "Bark beetle." A popular mixture for finishing the base. After application, an original surface is obtained, covered with small grooves;
- A composition that imitates a surface covered with granite or marble chips;
- "Lamb." The surface of the base becomes rough to the touch;
- “Venetian”, After application, the effect of cladding the base with large pieces of marble is created.
How to paint concrete to look like stone - step by step
- We apply the acid dye with any available tool - it can be a roller, a brush, but it will be most convenient to spray the substance with a spray gun or any sprayer. A thin layer is enough, but there should be no gaps.
- Immediately after applying the dye layer, rub it into the surface with a stiff brush.
- Leave for 6-8 hours for a complete chemical reaction between the dye and concrete.
- We rinse the surface very well with water. It's better to use a hose, but you can also pour water in buckets.
- Without making much effort, rub the concrete a little with a sponge.
- Leave the area until completely dry.
- If the color is not bright enough, spray a second layer of acid dye.
- If you are satisfied with the color, you can apply a second layer of the substance only to some areas of the site - to obtain the desired color differences.
- Sometimes dividing lines are applied to the site to imitate the boundaries of stones.
- The second time you can apply a dye of a different color. In these places, immediately after application, rub the dye into the concrete with a brush. There will be a slight hissing (reaction), you need to rub in until it stops.
- We try to distribute the acid dye evenly over the area.
- Leave the area for another 6-8 hours and repeat abundant rinsing with water.
The site is ready. And here are the options for already painted concrete platforms.
To create dividing lines that imitate stone or tile, apply adhesive tape to the surface.