Methods for painting lacquered furniture, general recommendations and nuances
Over time, even the most durable and reliable interior items lose their original appearance, become shabby, and various defects appear on them. Painting furniture will help transform it, change it beyond recognition. How to paint lacquered furniture interests many craftsmen who decide to restore old chests of drawers, tables or cabinets. Before work, it is recommended to familiarize yourself with all the nuances in order to avoid mistakes and achieve the best result.
We fix minor defects without removing old varnish
There are several ways to restore polished furniture if there are minor defects:
- Dull color and minor stains can be removed using a product made from orange oils and intended for wood care. To ensure that the product is distributed evenly, it is applied using a spray bottle, after which you take a cotton cloth and rub the surface.
- To get rid of stains, use a retouching marker, wax, or denatured alcohol. At the first stage, the surface is degreased using a weak solution of dishwashing detergent. After the moisture has dried, apply alcohol to a cotton swab and wipe the stains. Deep scratches can be removed with a marker. To restore shine, apply wax to the surface and rub it with a rag.
- Irregularities formed by small scratches are cleaned using a manicure file.
- If the wood is swollen as a result of moisture, rub the swelling area with a mixture of olive oil and salt. Leave for 30 minutes. During this time, salt absorbs moisture, and olive oil makes the wood fibers elastic. When the mixture is dry, remove it, apply wax and polish.
- Chips are removed using wood putty. The material is applied to the chip and the surface adjacent to it. After drying, the coating area is sanded using fine-grain sandpaper.
To refresh the polish, you can use the following solutions:
- flax oil, turpentine, vinegar in proportions 2:2:1;
- turpentine, alcohol, 10% soap solution, drying oil, shellac, water in proportions 25:15:1:5:4:45.
Please note: Exterior concrete paint
Background for painting furniture
You can determine that interior items require repairs by their appearance. A change in appearance during long-term use is the first sign. Darkening appears at the place of the carving, and a mesh forms on the surface of lacquered furniture.
Sometimes minor damages add value to interior items and they become real antiques. If the flaws, abrasions, or other visual defects are more significant, the furniture requires restoration. You can entrust it to specialists or do it yourself at home. It is possible to update the furniture so that the wood structure remains visible as before. You can repaint it a different color, and the product will look completely different. The only caveat is that the texture of real wood in this case will be hidden under a layer of paint. In order for the products to look beautiful, it is necessary to properly prepare the surface and select dyes. It is important to familiarize yourself with the mistakes that craftsmen often make and do everything to prevent them.
Seal the cracks
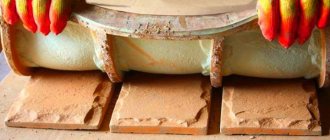
The appearance of cracks on pieces of furniture made of chipboard, as a rule, is facilitated by the ingress of moisture, they are also formed due to exposure to heat or frequent opening and closing of doors without holding them, or slamming doors. You can remove this defect yourself without resorting to outside help.
To work you will need a syringe with a needle, clamps, and PVA glue.
Fill the syringe with PVA glue and put on the needle. Fill the entire crack gap with glue. We attach a clamp to the plane from the side where the crack appeared and tighten it. Remove excess glue with a napkin. Leave it for a day or two. After time has passed, we continue restoration work.
You can get rid of cracks using putty.
Apply the mixture to the surface with a spatula in two layers. We distribute the first layer equally evenly on the surface. We wait for it to dry, apply a second layer of putty, and also let it dry.
Main difficulties and mistakes
Common mistakes made by craftsmen during the restoration of lacquered furniture:
- Incomplete removal of the old coating is the most common mistake. It is necessary to get rid of the old varnish completely, sparing no effort or expense. Even a small part of the previous coating will appear after restoration and spoil the appearance of the product;
- Excessive haste - you must carefully study the instructions for dyes and various products that remove old varnish. Failure to comply with the timing can ruin the result;
- Inattention also often prevents craftsmen from painting furniture efficiently. Flaws and cracks noticed in time can be puttied;
- Uneven or excessive application of paint - many craftsmen try to apply paint in a thick layer, which later leads to the appearance of bumps and drips;
- Skipping an important step - grinding. Many people mistakenly believe that removing the old coating is enough; the surface of the products is already quite flat and smooth. This opinion is wrong. Sanding is an important part of the furniture restoration process. The surface becomes smooth, the paint adheres more evenly and better, and lasts longer.
Tips for painting furniture
In order to paint furniture, it is not necessary to seek the help of specialists. Using the tips and instructions below, you can easily do it yourself.
Primer, like paint, can be applied to the surface in various ways - with a brush, roller or sponge.
Before you start painting furniture with your own hands, the product should be placed at a comfortable height for you.
Working with a roller provides higher productivity, but the quality of the coating will be slightly worse than when painting with a brush. It is advisable to use a roller when painting large flat surfaces.
The technology for painting furniture is as follows: a roller soaked in paint is placed on the surface to be painted and, with slight pressure, rolled several times over the same place. Stripes of paint applied with a roller should overlap one another with an overlap of 30-40 mm. Applying the paint to part of the surface in this way, it is shaded using the same roller with uniform parallel movements.
When applying paint, the brush is held with a slight inclination to the surface; it is not completely immersed in the paint, but only half the bristles. Excess paint is removed from it using the edges of the can. The paint is applied to the surface in wide stripes, light strokes, without strong pressure on the brush.
Stages of work execution
Restoring the paintwork of furniture goes through several stages. First you need to remove the layer of old varnish, then sand and degrease the surface, and apply paint.
Removing varnish
How to paint lacquered furniture so that it looks well-groomed? Removing varnish is one of the most important steps in the process of painting lacquered furniture.
There are three popular methods:
You can remove the old coating mechanically using sandpaper, a steel brush, or sand the surface with a special grinder. The chemical method involves removing old varnish from the surface of furniture using a powder or mixture called “removal”:
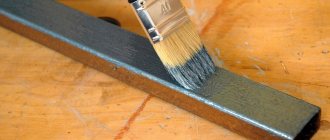
- The product is applied with a brush to the surface of the product;
- Cover the top with plastic wrap and leave for 3-4 hours;
- After removing the film, remove the old coating using a spatula.
With the thermal method, the surface of the product is heated with a hair dryer or blowtorch. Remove melted varnish with a knife or spatula. With any chosen method of removing varnish, you must take care of safety: wear a protective suit, gloves, and goggles.
Cleaning and polishing the surface
Experts recommend disassembling the furniture into parts before starting work. This will allow you to process the surface of each element as efficiently as possible. Replacing old, worn-out fittings in disassembled furniture is much easier. You can sand the surface of the furniture yourself using a special tool or sandpaper. It is also necessary to get rid of minor defects. At the final stage, an antiseptic is applied.
The next stage is priming and puttying the surface. Transparent products will preserve the fibrous structure of the wood. To achieve this result, apply a minimal amount of primer. Usually putty is applied to the product in an even thin layer. When you need to achieve a perfectly smooth surface, the product is applied several times. After this, leave the product until completely dry. The surface is rubbed with fine sandpaper and coated with primer again.
Degreasing
After finishing cleaning and polishing the surface of the furniture, they begin to degrease it. It is necessary so that the paint lays on the surface in an even layer. Degreasing will also increase the service life of restored furniture; the paint will last a very long time. The means for this procedure are different. Any detergent will do. Powder, dish soap or soap is diluted in water and the surface is thoroughly cleaned. After this, wipe with a cloth moistened with clean warm water and wipe dry. An alcohol solution will also help degrease the surface of the product, and vinegar will do an excellent job of removing dirt and grease.
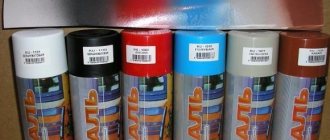
Paint selection
It is important to choose the right coatings for furniture. Water-based paints have proven themselves to be the best. These products include acrylic and thixotropic paints. Acrylic - does not have a strong odor, is diluted with water, and also has good stability. Thixotropic - dense, when it dries, it becomes like plastic.
If it is important to emphasize and preserve the structure of the wood, the furniture is varnished. It is also suitable as a finishing coat after paint. Interior items will acquire a pleasant shine, the surface will become more durable and hard. There are varnishes:
- Water-based – dries for a long time, non-toxic, suitable for all types of surfaces;
- Nitrovarnish has poor wear resistance, so it is only suitable for painting minor parts;
- Polyurethane – diluted with solvent, good wear resistance;
- Shellac is the most popular type, but expensive. Shellac creates an attractive gloss on the surface.
Painting
Before repainting furniture with your own hands, you need to seal the elements that will not be processed. The best option would be masking tape. It will perfectly protect the surface from paint and will not leave marks after removal.
Furniture painting process:
- All furniture elements are painted separately. If you do not have experience in restoring interior items, it is recommended to use a roller. With its help, the paint will be more evenly distributed over the surface of the product;
- When the drawers, shelves, and doors are painted, proceed to the main surface. The product is applied carefully so that there are no smudges;
- Leave until completely dry;
- Paint the surface one more time. Repeated application will allow you to achieve the best results in coloring;
- After drying, begin assembling the furniture.
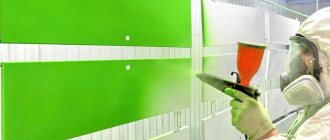
You can paint interior items using a spray bottle. It will help to distribute the paint evenly over the surface, significantly saving it. The process of restoring furniture with a spray gun will be much faster than using a brush or roller.
How to choose the right paint
Anyone who decided to paint furniture themselves probably wondered how to do it correctly. Interior items made from chipboard absorb moisture to a lesser extent than wood. It will take a long time for them to dry.
Chipboard will need less primer than wood.
So how to paint the cabinet? What paint should I use? The best option would be to use water-based alkyd or acrylic paint. It has many advantages - it has a rich shade, is odorless, which is of great importance when you work indoors, and is easily diluted with water. It is easy enough to wash off to correct inaccuracies during painting. Working with her is a pleasure. Once the paint dries, it will become stronger. Keep this in mind as you layer. Regular wood paint or spray paint will also work.
There is a wide variety of acrylic paints with a metallic or pearlescent effect.
To thoroughly paint, use varnishes. They will give the furniture an antique effect. She will look great. The plane must be painted in several layers, first allowing each layer to dry. This is not their only property.
Varnishes help fix the color and protect against minor defects.
You can paint the cabinet in different colors, such as a light base and multi-colored details. To achieve the desired color, add a tint to the white paint. When decorating a children's room, use all your imagination. Having decided what shade you need, apply paint to a small area of the furniture, so you will understand what color paint you will need and what its brightness will be.
Each manufacturer produces the appropriate primer for their paint, and it is better to use this particular primer.
Do-it-yourself restoration of lacquered furniture at home
Hi all! I can say with confidence that even old Soviet lacquered furniture has a second chance. It can be restored and given a completely new appearance without changing the design. Today we’ll talk about such a procedure as restoration of lacquered furniture.
We are mainly talking about furniture made of wood. Although we cannot exclude the possibility of restoring structures made of chipboard, veneer boards and other materials, on top of which several layers of varnish were applied.
You can restore polished lacquered furniture to its original appearance, or even improve it, with your own hands. Work carried out at home requires accuracy, attentiveness and consistency. But the result in the end may pleasantly surprise you.
Briefly about the main thing
Repainting a cabinet a different color on your own is a simple job that only requires care, time and a set of necessary tools. The process is divided into several stages. The main task is to create a rough surface that helps the paint lie evenly and tightly. The cabinet is first cleaned, defects are repaired and primed.
The main problem may arise when removing the old varnish or film layer. It is solved mechanically, chemically or thermally. The paint is applied in several layers, the number of which allows you to emphasize or hide the texture of the base. For the finishing coat, choose wax or water-based or polyurethane-based varnish.
Read later
We will send the material by email
Calculation of sliding wardrobe doors for self-assembly: formulas and programs
Restoring lacquered products is a great way to breathe new life into old furniture, providing it with excellent external characteristics. If the structure has multiple scratches and damage to the varnish, it will be enough to remove it, then apply a new layer and restore the polishing with special compounds and tools. But it is not always possible to limit yourself to minor damage.
Over time, even very high-quality varnish darkens. Because of this, a cloudy effect is observed on old furniture. The surface is no longer glossy as before. As a result, the furniture loses its presentability.
If the varnish has darkened, restoration will require removing the old worn coating and applying a new one. All this can be done with your own hands. Such alterations usually do not cause serious difficulties. Moreover, it is often possible to do without sanding by using special means for removing varnish and paint.
How to paint furniture with varnish: useful tips
Varnishing, that is, coating with varnish, is one of the most popular ways of transforming unpainted wooden furniture, protecting them from moisture and dirt. Varnishes come in glossy, semi-gloss, matte, semi-matte.
Varnish creates a hard, abrasion-resistant, water-repellent film on a wooden surface and is often used as a topcoat on decorated furniture.
If you plan to varnish the furniture after treating the surface with liquid stains, it is advisable to use a wood conditioner to prevent their uneven absorption. Using gel and paste stains will also help prevent stains.
Many novice decorators are wondering how to varnish furniture with their own hands at home, without the help of professionals. Useful tips will help you do this easily and quickly:
- After each coat of varnish has dried, lightly sand the surface. Always sand in the same direction. This can be done by hand or using a low-power sander that will not damage the wood.
- After sanding, carefully remove dust with a cloth, especially before applying the final coat of varnish. Make sure that there is no sanding dust in the room, and to be on the safe side, it is better to vacuum and spray the floor with water.
- On the finished product the varnish is completely transparent. Leave it in a clean, dust-free, warm room for six hours. Before using the item, the varnish must be completely dry.
Water-based varnishes can only be stored, transported and used at temperatures above zero degrees.
Assessment of the degree of coating wear
After looking at numerous photos before and after restoration, many people are inspired. After that, they try to work on improving their own furniture.
I can say that it is no more difficult than restoring a mirror. But it’s not easier compared to repairing wooden chairs. We have already talked about these procedures, and therefore I suggest you follow the links and read our materials, leave reviews and share your personal experience.
At the first stage of restoration, it is necessary to visually assess the current condition of the surfaces. The first sign is visual aging. Darkening often appears near threaded connections, the varnish cracks, and a large number of chips can also form. The aging of the varnish and the end of its life cycle are indicated by small meshes on the surface. Yes, small defects do not always significantly affect the overall picture.
But there are also cases when simply removing the old layer and applying a new coating cannot be done.
Consider whether restoration makes sense. If yes, then get to work.
Application of primer
The primer is applied to ensure high-quality adhesion of the furniture surface to the paint. It also protects furniture from moisture, temperature changes, and reduces enamel consumption. When using acrylic, it is necessary to treat the doors and sides with the same primer. If painting is carried out with alkyd enamel, it is worth purchasing an appropriate base. Their components fit perfectly together.
The primer is applied with a brush or roller in a thin layer and left to dry. After this, the staining procedure begins.
Pre-treatment of the surface before painting
Material selection
Many home craftsmen are sure that you can take the first solvent you come across, or even use ordinary alcohol, and then remove the old peeling varnish with a swab. And then take any varnish and then cover the furniture with it.
For restoration, use special compounds designed to remove the old layer and apply a subsequent new decorative and protective coating.
There are several materials that even the masters in the videos often forget to mention, although they use them exactly.
Shellac polishes
. Varnishes that can perfectly highlight the texture of wood and provide an original shade. In the field of restoration of lacquered furniture, polish is called one of the oldest materials used. The structure of this varnish resembles water. To restore furniture, you need to apply from 40 to 60 very thin layers. It's long and difficult.
Nitrocellulose varnishes
. Often professionals talk about them. Although in relation to home use this is a categorically incorrect recommendation.
This varnish is used for coating and restoration of surfaces with a fairly large area. For professional application, special sprayers are used to distribute the product over the surface. Here the main role is played by high application speed. If you use a regular paint sprayer, bubbles will remain on the surface.
Nitrocellulose varnishes are not suitable for restoration at home.
So we immediately reject this option.
The best option
In fact, the home handyman has only one option.
Drying rules
Paint or varnish takes a long time to dry. You need to take care in advance about the place where this will happen. The room must be non-residential and well ventilated. It is advisable for the furniture to dry away from children and animals, who could accidentally disturb the appearance of the coating. Some varnishes and enamels, when dry, emit harmful fumes that can be harmful to health.
After the first layer has dried, apply the coloring composition again - this will create the most uniform and durable coating.
On average, paints and varnishes require one to two days to dry. The instructions for the paint or varnish indicate the optimal drying time at certain temperatures. As a rule, the temperature regime for drying is considered favorable at 20-23 degrees Celsius.
The lower the ambient temperature, the longer it will take the furniture to dry.
Materials for making kitchen furniture: which ones are better to choose
This is pentaphthalic varnish
. Very easy to use. The optimal choice for working at home. Does not require special technique for application. Dries quickly. When applying it, it is recommended to use at least 4 layers. Moreover, the varnish itself, diluted 10-15% with a solvent, acts as a primer. To create a semi-matte surface, it is better to use tampons. For glossiness, it is recommended to use brushes, and then carefully sand the surface.
Choose a color to suit your taste. These can be colorless coatings, as well as varnish with a certain shade. This largely depends on the furniture design and the result you want to get in the end.
In general, I would like to recommend a separate material on the choice of varnish at the link. There this issue is considered in more detail. Really useful, informative and essential if you are planning on doing any paint work at home.
Which furniture varnish to choose: main types
The wide range of paint and varnish products presented in stores and construction supermarkets can cause confusion and make it difficult to choose the necessary varnish, especially when you consider that not only varnishes, but also impregnations and glazes can be used to coat wooden furniture surfaces.
To protect the furniture surface, you can use not only furniture, but also parquet and yacht varnishes. Varnishes vary in composition. They are: oil, polyurethane, epoxy, alcohol, alkyd, acrylic, nitro varnish.
To understand which furniture varnish is right for you , we suggest that you read the description of the main types of varnish for wooden furniture.
Oil varnishes add shine to the surface, but change, darken the color and turn yellow over time. They dry slowly, and to give the surface a mirror-like smoothness, you need to use a linen swab moistened with alcohol. These varnishes can be applied with a brush.
Alcohol varnishes based on shellac and rosin were most often used in carpentry in the past. These varnishes not only protect the surface, but also highlight the color and grain of the wood. This coating dries quickly, but the surface is not sufficiently moisture resistant. This varnish is applied with a cotton swab, previously wrapped in linen.
Nitrovarnishes are toxic. They are applied with a swab, brush or spray. They are colorless, dry quickly, reversible and easy to renew, therefore they are widely used in furniture production.
Alkyd varnishes take a long time to dry, they are waterproof, toxic, and come in different colors - from colorless to black. It is preferable to use them to cover garden furniture. Apply with a brush or spray.
Water-based varnishes - acrylic and polyurethane varnishes - are the latest generation of paint products, a versatile and environmentally friendly option. They have a low content of harmful solvents and are odorless. Such varnishes are easy to apply, dry quickly, are resistant to moisture, abrasion, scratches, and do not turn yellow. Apply with a brush or roller. They sand well.
Tools and materials
To carry out restoration work, you will first need to not only select a varnish, but also prepare some necessary materials and tools.
Of the main consumables you need to take:
- nail polish remover (solution);
- masking tape;
- tassels;
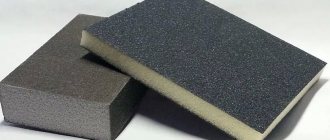
- sandpaper of different grain sizes;
- metal scraper;
- spatulas;
- wood putty;
- rags and brushes for cleaning dirt;
- soft sponges;
- cardboard or film to protect adjacent surfaces;
- regular solvent such as White Spirit.
All work is divided into several stages. This includes preparation, application and sanding.
Preparatory activities
At the first stage, you need to prepare all the materials and conveniently place the tools around you.
Before painting the furniture, it must be brought into appropriate condition. For this:
- the varnished surface is washed with a solution to remove varnish;
- then washed with plain warm water;
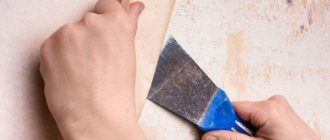
- peeled off areas of varnish are removed with a scraper;
- The surfaces are sanded with sandpaper until they become matte;
- dust is removed;
- the furniture is thoroughly dried.
This completes the preparation.
Applying varnish
In most cases, lacquered furniture is restored at home using acrylic or water-based compounds.
If you have a water-based varnish, then you need:
- Apply 2-3 layers of varnish to the previously prepared furniture surface;
- Between each new layer you need to wait time for complete drying;
- when the surface is dry, sand it a little and remove dust;
- Finally, rinse with soapy water.
If the varnish is acrylic based, the procedure will look slightly different.
In this case you need:
- choose the varnish you need;
- take a small part of the varnish, dilute it 10-15% with white spirit;
- apply one layer of such a solution, which will act as a primer;
- wait for it to dry;
- polish;
- Apply undiluted acrylic varnish in 2 layers;
- Each new layer is sanded.
And everything ends with final sanding.
In addition to varnish, you can also restore furniture with paints. In this article we discussed with you what and how furniture is painted.
Grinding is the third and final stage of restoration.
It would be a good idea to use a polishing wheel and special pastes or products designed for varnished surfaces. Although you can successfully cope with it by manually rubbing polishes.
Thank you all for your attention! Subscribe, leave comments and reviews, ask questions that interest you!
Selection of paint and additional materials
To make the product look beautiful, you need to buy a good paint and varnish material. The product must be suitable for wood, because the durability of the new coating depends on the quality of the paint. It is also worth considering personal preferences - the effects of different paints may not be the same. For handles and other metal parts, you should additionally purchase metal paint, otherwise they will quickly peel off.
Paint and varnish material for wood must have a number of properties:
- moisture resistance,
- non-susceptibility to abrasion, rapid wear, dirt, mechanical influence, as well as staining when exposed to chemicals,
- frost resistance, if the product is used outdoors,
- long service life while maintaining original properties.
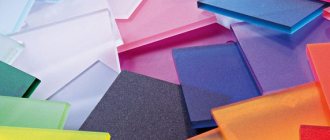
After removing the old varnish, you can apply almost any paint effect to the base. The new coating will be glossy, matte, semi-matte, you can make it completely transparent with or without color. It all depends on personal preferences and how well the product fits into the overall interior. If you decide to repaint the furniture white, it is better to buy translucent paint - matte will immediately give the products an out-of-date look.
Here are the most common types of paints for wood products:
- acrylic - water-based, perfect for natural wood, veneer, plywood and even laminate, MDF,
- enamel with a metallic tint is intended for painting fittings, as well as for giving the wood an original tone,
- varnish - usually purchased for painting an old coating in order to renew it.
It happens that you have to varnish or paint furniture that comes into contact with hot objects or is used in hot rooms. Then the paint should be chosen with fire-retardant properties. Pre-treatment with a primer is also allowed to increase the level of heat resistance.
After purchasing paint, you should prepare a number of auxiliary materials and tools. To apply paint and varnish, buy a roller or brush; large areas can be painted with a spray gun. For sanding, purchase an emery sheet or use a sanding machine. Removing stubborn varnish will require the use of a scraper or wire brush. If you decide to heat up the old coating, you will have to purchase a hair dryer.
Additional resources you need to prepare:
- primer,
- putty,
- varnish for varnishing after paint (if required),
- detergent or washing powder,
- varnish thinner,
- antiseptic (etchant),
- insect repellent (if required).
Work order:
At first I wanted to paint it like this without removing the door, then I realized that it would be inconvenient. So I took a risk. and took it off. It turned out not to be difficult. True, worries about how to put them back on were present until the last moment. In the end, I also screwed it myself; I didn’t have the patience to wait for my husband))).
I pulled out the built-in lights and wrapped them in a suspended state with masking tape. The same tape was used to protect the walls on the sides of the cabinet, the floor, and the mirrors on the doors. Prepared the workplace. I decided to paint it. on the bed)))! I covered it carefully with polyethylene. And I have never regretted this choice. The bed was large and high, everything fit, there was no need to bend over and crawl on all fours. I prepared approximately equal stacks of books and wrapped them in cling film. They are needed as substrates so that the doors can be lifted and painted as if suspended; the painted edges will not come into contact with a flat surface.
Stage 2.
I sanded all surfaces that needed to be painted. It is necessary to sand lightly, without fanaticism, with the finest sandpaper. Light circular movements. Purpose: to create roughness without removing the laminated layer. If there are dents and scratches, they should be filled with putty at this stage. After sanding, thoroughly wipe all surfaces with degreaser. It will remove dirt, grease marks, and everything that can disrupt the adhesion of the primer and paint.
Stage 3.
Primer. I went through hard-to-reach places with a brush, and the rest with a roller. A thick layer is absolutely not necessary; it must be covered with primer without drips and in a thin layer. Uneven coloring is not a problem, but there should be no gaps. I didn’t prime the rattan inserts; the paint applied well to them anyway.
They are easy to paint - just roll them with a roller; with a brush it is more difficult not to go beyond the edges. Wipe off any blemishes immediately with a cloth. Each layer was dried as recommended by the manufacturer; the acrylic dries “touch” in an hour and, in principle, you can carefully turn the door over and paint the other side.
Stage 5.
I assembled the closet. I screwed the doors and handles. I removed the masking tape and cleaned everything up. At first I planned to keep the doors open for two days, I was afraid that they would stick. Nothing like that - you can close it right away.
Dresser.
Mirror.
Important!
Acrylic paints dry quite quickly “touch-free”, but polymerize for at least a month; with a primer the process can take even longer. The painted product can be used almost immediately (or it’s better to wait 2 days) and even wiped with a damp cloth. But within a month, the coating remains very vulnerable; it must be handled carefully, not scratched or rubbed with force. If shelves or horizontal surfaces are painted, then it is better not to immediately place things on them that could “stick”, wait until the paint “sets”. Although I immediately put everything I needed on the chest of drawers, nothing stuck).
Here you go. The work is labor-intensive, but I was pleased with the result. The paint job ends up looking no worse than the factory paint, no brush marks are visible. It holds up well too. I haven’t tried scratching, I use the furniture as usual. But usually I don’t scratch it))). Although I will conduct an experiment in a month. The room has been pretty updated). Alas, the photos after compression leave much to be desired; in fact, the colors are brighter and cleaner, but this is not so important.
If you also want to redo furniture and have questions, write to me and I will answer. And if such a rework seems complicated to someone, I assure you that it is not, labor-intensive - yes, but quite doable without any experience. You can just start with internal, unnoticeable parts, or with small furniture, a chair, for example. The rework took three days. At the same time, I managed to cook and... suffer from bronchitis + my leg is still slightly lame after the cast. The “disabled painter” was able to paint, which means you can too))).
How to fix minor defects
To restore and repaint old furniture, it must first be disassembled. The more individual elements you have, the easier it is to work on particularly hard-to-reach areas.
If you are going to paint furniture yourself for the first time, then paint with a roller rather than a brush, so you can cover the desired area more evenly.
All damage and dents are puttied and cleaned. You can apply an additional layer of antiseptic to prevent the formation of mold and mildew. If you do not plan to paint the product, but only varnish it, buy transparent putty. It will not stand out against the background of the entire wooden surface. To correct defects, work in thin layers, which must dry well.
It is better to apply putty several times than to create a dense layer that will take a long time to dry and possibly become deformed during the painting process.