If the plaster has become swollen or cracked, then the only reliable way to fix it is to remove all the old plaster and plaster again. Such problems can arise due to many reasons: poor-quality materials, violation of application or drying technology, or even flooding by neighbors. As a rule, there is no need to remove the entire plaster layer. Usually the unreliable part + 30-40 centimeters in a radius around is removed.
So, if you decide to remove the old plaster yourself, you should start by identifying the areas to remove. It is better to outline them directly on the wall. For the removal itself you will need: a hammer drill, a chisel with a hammer, a spatula and dust protection for the eyes and breathing.
1 step. It is necessary to moisten the plaster generously in the area to be removed. This step will help reduce dust and soften the plaster.
Step 2. Removing large pieces that weakly adhere to the surface using a chisel or hammer drill. It is best to first make “notches” along the border of the area to be photographed, and then shoot towards the center. Then you will get neat edges.
Step 3. Re-wet and remove residue with a spatula. After cleaning the surface from any remaining plaster, allow the surface to dry and apply a coat of primer. After this, the wall surface is ready for new plaster.
Why do you need to remove plaster from walls?
Before we proceed directly to the consideration of methods for removing old plaster coating, let's figure out why and in what cases this should be done.
It is necessary to clean the base from old plaster in the following situations:
Carrying out repairs in old houses. Construction during the Soviet era was not particularly high quality, and the unevenness of the walls is striking even to a novice in renovation. There is only one way to correct the situation - by removing the old coating down to the brick or monolithic base. Attention! No matter how much you would like to save your own time, you should not experiment and apply new plaster to the old layer. This risks the fact that after some time the new coating will peel off, and with it the wallpaper or other type of finishing.
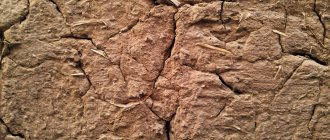
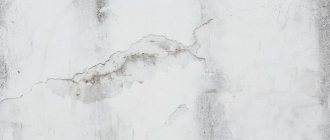
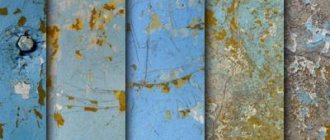
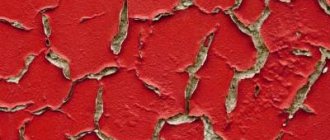
You cannot do without removing the old plaster even when it begins to crumble or cracks appear on the surface of the base. Another signal that the old coating needs to be removed are large wet spots on its surface. Experts recommend removing the old plaster coating even in cases where you are not confident in its strength, and in subsequent finishing you want to use heavy materials - natural or artificial stone, tiles.
It is important to know: cracks in the coating are not always evidence of its unreliability. A simple method will help you check the strength of old plaster: you need to tap the surface with a hammer and if the sound is clear, the coating is holding up well.
Preparation
Before you start removing a layer of plaster from the walls, you need to prepare. Regardless of the chosen method of dismantling the old coating, this process is always associated with the formation of a large amount of dust, which must be taken into account before starting work.
Preparation consists of the following steps:
The room is de-energized.- They twist sockets, switches, lamps, and a chandelier (it is removed if the plaster is to be removed from the ceiling). The resulting holes are covered with masking tape.
- Protect the floor covering from construction dust and dirt. If the layer of plaster is thick, it will fall in heavy pieces. Therefore, first, corrugated cardboard is laid on the floor, which is covered with plastic film on top.
- Window sills are covered with newspapers or thick fabric, pressing them with a weight so that they do not fall to the floor.
- Interior doors are covered with stretch film. When carrying out work, the gaps between the doors and the floor are sealed around the perimeter with masking tape. This will prevent dust from spreading throughout the apartment.
- Cover the windows with polyethylene, leaving a small hole to allow the room to be ventilated.
- They take out all the electronics so that dust that gets on them does not lead to damage. The remaining furniture in the room is covered with film.
You should not be lazy and ignore the preparatory stage, so that after completion of the work you do not have to painfully collect dust from all surfaces.
Personal protective equipment and safety precautions
Now it's time to take care of your own protection. In any case, small pieces of plaster, breaking off from the wall, will fly in different directions.
- Be sure to wear safety glasses. But as practice shows, it is better to use models that fit tightly to the face, for example, a scuba diving mask. Because when using a power tool, grains of sand can ricochet and slip even between your glasses and your face;
- The use of a respirator is mandatory. Not only will it help you inhale less dust, but it will also protect the rest of your face. Let us immediately warn you that when working with a hammer drill or grinder, even a respirator may be ineffective;
- Wear closed clothing with long sleeves and trousers;
- Also wear closed, hard shoes. House slippers or flip-flops are not an option. Even sneakers will get small fragments and a huge amount of dust. You will have to constantly stop working and shake out your shoes, because the discomfort will be noticeable. Old tall boots that you can tuck your trouser legs into are best;
- Don't forget your hat;
- In addition to the fact that you need to de-energize the room, it is also necessary to determine the location of the hidden wiring. Of course, if you are going to change it, the damage may not be unwanted.
How to remove old coating?
To remove plaster from the wall, you can use a percussion tool in the form of a chisel, hammer or hammer drill . If the plaster layer is thin, use a grinding or vibrating machine. In the absence of power tools. They resort to using a scraping spatula.
Chisel and hammer
You can get rid of a layer of plaster using available tools in the form of a chisel and a hammer. It’s easy to work with them, the main thing is to control the force of the blow. If you hit the chisel too hard, you will leave nicks on the wall that will have to be smoothed out.
Procedure:
- divide the walls into small fragments - to do this, lean the chisel against the wall vertically and hit it with a hammer;
- when the outline of the fragment is knocked out, the chisel is tilted at an angle of 45 degrees, inserted into the groove and tapped on it with a hammer;
- As the elements move away, the chisel is moved forward.
This method is suitable for removing plaster of medium to significant thickness.
Grinder
It is best to use a grinding machine to remove decorative coatings that have been applied in a thin layer.
Mode of application:
- Choose an attachment in the form of a brush or coarse sandpaper.
- Put the device into operating mode and sand the coating.
- You need to control the work visually, continuing sanding until the base becomes visible.
Sanding produces a significant amount of dust, so whenever possible, use a tool with a built-in dust collector. If it is not there, the wall must be wetted before work begins.
Hammer
You can quickly cope with the task using a hammer drill. To do this, you will need a tool with attachments in the form of blades of different thicknesses.
Mode of application:
- the device is put into working condition;
- set the crushing mode on the hammer drill;
- lean it against the wall at an angle of 80 degrees;
- they pierce the plaster to the full depth, right to the very foundation, and make a groove;
- tilt the hammer drill at an angle of 40 degrees, insert it into the groove, knock down the plaster, moving in the desired direction.
A hammer drill is used to remove a thick layer of plaster.
Vibrating machine
A vibrating machine is great for removing thin layers of plaster. Its working surface is represented by abrasive materials of different grain sizes. The coating is removed by small but very frequent movements of sandpaper along the surface of the wall.
No special skills are needed to operate a grinding machine. It is enough to plug it into the network, attach it to the wall and systematically work it until the plaster is completely removed.
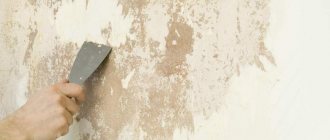
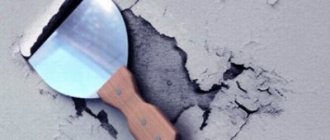
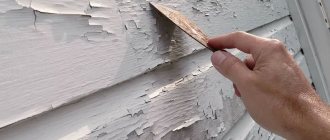
Roughing spatula
A scraper is an affordable tool for removing plaster. Working with it, you will be able to carefully clean the wall without damaging its base. A spatula is used to remove medium thickness coatings.
Mode of application:
- Using the corner of a spatula, make small notches over the entire area of the wall.
- Starting from the most convenient side, remove the plaster, gradually moving forward. Hold the tool at an angle of 30-45 degrees.
- Sometimes you can tap the handle of the spatula with a hammer to drive it deeper under the base.
The advantage of using a spatula is that the work will be carried out quietly and with a minimum amount of dust.
Preparatory work
As you know, the main difficulties with ceiling repairs arise when the finishing is replaced. For example, you decided to replace the old paintwork with new wallpaper or change the color of the ceilings, which will be in harmony with the overall design of the apartment. But how to prepare the surface and remove worn coating?
The main thing to remember is that they begin finishing the ceilings first, that is, before starting to repair the walls and floors.
- First, you need to remove, if possible, all the furniture from the room (of course, if you are not going to send it to a landfill after repairs and buy new ones).
- The floor, door and window openings, window sills, as well as lighting fixtures (chandeliers, lamps that cannot be dismantled) should be covered with any available materials: plastic film, newspapers or old sheets.
- If repairs are carried out in the cold season, then the room temperature should not be below +5o
Ceiling cleaning tools
No one will dispute the statement that the quality of repair depends not only on the materials, but also on what tool is used for this and how the master uses it.
To prepare the ceilings you will need:
Paint roller with thick bristles
- rollers;
To get through places that a roller cannot reach
- paint brushes;
Hard spatula for cleaning surfaces
- a set of metal spatulas;
A simple and irreplaceable device that can be assembled in 10 minutes with your own hands
- light and reliable stepladder or sawhorses.
Advice! When starting work, do not ignore personal protective equipment: put gloves on your hands and a cap or beret on your head. And don’t forget about eye protection - glasses will come in handy here (the ceiling is not the floor - you’ll have to look up).
In the old days, the most popular type of ceiling finishing was whitewashing or painting. However, over time, wallpaper and polystyrene tiles began to be glued to them, and only recently they began to install suspended structures.
Each of the finishing materials leaves its own “indelible” marks on the surface. Therefore, their removal requires an individual approach.
How to deal with a layer of old whitewash
This material can be quite an impressive layer, so it is recommended to remove whitewash from the ceiling gradually so as not to damage the base (putty) and to do everything efficiently.
Wetting tool
To do this, use a sharp, medium-sized metal spatula. To make the work progress more fun, the surface should first be moistened with water.
The ceiling needs to be well moistened and allowed to stand for 10-15 minutes.
As the area is cleaned, use a spray bottle or roller to moisten the following areas. Cleaning must be done thoroughly, without flaws.
It is much easier to remove a thin layer of whitewash:
- To do this, again, the surface is sprayed with water and cleaned with a spatula;
- After completing the work, you must carefully check the entire ceiling area: perhaps there are untreated areas left somewhere;
- If this is the case, then they should be wetted with a wet sponge and removed.
Old putty and plaster
How to clean the coating and wash the ceiling from putty
Sometimes it happens that layers of putty and even plaster become unsuitable for further use. They can peel off from the ceiling, threatening not only to ruin the new finish, but also to fall down on the residents’ heads.
If such a picture is observed in the room being renovated, then all layers must be removed. Only an external visual inspection with tapping will show whether this is done in whole or in part. In any case, everything that does not hold well is removed.
For such work, in addition to a spatula, you will need a more serious tool:
For such work you will need a reliable tool of sufficient power.
- Hammer;
A crowbar and a nail puller are always indispensable during dismantling work.
- Crowbar;
Construction stretchers
- Durable stretchers with handles or iron buckets for removing heavy garbage.
We see no point in describing the procedure, since we think that everything is already extremely clear.
Removing the water emulsion
Remember the recommendations from the first section and use protective equipment. Be sure to wear glasses, as you will have to use a roller to remove the layer of water-based paint, which may cause splashes to get into your eyes. How to remove water-based paint from a ceiling quickly and effectively?
So:
- To do this, the surface must first be moistened with warm water. The tool used is a paint roller mounted on a telescopic rod.
- After dipping it in water, you need to thoroughly moisten the layer of water-based paint. If water is not absorbed, but rolls off the surface in drops, it means that paint with a water-repellent effect was used to decorate the ceiling. Therefore, it is unlikely that it will be possible to soak it in one pass.
It will be much more difficult to remove such paint.
- After re-processing with a damp roller, you need to wait 15 minutes, which will allow the moisture to soften the coating and completely penetrate its structure.
- Now all that remains is to take a spatula and scrape off the swollen layer of paint down to the plaster. The spatula must be kept parallel to the surface so that its sharp corners do not damage the ceiling.
- Moisture-resistant water-based paint can be removed either with a spatula or a sanding machine.
Attachment for grinder for cleaning surfaces
- The last method is recommended to be used if nothing else helps to cope with the coating. The main disadvantage of mechanical treatment of ceilings is the abundance of dust, which can penetrate even through tightly closed doors into neighboring rooms.
There is another method for removing water-based paint, which is simple and convenient. To do this you will need old newspapers, PVA glue or starch paste.
This glue is truly a universal product.
Its essence is as follows: glue is applied to the ceiling using a roller and newspapers are pasted. After the adhesive has dried, the paper can be easily removed along with the paint. If you have difficulty removing newspapers, you can use a narrow spatula.
Advice! Experienced finishers recommend sanding the ceiling with sandpaper after removing the layer of water-based paint.
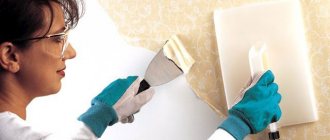
How to remove wallpaper and traces of glue from the ceiling
Wallpaper removal devices
After removing old wallpaper, glue streaks and yellow stains usually remain on the ceiling.
To get rid of these “rudiments” we do the following:
- It will be easier to remove the wallpaper if you pre-moisten it with water. In order for moisture to penetrate the material faster, it is recommended to trim them in places and pierce the vinyl coating with a needle roller.
Wallpaper remover - the price is not small, but it helps a lot in some situations
- Problem areas can be treated with a special compound designed for removing old wallpaper. It is quite convenient to treat the surface using a roller.
- Processing begins no earlier than half an hour later. For this we use spatulas and all kinds of scrapers.
Next, let's look at how to remove glue from the ceiling and prepare it for further work:
- To do this, apply a stripping solution to the cleaned surface using a paint brush and give it time to absorb.
- Glue and old whitewash are removed with a wide spatula or a metal brush.
- At the final stage of work, the surface is washed with a wet brush, which allows you to remove various small particles of finishing and dust from the ceiling.
- It is recommended to wash the cleaned ceiling with soapy water and dry it thoroughly.
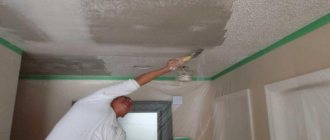
Removal from the ceiling
Removing plaster from a ceiling is more difficult than removing plaster from a wall. A person will have to perform work in a position where his arms are always raised up. This requires more time and physical effort.
The choice of tool depends on the thickness and composition of the plaster applied to the ceiling, but there is one universal method to make the work easier.
To do this, you need to prepare a special solution that softens the coating. For 1 liter of water take 2 tablespoons of starch, which is mixed until completely dissolved. The resulting solution is used to treat the ceiling.
Under its influence, the plaster will become looser and it will be easier to remove it from the wall surface. After 15 minutes you can start cleaning. The work will go much faster.
If the layer is dense, then irrigation with starch solution can be repeated when the top soaked plaster is removed.
Features of removal depending on the type of building material
Depending on the type of plaster, the features of its removal from the wall differ:
- The cement coating adheres firmly to the surface and is difficult to knock off, even if the material was applied a long time ago. Its removal is started only when there are no other finishing options. For removal, use a breaking tool, for example, a hammer drill. The layer of cement plaster is most often thick.
Gypsum coating holds strong, but it is prone to cracking when impacted. Therefore, to remove it, use a chipping tool. If the layer is thick, use a hammer drill, and if it is insignificant, use a spatula or chisel.- Decorative coating is most often applied in a thin layer. It does not hold as firmly as a cement-based mixture. Therefore, a grinding or vibrating machine is used to remove it.
- The clay coating must be removed. If you leave it on the wall, then the new decor, for example, wallpaper, will not stick firmly. This type of plaster is prone to breaking and peeling. Therefore, cleaning it will not be difficult. If the area is small, then you can use a roughing spatula or chisel for the work.
- The polymer coating holds firmly due to special additives in the composition. It is difficult to remove it by hand; it is better to use a grinding machine.
Ceiling plaster. What are the advantages and disadvantages of plastered ceilings?
The very first thing to start with is efficiency. Not every one of us can afford to spend money on installing a complex suspended ceiling structure, not to mention stretch ceilings. In terms of materials costs and labor costs, plastering the ceiling is considered the cheapest way to bring the ceiling part into proper shape.
Advantages
Here it would be appropriate to talk about the advantages that plaster has. This technology has the following advantages:
- environmentally friendly (lime-cement and gypsum mixtures are absolutely harmless to humans);
- the plastered layer does not reduce the height in the room (the maximum permissible layer thickness is 5 mm);
- durability (a properly made solution guarantees the integrity of the plaster for 7-10 years).
Against this background, you can correct the idyllic picture by mentioning the shortcomings that plaster for ceilings in residential premises has.
Flaws
It should be said right away that self-repair always means significant cost savings. However, when you do plastering work yourself, only your skill and skill can guarantee you good quality work. If you hire professionals for such work, plastering ceiling surfaces will become an expensive pleasure for you.
Let's return again to the manufacturability of plastering panels. The current limitation on the thickness of the applied layer of 5 cm will not eliminate significant level differences on the ceilings.
And one last thing. Plastering a ceiling with your own hands is not as simple a task as it seems at first glance. To do this, you need to have certain skills and abilities, an idea of how painting and plastering work is carried out. When you start plastering a ceiling surface for the first time, it is difficult to achieve a perfectly smooth coating the first time. When working with suspended structures, the result the first time can be more or less tolerable.
Plastering, like any other finishing option, has its positive and negative sides. The advantages of this alignment method include:
- Environmentally friendly. Plaster mixtures are made from materials that are absolutely safe for the human body, so they are allowed to be used even in bedrooms and children's rooms.
- Versatility. The special properties and high adhesion of this material allow it to be applied to any base (brick, concrete, wood or plasterboard). At the same time, they can perform not only internal, but also external work.
- Maintaining the height of the room. Unlike leveling the surface of gypsum boards, plastering the ceiling has virtually no effect on the height of the room.
- Cheapness. The relatively low cost of plaster makes it a truly indispensable material for a limited budget.
The disadvantages of this leveling method include the high dustiness of the work and some restrictions on the thickness of the applied layer. Experts recommend not plastering a concrete ceiling if the height differences on it are more than 50 mm. Otherwise, there is an increased risk of cracking and peeling of the finish.