At the moment, there are many tools on sale for facing work; they are also presented separately for plastering. New tools are being created to simplify the work process and make it faster and better. A plaster grater is also such a device. It is necessary for grouting plaster work and leveling the surface.
What is a plaster float
For the initial leveling of the plaster layer, a rule is used - this device creates the direction of the leveling plane. After the rule, a grater and a trowel are used - tools for rubbing, smoothing plaster, removing flaws and removing excess mortar. The grater helps to obtain a smooth finish, so it is widely used for finishing walls.
Scraper and floats for plastering work
Until recently, craftsmen made their own tools from wooden blocks with a smooth surface, to which they attached a handle. Such improvised graters did not last long, since wood quickly absorbs moisture and cracks under temperature changes. Modern instruments are made from more durable materials, although wooden ones are also available for sale.
High-quality products allow grouting and sanding and have many advantages:
- even with long-term use, the master does not experience any inconvenience, since the design of the tools is optimal for the job, and the weight is quite light;
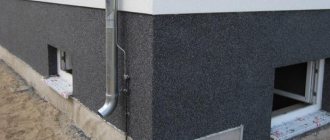
- The materials used for the graters are, for the most part, resistant to moisture;
- the cost of plastering devices is affordable, they are sold in any hardware store;
- Grinding tools last for a long time: when used correctly, one grater can process up to 1000 square meters. m area;
- The range of products is large, you can choose a product of the desired shape, size, weight, with the necessary characteristics.
Leveling plaster with a float
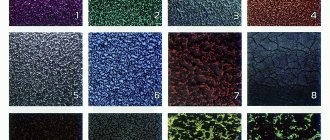
A feature of construction floats is their ability to create both smooth surfaces and form texture when it comes to decorative plaster. There are even special tools on sale with a textured surface that allow you to “draw” interesting pictures and ornaments on the wall.
Typically, the length of the tool platform is 12–36 cm, width – 12–18 cm, thickness – no more than 2.5 cm. The handle can be open or closed, attached to the sole or molded with it.
Construction float – one term, different tasks
One of the tasks of repair work is leveling the surface of walls, floors, and ceilings. The list of such works usually consists of plastering the surface, as well as further finishing with putty. These works are usually carried out under the label of “preparatory work”, using rough tools that cannot perfectly bring the surface to condition. That is why a construction float has come into use, which allows you to give the surface the proper appearance with greater precision and achieve maximum leveling quality.
It is possible that the grater was initially used to grind the finished plaster layer to zero, and accordingly, it coped with this task. Of course, it was impossible not to notice all the conveniences that this tool, the design of which was painfully simple, gave the craftsmen. But, as they say, everything ingenious is simple, and it’s impossible to argue. The device of the grater is, first of all, a small plane and a handle attached to this plane for ease of operation.
Principle of operation
The tool acts mechanically: the sole grinds off the unevenness of the plaster layer, smoothes it, makes it even and smooth, or imparts other decorative properties. The procedure for using construction devices is as follows:
- The solution is mixed in a container in a small amount - it should be enough for an area that can be treated in one go. The plaster (coating) is applied to the wall and leveled according to the rule.
- The construction float is pressed against the surface. The wet solution is rubbed in a circular motion, counterclockwise. You need to work quickly so that the plaster does not have time to dry completely.
Sanding plaster with a float
The grater is also used for grouting plaster when it has already dried. Rubbing is the final stage of plastering work, during which the wall will become smooth. In this case, the movements are performed not in a circle, but up and down. After processing one strip, they move to another section.
To get excellent results, it is important to use only a properly mixed solution. Plaster with fine fillers is suitable for finishing work. It will not be possible to rub larger fractions until smooth, except perhaps for subsequent laying of tiles.
Finishing grades of plaster mixtures are subjected to grinding and grouting
Grouting plaster using a trowel
There are two ways to grout plaster: in a circle and “running”. Rubbing in a circle is easier than rubbing, and is more convenient for beginners. But the second method has a cleaner result, and is more often used with high-quality plaster. Below will be a description of the technique for performing both methods.
Grouting method in a circle
The trowel for grouting plaster is pressed firmly against the plastered wall and made in a circular motion counterclockwise. All bulges are removed with its edge. This way the mixture will cover the existing indentations, and the covering will be rubbed. You should monitor the force of pressing on the tool; it acts more strongly on convexities, less intensely on recesses. During operation, the mixture will remain on the ribs and must be removed.
The surface will dry out little by little, so it is worth periodically moistening it with a chalk brush.
After completion of the work, round marks will be slightly visible on the surface; if high-quality plaster is required, it is necessary to carry out the “match-up” grout afterwards.
“Catch-up” method
The grout float is also pressed firmly against the wall and made straight strokes. Surfaces up to 4 meters are rubbed down, leaving only 1 joint. The technique consists of swinging first from the ceiling to the middle, then from the middle to the floor. To get the most even wall, you should first rub it with a wooden float. And then work with a grating tool with a felt or felt pad.
If rubbing is done to eliminate traces after a circular technique, then it is worth starting it almost immediately, approximately through areas of one floor or one square meter.
Types of tools
The main difference between all graters is the material from which they are made. Outwardly, they are all similar to each other, and the principle of operation of the instruments is the same. The most popular are graters made of polyurethane, wood, foam, metal, plastic and sponge.
Polyurethane
Construction devices made of polyurethane are now considered very popular. They are suitable for applying and grinding gypsum, lime and decorative plaster. The thickness of polyurethane floats reaches 3–25 mm, the “size range” is as follows:
- 120 x 240 mm;
- 110 x 600 mm;
- 140 x 280 mm;
- 180 x 320 mm.
Polyurethane grater 140x280mm
The thinnest soles (3–5 mm) of an oblong shape are suitable for working with decorative plaster; thicker ones are suitable for rubbing and leveling ordinary mortar. The products last a long time, are comfortable, lightweight, and have an ergonomic design.
Polyurethane, as a heterochain polymer, is very strong and elastic, and the most wear-resistant modifications of the material are used for the manufacture of construction floats.
Features of using the tools:
- when working with decorative compositions, either the surface or the instrument itself must be wetted with water;
- During operation, the grater must be cleaned regularly, otherwise the quality of the finish may decrease;
- Grinding of ordinary plasters is carried out only on a fresh layer that has not yet dried;
- for lime mortars, you should choose only rectangular tools 20–25 cm thick.
Grouting plaster in a circular motion
Wooden
Wood products are considered the simplest, even quite primitive, and therefore are rarely used due to the availability of other options. They strongly absorb moisture during operation, because any plaster solution contains water, and the wall becomes wet during rubbing. The service life of wooden floats is short, they gradually become deformed and increase their weight, as a result, the labor intensity of troweling the plaster for the master increases greatly.
Wooden grater Mastertool
Foam
They are the most inexpensive option for construction floats, but are not suitable for all types of work. For their production, fairly hard types of foam are selected, which perfectly level and smooth the plaster. Such a tool is not suitable for creating relief, but gypsum and polymer plasters after processing will acquire a perfectly smooth surface. You must handle foam tools with care, because they are quite fragile and can break.
Foam plastic grater 130x270 mm KLASSE
Metal
Most often, metal construction floats are used for ironing walls. During ironing, a thin water-repellent film is formed on the coating, which will protect the plaster from the negative effects of moisture. Smooth metal tools make the surface smooth, almost glossy. With the help of such floats you can compact even porous mortar that other tools cannot handle.
To rub rough plaster, you can use metal floats with a rough grinding surface. They are especially suitable if special ladles were used to spread the plaster. Next, the finishing layer is processed with a trowel with a smooth sole, using circular grouting or up and down movements. Metal tools with a serrated base are also available for sale. They are used for leveling adhesives under ceramic tiles.
Grinding grater with metal working part
Plastic
Such graters are used for high-quality application of building mixtures: putty, plaster, decorative materials, adhesives. They distribute the mass well over the surface, smooth out seams and irregularities, and are suitable for forming bark beetle-type coatings. However, the service life of plastic graters is short, so they are often chosen for one-time jobs. They are also not suitable for applying thick layers of plaster.
Plastic grater STAYER
Sponge graters and graters
Sponge instruments are made from foam, latex or rubber. They are used for processing structural plaster and grouting other decorative materials. Typically, the float body is made of lightweight aluminum or polyurethane, and the sponge itself is located only on the grinding pad. Such tools allow you to create designs on plaster and cannot be used to compact the mortar, give it perfect smoothness or gloss.
Product with sponge coating
Sponge trowel for decorative plaster
Using a sponge product, they create the finishing touches for a room outside or inside a building.
This tool is designed for applying various patterns or structures on the surface of decorative plaster.
The body of such a product is made of light aluminum or any metal alloys, while the surface for grinding the plaster is created from a dense sponge. For a detailed description of the grouting process, watch this video:
The tool is very convenient to use, but it requires careful handling, since it can tear with sudden movements on the surface of the wall.
To summarize the written material, it should be said that each owner, before starting finishing work in his premises, must select all the necessary materials and tools. You should first familiarize yourself with the features of the products, in particular, plaster floats, and not purchase the first option you come across.
Grater or grater: what is the difference
A grater is a grater that is narrower and longer than a regular one. The plaster trowel also has another name - trowel. Most often, it is used not for completely rubbing the plaster, but for removing flaws from an already applied layer, leveling small areas, and removing excess mortar. If you want to make the wall smooth, you cannot cope with this task with just a float; you need a regular grater.
Polyurethane trowel 120x800mm
What is better to use
The choice of tool depends on the specific task facing the finisher, his level of skill and proficiency in plastering supplies. A grater is considered the most successful option among professionals: it allows you to do most of the work of applying, rubbing and sanding walls, which cannot be said about a trowel. Most often, experts choose polyurethane floats, which can be used for a long time and carry out a wide range of tasks for covering different surfaces.
How to use a float to sand walls - step by step diagram
Step 1: Selecting Sandpaper for the Job
The work of grouting putty is carried out not with ordinary sandpaper, but with special meshes with an abrasive coating. They are specially created for our instrument. Like regular sandpaper, the mesh has different cell sizes and, accordingly, the density of abrasive coating. When choosing, first of all, take into account the composition of the putty with which your walls are finished; for soft putty, you can use smaller cells; for hard putties, on the contrary, larger cells with a massive emery coating are suitable.
Advantages and disadvantages of various plaster floats
Each tool has its pros and cons, so the choice is always up to the master:
| A type of grater | Advantages | Flaws |
| Wooden | Low price, lightness, compactness | Rapid impregnation with moisture, deformation, abrasion, short service life, rapid loss of quality |
| Foam | Cheap, the ability to perfectly smooth fine plasters | Fragility, especially in the handle part, the need for experience to work with such a tool |
| Polyurethane | No need for experience, lightness, ergonomics, low abrasion, optimal softness, elimination of deformation over time, suitable for almost all types of work, including large volumes | High price for products made from the highest quality polyurethane (standard graters are inexpensive) |
| Plastic | Corrosion resistance, durability, easy to hold, lightweight | Lack of flexibility, brittle due to temperature changes, only suitable for small jobs, unsuitable for beginners |
| Spongy | Ability to work with decorative plaster and create interesting effects, lightness, ergonomics | Useless for rubbing to perfect smoothness, gloss, risk of the spongy sole being torn from the base if used carelessly |
| Metal | Use for compacting and ironing plaster, for leveling porous mortars, strength, smoothness, smoothing seams | Unsuitable for classical leveling and rubbing of mortar, for decorative plasters, high cost, prone to corrosion (we are talking about floats made of simple carbon steel) |
Tool selection
Before purchasing, you should carefully inspect the device and make sure that it suits the master in all respects:
- a good instrument is comfortable to hold in your hand, it has a comfortable handle with grooves for your fingers;
- there should be no potholes or other defects on the working surface that can scratch the coating; the material must be of the highest quality;
- for large volumes, choose a larger product, otherwise rubbing or applying plaster will be too slow; compact graters are well suited for small areas, but, in any case, you should correlate the dimensions of the tool with your own palm;
- a short tool is suitable for walls with artificially created openings, and a long one for open areas;
- products made from polystyrene foam should not be confused with polyurethane products - these are two different materials that have their own pros and cons;
- to prepare the surface for painting, especially with light paints, you should choose metal devices;
- in skillful hands, a sponge trowel can replace a textured roller, but this requires some experience;
- dilapidated wooden fixtures with cracks may be suitable for applying bark beetle type plaster.
Grater for textured plaster
Meet: a grater for sanding walls after puttying
As a rule, construction work is carried out in stages, and if the plastering of the walls has already been completed, the next step, according to the law of the genre, is to putty the walls with zero leveling. No matter how professional the master painter is, in any case, after applying the putty, there will be defects in the form of sagging or depressions on the walls.
A grater for polishing putty will help to cope with such defects. This hand tool is created on the principle of a plaster float, but is significantly different from it. In general, the same handle and working plane are the main components of the grinding tool, but if in the case of plaster we smooth the surface with the working plane, then in the case of putty we need to process the wall with emery cloth.
In order to secure the sandpaper to the working surface, the sanding float has special fasteners along the edges. This fastener allows you to clamp the sandpaper and secure it tightly so that you can clean the putty walls, removing sagging from them. Of course, while there was no such construction tool, craftsmen often used a plaster float, into the working surface of which small nails were hammered, and thus attached sandpaper.
Features of the use of graters and half-graters
Such tools are used for rubbing the wall after applying the finishing layer of plaster (covering). Movements must be carried out smoothly, with even pressure, “drawing” circles counterclockwise. Experts also use other types of movements: up and down, in the shape of a figure eight. Typically, wall treatment is carried out sequentially in small sections. After making the first section smooth, move on to the next.
You need to work on dried plaster, periodically wetting the sole of the tool with water. You can even spread the raw solution over the base with a grater, using it instead of a spatula. To work with decorative plasters such as bark beetles, other techniques are used: they stretch the solution over the surface, creating small grooves. To create a spiral texture, make appropriate movements with a plastic or sponge grater. The drawing will fully appear only after the wall has dried. Next, individual seams and irregularities are polished with a trowel.
What kind of grater is needed for decorative plaster
To create a decorative surface using the bark beetle technology, a special plastic sponge grater for decorative plaster is used. It helps to decorate the wall with different patterns; the patterns are created in different ways by changing the direction of movements when working with a grater. When moving in a circle, you will of course get a circular pattern; if you make movements from top to bottom, you will get the effect of raindrops. Important! Do not press unnecessarily on the surface plastered with bark beetle with a plastic float, so as not to deform the layer.
If you decide to create a soft relief, then you need to use smooth graters; for an expressive structure, there are textured models.
The best manufacturers
High-quality trowels and other troweling tools are produced by Zubr, PU-TECH, DEXX, Stayer and others. Examples of quality models are:
- FIT IT 05301 (280 x 140 x 90 mm) - the sole has a foam rubber sponge, used for finishing the finishing layer of plaster;
- MATRIX 86802 - polypropylene tool with a hard sponge on the sole, size - 140 x 280 cm;
- plaster smoother "Oleynik" - a stainless steel product with a wooden handle, suitable for all smooth plasters;
- sponge grater “Volma” on a telescopic rod - easy to use thanks to the long adjustable handle.
Tool for grouting plaster with a wooden holder
Despite the time-consuming and labor-intensive plastering work, using high-quality tools can seriously simplify the task. A responsible attitude to the choice of a construction float and the correct use of it will help you get an excellent result: perfectly smooth and beautiful walls.