By correctly combining several types of coatings, you can achieve an original effect.
In fact, all the options I have proposed can be called aging wood, since they are based on brushing. Well, besides this, we will use acrylic and chalk paints, oils and various waxes. This type of treatment is suitable for decorating furniture or interior decoration. In total, I prepared 12 samples - therefore, 12 decoration options. All of them are simple to implement, but at the same time they look very impressive.
12 available decorative wood finishes
For the blanks, I used pine - an accessible and interesting material from a decorative point of view: the active grain of the wood is ideal for aging. Let's start with brushing. Using a polymer-abrasive brush, we remove soft fibers while preserving the hard ones. You can also use a metal brush for aging, but the result will be somewhat different, since it works less delicately, and after processing, noticeable scratches remain on hard fibers.
Polymer abrasive brush
Important! During the brushing process, a lot of fine dust is generated, so it is necessary to reliably protect the eyes and respiratory organs. Now that mechanical aging has been completed, we will proceed to processing with various compounds.
Ads by
Tinted oil
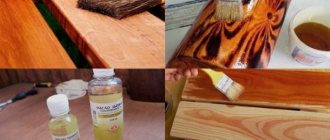
We use black tinted teak oil. You need to apply it with a piece of cloth. Next, wait about a minute and wipe it off with a clean rag. Already at this stage we get a contrasting wood pattern. But we won't stop. Apply dark green wax to the surface. The result is a deep green tint. This method of finishing wood looks good in the interior. For example, I have a wall in my living room decorated in a similar way. Different shades appear in different lighting. You can achieve the desired effect by alternating tinted oil and colored wax.
Oil and wax treatment
You will need:
- linseed oil;
- beeswax;
- flute (wide flat brush);
- fine grain sandpaper;
- rags.
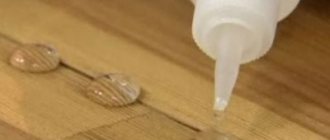
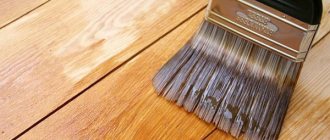
There are different methods for treating wood, but they have the same goal - to prevent rotting, mold, drying out, damage by insects, and also to give the surface a beautiful finished look. The use of special oils (drying oil) and beeswax allows you to preserve the structure of the material, gives it shine and strength, and increases its service life.
The depth of impregnation of linseed oil is 2 mm, which is sufficient to form a protective layer.
You can treat wood at minimal cost using linseed or hemp oil. Before starting work, it is necessary to clean the wood from dirt and dust, completely remove the previous coating, and sand the surface with fine-grain sandpaper. Experts recommend heating flaxseed oil in a water bath, but you can do without this procedure. Apply the oil either using a flute or rub it into the wood with sandpaper. It is important to follow the direction of the brush; apply oil only along the grain. The work is left for a day, after which the oil is applied again, the procedure is repeated until the desired result is achieved. Small items are immersed in oil for several days.
There are other treatments, such as coating the wood with a mixture of linseed oil and beeswax. All components are melted in a water bath, then applied to the surface with a brush or cloth. In order to give the wood a certain shade, a tint of a suitable color is added to the composition. This method has a significant drawback - very slow drying. You can speed up the process if you add a drier (sold in art stores) or purchase ready-made oil (driing oil), which contains polymerization accelerators and antifungal additives.
Color palette of hard wax for wood.
You can treat wood with only one wax. Modern industry offers colored, colorless, matte, semi-matte, glossy compositions that not only strengthen, but also favorably emphasize the texture of wood. To treat a large surface, it is necessary to heat the wax in a water bath (in this case it is applied with a wide brush). Cold wax is rubbed into the wood in a thin layer using a cloth, left for about a day, then the surface is waxed again. You can combine colorless and tinted wax, for example, treat the edges with a dark composition and the middle of the product with a transparent one. After the wax has dried, you need to polish the surface with a woolen cloth (felt).
Related article: The principle of operation of a thermocouple
Wax + paint
This method is very similar to the third option, but we will choose a light olive color - and we will not treat the fibers with wax before applying it. After the paint has dried, we’ll go over the workpiece with sandpaper, freeing the protruding fibers from the color. As a result, they will have less contrast. Next, we treat the surfaces with oil the color of larch wood. It has a reddish tint, which in combination with paint will give an interesting effect. Feel free to overlay different colors and shades
Wood brushing
You will need:
- gas-burner;
- metal brush;
- work gloves;
- flute
The brushing method allows you to advantageously emphasize the structure and give the wood a touch of antiquity; it involves removing soft fibers (from the top layer) using a hard metal brush. For this purpose, a tree with clearly defined growth rings is selected; the presence of knots, eyes and other defects is only welcome. The best types of wood for brushing are pine, spruce, oak, linden, and walnut. The following are considered unsuitable: cherry, pear, alder, juniper, teak, beech.
Brushing can be superficial and deep, and is performed with or without firing. It is much easier to use the non-firing method at home. The wood is cleaned of dust and dirt, the surface is moistened with water, and after about 15 minutes they begin to comb out the fibers using an iron brush.
You need to move along the direction of the fibers, and it is advisable to repeat the pattern of annual rings (the furrows should not be perfectly even).
Hand movement patterns for waxing wood.
This work is quite dangerous, so it is important to follow safety precautions. The remaining debris is cleaned with a flute (wide brush), moving against the grain, otherwise the dust will adhere to the surface. This is followed by treatment with stain or wax.
For processing using the firing method, you will need a gas burner; it is used to char the surface of the wood. Sometimes there are so-called resin pockets in wood, which can catch fire during firing. Under no circumstances should such places be allowed to burn for a long time; the fire must be extinguished immediately. The degree of charring depends only on your idea; it can be light or completely blacken the surface layer. After this, the fibers are combed out with a wire brush. It is better to work outdoors, as brushing produces a lot of black dust. At the final stage, the surface is sanded using fine sandpaper. In some cases, the firing treatment (followed by combing) is repeated several times, thus achieving the effect of aged wood. If necessary, apply stain or patina, but you can do without it. The result is secured with furniture wax.
Related article: Combined wallpaper for the kitchen in the interior: 35 photos of successful combinations
Etching
The first thing the master class participants tried to do was stain the wood. This is a simple but effective way to decorate wood: unlike paint, the pigment in stain is so fine that it penetrates into the thickness of the wood and creates the illusion of the natural color of the wood. In addition, soft and dense fibers absorb pigment differently, so staining emphasizes the texture of the wood.
Advice. You need to make sure that there is no excess pigment on the brush. It should be applied with gentle movements, “stretching” the color over the surface. Keep in mind that it will be almost impossible to wash the pigment off your brush.
As a bonus to etching, Mikhail told the audience about brushing. The essence of this technique is that the wood is “combed” with a wire brush to select soft fibers and emphasize the texture of the material. Depending on how aggressively this is done, the result is either a velvet surface effect or a textured pattern of aged, weathered wood. On lightly etched plywood boards, the master class participants also got a worn effect: the brush exposed fibers that were not touched by pigment.
Advice. To emphasize the texture of a brushed surface, put a little light or pearlescent paint on a wide brush, wipe off the excess on the paper and walk over the surface of the material with light, quick movements. Light paint will linger on the exposed grain, highlighting the grain of the wood.
Processing wood with stain
You will need:
- stain;
- wide brush;
- fine grain sandpaper;
- rags.
The stain is applied parallel to the wood fibers, preventing the layers from touching.
Treating wood with stain is one of the most popular finishing methods. Stain can be water-based or alcohol-based, the latter giving more saturated tones. The alcohol-based composition is applied to a cleaned and sanded surface using a flute (wide brush), moving along the fibers in one direction. At the same time, they try to apply as much stain as possible. After which the product is allowed to dry, the operation is repeated if necessary. Using stain of various tones (by layer-by-layer application), you can achieve interesting color effects. After the stain dries, the washing stage begins. It is necessary to remove excess product; to do this, place the product at an angle of 30º, then dip the brush in acetone and walk over the surface (with light up and down movements).
To give the wood an antique effect, use the following method. First, apply the main background color of the stain (water-based), after it dries, go over the surface with fine sandpaper (strictly along the fibers, otherwise transverse stripes will be visible after processing). The result should be uneven tinting with scuffs and bald spots. Then they take a water stain of a different color, cover the wood with it, let it dry, and then sand it again. The operation is repeated until the desired tone is achieved. If you plan to make a single-color coating using water stain, then it is applied in several layers with mandatory intermediate drying and processing with fine sandpaper. Excess stain is washed off immediately after its application. Excess is simply wiped off with a damp cloth.
Composition for wood impregnation.
When applying water stain, you should not return to the painted area, otherwise dark spots will form that will be difficult to remove.
At home, you can prepare a stain that will give the wood an aged look. Small nails or metal shavings are placed in a glass jar, filled with table vinegar (it is better to use wine vinegar), left for a day, after which the liquid is filtered. If it is necessary to obtain a darker color, then the exposure time is increased. The resulting solution is used to stain wood. As a stain, you can use strong brewed black tea, coffee, cinnamon and even potassium permanganate. The result is secured with nitro varnish. If water stain was used for processing, then it is better to use alkyd or acrylic varnish.
Related article: How to make wallpaper glue at home
The importance of the procedure
So, the last two stages of working with wood are cleaning and painting. Initially, the wooden workpiece must be thoroughly cleaned of debris, dust, shavings, grease and any other type of dirt.
The methods used for this are as follows:
- Mechanical. Any visible plaque can be removed with a brush, including a hard one. In the latter case, the surface is scraped.
- Chemical. Those wooden products that are already painted or varnished can be wiped with soapy water. And the fatty layer is removed with products that contain alcohol. Treatment against mold is carried out using fungicidal solutions.
If a person comes into contact with even perfectly sanded, but unpainted and unvarnished wood, there is a high probability of getting a splinter and ripping clothes. Untreated products quickly get dirty, break, are exposed to fungi, mold and other bacteria and become unusable.
By cleaning and painting, you can radically change the color of the wood, emphasize its texture and, if necessary, even age it.
General principles for choosing wood preservatives
When selecting a preparation for treatment that will protect wood, experts recommend focusing on the following criteria:
- durability of the layer. If you impregnate wooden products with this coating, it will last about four years. If the manufacturer guarantees a thirty-year service life, these products should be purchased with special caution.
- consumption of protective agent. A budget solution will likely require high consumption. Such products cannot be called economical. On average, the consumption of bioprotective agent is 230 g/m2.
- name of the manufacturer. The production of high-quality compositions is carried out by factory enterprises that have modern equipment and technological devices. However, such products will cost more.
- versatility of purpose. The complex preparation for impregnation provides protection of the wooden surface from burning and the occurrence of putrefactive lesions. However, the effectiveness of a solution that combines several potent substances is significantly reduced.
- what the drug consists of, product certification. The base may consist of components of organic and inorganic origin. A number of inorganic compounds are harmful to human health and are prohibited in many European countries. Organic-based solutions are more effective and are considered relatively safe. All products of this type must be certified.
Means for protecting wood from fire
A massive log takes longer to burn compared to a thin board. Smoldering of the charred layer occurs slowly. The presence of chips and cracks makes the surface of the log vulnerable to fire. The fire retardant delays the process of ignition and spread of fire.
Fire retardant can be produced in the following forms:
- liquid (varnish for decorative finishing, enamel, paint);
- solid (backfill, coating composition).
Useful information: Just a few years ago, a treatment agent such as a fire retardant was extremely hard. Using the drug in the form of a ready-made liquid concentrate is more effective. When working with powders, it will not be possible to completely avoid toxic fumes entering the body.
All flame retardants can be divided into:
- active, created on the basis of salts of phosphoric and boric acids. Elevated temperatures contribute to their melting, resulting in the formation of a protective layer that retards the spread of fire;
- passive, capable of creating a thin layer that reflects heat from the wooden surface. When overheated, swelling occurs, slowing down the spread of fire.
The highest quality fire-resistant coating is applied in industrial conditions. However, this type of processing can be carried out manually - with a brush, roller or aerosol. Small-sized products can be processed by immersing them in concentrate for several hours.
Imitation of a fresh cut of wood
This is the only way to decorate wood for which the master class participants needed a special tool - a rubber spatula with veins. Thanks to its pattern, it can erase part of the thick layer of paint applied to the item so that the pattern imitates the structure of wood. The pattern will be unique depending on how the master tilts the spatula while working.
Advice. You need to move the spatula in one uniform, confident movement. The slightest jerk will be noticeable and ruin the drawing.
“I’m delighted, I really liked everything: interesting and informative. I wanted to decorate a house in the shabby chic style, and now I know how to do it!”, one of the participants in the master class, Gulshat, admitted to us. The others were not disappointed either: the meeting really turned out to be productive and very sincere.
The next event of the “Quartblog Live” project will be a lecture by designer Olga Rozet “The use of color in interior decoration.” We invite everyone who wants to learn how to create harmonious interior solutions using knowledge about the nature of color and professional tools for working with it. You can find out more about the event here.
I wish you a creative mood and see you again!
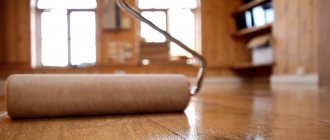
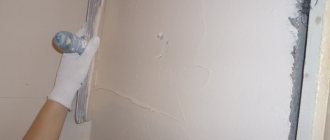
What primers to use before painting?
The modern market offers a huge variety of primers for processing, and sometimes it is difficult to make the right choice even for a professional, not to mention beginners.
To select the necessary primer composition for treatment before painting, which will be truly effective, you need to build on the following factors:
- Under what conditions will the surfaces be used? If the surfaces that are planned to be primed are facades, you can choose a primer even containing toxic additives, while in residential areas only environmentally friendly mixtures should be used. You should also try to choose those primers that also have protective properties.
- What finishing material will be used. The primer must either be from the same manufacturer with the dye or varnish that is planned to be used, or be as close as possible in composition. If you use completely different compositions, this will reduce the quality of work and spoil the appearance of the base, and the service life of such coatings is not durable.
Also, when selecting, you need to pay attention to what components the primers are made from. The most popular are:
Acrylic
They are environmentally friendly materials made from water without toxic additives. They impregnate substrates well, dry quickly enough, have a high degree of strength and are easy to use.
Also, in most cases, primers contain fillers and additives that protect the substrate from various negative influences from the outside.
Acrylic primer compositions with protective components are 2 in 1 products. After application and complete drying, you can begin painting or varnishing the wood.
Such compositions can be used both for application to facade walls and to surfaces inside residential premises. It should be borne in mind that since their base is water-based, outdoor use will be short-lived.
Alkyd primers
Recommended for use in rooms with high humidity levels and outdoors. They prevent swelling of surfaces, their delamination, as well as the formation of mold, rot and fungi.
Contains some toxins. But they still belong to moderately toxic drugs. They dry for quite a long time (more than a day, at a temperature of +20°).
If the composition will be used for application to facade bases, you should choose fine, windless and sunny weather, or carry out work under a canopy.
It is also advisable to use them for wooden bases and elements in saunas, baths, etc. etc., before using decorative materials.
Epoxy compounds
They are moisture resistant and are made on the basis of epoxy mastics. They are used exclusively outdoors as they are toxic.
The primer is a two-component primer (base + hardener), which are mixed immediately before use and has a limited period of use.
It is not recommended for beginners to work with it, as it can be difficult and time-consuming. A fairly good option for protecting façade bases from moisture and water in humid climates.