How to cover cracks in a brick stove?
For these purposes, you can use several options that will reliably seal cracks in the walls and prevent gas from escaping into the room.
Let's look at each method in more detail. One of the reasons for smoke entering a living space may be cracks that appear, which are formed for the following reasons:
- poor quality solution;
- improper finishing;
- gross violation of the technique of use;
- uneven heating of the structure;
- drying of materials.
If the problem is an incorrectly made foundation, then drastic measures may be required, including disassembling the furnace. However, with minor cracks, you can simply coat the stove, after first removing the lining and plaster from the bricks. The best options for putty are clay mixed with sand, glue and grout. Materials should be selected based on the extent of damage and financial capabilities.
You can cover the stove with a purchased mixture or a solution you prepare yourself. Further about the features of the options.
Putty made of clay and sand is the most accessible and inexpensive option. Scheme for preparing the mixture:
- you need to take clay and fill it with water in a ratio of 1:3; after this you need to leave the mixture for at least a day;
- The clay should be thoroughly mixed, adding liquid from time to time; after kneading, strain with a fine-mesh sieve and tincture again (several hours);
- after the next infusion, you need to drain the water and make sure that the mass has a creamy consistency;
- you need to mix clay and sand - first in equal proportions.
Readiness is determined using an object used to mix the solution. If too much clay sticks to it, add a little sand. As a result, the ratio of components can be from 1:1 to 1:2.5. The composition can be considered ready when a small amount of the viscous component remains on the stick.
This recipe is approximate as clays can vary greatly. It is best to rely not on a stick with stuck clay, but on the result of experiments. Experienced craftsmen make grout with different compositions. After this, several different types of cakes are dried in a place free from sun and wind.
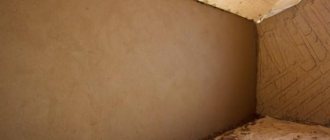
Figure 4. Plaster over reinforcing mesh
To prevent the stove from cracking, you need to take a competent approach to its construction and operation. But if cracks do appear, they need to be eliminated as quickly as possible. Regardless of the type of mixture, the structure should be prepared before restoration. The surface is cleaned of dirt and debris, and the cracks are deepened and widened. If there are bumps and sagging on the base, they are knocked down.
Before coating, the hearth must be heated. Due to the high temperature, the furnace materials will increase in volume. This will avoid repeated cracking immediately after post-restoration heating.
If there are few “seams”, they are sealed locally before plastering. Otherwise, a complete coating is used - the entire surface is covered with liquid heat-resistant putty.
Scheme of work
Figure 5. Local filling of cracks
In general, the procedure is as follows:
- clean the base and perform other additional work;
- cover the surface with a thin layer of liquid mixture and allow the putty to dry;
- reinforce the base (or cracks, if the repair is local); for this purpose, a metal mesh with small meshes is used; fasten the reinforcement with nails or dowels; as an alternative to the mesh, you can use burlap soaked in putty; It is preferable to use it to seal cracks pointwise;
- after the starting layer has dried, the fireplace is plastered; the oven is coated in two layers - the thickness of each layer is no more than 5 mm.
The next steps are at the discretion of the stove owner. The structure is covered with whitewash or decorated in another way.
The resulting solution can simply be used to seal cracks in the brickwork without subsequent sealing of the oven. To do this, the cracks must be thoroughly cleaned and moistened with plenty of water, then coated with the solution and rubbed. When the oven heats up too much, thin cracks may appear on it, which disappear when cooled and do not require grouting.
To coat the entire oven you will need the following tools:
- Paint brush.
- Putty knife.
- Construction knife.
- Soft mesh made of iron wire.
- Hammer, nails.
First, you need to clean the brick and thoroughly clear the masonry seams to a depth of 1 cm. After this, you need to cover the stove with a metal mesh and nail it in a checkerboard pattern at a distance of 10 cm, getting into the seams between the bricks. The coating is made on the basis of this mesh. It is recommended to carry it out on a hot stove surface, since as a result of preheating, the seams expand and will better hold the plaster.
In turn, the pores of the cooling brick will also attract mortar. The oven is moistened with water and coated with the mixture in two steps. The first layer is more liquid (for this the solution is diluted to the thickness of sour cream) 5 mm thick. The second thicker one is applied on top and has the same thickness. Then the layers are leveled and rubbed. If cracks form after drying, they must be cut and the edges trimmed. Then moisten with water and rub with a thick solution.
The use of a mesh when coating the furnace allows you to avoid further lag of the solution from the walls and the appearance of cracks. Instead of iron wire, you can use natural burlap. Before use, it must be kept in the prepared solution, and then covered with a heated stove. Cover the top with a second layer of mixture and level.
After the plaster has dried, the stove can be whitewashed. For this purpose, only water-based compositions with chalk or lime are used. Oil paints decompose when heated strongly and emit an unpleasant odor.
How long does it take for fireclay to dry?
According to experts, there may be a huge amount of liquid on the stove; it is contained in fastening compounds. Almost all seams of any design are sealed with a solution containing water. Therefore, it is so important that the fireclay composition dries completely and becomes a highly reliable thermal system. To achieve this, it is not enough to wait - you need to heat the stove slowly, not until it gets hot, using a small amount of fuel. Thanks to this, the water will gradually evaporate.
It is very important not to forget about the external temperature. If it is below -10 degrees, then the moisture will evaporate longer.
The external temperature should be between 18 and 20 degrees. The stove is heated at least 2 times a day, ideally with firewood, but no more than 4 logs per firebox. This mode should be maintained for 1 to 1.5 weeks in the summer, the time varies depending on the thickness of the masonry and the dimensions of the stove. In winter, drying time increases to 14-20 days.
For more information on how to prepare a solution from fireclay clay, see the following video.
Clay mortar for laying a furnace
To properly coat the stove with clay, you must follow these step-by-step instructions:
- The surface, cleaned of plaster, is generously moistened with primer or water.
- Using a chisel, knock out the gaps between the bricks.
- The oven is warming up.
- Using a trowel, apply the clay mixture into the cracks and spread it over the entire surface in an even layer. If you don’t have a tool, you can do the smearing by hand. The mixture does not cause irritation or damage to the skin.
- When the surface is dry, another layer of the mixture is sprayed. Particular attention is paid to cracks - there should be a dense layer of mortar between the gaps.
- Using a damp wooden trowel, grout in a circular motion to remove any unevenness.
- The last step is plastering the stove.
The process of sealing with fire-resistant adhesive is carried out according to the same scheme, but includes an additional step. After filling the cracks with plastic material, the entire surface is treated with a hard type of glue so that the stove no longer smokes. It takes half an hour to dry, which can be spent on decorating. It is important to remember that the structure can be used after the solution has completely hardened.
Regardless of the nature of the defects, you will need a solution to cover them. Sometimes chamotte (fireclay clay) or a traditional mixture of sand and clay is used for this. The modern market of finishing materials offers a large selection of different grouts and adhesives. You can make regular grout yourself. There are several recipes for traditional putties:
- Sandy. To mix the composition, you need 4 parts of river sand, 2-3 parts of lime mortar and 3-4 parts of cement mortar. All components are kneaded until smooth to form a plastic mass.
- Fireclay and clay. This type of putty consists entirely of fireclay or clay. Both materials can be purchased at a specialty store.
- Lime. One of the simplest and most common putty for Russian stoves is lime solution. To do this, buy a liquid mass or extinguish the dry composition.
- Cement. For furnaces, it is optimal to use the M400 composition; 0.5 cement is diluted to 1 part water.
All materials are equally popular in caulking stoves. In order to choose a solution suitable for your stove, you should familiarize yourself with the pros and cons of each of the presented compositions.
Fireclay clay
This type of clay is considered one of the most popular putties among traditional compositions. Fireclay is considered a very reliable material; it is resistant to processing at high temperatures. Most of the ancient stoves, coated with fireclay clay, are still functioning.
You can buy fireclay in almost any construction department. The material is packaged in bags of 5, 10, 20 and 50 kg. Before application, the clay must be diluted with water and left for a day to gain viscosity and plasticity.
Sand coating
This composition is very popular due to its low cost. Moreover, it is used not only for coating, but also for laying seams during laying. The low cost of the components does not in any way affect the quality of the composition. After kneading, you will get a very plastic mass that will gain strength after a couple of heating cycles.
To prepare the sand-clay mass, use the following instructions:
- For 1 part clay, take 3 parts water, mix it all and leave it for three days.
- After 36 hours, the composition is mixed again by pouring water into it. To remove lumps, the mass is passed through a fine sieve (1-2 mm mesh).
- Excess water is drained from the mass, and everything is kneaded again. After which you should get a composition reminiscent of sour cream in consistency.
- The final step is adding sand. At this stage it is very important not to add too much sand. The component is poured into the mass gradually, stirring with a stick. During the kneading process, you need to check the amount of composition sticking to it. The quality of the composition is determined by the abundance of mass on the stick. There should be small lumps left on it, no more than 2-3 cm. The ratio of components in the composition is 1:2.5, where 2.5 is clay, and 1 part is sand.
The coating composition is thoroughly mixed and checked for plasticity. To do this, roll the mass into a ball and squeeze it between your fingers. The correct composition turns out to be plastic, like plasticine; when pressed and rolled, it wrinkles well and does not crack. If chips form on the ball, you should add a little more water.
Oven grout
Stove grout is considered the optimal composition for beginning craftsmen. The mass is very easy to work with, but most importantly, it has high ductility and durability. Once applied and dried, it can withstand temperatures of 10,000C?.
The disadvantages of this composition include its high cost, but it is fully justified by its high characteristics. If you want to save money, you can make the putty yourself. To do this you will need:
- clay 1 part;
- 2 parts water;
- 4 parts sand;
- 1 part finely chopped straw;
- a pack of regular salt.
The clay needs to be mixed with water (1 part water and 3 parts clay), after which the mass is left for a couple of days. Then sand is poured into the solution and gradually mixed. At the very end, the composition is supplemented with straw and salt, and everything is kneaded.
Furnace glue
This composition can also be purchased at a hardware store. It is very easy to mix and apply.
Today, the construction market offers two types of glue: plastic and hard. The first is optimal for restoration (sealing cracks), the second is used as a finishing touch.
Application of the composition is carried out according to the following instructions:
- kneading 1 liter of glue;
- wetting areas with cracks with water;
- treating cracks with a mixture (you need to push the composition as deep as possible);
- mixing 5-6 liters of hard glue;
- finishing of the furnace.
Cracks can form on any structure; this process should not be started. Timely restoration can significantly extend the service life of the furnace.
You can now find special mixtures for coating ovens on sale. For example, experts recommend using a refractory mixture, which is ready-made clay, to seal cracks. Before use, it must be diluted with water, following the instructions, to the desired consistency, add PVA at the rate of 100 g per bucket of solution and you can seal the seams that have crumbled over time or coat the entire oven.
To obtain the solution you will need the following tools and materials:
- A construction sieve with a hole size of at least 3 mm.
- Sealed container (trough, bathtub or tub).
- Bucket, shovel.
- Clay, sand.
This is a recipe for a classic solution in which clay and sand are mixed in a 2:1 ratio. Our ancestors added fine straw or horse manure to it to avoid the formation of cracks. For the same purpose, experienced professionals advise adding table salt to the solution (300 g per 10 l). This putty should be allowed to sit overnight before use.
The following solutions are recommended for use:
- 0.1 part asbestos, 1 part lime and clay, 2 parts sand;
- 2 parts sand, 1 part each clay and cement, 0.1 part asbestos;
- 2 parts lime, 1 part gypsum and sand, 0.2 parts asbestos.
Materials must be measured by volume in accordance with the required quantity. Before starting work, all components should be sifted through a fine sieve. The clay can be pre-soaked for a day, in this state it will mix better with sand. The lime is first slaked with water, and the resulting milk is mixed with the other components, depending on the composition of the mixture. The prepared solution should be homogeneous and have a fairly thick consistency. If necessary, it can be diluted with water.
Mixtures with cement and gypsum are prepared in small portions. It is advisable to use a cement solution within 1 hour; a solution with the addition of gypsum is suitable only for 5 minutes. Then they lose elasticity and become unsuitable for use.
When constructing a stove, a cement mixture, which is prone to cracking under strong heat, is used only when laying its base (foundation) and the chimney head. For masonry of the firebox, chimney and for plastering, only clay-based solutions are used.
To lay the base of the furnace, it is allowed to use ordinary red clay, which can be found in any quarry. In the firebox and chimney, the bricks are held together with heat-resistant fireclay clay, a high-density white kaolin sedimentary rock that is fired in kilns to increase its strength characteristics. Under the influence of high temperatures, it acquires a cream or gray-brown tint, and after firing it is not inferior in strength even to stone.
The classic composition for laying a stove consists only of clay and sand. If necessary, other ingredients are added to improve the composition.
Manufacturers offer the following fireproof fireclay mixtures:
- “Terracotta”: made using classic furnace technology.
- “Plitonit”: with reinforcing heat-resistant fibers.
- "Pechnik": in the form of ground fireclay powder.
- “Makarovs’ stove house”: fireclay mortar (unmolded mass), the composition includes clay and ground refractory brick.
- "SPO": based on chamotte and sand.
In addition to masonry and plaster mixtures for stoves and fireplaces, construction stores also sell reinforced clay compositions used for fireclay fireboxes. There are also special compositions on sale for laying sauna stoves operated in conditions of high humidity.
To perform furnace work, the following types of solutions are used:
- Based on red clay: able to withstand an average temperature of 1100°C, used for laying the body of the furnace.
- Fireclay fireclay: for fastening bricks in a firebox or chimney.
- Limestone: fire resistance is below average, can withstand temperatures of only 450-500 °; used for laying the base of the furnace and pipes located above the roof level.
- Sand-cement and cement-lime: used only for the upper part of the chimney and foundation laying. Cement-lime is stronger than ordinary lime, but can withstand temperatures only up to 200-250°C.
- Clay-lime: used for plastering.
- Sandy. To mix the composition, you need 4 parts of river sand, 2-3 parts of lime mortar and 3-4 parts of cement mortar. All components are kneaded until smooth to form a plastic mass.
- Fireclay and clay. This type of putty consists entirely of fireclay or clay. Both materials can be purchased at a specialty store.
- Lime. One of the simplest and most common putty for Russian stoves is lime solution. To do this, buy a liquid mass or extinguish the dry composition.
- Cement. For furnaces, it is optimal to use the M400 composition; 0.5 cement is diluted to 1 part water.
Oven grout
Technical characteristics and properties
When purchasing fireclay clay, you must make sure that its expiration date has not yet expired and that it has been stored under the correct conditions. Since during long-term storage kaolin loses its properties. Humid air is especially dangerous for it.
Fireclay clay is produced in accordance with GOST - 6137-8 and has the following technical characteristics:
- The average grain size is approximately 2 mm.
- Moisture absorption: for high-burnt fireclay from 2 to 10%, for low-burnt fireclay – up to 25%.
- Humidity – no more than 5%.
- Fire resistance – from 1550 to 1850 °C (depending on the composition);
A package of fireclay clay weighing 20 kg is enough to lay 20-30 bricks. For one cubic meter masonry will need 100 kg of calcined kaolin. The finished solution hardens within two days at an air temperature ranging from + 10 to + 25 ° C.
Fireclay clay can be stored in its original packaging for no more than three years, based on the date of manufacture. Full strength is achieved after 28 days.
Tools and materials required for work
To carry out coating work you will need the following tools:
- poplar or brush;
- knife;
- hammer;
- putty knife;
- mesh made of steel wire or natural burlap;
- nails.
For proper preparation you will need the following tools and raw materials:
- a sieve with mesh sizes of at least 0.3 cm;
- mixing container;
- shovel for mixing;
- bucket;
- sand;
- clay.
Coating compositions according to their purpose are of the following types:
- to cover cracks and cracks;
- in order to completely plaster the surface.
How to properly coat a stove?
Cracks cannot simply be repaired with plaster or other material; all defects must be identified and restored correctly. You should not skimp on such work, as this can lead to even greater defects. The entire process of restoring the furnace lining includes the following steps:
- inspection and determination of the causes of defects;
- selection and mixing of the solution;
- applying grout and plaster.
In most cases, the actions will not take much time, and most importantly, they will not allow carbon dioxide and combustion products to accumulate in the room.
In order to reliably cover the cracks in a brick kiln, work is carried out in several stages:
- For large cracks, you will need to completely remove the layer of plaster and use a chisel or other tool to widen the cracks and gaps between the bricks. You need to work carefully, not missing even small cracks. By cutting the crack edges in this way, you increase the area for filling with mortar and improve the quality of adhesion to the main surface of the wall. The minimum depth for filling cracks with mortar is 10 mm.
- Now it is important to cover all surfaces with a deep penetration primer or plain water. Then we heat the stove by adding a small amount of firewood. It is important for us to dry all surfaces before work.
- While the oven is still warm, apply a thin layer of liquid clay solution using a paint brush or a large paint brush. This solution, once dry, will serve as the basis for continuing work.
- You can lay a layer of reinforcing mesh on top or simply cover the surface with old bags. We fasten the steel mesh with self-tapping screws, and glue the burlap with glue or nails, which we hammer into the joints between the bricks.
- Using any of the previously listed solutions, apply 2 layers of plaster, each up to 5 mm thick.
- After drying, you can plaster the walls with an additional layer of lime mortar or simply whitewash the walls of the stove with lime.
Coating process
Recommended coating solutions
The following compositions can also be used for coating:
- a solution based on clay and lime. Asbestos and sand are also added to it. The proportion of the mixture is as follows: 1:1:0.5:2;
- mix clay and cement in equal quantities, add sifted sand and asbestos. The proportion of the solution is as follows: 1:1:2:0.5;
- combine equal amounts of gypsum and sand, add sifted sand and lime. The proportion of ingredients should be 1:1:2:0.2.
In order to properly coat the oven, you must adhere to certain rules and recommendations:
- Clean the brick surface.
- Clear masonry joints to a depth of 10 mm.
- Cover the stove with steel mesh and secure it with nails in a checkerboard pattern, hitting the masonry joints. The distance between the nails should be 0.1 m. The steel mesh will help avoid the appearance of cracks during further use and prevent the mortar from peeling off.
- Wet the surface.
- Coat the structure in 2 steps. In order for the coating material to adhere better, the surface of the structure must be hot. The first layer should be 0.5 cm thick. For these purposes, you will need a solution that resembles sour cream in consistency. The second layer is also applied with a thickness of 0.5 cm. The solution for this layer should be thicker.
- Align layers.
- Grout the surface.
- If cracks appear after drying, it is necessary to cut them and smooth the edges. Next, wet and grout with a solution of thick consistency.
- After the plaster has dried, you can begin finishing work.
- If finishing work is not carried out, then you can begin to operate the structure after 72 hours.
Composition of mortar mixtures for plastering a stove
Our ancestors also added horse manure or salt to the mortar, but this only works when it is necessary to coat the entire stove after it has been completely laid out. For us, in order to cover up the cracks, clay, sand and water will be enough. When the solution is mixed, you need to let it stand for 24 hours, covering it with plastic wrap. After time has elapsed, the film is removed and the solution is mixed again. In this state it is ready for use.
Furnace glue
Important! Oven glue dries very quickly, so you need to work with it as efficiently as possible. It is recommended to mix the composition in small portions and immediately apply it to the cracks.
Furnace glue
Requirements for the solution
A well-prepared solution is the basis for long-term use of the oven. Before choosing a mixture, familiarize yourself with the main characteristics that you need to focus on when purchasing:
- Heat resistance. The basic and main requirement, after which the rest are not so important. The applied solution must be able to withstand high temperatures - up to 95⁰C.
- Thermal conductivity. The stove, as a heating source, must release heat indoors when a certain temperature is reached.
- Elasticity. When heated, the applied coating should be slightly stretchable. Thanks to this, the layer of plaster will not burst, will preserve its appearance and prevent subsequent restorations.
- Environmentally friendly. The solution should not contain toxic chemicals, since when heated they will be released into the air, which is not good for rooms.
Reasons for appearance
Defects in masonry and coating may appear on the stove due to the following features:
- Use of low-quality or cheap materials. If the putty or mortar was mixed incorrectly, it will sooner or later crack. When working with a furnace, you should not skimp on coating work.
- Failure to comply with finishing technology. When finishing a stove, it is very important to remember the intermediate steps, such as wetting the masonry and drying. Do not rush and apply the coating when the mixture has not yet dried.
- Incorrect drying. Some craftsmen use hair dryers or heat guns to speed up drying. This process is contraindicated in ovens, especially clay ones. The structure must dry naturally to ensure uniform hardening.
- Drawdown. If the furnace substrate or the first row of masonry was done incorrectly, it will sag. Such a defect is more difficult to eliminate; in extreme cases, complete or partial dismantling of the masonry may be required.
The most difficult defect to correct is subsidence. You should never skimp on your furnace foundation. A high-quality stove can survive even after a house is destroyed.
Often, combustion products accumulate in the house due to the following shortcomings:
- Chimney blockage. You can clean the smoke duct in different ways, but this must be done frequently.
- Clogging of the stove riser with brick chips. The brick gradually crumbles, which leads to clogging of the riser systems.
- Violation of internal masonry technology. In such a situation, you will have to completely redo the chimney.
- Hypothermia of the riser due to downtime. If the stove is left unlit for a long time, it may start smoking. To prevent this from happening, the first kindling is done gradually, heating the stove with paper and wood chips.
If you cannot independently determine the cause of smoke in your home, be sure to invite a professional to do this. An experienced stove fitter will not only help detect defects in the stove, but will also draw up an estimate for the work.
Note! Household members often believe that smoke accumulates in the room precisely because of cracks. But sometimes the reason lies elsewhere.
Before properly and reliably caulking the stove, in order to prevent repeated malfunctions, you need to know what can affect the integrity of the stove coating:
- during a long break in heating the house and sudden temperature changes;
- the furnace was laid using low-quality mortar;
- Perhaps the reason is the settlement of the building or foundation. In this case, it will be necessary to carry out major repairs to the foundation, increasing its size and strength;
- after laying the stove, the process of normal drying of surfaces was disrupted;
- when plastering the stove, a low-quality solution was used or a thick or very thin layer was applied;
- Perhaps the reason is faulty ventilation and condensation deposited on the walls of the furnace.
How to prepare for modeling?
Fireclay plaster is perfect for creating interior items. Modern design makes it possible to use them as details of an artistic composition. Chamotte plaster is great for leveling out any unevenness and self-designing any surfaces. Fireclay clay is used to create:
- pots;
- sculptures;
- dishes;
- frames for the interior;
- other decorative items.
To make the clay suitable for sculpting by hand, the following is added to it:
- water;
- plasticizers;
- reagents for moisture retention.
In this case, it is possible to create any of the above items that are fired at high temperatures. Since it is high temperature that affects the color and strength of the product, it is important to use a composition that is not afraid of fire. In special stores you can buy fireclay-type masses that are introduced into the clay. This additive will provide the mass with heat resistance and high ductility. The composition is perfect for creating objects of large shapes; working with it is quite comfortable.
Fireclay for modeling can be presented in different variations of fractions. Pottery is wonderfully made from small fireclay, but large fireclay is absolutely not suitable for this. Large-type crumbs are suitable for forming massive products and street decoration.
The recipe for preparing the modeling mass is as follows:
- the clay is sifted, gets rid of any foreign inclusions, soaked and dried;
- dry clay is crushed under a tarpaulin and sifted;
- you can pass the clay through a large meat grinder, but in this case no sifting occurs, only grinding;
- the clay needs to be left in water, removing all excess from the surface;
- In this way, the clay is soaked several times, removed from one container and placed in another;
- after that another drying;
- last of all, fireclay sand is added, it is introduced in quantities that depend on the purpose of use;
- for the manufacture of ceramic decorative products, the ratio of fireclay and clay should be 50 to 50, this mass is called fireclay, the minimum amount of fireclay is 1 to 5.
Furnace inspection
To analyze the condition of the stove you do not need to have the professional skills of a builder or stove maker. The main thing is to detect all cracks and assess their size. If there are no major defects in the masonry, then removing the old coating and applying a new one will be sufficient. In addition, you need to remove part of the mortar between the bricks in the place where the crack formed. After these procedures, the masonry is covered with mortar so that the patches are not noticeable.
In the case of large defects, some of the bricks will have to be dismantled and replaced with new ones. The danger of a crack can be determined by the characteristic burning smell from the cracks and the release of smoke. Repairing large cracks is a painstaking and lengthy process. It is best to entrust such restoration to a professional.
Advantages and disadvantages
Advantages of fireclay clay:
- Resistant to high thermal influences.
- It has good adhesive properties, thanks to which it adheres to all types of surfaces.
- Vapor permeable. The solution allows moisture vapor to pass through, accumulate and release back.
- Long service life The solution does not crack or crumble and retains its original geometry as a whole for a long time.
- Eco-friendly and absolutely safe.
Flaws:
- The difficulty of preparing a high-quality solution for an inexperienced master;
- High price compared to conventional, unprocessed types of clay.
Examples of stoves made of fireclay bricks and clay
Did you like the article? Share with friends on social networks:
And subscribe to site updates in Contact, Odnoklassniki, Facebook, Google Plus or Twitter.
Plastering from cracks
You cannot plaster the stove over cracks. First you need to treat the defects using one of the methods described above, and then apply plaster. The composition can also protect the oven from improper heating and cracking.
During the process of restoring the furnace, the plaster is always removed where defects have formed. Decorative trim also needs to be removed.
Before any restoration, the masonry is generously moistened with water, this increases the adhesion of the composition to the working surface. If you skip this step, the solution may simply fly off.
When working with cracks, it is most convenient to apply the putty with your fingers; this will allow you to feel the direction of the putty and its amount. For convenience, it is better to apply the composition with rubberized gloves.
After all defects have been treated, the oven is left to dry for 7-10 days. Only after this period has passed can the first fire be carried out.
Sealing cracks and crevices on the stove
In order to cover up cracks and crevices, the following types of solutions can be used:
- Using a solution based on refractory clay. PVA glue and water are added to this solution. The proportion of the mixture for filling cracks is as follows: add 0.15 kg of PVA glue to 5 liters of mixed clay with water. Mix the solution thoroughly until a homogeneous consistency is obtained. Before covering a crack, its surface must be cleaned of dirt and dust and moistened with water. After this, you can cover the crack with the resulting solution.
- The second solution, suitable for sealing cracks, is prepared based on cement and clay. This option is more durable. This mixture is suitable for sealing small cracks on plastered surfaces. The ingredients for this mortar are: fire clay, cement, sand and asbestos. Mix from in the following proportion – 1:1:2:0.1. All components are thoroughly mixed, gradually adding liquid.
Properly prepared solutions lie smoothly on the surface. After such mixtures have dried, it will be enough to sand the surface with sandpaper. It is recommended to use fresh solutions immediately after preparation. Before applying the mixture, the surface must be moistened. This will help the material to better adhere to the surface being repaired.
If all proportions are correctly observed, work technology and the use of high-quality materials, the repaired structure will have a service life of at least 10 years.
Description of species
Refractory fireclay is a component on the basis of which solutions for various purposes can be prepared. Clay is divided into lump and ground. The lump variety is used for the manufacture of clinker, ceramic and heat-resistant products, and fireclay powder is used to prepare working solutions used for coating or plastering surfaces. In addition, stuffing and molding mixtures are prepared from the powder.
Kaolin clay is also divided by composition, depending on the proportion of fireclay sand. To prepare solutions use:
- binder type clay containing 55% sand;
- smooth type, where sand can be from 20 to 48%;
- depleted type with sand content not exceeding 21%.
Depending on the content of aluminum oxides, the fireclay composition is divided into the following varieties:
- highly basic – no more than 40%;
- main – from 25 to 37%;
- semi-acid – no more than 27%.
In addition, fireclay clay powder is divided into varieties. There are 4 grades in total depending on the composition of impurities and the degree of fire resistance:
- special;
- I grade;
- II grade;
- III grade.
Unconventional mixture with clay
There are non-traditional mixtures for sealing cracks in furnaces. Other ingredients are added to the clay and sand, for example, chopped straw or horse manure.
There are unconventional mixtures that are used to seal cracks in stoves, in which, along with sand and clay, other components of plant or animal origin, such as chaff (chopped straw) or horse manure, are added.
In this case, take 4 buckets of clay, 1 bucket of fine sand, 1 bucket of water, in the old fashioned way this mixture is kneaded with your feet with the gradual addition of 50 kg of horse manure. Undigested herbs in manure will act as reinforcement material for cracks. The mixture should be free of lumps, completely homogeneous, and its readiness is checked as follows: a leg pulled out of this porridge should be clean.
The prepared solution is left under the film overnight, and in the morning, after mixing it thoroughly again, you can begin coating the oven. Before this, the brick must be wetted with water. Two layers of this mixture should be applied, the first layer should dry a little before.
After this, the oven should dry for two to three weeks, then it should be plastered with a mixture of sand and starch. After another month, you can apply whitewash in several layers. Of course, this method is labor-intensive and time-consuming, but worthwhile, considering that with such coating there will be no problems with the stove for at least ten years.
Fireclay clay is often used in the construction and repair of brick kilns. After heat treatment, this rock receives additional properties. Kaolin clay is used to make fireclay. During heat treatment (1500 degrees), it turned into stone. The resulting stone powder is added to the mortar when repairing or constructing a furnace.
Fireclay clay differs from similar materials in the following advantages:
- resistance to high temperatures,
- vapor permeability,
- high adhesive properties.
In addition, fireclay clay is safe for human health and will ensure a long service life of the fireplace. Unfortunately, there were some negative qualities.
If the stove has already been plastered, you can quickly put it in order and cover up the cracks that appear over time using the same clay. Plastering of stove walls is done in order to:
- Reduce the risk of smoke penetration from cracking seams in old furnaces.
- Give a certain style.
- Level out sloppy masonry.
- Keep the heat in the oven longer.
For plastering, you can use a simple clay composition, lime-clay, lime-gypsum, or make it from sand, clay and cement. The process of mixing such a solution is not much different from preparing a mixture for masonry. The clay mass is also pre-crushed and soaked, and then mixed with sand and lime or cement.
To 1 part medium-fat clay and 2 parts sand (it is advisable to find clean river sand), add 1 part lime dough. When using cement, focus on the amount of sand. The more it is, the more cement needs to be added. For 3 parts of sand you need to take 1 part.
When adding any other components to the clay solution, they are first mixed with each other, and only then with the pre-soaked clay.
To reinforce and strengthen the plaster, asbestos, fiberglass, hemp or straw can be added to it in a ratio of 1: 2: 0.1 (clay: sand: additives).
The surface of the stove is cleaned of old mortar, dust and dirt. If this was not done during the construction of the furnace, then masonry joints between the bricks should be 10 mm thick. Plastering begins only with a pre-heated warm stove:
- The surface must be moistened abundantly.
- First, a layer called spray is applied. A slightly more liquid solution is prepared for it, which can be easily sprayed onto the stove in a small layer with a brush or broom. It's better to do this twice. A second thin layer is applied after the first has set in order to seal small cracks and places where too little solution has been applied.
- Before applying each layer, the wall must be moistened again.
- The reinforcement mesh is attached to the nails.
- It is covered with a thin layer of very liquid clay mortar. After such priming, the base layer will stick better.
- The primer is dried.
- Now the base layer is applied. It should be small - 2-5 mm. If a larger layer thickness is required, it is reapplied after drying.
- The last layer is a covering that levels the surface and fills all small irregularities. Its thickness is 2-5 mm. The solution for it is prepared in the same liquid as for spraying.
So, preparing a clay solution is not such a complicated process. But the masonry itself requires experience and care. An error in the order (masonry scheme) can result in the stove smoking mercilessly or, in the absence of sufficient draft, refusing to light up at all. Therefore, if you are starting such work for the first time, do it under the guidance of an experienced stove maker.
We hope you found the article interesting. Leave your questions and comments in the comments below.
Fireclay clay
Most often, fireclay clay, which has excellent fire resistance, is used to restore a brick structure. Stoves made with this material are reliable and durable. Many people don't know where to get clay. This clay is sold in every hardware store - it is packaged in paper bags weighing 20 kilograms.
Sand and clay
You need to follow the procedure for preparing clay for coating the oven. It is first soaked in water and left for 2 days. The cost of fireclay clay is affordable.
A mortar made from ordinary clay and sand is the most inexpensive solution than covering up cracks in a stove between bricks. It is used quite often, since the mixture is plastic, and after firing it becomes durable and strong.
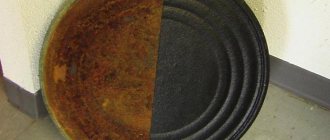
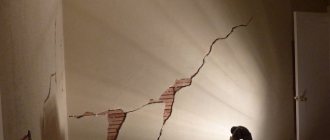
Why do cracks appear in furnaces?
Most often, problems appear in brick fires. There are 4 main reasons for violating the integrity of the masonry:
- prolonged absence of heating in the house; if the stove stood in an unheated building during the winter, then cracks cannot be avoided - and not only in this structure, but also in the walls of the building;
- ignoring operating rules; a “fresh” stove must stand – the masonry mixture should set and the structure should dry well; heating a damp hearth will certainly lead to the appearance of cracks;
- uneven heating of furnace zones; the structure must be made in such a way that heat is distributed evenly throughout it; otherwise, the thermal contrast boundary line will become clearly visible - the masonry will crack in this area;
- difference in thermal expansion coefficients of masonry mixture and masonry; the furnace material and the solution must have approximately the same thermal expansion rates, otherwise the surface will be covered with a network of microcracks; This is not the biggest problem - cracks are not visible on a cold structure.
Figure 2. Formed cracks along masonry joints
These four reasons lead to troubles that can be relatively easily eliminated with putty. But there are more fundamental reasons:
- improper foundation design; if the latter, for example, does not correspond to the dimensions of the heat source, the stove monolith will be damaged; the oven will begin to crack even if the shrinkage of the base does not go according to plan;
- incorrect calculation of physical characteristics of materials; for example, without a reserve in thermal seams, the metal structure will “break.”
In these two cases, putty will not help. We'll have to move the oven. Therefore, the first step is to diagnose the structure. Once you are sure that the problem can be solved with little effort, you can proceed to the next steps.
It will be interesting - an article about sealant for stoves and fireplaces.