Varieties of stucco elements - how to decorate a room
Having chosen the option of antique, architectural decoration, you need to think through the design of the image and combine it with the rest of the interior of the room. The stucco molding on the walls and ceilings should be in harmony, and not stand out as a bright, whitish and inappropriate spot.
Of the wide range of elements, the most popular are:
- Floral and plant themes.
- The theme of the animal world.
- Geometric figures.
- Elements of antiquity.
Now let's talk about them in more detail and look at photos illustrating how it looks in reality.
Queen of small architectural forms Source goodlinez.ru
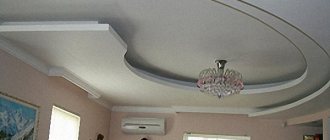
Types of stucco decoration
Moldings
One of the most popular types of stucco in modern interiors, although it is used in any style. Moldings are volumetric strips that are used on any surface, modeling space. With their help, you can add volume to a simple finish, highlight certain areas or highlight the decor.
Instagram @natamodo
Instagram @enjoy_home
Instagram @zhilin_brothers
Instagram @quadro_room
Instagram @malitskie
Cornices
Ceiling cornices with stucco molding are used as an analogue of floor plinths, covering the joints of walls and ceiling with them. They can be either patterned or completely smooth. Such planks play a decorative role; their color can match both the ceiling and the walls - depending on this, the height of the room will appear larger or smaller.
Instagram @lesya.pechenkina
Instagram @ruger_design
Instagram @zhilin_brothers
Instagram @studiolawahl
Instagram @natamodo
Friezes
A frieze in the modern sense is a wide border with a pattern that runs along the perimeter of a ceiling, window or doorway. Sometimes it is imitated, but the real frieze is convex, but its surface can be either embossed or smooth.
In the interior it acts primarily as a decorative element, often used in classics or neoclassics. It also visually lowers a ceiling that is too high, making the proportions of the room more harmonious. The larger the frieze, the lower the room appears, so you need to be careful with this element so as not to overdo it.
6 photos
Instagram @we.ar.1
Instagram @nikitinadesign
Instagram @polinov
Instagram @we.ar.1
Instagram @nikitinadesign
Instagram @ancconcept
Columns and semi-columns
Stucco molding in the form of columns is rare in city apartments. The elements consist of three parts: the lower support, the pillar itself and the top (this can be a pilaster or a capital, usually of a decorative nature).
Instagram @natamodo
Instagram @mikhailova_interior
Sockets
They are a patterned composition that decorates the mounting of the lamp to the ceiling. Most often, the rosette pattern is located in a circle, but there can also be free forms. The ornament is painted to match the canvas or made contrasting.
Instagram @a_gorskaya
Instagram @taupehome
Instagram @nikitinadesign
Instagram @a_gorskaya
- Decoration
7 mistakes in using stucco that make the interior tasteless
Stucco molding on floral and plant themes
Beautiful wall painting Source chromakey.spb.ru
Interior of a residential building Source dizainexpert.ru
Rose petals and grapevines are very popular. Symmetrical lines and simple shapes make sculpting easy.
Stucco molding on the theme of the animal world
Plaster prancing horses Source twistedsifter.com
Complex configuration Source howbuilde.ru
Modeling images of representatives of the animal world takes more time. It should be borne in mind that some of them may not fit into the overall interior and can make a negative impression on a person.
See also: Catalog of companies that specialize in finishing materials.
Stucco molding in the form of geometric shapes
Universal type of stucco Source www.mwmgraphics.com
Luxurious, stylish, modern Source domiofis.ru
Straight, curved, sometimes meaningless lines and figures are considered the most universal type of stucco on the walls. Thanks to their neutrality, they harmonize perfectly with most interiors.
Types of stucco in the interior of an apartment
Anything your heart desires can be displayed on the walls. The main thing to consider in the composition:
- the size of the area allocated for it;
- the ratio of the size of the molding to the free space in the room;
- pattern location;
- material used.
The combination of certain elements occurs according to a single texture, color and type of execution.
You not only have to come up with a plot image, but also combine it with other elements of the apartment’s design. Modeling should meet the requirements of the chosen style, and not become a thorn in the interior design.
Popular images of sculpting include the following types:
- floral and plant motif;
- animalistic theme;
- geometric figures;
- antique theme.
Only the hand of an experienced craftsman can depict the chiseled forms of an antique bas-relief.
If the first three types are easy to perform, then the last one will require the help of a professional.
Floral and plant pattern
Most often they depict bouquets of lush flowers and vines. The symmetry of their lines and simplicity of shapes simplify modeling.
This decor significantly transforms and enlivens the room, and gives it a unique style.
Animal images
The world of fauna is inferior in popularity to stucco flora, since it does not fit into many interior styles.
Not everyone can depict animals realistically, so you can’t do without a specialist.
Geometric figures
Neutral geometric patterns are easy to implement, thanks to the severity of the lines and streamlined shapes.
The most versatile type of stucco that looks beautiful in a variety of interiors.
Antique bas-relief
To depict antique figures, they use a special tool and high-quality material.
The most complex type of stucco molding, which is considered a separate type of artistic art.
Antique stucco
An antique palace in a country house Source colorprofi.ru
In the style of Ancient Greece Source remont-f.ru
The depiction of ancient figures will require high professionalism and high-quality material. Even a beginner can handle the patterns, which also date back to antiquity. The main thing is the correct arrangement of elements on the surface (the entire composition as a whole).
Corridor in a classic style Source lepnina.com.ua
DIY plaster molding
- 1 Shape selection
- 2 Solution
- 3 Manufacturing
- 4 Surface preparation
- 5 Videos
- 6 Photos
Plaster decorations will add individuality to your interior design. In addition, stucco can be used quite widely, in various styles of room decoration. In this article we will tell you how to make stucco molding from gypsum with your own hands (at home), and give step-by-step instructions for making it.
Functional varieties
Based on functionality, stucco on the walls is divided into several types.
Space delimitation Source gessostar.ru
Cornices, baseboards. Placed at the junction of the ceiling and walls. In addition to decorative functions, the elements perform a number of additional tasks:
- Mask the top edges of the wallpaper.
- Visually increase or decrease the space of the room.
- They hide possible flaws in this part of the walls. Can be patterned or straight.
Molding. Used as edging for paintings, panels, mirrors, decorative inserts. With a certain layout it can visually increase the space. Available in smooth or embossed.
Bas-relief in the interior of the apartment Source pikstagram.com
Bas-relief. A convex texture depicting only part of an element protruding above the wall by no more than half the volume. A chic type of stucco for walls that adds sophistication and grandeur to the interior of the room.
Stucco molding - bracket Source gazeta-pravo.ru
Bracket. Used as a decorative support for cornices and other elements.
Creating a Form
A plasticine or plaster mold is coated with a release agent, and then silicone diluted with a release agent is applied to it using a brush. When performing this stage of work, special care should be taken to avoid the formation of bubbles, which may subsequently affect the appearance of the product.
After applying the first layer of silicone, it should be strengthened with gauze, and then, after drying (after 2-3 hours), the procedure must be repeated. As a result, the finished form should have a thickness of 3-4 mm, which means 2-3 layers of silicone and gauze, but for large forms these parameters should be increased to 4-5 mm. After final drying, the finished form is separated from the plasticine (clay) sketch and installed in a wooden box or on a frame. If a large mold is poured, then it is additionally required to fix it on a support using cement or alabaster, which will help withstand the large weight of the future product.
To ensure that the stucco molding on the walls or ceiling does not have defects and the finished product is easily removed from the mold, it is recommended to treat the mold with a release agent or colorless furniture varnish. After this, you can start pouring the finished gypsum solution into the mold.
[my_custom_ad_shortcode5]
Materials: gypsum, polyurethane, polystyrene foam
Beautiful stucco Source richartone.ru
The history of stucco can be read by its name: decorative elements were cast from plaster and molded onto the wall. In most cases, this was done manually, but only with the advent of automation of production workshops did pouring begin to occur autonomously.
The development of technologies and materials has made it possible to expand the range of products and establish production from polymers. Simple compositions are assembled using stucco foam. But, gypsum, as before, was and remains an eternal classic, used mainly only by professionals.
Modern Bedroom Design Source givewhereyoulivehamptons.org
DIY bas-relief on the wall for beginners
Most people today rely on the presence of a certain zest in the interior.
For example, a very popular innovation today is the use of decorative bas-relief on the wall, which allows you to use limitless imagination to decorate the design and interior of an apartment. With the help of such a handmade work of art, you can create entire three-dimensional paintings on the wall, which will look like a real panel. This design technique is often used to decorate private houses, where the layout includes a fireplace. In this case, the decor can act not only in the form of a picture, but also as a pattern that surrounds the fireplace. In addition, this interior decoration will look great in door and window openings; the main thing here is to choose the right size and texture. Aerobatics is a decorative bas-relief, which will include the presence of lighting. It will make the images more voluminous, creating the impression of 3D graphics.
An important point about using relief decor on the wall is that it does not necessarily require the presence of different colors, as is the case with ordinary painting. The main thing here is to choose the lighting wisely; this will allow you to highlight different edges of the image, using only artificial lighting, as shown in the photo.
There is a misconception that decorating a house with elements of bas-relief inserts is too expensive. In fact, how to make a bas-relief on the wall with your own hands is quite accessible for beginners. It is enough to strictly follow the step-by-step guide presented below. It is supplemented with a video that will allow you to answer many questions that arise during the work.
Plaster stucco
Gypsum stucco Source decorationinfo.ru
A universal finishing material whose properties allow it to be poured into molds. It is used everywhere as a raw material, both in residential and commercial or public spaces. Gypsum stucco on walls is made in several ways:
- Poured into molds.
- By broach casting method.
- Molded by hand on the wall.
Upon closer examination, all the techniques are simple and can easily be done with your own hands.
The advantage of gypsum is the absence of chemical components, making it environmentally friendly for humans. The material is resistant to changes in room temperature, non-flammable, hygroscopic (capable of absorbing and, if necessary, releasing moisture into the atmosphere of the room).
Plaster monograms above the bed Source house-biz.com.ua
Important! The main advantage that gypsum stucco has in the interior is the ability to create a unique surface: any image and even a portrait.
The disadvantages include:
- Significant weight of the structure, which creates problems during installation work.
- Fragility - if handled carelessly and dropped on the floor, the element will crack.
- High cost compared to analogues made from other materials.
Decorative stucco as an integral element of the interior
The use of stucco in the interior has not lost its relevance and popularity for several centuries. In modern conditions, it is actively used when decorating premises not only in classical styles or when creating Empire, Baroque interiors; it can even be appropriate in minimalist high-tech, but, of course, subject to the use of other lines and shapes.
In the construction market, in addition to gypsum products, materials made from polyurethane and expanded polystyrene have also gained wide popularity. Wood products are also traditional, although their cost is much higher. Despite the fact that buying ready-made elements for creating stucco molding does not present any problem, in order to create a truly unique interior, many owners prefer individual production.
Of course, it’s easiest to independently produce stucco molding to decorate walls and ceilings if you have drawing skills, since you first need to make an accurate sketch, drawing out all the lines and elements especially carefully. But, if you have ideas, you can contact a specialist who will do this part of the work. And you can do the actual manufacturing, including preparing the molds, yourself.
In addition, it should be taken into account that.
stucco foam
, despite the fact that it is a mass-produced product, if you have some artistic taste, it may well become the basis for interior decoration.
Using different types of elements and combining them with each other, you can create original and beautiful compositions. Also, stucco molding from this material is often used as a finishing accent when decorating walls in a room, neatly separating zones from each other.
The advantages of this material include its affordable price, long service life and ease of installation. Polyurethane stucco , which is often used when decorating modern rooms, has similar characteristics Considering that both of these materials are moisture resistant, they can be actively used in rooms with high humidity and temperature changes.
In addition to the fact that stucco molding performs an aesthetic function, its use can also have a purely utilitarian function, for example, to visually hide some unevenness, cracks and other surface defects.
If used correctly in such cases, they will fit as organically as possible, giving the interior an additional touch of nobility or sophisticated charm.
[my_custom_ad_shortcode1]
Polyurethane stucco
Original frame above the door Source gessostar.ru
The development of technology has made it possible to develop the concept of making stucco molding from lightweight materials that are affordable according to price criteria. Foamed polyurethane is a universal substance from which all kinds of decorative elements are obtained:
- Columns.
- Pilasters.
- Skirting boards.
- Cornices.
- Moldings and even prefabricated bas-relief elements.
Huge assortment Source www.liveinternet.ru
Long service life, high plastic and strength qualities, ease of installation - all these are the advantages of polyurethane stucco molding. The material is resistant to ultraviolet rays, does not turn yellow over time, is not susceptible to sudden temperature changes, and has good contact with most paints and varnishes. The ease of arrangement allows you to do the work yourself, fixing the composition using ordinary mounting adhesive.
The disadvantages include a high fire hazard. As a result of fire, it releases toxic cyanides that can cause respiratory and cardiac paralysis.
Healthy! Polyurethane is an environmentally friendly polymer with a density coefficient similar to wood. Used to make water pipes and children's toys.
Gold stucco elements Source design-homes.ru
Unique individuality: do-it-yourself stucco molding
An invited professional master can decorate the room with stucco, creating a unique and inimitable interior. If you want to plunge into the world of fantasy and creativity yourself, then you can make the design and decor with your own hands.
Stages of self-made stucco molding:
- Sketch. You can first draw it, and then make it from plasticine or modify a polyurethane model.
- Making the mold. At home, it is best to make a mold from silicone. Liquid silicone and silicone oil are mixed, and the resulting composition is applied with a brush in smooth strokes to the model, which has been previously lubricated with a separating agent. After this, the form is strengthened, most often gauze is used for this - it is, as it were, imprinted into the silicone. After drying, the procedure is repeated several times, achieving a mold thickness of at least 3 mm. When the last applied layer has dried, the mold is removed from the model.
- Making your own gypsum mortar. When working with plaster, remember that it hardens quickly. The composition of the gypsum solution is as follows: 10 parts of dry gypsum (powder), 7 parts of water and a little PVA glue diluted with water (it will prevent cracking of the finished product). The solution is quickly mixed and its consistency should resemble liquid sour cream.
- Manufacturing of the product. The resulting gypsum mixture is poured into a mold greased with a release agent. The composition is poured smoothly, the form is shaken periodically. Shaking and vibration help prevent air bubbles from forming. Then the surface is leveled and time is given to dry.
- After half an hour, it can be removed from the mold and left for another day for final drying.
- If desired or necessary, you can fine-tune the future interior element, sand it, and fill in minor unevenness.
Your handmade decorative element is ready! You can use it in the interior and show it to guests.
Make a choice of plaster or polyurethane, purchased elements or made by yourself, and enjoy the result!
Source: mr-build.ru
Expanded polystyrene
In terms of performance properties, it is practically an analogue of polyurethane. It has a lower (almost a penny) cost and a number of significant disadvantages:
- Lower elasticity coefficient. When installed on uneven surfaces, in case of slight curvature, the element will not bend along the given path, but will break.
- The porous surface of the foam is an obstacle to uniform coloring. To hide the texture of the “balls”, you have to paint in several layers.
- It ignites easily and produces smoke that is toxic to humans.
Expanded polystyrene (foam) is a synthetic polymer that has a foamed granule structure.
Photo examples of beautiful interiors
In order for the stucco molding in the interior of your apartment to look stylish and elegant, we will give several photographic examples of proper design.
Competent classicism combined with modernism Source www.pinterest.com
Once you start in one style, you shouldn’t change it Source www.pinterest.com
Combination of direct molding and stairs to the second floor. The lower part - the base and the door to the storage room, basement - is covered in a similar way.
Classic design style Source youtube
Having chosen a classic style, pay attention to the furniture. It must match the interior. The only thing the owner made a mistake was the location of the air conditioner; it is superfluous here.
Impressive columns supporting the ceiling Source dizainexpert.ru
Do-it-yourself decorative plaster from ordinary putty
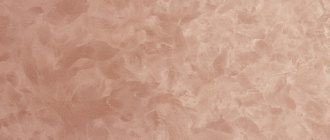
Decorative plaster, made with your own hands from ordinary putty, is gaining popularity as an inexpensive type of finishing, because almost everyone is looking for a middle ground when renovating their home, as well as an optimal price-quality ratio.
- Advantages of homemade plaster Using textured and structured rollers Homemade finishing tools Other necessary tools Decorative plaster from ordinary putty Applying decorative plaster Various application methods
Advantages of homemade plaster
Modern road repair, both in terms of purchased materials and hired labor. The work of a plasterer-finisher costs a lot of money. Everyone’s desire to save money is understandable and justified: no one wants repairs to drag on for months, if not years, due to the high cost of the material and work performed. To prevent this from turning into a family curse, we must look for the most rational way out of the current situation. The solution, however, is obvious: make the material yourself. This option is suitable for the vast majority of people who want to make an inexpensive and beautiful renovation of their apartment.
There are enough tools for this, and it’s not difficult to buy them - if only you would like to make a pattern.
The use of textured and structural rollers
An easy way to make textured plaster from ordinary putty with your own hands is to use a special roller.
Getting the desired finish this way is quite easy. Depending on the working surface of this tool, the desired result is obtained - the desired pattern on the wall.
Rolls vary depending on the material from which they are made:
- Pile rollers. Fleece can be either long or short, and fur can be either artificial or natural. The length of the piles should be selected depending on what kind of relief is needed, convex or smooth. Pay attention to the quality of the fur: if you take a short nap, it should not come out. If this happens, then under no circumstances should you purchase such a video! Not only will the job be a chore, but you'll also ruin the putty and waste your time: shedding is not suitable for this job because the fleece will always stick to the work surface. Rubber rollers. When working with them, it is necessary to control the degree of pressure of the tool on the wall. The designs on them imitate various patterns, ornaments and brickwork. Wooden rollers. The pattern left by this tool is very similar to the imprint of a rubber roller. But it is the wooden surface that makes the work of the finisher or home craftsman easier - the roller does not have a sticky solution. Of the minuses: it dries out the material a lot, and the instrument always requires careful washing and cleaning. Leather rollers. They are used when processing Venetian plaster, creating an imitation of a marble surface or other structure. In order for the roller to serve you for a long time, you should buy a product made of genuine leather. But if this product is purchased for one repair, there is no point in spending it on the skin. Plastic rolls. A cheaper tool that is not used by high-class craftsmen. Plastic cracks and, as a result, defects will remain on the treated surface.
In addition to these rollers, there are also tools made of foam rubber, fabric, polyethylene, with a spirally attached rope.
They can be used to create a rough, patterned surface. Important! Do not press too hard on the tool while working, as a sharp drawing is only possible with minimal force. The tool should be lowered and pressed firmly against the finished cut.
These tools fall into two categories:
- Billing roller. They come in different types. You can choose a tufting roller and work with it, you can roll with patterns. Such rollers are designed to imitate the texture of various materials: stone, marble, wood, etc. The pattern can be either concave or convex - this is possible thanks to the pattern on the roller. Construction roller. It is used for the production of homogeneous patterns of varying complexity. No other tools are used in this case. The patterns are applied closed in the form of grooves, lines, cornices. The applied composition is smoothed with a spatula using this roller. After the composition has partially dried, the surface can be treated with a brush with a sharp angle to make the pattern soft.
Homemade finishing tool
You don't have to use only store-bought tools. If you have some materials on hand that can be discarded, you can make a roller that will create an unusual, unique design.
For example, you can use a ready-made roller, or you can make your own adjustments to its design. Examples:
- The rubber roller is wrapped with a medical belt so that the instrument imitates the surface of wood. Symmetry and correctness of shape are not at all important here. Rolls can be of different thicknesses and widths, which will give not only originality, but also maximum resemblance to wood. A fabric roller is made as follows: a regular smooth roller should be covered over its entire diameter with fabric with the desired pattern. Another option: the fabric comes in different types and can be tied in knots.
There are many options for such a homemade creation: you can use polyethylene, rope, string or thread. The foam roller can be used to cut out abstract shapes, slits, etc.
Important! When working with texture and texture rollers, to ensure they work smoothly, do not make any sudden movements.
Other necessary tools
Patterns can also be used with other devices:
- Pac. The material and shape can be very diverse: stainless steel, plastic. Coating techniques are very different. It all depends on your imagination and taste. For example, a notched trowel will allow you to draw parallel lines in a checkerboard pattern. Pac. With its help, like the most ordinary spatula, you can create an original, unusual pattern using chaotic movements. Sample. This tool is also worth mentioning. They can be used not only for simple abstract patterns, but also practically for painting or bas-relief. The template can be attached to the wall, or made into a paperweight - they create a pattern or image. Before you start applying the image, you should make your choice and purchase the necessary template.
In addition to these tools, you can use many others, from a brush to a Venetian spatula. Even an ordinary broom can create a unique pattern on the wall.
Decorative plaster from ordinary putty
Of course, you should not discount simple types of finishing, which are quite attractive in appearance, using the most common putty as a starter and finish. How to make textured plaster with your own hands? Very simple, and this option has been widely used lately. “Branded” ready-made putty costs about three times more than regular putty, and making it yourself won’t cause much trouble.
Now let's talk about how this can be done and how to work with a self-prepared mixture.
Materials for making decorative plaster from putty:
- PVA glue – 200 g. Gypsum-based mixture – 6 kg. Water – 2 l.
First we apply a layer, which we call the base layer - we do this with a wide spatula.
When this layer is dry, start decorating. There are different ways to create a textured surface. The composition can be applied with trowels of different sizes and textures - from smooth to jagged. They can be combined. This can be done with one spatula, applying strokes in different directions. Even the most ordinary broom, as already mentioned, is used to create patterns, and the result is obtained when the broom leaves imprints on the plaster - from chaotic to strictly directed strokes.
There are many application methods, or you need to choose the one you like.
Applying decorative putty
Each of us would like to get a beautiful look of our own home at minimal cost. One of the easiest ways to get what you want is to buy finishing putty. This is a coating if its purpose is a soft texture.
There are many ways to create a beautiful surface using decorative wall putty. Here is one of them, quite popular.
Tools:
- Brush. Conical cloth or ironing board (float).
Next step by step:
Prime the surface with primer or primer paint. It is advisable that the putty be approximately the same color as the future painting. Bring the putty to the state of sour cream. PVA glue can be added upon request. The fitting is prepared in small quantities, usually (if you work alone), up to 1 kg. Sprinkle the surface of the resulting mixture of different sizes and shapes with putty with rounded corners, tapping without much effort, touching the wall with the entire surface of the trowel; Carefully pull the trowel towards you, thereby lifting the putty. After drying, rub in the mixture. The movement is light, the blur occurs in different directions. Complete drying. Landing. Paint with a paint roller or brush in two layers. Rub the paint onto wet surfaces with a plastic spatula. Varnish or wax. This method is especially relevant if the finishing is done in the hall, bathroom, or kitchen. In other cases, this item can be omitted, especially if you prefer a matte surface. Still, it’s better to work together, since you need to do everything quickly, without drying the mixture ahead of time, so as not to see the transition. After all, one of the main advantages of this finish is the absence of joints on the surface.
Of course, this is not the only option. It all depends on your personal preferences and taste. Your imagination should work for you!
Different application methods
How to do it:
- Before painting, the plaster is dried. If necessary, use fine-grit sandpaper. The paint is applied in two layers. The dark-colored basecoat is applied with a long, narrow roller. After complete drying - a lighter shade. The roller has a short neck.
Coloring methods:
- Blur method. This method exists for drawings with concave elements. A more complex style than the one below. It takes much more time and effort to achieve the desired effect. A darker layer is applied to the base layer. After drying for a short time, it is wiped with a damp cloth, leaving the paint in the concave part of the design. If more paint is removed than necessary, it should be reapplied. Dry application method. The dry brush method emphasizes raised elements. It fully lives up to its name, because when working, the brush really almost dries out - there is a minimal amount of paint on it. The paint is applied in chaotic, even careless, light strokes, erasing excess on the cornices. It is normal for thick strokes and sudden changes to occur when using this technique.
This will depend on the pattern.
In any case, the background paint is applied in two layers. After completion of the work, two layers of varnish are applied. Of course, your own composition is simple to produce, and gypsum-based mixtures are inexpensive, but they will not replace 100% branded decorative putty for walls, which includes marble and granite chips. In no case should it be compared, for example, with Venetian plaster, which is applied only to masters, and not to everyone. But, despite this, the option described above is available to anyone who wants to diversify the interior of their home. In appearance and durability of the coating it will surpass both wallpaper and paint.