Installation of plasterboard false wall
It is often necessary to redesign premises, change the location of partitions and walls, and with them the location of communications. To hide new utility lines laid, you can use an element such as a false plasterboard wall. Assembling such a structure requires a minimum of time and cost, but it is imperative to adhere to the correct technology.
Full contents of the material
Using drywall: pros and cons
Drywall is a universal material. Its properties provide much more possibilities than it seems at first glance. Advantages of the material:
- Possibility to replace expensive furniture.
- Thermal insulation. A layer of drywall effectively retains heat; if necessary, it can be reinforced with a layer of mineral wool or other insulation.
- Light weight. It does not load the walls or create excessive pressure on the floors, although some structures look heavy and massive.
- Fire safety. Only the cardboard layer can burn, which will not ignite on its own and will not cause a fire.
- Smooth smooth surface. Perfectly corrects or masks defects in walls and surfaces.
- Flexibility. Oddly enough, drywall can be bent, giving structures smooth shapes. Of course, to do this you need to know how to do it, you will need certain skills, but they are quite simple.
- Water resistance. There are specially manufactured grades of drywall that are resistant to moisture.
- Environmental friendliness and safety of the material.
- Low price.
Such properties characterize the material from the most positive side, but there are also disadvantages :
- Fragility. A sheet of drywall can be broken; it cracks under deforming loads. The problem can be solved, but this circumstance must be taken into account during design.
- Poor sound insulation. The seemingly massive structure is hollow, it resonates, all sounds penetrate through it quite easily, which sometimes creates certain inconveniences. To solve the problem, insulators are used - mineral wool or similar materials.
- Weak load-bearing capacity. If you need to hang shelves, wall cabinets or a TV on a plasterboard wall, you need to worry about reinforcement in advance using a double layer of material or install a supporting metal structure in the right place on the back side.
The shortcomings of drywall can be compensated for, the main thing is to know about them and take this into account during design work.
False wall: purpose
A false wall is built by a person for several reasons, but all of them are directly related to the need to hide something behind it. If we list them point by point, then among the most common reasons for the appearance of false walls in a house or apartment are the following reasons.
- Insulation or soundproofing of walls - in this case, various types of heat-insulating materials are hidden behind false wall panels. In most cases, mineral wool.
- Laying hidden communications. While electrical cables can still be embedded into an existing concrete or brick wall, this cannot be done with water supply, sewer and ventilation pipes due to their large diameter.
- Installation of hidden mechanisms will also require the installation of a false wall. For example, you cannot do without her help in the case of installing cassette sliding doors, which, when closed, are completely hidden in the false wall.
- Decorative purposes. Quite often, using a false wall, various kinds of functional niches are made in the interior of a room.
- Alignment of existing walls when they have a large degree of curvature.
In addition, modern builders also include the concept of false walls as interior partitions made of plasterboard, which have long been familiar to all people - they do not carry a load-bearing load, but they cope with the task of dividing the living space into rooms quite well.
Ways to disguise a boner
So how can you close the riser in the bathroom? This can be done in a variety of ways:
- Disguise in the walls. In this way, you can hide the riser only at the stage of its installation. And the work is very difficult and time-consuming, be prepared for this. First you need to draw up and transfer to the wall a diagram of the location of all communications. Then, using a hammer drill, you should make recesses slightly larger than the diameter of the pipes. Next, pipes are laid in the grooves. Then it is advisable to cover the entire surface with plasterboard sheet, chipboard, plywood or PVC panels to make a kind of false wall. It is not recommended to fill the depressions with concrete; if it breaks and is dismantled, you can seriously damage the riser.
- Closet. Yes, you can hide the riser in the closet. Moreover, you can either purchase a ready-made piece of furniture with a missing back wall and slots in the shelves, or make it yourself from an ordinary one. You will need to remove the rear section. Then, using a crown and a drill, make holes in the shelves corresponding to the diameter of the pipes. This method will not only hide the riser, but also provide additional space for storing products or hygiene items.
- The box is the most common way to disguise communications. It is convenient because you can purchase a ready-made structure of the required dimensions at a plumbing store. It is easy to install, so installation will not be difficult. In addition, there are different options for shapes and configurations: triangular, rounded, rectangular boxes, as well as those consisting of one or several levels.
- Plasterboard partition. To mount it, you must first install a durable frame, which is usually made of galvanized profiles. Although some use wooden beams, this material requires additional treatment with moisture-protective and antifungal agents. Next, the plasterboard sheets themselves are attached to the frame using self-tapping screws, and it is advisable to use moisture-resistant ones, since the humidity in the bathroom is significantly increased. The next stage is finishing. You can use different materials, but the most practical and preferred are PVC panels and ceramic tiles.
- Construction made of plastic panels. Plastic panels are practical, inexpensive, moisture-resistant, lightweight and relatively easy to install, as they have convenient joints. But the only drawback of using them is the complete lack of sound insulation; any sounds will penetrate through them. If this does not bother you, then get to work. First, install the frame, which can be made in the same way as for a plasterboard partition. But in this case it is advisable to use a metal profile. Install plastic panels on it. The joints can be masked with corners.
- Roller shutters will not only hide all communications from view, but also provide unhindered access to them. At any time, you can move the shutter to, for example, open or close a valve or troubleshoot problems. Roller shutters are installed in guides. In this case, the riser itself should be located in a recess so that it does not interfere with the movement of the shutter. And along the edges of such a recess the frame of the future structure is mounted. Currently, you can purchase special roller shutters designed for bathrooms and toilet rooms. They not only play the role of camouflage, but also perform hydro- and sound-proofing functions, as they are equipped with an additional internal coating.
Construction technology
In order to level the walls, it is not necessary to seek help from professional builders. Building a wall yourself is quite simple if you follow all the recommendations for constructing plasterboard structures. False walls around the perimeter of the room are installed in several stages.
Preparation
Before marking and installing the sheathing, it is necessary to treat the main wall. Remove all crumbling plaster and repair large cracks. Treat the surface of the main wall with an antifungal compound and primer. Carefully remove all generated debris.
For work you will need the following tools and materials:
- Grinder or metal file.
- Screwdriver, hammer drill.
- Spatulas.
- Marking tool (tape measure, square, level).
- Knife .
- Hammer .
- Wooden beam or metal profile.
- Galvanized screws and dowels.
- Drywall.
- Putty materials.
NOTE! In rooms with high humidity, it is recommended to use only metal profiles and moisture-resistant drywall.
Preliminary marking
The first step in installing a plasterboard structure to level the walls is to mark the surface. It is performed very carefully to avoid displacement and skewing of the future false wall.
Before you start applying marks, you need to decide on the distance by which the new structure will recede from the main wall. If you plan to hide various pipes under it, keep in mind that the frame of the new partition should not be adjacent to the communications. If the fit is tight, the pipes can be damaged by vibration. Damage to communications can also occur during the installation of a plasterboard structure. The indentation should be at least 3 cm. If you are going to insulate the wall or install sound insulation, take into account the thickness of the materials used. Having decided on the distance, proceed to marking. This is done in two ways:
Marking with a laser axle builder
Step 1
Measure the distance from the main wall at which the false wall will be erected. Install the laser axle builder so that the horizontal beam coincides with the marked point and is parallel to the main wall. Light markings will appear on adjacent walls, floors and ceilings.
Step 2
Check the marking accuracy. Attach the square to one of the adjacent walls so that the right angle coincides with the corner of the wall. The edge of the square should coincide with the horizontal laser line. If necessary, adjust the pivot point slightly until the laser line and the adjacent wall form a 90-degree angle. Draw marks along the entire perimeter of the laser lines.
For simple wall cladding, the distance from the main to the new surface should not be less than the width of the profile used for the frame.
Marking using a square and level
Marking is applied as follows:
- Measure the required distance in several places on the adjacent walls, floor and ceiling.
- Connect the lines, check the verticality with a level, and the angle with a square. Make any necessary adjustments.
Frame installation
Installation of a false wall made of plasterboard begins with a frame, which is mounted according to the finished markings. It is made from wooden beams or metal profiles. If wood is used for lathing, it is pre-treated with a special antiseptic.
Solid false wall
Installation of the sheathing of the simplest false wall is done as follows:
- The frame guides are mounted according to the applied markings on the walls and ceiling. Insulating material or sealing tape should be placed under the guides. This is necessary to dampen possible vibrations.
- Next, vertical posts are installed in increments of 50-60 cm. They are attached to the main wall with straight hangers to fix the partition and give the frame additional rigidity.
- Horizontal jumpers are secured between the vertical posts. This can be done using special crabs or using small pieces of the main profile. Horizontal jumpers should be separated from each other by a distance of up to 60 cm.
Work algorithm
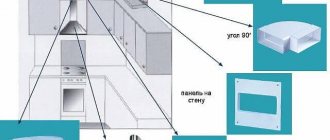
You can make a false wall from plasterboard by familiarizing yourself with the algorithm for carrying out the work. It will involve the use of guides and rack profiles. Ceiling profiles will also be needed, due to which the wall will be attached to the ceiling and have more impressive strength.
It will be possible to lay communications or soundproofing material inside the created frame. The top of the lathing is sheathed with plasterboard sheets, which can be finished with decorative material. But before that, the sheets are prepared. To do this, it is necessary to smooth out the unevenness with putty, and also coat the base with a primer. The last stage is necessary to remove dust from the drywall and improve its adhesive properties.
Preparation
To make a false wall, it is recommended to prepare a certain set of tools, namely:
- perforator;
- screwdriver;
- grinder;
- drywall knife;
- metal scissors;
- building level;
- marker;
- roulette;
- marking cord.
Without this minimum, it will not be possible to make a false wall from plasterboard. The master may need additional tools during the process.
First you need to clean the adjacent surfaces. They must be dried and treated with antiseptics. It is also important to calculate the amount of drywall that needs to be purchased. To do this, you should determine the area of the future partition, find out the area of one sheet of plasterboard and divide the first value by the second. To the above figure you need to add about 15%, which will go to trimmings. It is important to consider that the sheet material will be installed on both sides, so its quantity should also be doubled.
Attention! In order to make the partition more soundproof and eliminate the transmission of noise from neighbors, sealing tape should be used. It must be laid between the new structure and adjacent surfaces, such as the floor and walls.
It is better to start installing a gypsum plasterboard wall after completing all the rough work in the room. It is good if the flooring is laid after the partition is in place. This also applies to wall decoration.
Preliminary marking
Markings on the floor can be done with a long ruler, additionally using a construction corner. The line should be perfectly straight, because this will determine how correctly the guide profile will be strengthened. On this line you should mark the position of the doorway, if it is provided for in the project.
A false wall may have a small width and a curved design in order to exclude the presence of an opening in the center, because it is not so easy to make it. At this stage, you need to roughly imagine where the shelves and drawers will be located, if they are needed.
Using a Laser Level
The advantage of this device is that you won’t have to use a stepladder or crawl on the floor when marking. Using a laser beam, it will be necessary to make a projection into the place where the partition will be located. Along the projection beam, using a tapping cord or pencil, it is necessary to draw lines along the ceiling, floor and walls.
In order to form the angle of the future partition, the device should be switched to the projection mode of perpendicular planes. One of the rays must be aligned with the line marked at the previous stage. To mark the partition in the area of other adjacent walls, repeat the procedure.
Marking using a square and level
Having determined the first extreme point of the position of the future partition at the junction of the wall and the floor, you can connect it to the counter point on the opposite wall. To do this, you need to measure exactly the same distance from the parallel wall as at the starting point of the partition. Using a square, vertical lines are transferred to the walls. Their position to the ceiling can be checked using a building level. Additionally, you can check the marking line on the wall using a plumb line.
Work on the frame
You can make a frame by fixing the guides to the ceiling and floor. If necessary, they are also attached to the sides. To do this, use dowels installed at a distance of 500 mm from each other. Holes are pre-drilled for them.
If the project provides for side guides, they should be connected to the floor and ceiling profiles. To do this, you can use small self-tapping screws. When making a frame from a profile, the next step will be to install rack rails. For this purpose, direct hangers are used. They are mounted on the wall. Impact dowels should be used for this. The pitch between the racks can be 600 mm. There should be 3 slats per sheet of drywall. Profiles and hangers should be connected with fleas. To strengthen the wall you will need lintels. They will be made from rack profiles - they must first be cut, removing the shelves for fixing to the frame.
Solid false wall
A solid wall must have a strong connection not only in the area of the floor and walls, but also on top. A damper tape is laid at the joints around the perimeter, which will provide greater insulation. The main base of the solid partition will be rack profiles that are inserted into the guides. When choosing the size of these elements, you should take into account the thickness of the drywall and the complexity of the architectural shape of the partition. To ensure the reliability of the wall, it is better to use longer profiles, which, if necessary, can be cut into separate elements. This option is preferable to connecting short profiles together.
The rack profiles are first attached to the floor. Then the fixation is carried out along the wall. In this case, you need to move towards the ceiling. In order to ensure accurate installation of these elements, the level of height difference should be determined. Footrests are used if necessary. Then the structure turns out perfectly smooth.
False wall with window opening
Having examined the options for false walls, you can see that the made partitions sometimes also have window openings. In order to build in such an addition, you should use CD profiles, which are located under the vertical and horizontal plasterboard joints. Two additional profiles should be placed along the edge of the future opening. A jumper should be installed above the window. The central profiles need to be moved under the edge of the opening. This is done to ensure that the step between the elements does not exceed 600 mm. A UD profile must be installed under the space under the window. This also applies to the perimeter of the wall.
Installation of drywall and finishing work
To strengthen the drywall onto the frame, self-tapping screws and a screwdriver are used. The length of the fastener should be 20 mm or more. A distance of 250 mm should be maintained between fastening points. It is necessary to start installing sheet material from the bottom corner. In this case, it is necessary to navigate along the guide profile. After this, the sheet is attached to the top and then to the frame posts. It is finished with a primer and then puttied. The dried layer is primed again and then covered with wallpaper.
How to finish: options
There are no restrictions on the decoration of false walls. We list the most common and simplest options:
- Wallpapering.
- Coating with acrylic or oil paint.
- Use of decorative plaster.
- Decoration with ceramic tiles in the kitchen and bathroom.
To effectively decorate a blank wall, decorative slits are made in it using an ordinary construction knife. Glass or other interior elements are then installed into these holes - it all depends on your imagination.
Caring for a false wall does not differ in any special ways. To make a false wall always look beautiful and neat, you need to:
- Periodically remove dust and dirt from its surface.
- Avoid over-wetting it in the kitchen and bathroom.
- Inspect the space behind the grated screen in the wall for the heating radiator.
- Check for condensation, smudges and leaks on hidden water pipes and taps.
- Inspect the wiring hidden behind the false panel for defects.
Carrying out such measures will not only protect your apartment from fungus damage, but will also protect you from unexpected costs for major repairs associated with leaks or short circuits.
False walls are an inexpensive and easy way to diversify the design of your apartment. With the proper approach, anyone can handle their installation. They do not require special care and can always be easily demolished to reorganize the free space of the room. The presented designs fit perfectly into the framework of strength, usefulness and beauty.
It should be added that installation of a false wall made of plasterboard is also possible in cases where it is necessary to divide a space into several separate ones. This process is also not particularly complicated and can be done with your own hands. It should be noted here that, in principle, the installation of such a partition is no different from the installation of a simple false wall. The only difference is that the sheathing needs to be double-sided. By the way, when installing such a partition, it will be clearly visible that there will be space between its outer planes. It can be rationally used for a sliding door that can be installed inside. This option will be the best in most cases.
Partition design options for zoning
Even false walls can perform several functions - not only visually zone the space. If this design is supplemented with drawers, the partition can also be used for storing things. But its appearance can be diversified not only in this way.
Quite often, partitions are made with niches and openings, which are illuminated with artificial light or LED strips. This allows you to focus on the partition and also diversify the interior. An even more unusual design of the partition is its asymmetrical shape. The design can be lightweight, and in the internal hollow areas you can place lamps that diversify the design of the room.
If you don’t want to make the drawers visible, they can be supplemented with modern opening fittings, which completely eliminate the presence of handles. The drawers can even be located at the end of the partition, which will make it modern and even more unusual. And if you illuminate the structure from above, it will create the feeling that it is not in contact with the ceiling.
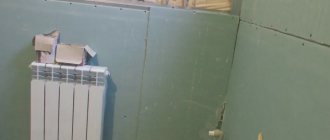
Features of installing false walls made of plasterboard for radiators
Protruding radiators look unsightly. Many designers prefer to hide them in false plasterboard walls near the window, behind decorative grilles. This looks very aesthetically pleasing, but, to be honest, it leads to heat loss. But since beauty requires sacrifice, so be it.
To create a niche, exactly the same frame is made from a metal profile. It is mounted on a load-bearing wall in such a way as to bring the surface of the box to the level with the battery.
Afterwards the frame is sutured with gypsum board
To reduce heat loss, the inside of the niche is covered with heat-reflecting material. After applying the finish, all that remains is to install a metal or plastic decorative grille that will hide the radiator.
Such designs completely change the interior
Sequence of installation of a gypsum plasterboard wall on a metal frame
The cost of installing a false plasterboard wall is not that high, but why pay someone if you can do it yourself?
Wooden or metal structures are used as a frame for the false wall.
Metal ones are more elegant, durable and perfectly smooth. We’ll dwell on them to talk about the nuances of installation.
What you need for work
To work, a home craftsman will need a set of common repair tools:
- a screwdriver or electric screwdriver with a pair of batteries so as not to waste extra time on charging;
- an electric drill with a hammer drill for drilling concrete walls;
- a sharp construction knife or a well-sharpened kitchen knife with a wide and thin blade;
- special scissors for cutting metal profiles. If you don’t have them, it’s better to buy them, because the profile will have to be trimmed.
Don’t forget marking tools: tape measure, level, pencil and cord
To make a false wall, you will need the plasterboard itself, a metal profile for the posts and guides, dowels for fixing the frame to the support and self-tapping screws for installing the plasterboard. Mineral wool is usually used for sound insulation. To finish the surface, it is first primed and puttied. The methods of decorating such a surface can be any: wallpapering, decorative plaster or painting.
How to make false walls from plasterboard: video instructions
The process of installing drywall is clearly demonstrated in this video on how to make a false wall from drywall with your own hands:
Preparing tools - their purpose
When you create a false wall from plasterboard with your own hands, you need to have all the tools at hand. This can be quite problematic, because there are not so few of them:
- Screwdriver for faster screwing of self-tapping screws. Don't bother with a shaped screwdriver. Practice shows that such a large amount of work requires two batteries, because when one runs out, it will have to be charged. This is not a quick job, and there is no need for downtime;
- hammer or drill. The false wall frame will be attached to other walls, the floor and the ceiling. If there is concrete somewhere, then only a hammer drill can make a hole to attach the frame;
- Using a construction knife, you will need to cut the gypsum plasterboard sheets to size. An ordinary kitchen knife will also be suitable for this work (although it will become a little dull);
- metal scissors. Everyone often forgets about them, but the metal profile will also need to be cut into pieces of the desired size, and trimmed in certain places for better fastening;
- The cutter is necessary for fastening two profiles together. Without it, you will have to screw them together with screws, which is undesirable;
- A level, tape measure, and pencil will be required for marking. Can use a water or laser level, as well as a tapping cord;
- a spatula, roller and brush will be required at the finishing stage.
No tool will help if your hands grow from the wrong place.
Ideally, work with a full set of tools, so that there are two batteries for a screwdriver, a hammer drill, a hammer cord, a laser level, etc. However, this does not mean that without all these devices, a false plasterboard wall will remain just a project. The main thing is desire and a minimum of tools. Of course, you still need some materials.
Preparation for finishing
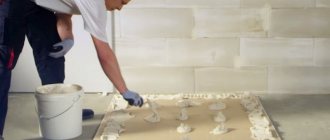
You cannot leave a false plasterboard wall in the form in which it turned out. It should be prepared for finishing, be it wallpaper, tiles, painting or something else. The first step is to putty the screw heads and the joints of the drywall sheets. The caps are puttied, among other things, to make the wall color uniform. This procedure also protects them from rusting, which is of course unlikely under normal conditions.
The joints between the sheets are primed if they are edged. It would not be a mistake to prime all joints so that the putty adheres well. After the primer has dried, finishing putty is applied to the joints, and then reinforcing tape (paper or sickle tape) is applied to the joints. The tape is smoothed with a spatula so that it sticks, and also to remove excess putty. This tape makes the joints stronger and prevents cracks from appearing.
After the putty has dried, the entire false plasterboard wall is primed twice. After this, it is completely puttied (it is permissible to apply two layers of putty to get a perfectly flat surface). After the solution has dried, the false wall is treated with sandpaper, which helps remove any remaining unevenness. That's all, the false wall is ready for finishing.
Watch the video on how to make a false wall from plasterboard.
Why do you need a false wall?
Many people mistakenly believe that a false wall is an ordinary partition, which is created for the purpose of zoning a room. We are talking, first of all, about a wall, so its purpose cannot be reduced to the functions of a partition or niche.
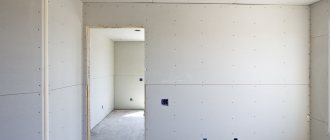
After installation, the false wall will be indistinguishable from the real one
In new buildings there are layouts with very large rooms. Some people prefer to divide them into two parts, for which they use a false wall. Even in one-room apartments they use a similar design. It is usually needed to give a growing child a room separate from his parents. She will be small, but it's better than sleeping in the same room with her parents. However, we will still consider slightly different situations.
A false plasterboard wall for a battery is not a bad idea when it comes to creating a niche for a radiator. Although some masters are pushing the idea to the masses that behind such a wall you can hide not only the pipes, but also the battery itself. Of course, this is a mistake, because heat loss due to such a design will be significant.
A false wall is also made in the toilet when the pipes are hidden behind it. In general, any pipes can be hidden behind such a structure, leaving a small hatch for access if necessary. A false wall may be required to hide communications in the bathroom
Wall with shelf and drawer
If the partition includes shelves, their frame will consist of guide profiles. If necessary, you can fill the space with jumpers at a certain pitch. The frames are fixed to adjacent surfaces on three sides. The frames of the shelves should be reinforced with jumpers from the rack profile.
If the shelves are 60 cm long, it is better to place the jumper in the center. This will make the shelves stronger. They will be able to withstand heavy loads. The sheathing of the shelves is carried out according to the same principle as in the case of the rest of the frame.
Construction of sheathing
There are two variations of frames that can be used when constructing a false plasterboard wall. The first option is a wooden sheathing. Among its positive aspects, I immediately want to highlight its low cost and ease of installation.
But the disadvantages of this design immediately come to mind - unreliability and fragility. Unfortunately, in order to extend its service life, you will need to use an overly expensive antiseptic, which can protect the wood from mold and rot, but in this situation, the advantage of the cheap design is immediately eliminated.
The second option for a false frame is a metal frame, which is reliable and durable. In addition, it is also very practical, because it can always be reused. Surprisingly, even a bent metal frame can be reused, because it can always be straightened.
At the same time, the cost of metal profiles is not much higher than that of wooden ones. The choice is up to you, but I want to note only one feature: while it is quite difficult to find a wooden beam that is perfectly straight, then it is quite difficult to bend galvanized metal posts to obtain the desired shape.
You should start by marking the guide profile, which, in the case of installing a false wall, is mounted on the floor and ceiling, after which the walls are marked along which the brackets will be installed. I would like to note that the distance between the vertical posts of the frame should be equal to half the width of the plasterboard sheet.
This condition must be observed so that the ends of the material clearly fall exactly in the middle of the profile.
After this, all the necessary holes are drilled out using a drill, and then dowels are inserted into them, onto which the brackets and the guide profile already mentioned above are screwed.
With the help of canopies, the vertical posts are fixed. Maximum attention must be paid to this process, because the end result should be a perfectly flat plane. To control, use a laser level or string stretched from one corner to another. The brackets have many holes with which you can easily adjust the vertical posts.
Materials and tools
Drywall
Before starting installation work, you will need to stock up on the following consumables:
- sheet plasterboard in quantities corresponding to the total area of the closed spaces;
- special profiles used for installation or wooden beams of a given section;
- dowel nails, as well as self-tapping screws for metal and wood (in some cases, butterfly dowels may be required);
- special primer and putty mixtures used for surface finishing.
Wall profile for plasterboard
In addition, you will definitely need the following tool:
- wooden mallet or hammer;
- metal hacksaw (electric jigsaw);
- electric drill, hammer drill and screwdriver;
- a set of spatulas of several types;
- level, well-sharpened knife and tape measure.
Electric jigsaw
Two options for installing sliding doors yourself
Do-it-yourself sliding interior doors can be made in different ways, or rather, for different rooms. Plus, the size of the budget plays a significant role; it’s one thing to assemble doors for a small summer house with seasonal living, and quite another to make sliding interior doors for a city apartment.
Option No. 1. A good door for an apartment
In this case, we will learn how to properly install sliding doors on rollers with our own hands.
You should immediately forget about homemade mechanisms; we are only talking about installing ready-made systems. Of course, such designs are sold with a description, but there are nuances that are not in the description.
To install sliding interior doors with your own hands, you need the following tool:
- Hammer or electric drill with impact function;
- Hydraulic level;
- Bubble level;
- Screwdriver;
- Roulette;
- Set of open-end wrenches (from No. 5 and above);
- Manual frezer;
- Wood hacksaw;
- Hacksaw for metal;
- Pencil;
- Hammer.
We assume that the door is made from ready-made components, that is, we have a door leaf, guides, rollers, stops and other door fittings. The only thing you will need to buy additionally is a wooden block 50x50 or 50x70 mm.
Even before assembling the sliding door and even before going to the store for components, you need to make sure of the following fundamental things:
- Check how smooth your opening is; if there is a skew, take a wide blade (with a margin);
- Make sure the wall can support the load. It is better for an amateur to work with a brick or concrete wall; leave foam concrete and plasterboard false walls to professionals;
- Absolutely all finishing must be completed. Door assembly is done at the very end.
How to make a compartment door with your own hands:
There are many models of rollers; we are interested in mechanisms on a supporting platform with the ability to adjust the gap between the blade and the guide profile.
Wide platforms are mounted on the edge of the door leaf, but if the door leaf is more than 80 cm, then you can step back from the corner by 1/6 of the door width.
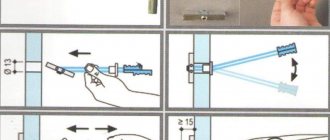
Using a tape measure, we calculate the center and, attaching a roller platform to the end of the canvas, mark the entry points of the screws.
You shouldn’t immediately drive the screws according to the markings; you don’t know what quality the slab is; when screwing the screw in “live”, it may crack. Therefore, first drill holes, the drill diameter is about 2 mm. Next, apply the bar and screw in the screws.
Now insert the carrier plate itself, equipped with a rod for the roller, into the grooves of the roller bar. In this case, the plate is fixed to the bar by screwing the rod a couple of turns (open-end wrenches will come in handy here).
As you can see in the photo, the rod is equipped with a thread; we need to screw the rollers onto this thread. Of course, there is a possibility of adjustment, but the thread must enter the roller by at least 3 - 4 turns. It’s better to count the revolutions so that they are approximately equal on all rollers.
In order not to work in the dark later, it is better to embed handles and locks right away, especially when it comes to hidden handles, as in the photo. All such grooves in the canvas are cut with a hand router.
We are done with the rollers and fittings, now we move on to installing the guide bar. The guide bar itself is metal, we will attach it to a wooden block
It is important here how to calculate the cross-section and length of the bar
Don’t be alarmed, for the calculation we only need a tape measure and a pencil. If your doorway is simply plastered, without platbands, then you can take a 50x50 mm block. The platbands will take up at least 10 - 15 mm, so you need to take a 50x70 mm block for them.
As for the length of the bar, it is calculated as 2 times the width of the door leaf, plus another 50 mm for the stoppers.
Now we lay the guide on the block and fasten it with self-tapping screws in increments of about 200 mm. The holes in the guide are drilled subtly, that is, so that the screw head does not protrude from above, otherwise the roller will begin to cling to it when moving.
Next we hang the structure. A professional only needs to take one measurement, after which the craftsmen attach the timber separately, and then attach the doors to it. It is better for an amateur to try on assembled doors; to do this, we insert the rollers into the guide.
To make the measurement more accurate, you need to insert a wedge, preferably more than one, between the door and the guide bar.
You need to put a mark on the wall above the block and move upward from this mark by at least 7 mm, plus the thickness of the carpets, if any are planned.
Holes in the block must be drilled immediately. The step depends on what exactly you will hang the structure on. For anchor bolts with a cross-section of 6–8 mm, a pitch of 50–70 cm is sufficient, and for long self-tapping screws with plastic dowels, holes are drilled at a distance of no more than 25 cm.
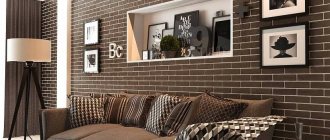
Application in the interior
Designers use false walls to decorate rooms. In this case, niches and shelves are cut out in them. Subsequently, they are filled with items that complement the interior. This visually complicates the design of the premises, making it more stylish and memorable. Colored glass can be installed in through holes to create a whimsical play of light and shadow. The same can be achieved with built-in lighting.
Such designs have not only decorative, but also functional significance. They are used to install household appliances - televisions, audio systems and multimedia players. In this case, the walls are reinforced with a strong frame that can support the weight of all devices.
False walls are hollow - two panels are connected to each other by a frame, but there is always an air gap between them. Thanks to this, they can be used for installing sliding doors. By closing the doors, it is possible to isolate one room from another, and by moving them apart, you can create a spacious room, for example, for receiving guests. The advantage of the design is the fact that they can be given any shape and diversify the design of the apartment.
False walls for a fake house
Even from a small one-room apartment you can create a cozy and stylish nest, you just need to correctly distribute the free space and create functional zones. This can be done in various ways. One of them is installing a false wall. This is a great way to bring your fantasies to life, express your feelings and diversify your home.
Installation features: step-by-step guide
Installation of drywall sheets should begin only after you have verified the strength of the frame. Place the prepared material on the floor. To cut it, use a construction knife. Directly during installation, follow the rules:
- Installation should begin from the door or window - then you will be able to save material and join the sheets.
- The cut panels are applied to the frame, after which they are attached to it with self-tapping screws with a drill at the end.
- Place the screws at a distance of at least 15 cm from each other. Recess the caps into the plaster as much as possible.
Do not make holes in the drywall in advance - this will not allow the sheets to fit tightly to the frame.
Once the sheets are secured, surface treatment begins. A primer is applied to the material with a roller. Large gaps at the joints are filled with putty or building mixture. The screw caps are treated with fine sandpaper. After these measures, another layer of primer is applied and finishing begins.