How to glue wallpaper that has come off the wall
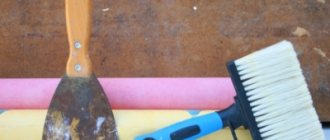
Before gluing up the peeled wallpaper, you need to prepare:
- rubberized roller;
- brush;
- wallpaper knife;
- adhesive composition;
- narrow spatula;
- clean cotton rags.
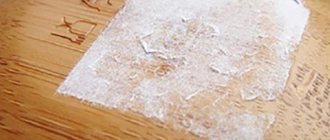
You will need a syringe when the wallpaper comes off in the middle of the canvas, forming bubbles. It is filled with glue, and the swollen areas are pierced with a needle. Then you need to carefully introduce a small amount of adhesive into the swelling. Wait a few minutes for the canvas material to soften. The prepared bubble is carefully smoothed with a roller.
Fighting bubbles
Swollen bubbles on wallpaper are a common problem in new renovations. But if you don’t pay attention to it in time, then over time it can remind you of itself with negative consequences.
The technique for eliminating this defect is noticeably different from the previous ones. In this case, you will not need to tear off part of the canvas from the wall; it will be enough to pierce the bubble and glue the voids to the wall. You can pierce the swelling of the wallpaper with anything, for example, a needle or the tip of a sharp knife. Through the resulting hole, glue is released inside. To facilitate and speed up the process, experts recommend doing this using a regular syringe. When the adhesive substance is inside, the glued area must be pressed and smoothed with a rubber roller.
To improve adhesion, heat the restoration site with a hairdryer. When the wallpaper dries and shrinks, not a trace of bubbles will remain.
What kind of glue is best for gluing?
Glue the peeled sheets with ordinary wallpaper glue - it is better to choose one that suits the wallpaper material.
To glue the joints, you need joint glue. Due to the components in its composition, rapid adhesion of surfaces is ensured. The advantages of this glue:
- packaging in dispensers - more convenient to apply;
- saving time on breeding;
- Brush for hard-to-reach areas included.
Excess glue that appears can be removed with a damp cloth. When the glue is completely dry, it will firmly grip the pasted canvas and will not come off the wall, even in a room where humidity is high.
Butt glue can be used to glue any type of fabric: paper, non-woven, vinyl. 120 g of joint adhesive is enough for approximately 60 linear meters of wallpaper.
How to update?
If washable wallpaper has turned yellow, you should wash it. You can use different detergents. To remove grease stains, it is permissible to apply a white napkin and iron. Before washing the surface with any product, you should try it on a small piece of wallpaper.
You can also mask defects by continuing the pattern or gluing a new piece of wallpaper that suits the theme. Another way: remove the desired piece from an inconspicuous place, and glue a similar one (to match) in its place. If you have an artist at home, he can help you disguise the signs of scuffs by painting a few elements. Anyone can use this method.
You can use paintings as decoration. They will help disguise dents. One way to save a faded coating is to repaint it with water-based paint (if it allows it). You can also glue photo wallpaper or any other canvas of a suitable color to the place of the damaged fragment. You may be able to find the same wallpaper as yours. It’s worth starting restoration only if you are sure that it won’t be cheaper to re-glue the wall coverings.
You will learn more about how to fix the joint problem in the following video.
How to glue completely torn wallpaper
If a strip of wallpaper peels off near the ceiling or floor, to fix it, you need to use liquid wallpaper glue. Carefully coat the separated part of the canvas with adhesive, wait about five minutes, and then carefully glue it to the wall.
When a piece comes off in the center of the wall, you can seal the hole in this way:
- Cut off the ends sticking out around the defect.
- Cut a piece of wallpaper that will cover the damage on all sides by at least 2 cm and match the pattern.
- Place the insert over the defect, align the pattern and secure the corners with tape.
- Attach a ruler to the insert, stepping back 5-10 mm inward from the edge, and use a wallpaper knife to cut through both layers to the base.
- Remove the insert and moisten the bottom layer of wallpaper with a spray bottle.
- Peel off the bottom layer, remove the tape and insert. Treat the exposed area with wallpaper glue.
- Carefully stick the insert, remove excess glue with a dry cloth.
When tearing off pieces at the bottom or top, you can proceed in the same way, but adjusting only the joint of the insert and the canvas. The remaining edges will fall as they should.
Why does wallpaper peel off?
There are many reasons that cause a renovated room to lose its original beauty. There are two main reasons: either environmental factors or failure to adhere to gluing technology. Environmental factors include:
- High humidity. Caused by problems with the heating system, room ventilation, proximity to a large body of water, unexpected flooding. Residents of the private sector have a high probability of having to carry out repeated repair work. Houses located near rivers that flood every spring are flooded, which is accompanied by peeling of the wallpaper and irreversible damage to other finishing materials. This problem also awaits apartment owners who are located on the first floors of buildings. Evaporation coming from damp basements penetrates into the living space, becoming a source of damp stains.
- The appearance of fungus and mold. Today, the practice of installing double-glazed windows in outdated buildings has become widespread. After work, vapors condense, creating a favorable environment for the proliferation of microscopic fungi. The attack can be found on the ceiling, around window structures and inside the joints of gradually increasing spots of a dark shade. The main reasons for their appearance are basement dampness, leaking pipes, poor ventilation and winter freezing of walls. The proliferation of fungi is prevented by frequent ventilation of the room, laying vapor-permeable materials and treating the walls with chemical antiseptics.
As for the human factor, there are many more reasons:
- Incorrect surface alignment. The base must be inspected for the presence of cracked areas, crumbling layers of plaster, non-optimal relief height and other defects.
- Incorrectly selected adhesive solution. Its brand must firmly hold the specific type (paper, vinyl, non-woven) of wallpaper being attached. In addition, you also need to dilute the glue according to the instructions, because... the wrong proportion leads to peeling of the canvases.
- Failure to comply with temperature conditions (for example, the master ventilated the room being repaired during the work). The path to drafts is blocked by tightly closing the window sashes and locking the door panels.
- Elimination of the surface priming stage. Dust and dirt remaining on the surface, as well as a poorly prepared base, guarantee that the wallpaper will fall off. It’s easy to check the quality of the surface: take a piece of electrical tape, stick it on the wall and immediately tear it off. If there are large particles of finishing on the sticky part, you should continue to prepare the surface until it is completely smooth.
- Using incompatible tools and poor materials. Today there is a huge source of information where you can get information that will help you choose the right wallpaper, leveling mixtures and suitable devices. Its name is the Internet. And any hardware store will tell you exactly which glue is suitable for which wallpapers, and which tools are best to use.
For whatever reason this problem occurs, it will still have to be eliminated (unless, of course, you want to make repairs every six months or a year). This means that if the joints on the wallpaper come off, they will have to be glued again, using approved means.
How to do without wallpaper glue
If there is no adhesive, use improvised means - flour or starch paste. To make a sticky solution, you will need flour (can be replaced with starch) in a ratio of 6 tablespoons per liter of water. Mix the powder thoroughly in cool water. Heat over low heat until the consistency of the mixture resembles thick jelly.
You can try making casein glue from milk and nine percent vinegar, or cottage cheese, soda and water. Heat 0.5 liters of milk and pour 3 tablespoons of vinegar into it. The mixture is mixed well. In the second option, 0.5 kg of cottage cheese must be mixed in half a liter of water, add 1 tablespoon of soda, stir thoroughly and leave to steep for about half an hour.
As a result of these actions, a chemical reaction occurs, and casein will precipitate. To create glue, the sediment is strained through cheesecloth and a sieve, squeezed out, and left to dry. Grind in a coffee grinder and mix with water in a ratio of 1:2 and leave for half an hour.
But paste and casein are used in emergency cases. The connection will not be strong, and insects and rodents also love the paste.
How to glue the loose fabrics at the joints
Often after repairs there is a little wallpaper glue left in powder. In this case, we simply dilute it with water and, spreading the joints of the wallpaper, apply the adhesive composition. You can use a brush for this to evenly distribute the glue. Then we press the wallpaper tightly against the wall and each other and wipe it with a clean rag. You can use a special plastic spatula to remove air bubbles.
Of course, there is nothing better than the wallpaper glue that was used to glue this particular wallpaper. But if there is no material left or a lot of time has passed since the repair, and the expiration date of the fixing composition has already expired, you will have to use other methods.
One of the budget options is to use PVA glue.
Remember: PVA glue is only suitable for paper canvases, but even then the method is not without its drawbacks. Depending on the manufacturer, polyvinyl acetate based adhesive may leave yellow or brown stains. To avoid this, it is recommended to mix PVA and wallpaper glue in a ratio of 1:10, or half and half with water.
Polyvinyl acetate glue is definitely not suitable for non-woven and vinyl wallpaper, so you will have to visit a hardware store and purchase a special glue for joints. The advantage of such a fixing composition is that it is exactly suitable for any type of canvas, while providing reliable fixation.
Another advantage is its easy application: this glue is produced in tubes with a thin tip, ready-made (that is, it does not need to be diluted with water or any other means). The ambient temperature when using the product can vary from 10 to 25°C. The most popular brands on today's market are Kleo, Quelyd, Metylan.
Tip: in order to avoid divergence of the joints of the canvases in the future, you can stick a special paper tape between them, which provides a more durable fixation. However, this method is not suitable for thin paper and some non-woven wallpapers, but for heavy vinyl wallpapers this option is a godsend.
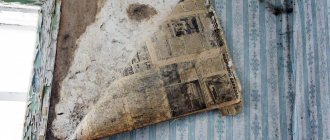
How to glue wet wallpaper after flooding
Do not leave soaked wallpaper on the wall: it will begin to rot and become covered with mold and mildew. The paper wallpaper will have to be removed and thrown away - it cannot be restored.
Non-woven fabrics and vinyl are removed, the stains are carefully washed with detergent and water and left to dry in a ventilated area for several days. Make sure that the wall is completely dry and the wallpaper has not lost its external qualities, then re-glue it.
The canvas has come off - brief instructions on how to fix it
After the repair, did the strip come off completely? We follow the following important rules. We close windows and doors to completely eliminate drafts. We completely clean the peeled strip of plaster and other particles. We do the same actions with the wall. We make the surface smooth and get rid of gaps.
How to glue loose wallpaper? Use the glue remaining after the repair, we recommend Metylan or Quelyd. Carefully coat the strip with a roller and leave to soak for 5–7 minutes. We straighten the strip and apply it to the wall; an assistant will be needed here, otherwise creases and bubbles cannot be avoided. Next, go over the entire surface with a rubber roller and treat the canvas with a dry rag.
Remember, if you are gluing paper wallpaper, then additionally coat the walls with adhesive for better adhesion to the surface. But with vinyl wallpaper on a non-woven base, you don’t need to do this; we only apply glue to the roll.
How else can you “cure” joints that have come apart?
In addition to the above option, there is a restoration method for restoring the joint, and it does not matter how much the edges have separated. But it can only be used for thick textured paper wallpaper intended for painting.
The essence of the method is to seal the cavity between the edges with a special adhesive composition, followed by grouting and painting. The composition is prepared from finishing or super-finishing putty with the addition of 25-30% cellulose fibers obtained by abrading the paper base of the material.
When applying the restoration composition, the edges that have separated are covered with paper so that the finishing mixture does not fall on the wallpaper surface. Using a spatula, the surface is carefully leveled and, after drying, sanded down with sandpaper. Due to the presence of cellulose fibers and an acrylic base, the composition does not crack and absorbs paint well.
Unfortunately, the above method must be tested in practice for each specific type of wallpaper material. There is a lot of evidence of successful repairs of seams that have come apart due to temperature, but there are cases when, 10-12 months after painting, the chalk base of the seal begins to show through the paint.
Indoor climate
With a high level of humidity and frequent formation of condensation, the wallpaper may become damp and come off the wall.
After the walls are prepared and the material is applied to the surface in compliance with the technology, it is necessary to maintain the internal climate in the room so that the wallpaper does not peel off:
- the humidity level in the room should not rise sharply;
- drafts must be avoided;
- in rooms facing south, the windows should be covered to prevent direct sunlight from entering the finish.
During the drying period of the finishing material, a constant temperature in the room should be maintained, the level of which should not be lower than +180C.
The main reason why wallpaper peels off or lags is that most non-professionals consider this process simple and does not require any skills, and begin work without studying the specifics of materials and the technology for carrying out work under incorrect conditions.
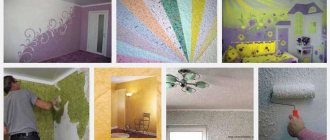
What to consider before starting work
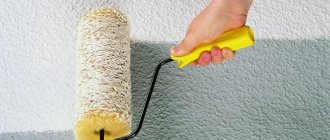
Before wallpapering, you need to carefully prepare the wall. If there are irregularities on it, then imperfections at the joints of the canvases are inevitable. The wall must be puttied, sanded and primed.
Without a primer, there is a lot of dust on the wall, which absorbs the glue and prevents a good connection with the wallpaper. It is preferable to apply the solution one day before the planned work.
To prevent problems with wallpaper joints, you should apply the glue correctly. Its excess or deficiency leads to unpleasant consequences. If the glue layer is too thick, it will take a long time to dry.
The surface must be prepared before wallpapering.
If glue is applied to wallpaper, then you should fold the strip into an envelope and run over it with a rubber roller to distribute it evenly. The procedure must be repeated after placing the wallpaper on the wall.
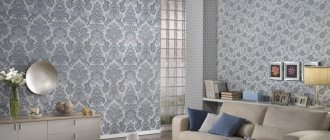
When purchasing, it is best to pay attention to wallpapers with a large width. This way there will be fewer joints, and it will be possible to disguise them with furniture and accessories.