The history of chrome plating
A mirror emulsion, which is applied in compliance with a whole set of rules and conditions, creates a specific coating that completely imitates perfectly polished metal. This effect is created due to the fact that the special paints contain the smallest particles of the metal itself, as well as a unique varnish. It is thanks to this composition that when applied, a thin layer is formed, which forms a very smooth and shiny surface on almost any object. The range of applications of this new product is increasing every year, and the popularity of this invention is only increasing.
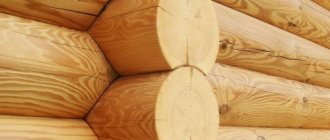
Chrome products have always attracted attention with their shine. Chrome plating technology developed rapidly in the mid-twentieth century. This type of coating has become very widespread in plumbing. With proper care, this type of item always pleases the eye with its brilliance and irresistibility.
At one time, chrome plating was used extremely widely in the automotive industry. North American automakers especially distinguished themselves by this in the 50s and 60s of the last century. If you look at the cars of those years, you will notice that they literally shone with an abundance of chrome. Bumpers, moldings, side view mirrors, many overhead parts - everything is covered in chrome. Aesthetically it looked great, while providing a fairly good anti-corrosion coating.
However, achieving such an effect was possible only when manufactured in a factory and with strict adherence to technology. Deviation from the technological process threatened that the chromium would peel off from the metal. There was another drawback at that time - chrome plating could only be applied to metal surfaces.
Progress does not stand still. Today, chrome plating of various surfaces is possible. However, real chrome plating still remains the lot of manufacturing enterprises. This is due to the fact that the application of chromium metal is an electrical process.
An alternative to the technology of applying metallic chrome is chrome effect paint. Two options are possible here. This is the use of compositions using a traditional spray gun and liquid in cans. The first option can be divided into simple painting and using heat treatment.
Paint chandelier shades
Contents
Your old chandelier has served you faithfully for many years, but has long since lost its presentability, become unfashionable, the paint on it has become dilapidated, has it ceased to please your eye? Of course, you can buy a new lamp, but it is not a fact that you will be completely satisfied with it in terms of price and external design. The quality of modern lighting devices is often disappointing - they are much inferior to the old technology that has been proven over the years. In such a situation, you can try to update the lamp, for example, you can paint the shades for the chandelier yourself. How to do this correctly, what tools and materials to use will be described in this article.
Updating an old chandelier with paint
What options are there for updating a chandelier? There are many ways, you can paint or update lampshades, create a new or refresh an old lampshade, make something completely new from an old lamp. Painting means updating the base color, painting glass, plastic or ceramic shades.
Important! It is better to paint in several layers and fix the finished work with varnish.
Benefits of coloring:
- You can choose any shade, taking into account individual preferences and tastes, the color scheme that prevails in the existing interior.
- As soon as you get bored with the new color, you can easily repaint the lampshades again.
- If the result does not suit you, then you can simply throw away the old chandelier. But this is already a last resort.
What materials are needed for painting?
Today, there are many options for coloring compositions that can be used to bring your idea to life.
You will need the following materials and equipment for work:
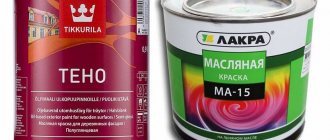
- Primer. You can use an acrylic primer or a primer specifically designed for metal surfaces.
- Aerosol acrylic paints. The choice of shades and colors of these compositions is simply huge; you can find even the most unusual variation.
- Transparent acrylic varnish. It allows you to protect the paint from various damages, gives the new color depth, and the coating will begin to shimmer and shine beautifully.
- Gloves and respirator. Their use is mandatory when performing such procedures, because your health is at stake.
- Solvent. You will need it to degrease the surface of the lampshades before painting.
- Clean dry cotton rags or cloth napkins.
- Screwdrivers. Useful for removing all removable parts from the chandelier.
How to prepare a chandelier for painting?
Of course, before you paint the chandelier shades with your own hands, they need to be prepared. It is better to organize the workplace outdoors.
Do the following:
- Hang the chandelier on some kind of hook, or stretch a rope - you can use a children's wall bars, the ceiling in a gazebo, or a branch.
- Cover the floor directly below the work area with something to prevent it from getting stained by drops of paint.
- Remove all light bulbs and removable parts from your chandelier. If any element that you do not plan to paint cannot be removed, then simply cover it with plastic film or masking tape.
- Clean the chandelier carefully, remove cobwebs, dust, dirt, and any contaminants so that they do not remain forever under the paint layer. First, wipe it with a dry cloth. Wash parts that require more thorough cleaning with a damp cloth and mild detergent. Let it dry completely.
- The entire surface should be degreased, for example, with kerosene or acetone.
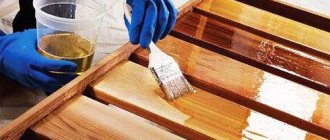
Painting a chandelier
Painting a chandelier from a spray can is actually very easy, the main thing is to strictly follow the recommendations of specialists and instructions.
Perform staining according to this scheme:
- To get an ideal result, immediately before applying paint, treat the surface with an aerosol primer. It is recommended to apply it from top to bottom with broad strokes directly from the can. It is better to apply several thin layers.
Important! The can must be kept at a distance of 20 cm from the structure, otherwise the primer will begin to leak. If this happens, first let it dry completely, then sand off the smudges with fine sandpaper and prime it again.
- Before painting, shake the paint can thoroughly so that it is thoroughly mixed inside and has the ideal consistency. Apply it with sweeping movements, paint from top to bottom so that no smudges form.
- Paint the surface in several layers, allowing each layer to dry thoroughly before applying the next layer. Modern compositions dry in 20-30 minutes. Determine the number of layers yourself. If you evaluate the result and understand that one more layer is not enough to obtain a more saturated and deep color, then feel free to take up the spray can and apply paint again.
- To protect the painted surface and add shine and depth to the color, apply an acrylic varnish on top. It must dry for at least 2 hours.
- Make sure that the paint and varnish are completely dry, the chandelier is no longer sticky, remove the protective film or masking tape.
- Reassemble the product and return all removed light bulbs and parts. Install an updated chandelier in your home.
If you understand how to paint a chandelier, strictly follow the proposed scheme, and approach the work creatively, then the result will surprise you, and the process itself will bring a lot of positive emotions and pleasure.
Options for updating lampshades
Lampshades preserved in excellent condition can be brought to life using various decorative techniques. The choice of a specific option depends on what materials you have at hand, your imagination and preferences.
The following materials can be used to decorate lampshades:
- Beads, beads.
- Lace.
- Ribbons, fringe, braid.
- Feathers and furs.
- Ready-made butterflies and artificial flowers.
- Paper napkins, petals, scraps of fabric.
- Wire.
- Decorative chains.
- Laces and yarn.
Take the old lampshade as a basis, then work according to one of the proposed schemes, selecting suitable materials for decoration.
Important! You can completely cover the base with decorations or lay out some kind of pattern or ornament.
New lampshade for lampshade made of yarn:
- For work, prepare yarn and PVA glue.
- Then inflate the balloon to the required size, pour some glue into a small container.
- Pass each strand of yarn through a bowl of glue, then wrap it tightly around the ball.
Important! Make sure the winding is even on all sides.
- Let the structure dry, then pierce the ball and remove it from the resulting fabric lampshade.
- Decorate the lampshade with bright ribbons, beads or fringe.
Original wire lampshade
Build a frame from wire, cover it with the selected material, for example, wicker, fabric or paper. The main thing here is not to forget about fire safety, so give preference to raw materials that are resistant to high temperatures. Decorate the lampshade with painting or other decorative elements.
Video material
You now know how to paint a chandelier with your own hands, refine an old lampshade or create a new one, so don’t even doubt that you will be able to revive your old lighting fixtures. The renewal process itself is a fun and creative activity. The main thing is to show your creative thinking to the maximum. Naturally, it doesn’t hurt to get acquainted with ready-made ideas that have long been brought to life.
Share on social media networks:
serviceyard.net
Problems you may encounter
In coloring, or rather in durability, there is only one significant problem - the type of light bulb, and most importantly the incandescent temperature.
There are 5 main types of lamps:
- incandescent - service life is about 1000 hours. They glow yellow. Available with a matte surface for better light diffusion. Heats up to 250.
- halogen - service life about 4000 hours. Produces low-frequency noise and is used only for special purposes: spotlights, headlights. Heats up to 200.
- luminescent – service life 5 years. High light output, many shades of light. Heats up to 70.
- energy saving - service life depends on the manufacturer. There are 3 color spectrums: soft, cool and daytime. Heats up to 50.
- LED – service life 11,000 hours. White LEDs are used in everyday life. Heat up to 50.
One very important fact can be gleaned from these basic data.
Any paintwork material tends to collapse at high temperatures. Therefore, the first thing you should pay attention to is the type of light bulb and the temperature resistance of the selected paintwork material.
Potential problems
The main problem that you may encounter after painting a lamp is high temperature. A 25-watt incandescent lamp or fluorescent device heats up to 100 degrees. The surface of a halogen 275-watt light bulb heats up to 250 degrees. The LED device heats up quite moderately - up to 35 - 50 degrees Celsius.
Halogen appliances cannot be painted. As for other types of lamps, in most cases the paint coating does not withstand the temperature and is destroyed. After losing transparency, the lamp will heat up unevenly, which sharply reduces its service life.
Possible problems
Before changing the color scheme of the device at home, keep in mind that the lamp gets very hot during operation. This becomes the main problem when repainting. When using conventional pigments that are not intended for use under high temperatures, the coating quickly dries out and cracks. This is reflected in the deterioration of the visual result, and in the possible overheating of the light bulb when the dye melts. The heating of a light bulb depends on its characteristics:
- A light bulb with a capacity of 25 W and energy saving heats up to 100 degrees Celsius;
- Capacity 40 W – 150 degrees;
- Capacity 75 W – 250 degrees;
- Halogen lamp, capacity 275 W – up to 550 degrees;
- LED – up to 50 degrees.
Why paint a light bulb?
Before choosing what to paint a light bulb with, you should clarify whether the method is suitable for achieving your original goals. Painting lighting fixtures is usually becoming an alternative to purchasing ready-made elements. Colored dyes are most often used for:
- Eliminating their possible theft at the entrance. They are usually stolen for further resale or use at home, but lamps painted in a different shade or darkened are not suitable for this. This reduces the risk of theft of lighting in the house.
- Creation of light music. Using lamps of different colors will help create an unusual atmosphere in the house, which is suitable for creating home parties and discos.
- Zoning of space. You can use different shades to highlight or emphasize different areas in the apartment. The paint used for light bulbs is not bright, but muted tones are suitable for changing the color scheme of the room.
- Decoration of rooms. Creating small illumination of shelves or other elements can be done by changing the color of the lighting, which usually looks impressive.
Instead of painting the light bulbs yourself, you can buy ready-made devices. However, keep in mind that their prices vary greatly - with home painting you can save up to 60 percent of the price. In addition, you can choose an unusual color scheme, which is not always available ready-made. The initial goals for coloring a light bulb may be different, but keep in mind that if the dye is used correctly, it does not lose its technical characteristics, which is why it can be used for regular room lighting, even after repainting it red. This is interesting: painting organic glass.
Example of using colored light bulbs
Why do you need to paint light bulbs?
Making multi-colored light bulbs at home gained popularity during the years of total shortage. Electrical stores sold only ordinary clear or white frosted light bulbs. Factory-made multi-colored light garlands were a rarity, not available to everyone.
However, there is no limit to the ingenuity of craftsmen. They learned how to paint light bulbs themselves and even use them to assemble color music. Painting light bulbs does not always serve for decoration: a life hack with color markings often saves lighting sources in hallways or lanterns above the entrance to a house from being stolen by enterprising passers-by.
Now you can easily buy ready-made colored light bulbs in the store. This option is acceptable if you only need a few pieces. In addition, lighting fixtures are not available in all colors.
Colored light bulbs cost 10 or 20 times more than regular ones, and buying a large number of them can hit your pocket. Painting light bulbs at home will cost much less, and the money saved can be spent on something else.
Effective painting methods
In order to change the color of a product, it is recommended to use highly effective painting methods. The best solution is to use specialized paint, which is created specifically for painting glass objects.
Ballpoint pen paste
If you don’t have time to find special paint, you can use ballpoint pen paste. To carry out staining using this method, you must perform the following steps:
- Take the stick with the paste.
- Remove the tip and extract the paste.
- Using a brush, apply the paste to the light bulb.
You can use either a blue or any other pen as a source of paint. The final result will depend on the amount of paste applied. It is worth understanding that using only ink from a ballpoint pen you will not be able to perfectly darken the product.
Nail polish
Using nail polish, low-power light bulbs are painted that do not heat up very much (the temperature during operation does not exceed 100 degrees C). The varnish has pronounced adhesion and durability. It can also be used to paint the entire surface evenly. You can use varnishes of any color, from yellow to red and green. Clear varnishes can be used as a base for other colorants. After applying the varnish, any other paint will adhere much better and with higher quality to the surface of the light bulb.
PVA
PVA glue is a good base for applying any coloring matter. If a high-quality result is required, it is recommended to create a layer of PVA before applying paint. Next, you can color the light bulb with ballpoint pen paste or special ink.
Auto enamel
Automotive enamel is a specialized paint that is sold in the form of an aerosol. Its advantages are good adhesion, convenience, high application speed and durability. Auto enamel is applied in a thin layer to achieve the desired darkening effect. You can find paint of any color on the market without any problems.
Application is carried out from a distance of 30-50 cm. Before this, the can is thoroughly shaken. It is important to make the layer thin so that the glass of the light bulb does not lose its transparency. If the layer is too thick, light will not pass through it.
Stained glass paints
Stained glass paints are created specifically for painting glass objects. With their help, you can give the glass the desired color while maintaining its transparency. To change the color of the light bulb, water-soluble stained glass paints are used that can withstand high temperatures.
Paints are sold in tubes. Substances must be applied in strict accordance with the instructions. You will first need to prepare the surface by cleaning and degreasing it. To give the light bulb a special look, purchase fluorescent paints with sparkles.
Tsaponlak
Tsaponlak is a varnish that is used to coat metal products and microcircuits to protect them from negative external influences. It is possible to purchase both transparent and colored tsaponlac. Using a colored liquid, you can try to paint a light bulb. The advantage of this varnish is resistance to high temperatures and wear resistance. The downside is the small selection of colors (only red and green tsaponlaki are available for selection).
Organosilicon
Organosilicon paints are characterized by extremely high heat resistance. They can be applied to coatings, which will subsequently heat up to temperatures above 500-600 degrees C. Organosilicon is used to color powerful light bulbs, which become very hot during operation. Before staining, it is recommended to dilute the dye with a solvent, otherwise the glass will be darkened too much. You need to act based on the instructions for the specific silicone-based paint.
How to paint light bulbs
As has already become obvious, gouache and watercolor will not help us in this matter. Therefore, it is time to look for non-standard solutions
Ballpoint pen ink
If you want to color a light bulb blue, black, red or green, a regular ballpoint pen will help you with this.
This coloring is very simple to do:
- Take a ballpoint pen and remove the paste from it.
- Then remove the writing rod.
- Blow ink onto any surface (sheet of paper, cardboard).
- Paint the light bulb
There is a more complicated method; for this you will need acetone. Simply dilute the ink obtained from the pen with acetone.
This technique allows you to maintain the desired color tone. However, the consistency will be very liquid and in this case it is preferable to dip the light bulb into the solution rather than dye by rubbing.
“Instead of acetone, you can also use ethyl alcohol, the result will be the same.”
Nail polish
Regular nail polish is an equally good option. You can choose a huge number of colors and shades, use glitter or achieve a matte effect, but the melting temperature of the varnish is 200.
This method is only suitable for LED and energy-saving light bulbs.
“Nail strengthening varnish, or colorless, has good adhesive properties, this can be used when painting a light bulb with a ballpoint pen.”
PVA glue
PVA glue is used to apply the adhesive layer. It can only process LED, energy-saving and fluorescent light bulbs.
When the glue dries, it forms a colorless film; this should be taken into account since the fact is not quite obvious. After the light bulb has dried, you can paint it with ink; it will go on smoothly and evenly.
Auto enamel
Automotive enamel is available in aerosol cans. It has a wide selection of colors and an affordable price.
It retains its performance characteristics up to a temperature of 200, then it begins to flow.
The paint itself is quite dense and intense; it should be applied carefully and at a distance of at least 50 cm. Otherwise, the paint layer will be too dense and thick, the bulb will darken and stop transmitting light.
Stained glass paints
Of the varieties of stained glass paints, only the category water-soluble for firing is suitable. Such paints adhere well to the surface and basically have a rich, but at the same time transparent structure.
They are originally designed for painting different types of glass. According to their structure, they lie softly and evenly.
At high temperatures they do not melt or ignite, but rather become stronger. The only drawback is their high cost.
Tsaponlak
Tsaponlak is a universal varnish that comes in a fairly wide color spectrum. Widely used in any repair work, it has a wide range of advantages, both in price and versatility.
According to its main characteristics it:
- dries quickly;
- operating temperature from -30 C to +120 C;
- strengthens the surface after painting;
- universal, it is used in coating: concrete, wood, paper, glass.
The main composition contains cellulose nitrate, which belongs to the category of ether-alcohol solutions.
Tsaponlak varnish is sold in two versions: painted and unpainted.
You can safely choose the unpainted version and add your own coloring pigment to it. Ballpoint pen paste works well; the choice of colors is huge if you go to a large stationery store.
" Interesting! Previously, women used tsapon lacquer to paint their nails, adding pearl and glitter to add color. “
Comments
“Network publication “Woman’sDay.ru (Woman’sDey.ru)” Certificate of registration of mass media EL No. FS77-67790, issued by the Federal Service for Supervision of Communications, Information Technologies and Mass Communications (Roskomnadzor) December 13, 2021 16+.
Founder: limited liability company "Hirst Shkulev Publishing"
Editor-in-Chief: Dudina Victoria Zhorzhevna
Copyright (c) Hirst Shkulev Publishing LLC, 2021.
Any reproduction of site materials without the permission of the editors is prohibited.
Contact information for government agencies (including Roskomnadzor):
The need to paint a lamp is usually dictated by decorative purposes. Some people want to create a color music system, others need multi-colored lighting for a dashboard or room.
Colored lamps are sold in hardware stores, but the cost of such products is several times higher than regular light bulbs.
Most often, the consumer decides to purchase a standard incandescent lamp and paint it the desired color. So the question arises: how to paint a light bulb? This will be discussed in the article.
How to paint light bulbs for color music
To make a home disco happen, choose special paint products. They must be heat-resistant, safe and easy to use. These include:
- silicone paints;
- tsaponlak.
Organosilicon paints are sold in construction stores, and tsaponlak is sold in radio parts stores. Both products are intended for painting surfaces operating at high temperatures.
Cons: limited selection of colors. You can mix colored pen pastes with tsaponlak and apply them to the light bulb. But this method is not applicable to silicone paints.
In this article, you learned how to paint a light bulb using available products. Use our tips and enjoy the new interior of your room. By the way, a painted light bulb in the entrance will save you from darkness and petty thieves who steal them.
How to paint a light bulb at home
The easiest way is to use colored pen paste. Simply remove the tip and blow the contents of the wand onto the light bulb. For better application, mix the paste with alcohol. Instead of alcohol, you can use PVA glue and dilute it with multi-colored ink.
Nail polish is suitable for painting low-power light bulbs. Apply it with a brush or cotton swab. The second option is more convenient, since it leaves no gaps or streaks and the varnish is quickly and evenly distributed over the surface.
Simple gouache is used to cover light bulbs more for decoration than for color lighting, since after 15-30 minutes it hardens and stops transmitting light. Paint a gouache light bulb as an experiment, and then move on to other options.
Remember: the more layers, the richer the shade.
Are you wondering how to paint light bulbs different colors without having multi-colored varnishes? Use water-soluble stained glass paints for firing. They are durable and do not emit a strong odor. The downside is the high price.
Spray cans of car enamel lying around in the garage onto regular light bulbs. It is better to paint outside. Don't forget to wear gloves and hold the can at a distance of 30-40 cm.
Which means are not suitable?
Not all dyes are suitable for coloring a simple light bulb. The complete list of products that cannot be used for coloring depends on the specific purposes. To obtain the most attractive decorative result, it is necessary to use stable, heat-resistant stained glass paints, silicone or tsaponlac. To quickly create an anti-vandal lamp, paste from a pen is suitable.
Zelenka
Almost every person has a solution of brilliant green in their first aid kit. It is not recommended to use it for coloring, since it is not resistant to high temperatures, wears off quickly and does not allow for uniform darkening. When applied in a thick layer, the brilliant green darkens the glass too much, which is why the lamp ceases to fulfill its main task - illuminating the room.
Markers and felt-tip pens
It is extremely difficult to paint the entire surface of the glass with felt-tip pens and markers. In addition, they are extremely easy to wipe off the surface after application. Even alcohol-based markers can be removed from glass at the slightest touch. That is why coloring with felt-tip pens is not done when working with any lamps.
Expert opinion
Zakharova Irina Yurievna
Cleaning professional with 15 years of experience. Our best expert.
Ask a Question
Even if you manage to paint the glass with a marker, the product will greatly lose its brightness and will be unsuitable for lighting or creating light music.
Gels
Turn a flashlight and external flash into colored light sources using regular cellophane.
The combination of colored gels will create the effect of a combined shade. Photo: Claire Gillo
Color gel, also called a color filter or simply gel, is a transparent material that gives light a specific hue. Gels are often used to correct white balance problems. However, in recent years it has become popular to combine different gels with strong colors to achieve a distinctive look. Check out the work of artists like Nadav Kander if you're looking for inspiration.
When working with gel, at first it is better to limit yourself to two colors. As you develop your skills and gain a better understanding of colors, you can add as many gels as you like. For our photo we used cool blue and warm yellow.
To attach the cellophane (gel) to the flash, we simply cut a piece of blue clear material and wrapped it around the front of the head. Since we only had one flash, the second light source was a flashlight wrapped in yellow cellophane. To prevent extraneous light sources from affecting the result, we photographed against a dark background in a dark room. The shutter speed was 8 s. The flash (blue light) caught the water droplets in the air, and the flashlight (yellow) helped create a warm hue at the base of the glass.
Method 2
To create a photo in neon light in the second option, we will need a table lamp (preferably with a long leg) and an old T-shirt/rag of the color with which you want to illuminate your photo.
How to take a photo in neon light:
- Tie the fabric onto the lamp.
- Place the lamp on the side of you so that it is not visible in the frame.
- Turn on the lamp.
- Enjoy the neon lighting.
- You can set your camera on a timer or ask someone to take a photo of you in complete darkness.
If you want to create a neon light gradient, then equip a second lamp, wrap it in a fabric of a different tone and place it on the other side of you.
Tsaponlak
You can purchase this coating at a store specializing in radio components. The main function of the coating is to protect tracks and soldering from short circuits. Since the operating temperature of transistors reaches 150 degrees, the product is also suitable for coating light bulbs.
These are the simplest and most affordable ways to coat a rather capricious material - glass. The choice is narrowed several times if the question concerns light bulbs that burn often and for a long time, because not all dyes can withstand high temperatures.
How to paint an LED lamp
The method of painting an LED lamp depends on the type of its surface. Because this type of product generates less heat, more coloring agents are available. Even those dyes that can withstand only slight heating up to 100 degrees C are suitable. The main parameter that you need to pay attention to when selecting paint is its transparency and adhesion to glass. To preserve the brightness of the product to the maximum, both ballpoint pen paste and tsaponlak are suitable. There is no need to use expensive heat-resistant stained glass paint.
How can you color an incandescent lamp?
Incandescent lamps are the hottest source of electric lighting. For example, a 75 W light bulb can heat up to 268°C. Temperature is directly dependent on power. This feature should be taken into account when choosing a painting product. Below are examples of different materials and an assessment of their suitability for painting this type of light bulb.
Ballpoint pen paste
This method is suitable when you urgently need to paint a light bulb using improvised means. Ballpoint pen paste has a thick consistency. You can completely cover a glass flask with it or draw patterns. Common color options are blue, black, red, green and purple, which are made by mixing red and blue paste.
Paste coloring technology:
- cut off the tip of the rod;
- blow the paste onto paper or oilcloth;
- roll the light bulb over the paste to distribute the dye over the glass of the bulb;
- dry for an hour.
If you want to get a light transparent layer, then add a few drops of acetone or ethyl alcohol to the paste. You should not dilute it too much, because the paste loses its viscosity and collects in drops on the surface of the glass.
Nail polish
A bottle of inexpensive varnish and a brush will help you paint the lamps the desired color. Varnishes of different shades can be mixed with each other, as well as with clear varnish or acetone. This painting method is not suitable for high-power lamps, because at temperatures above 200°C the varnish loses its stability and melts. An exception can be made for low-power light bulbs. It is also unprofitable to paint a large number of lamps with varnish, for example, in a garland. There are less expensive ways to do this.
Slowly changing color RGB LEDs and their application for display
Yes, yes, diaivaya, a very fashionable word on the Internet these days. DIY or made by hand our way. Life on Muska, I see, doesn’t calm down even in the New Year, so I decided to share my handjob too. Actually, I already mentioned these LEDs in my review of garlands, but I used them extremely successfully (as it seems to me), so it’s not a sin to write a separate review. The LEDs themselves, in fact, do not represent anything supernatural - ordinary-looking narrowly directed 5mm LEDs in a transparent housing. But inside there are actually three LEDs and a control chip that smoothly switches them, thus changing the color of the glow “across the rainbow”
video of how they work here:
Actually, this concludes the review of LEDs and we move on to the display.
After purchasing a 3D printer, I began to be interested in ready-made models for printing. Well, of course, the first thing I found was the site thingiverse.com. And on it, in particular, there is a wonderful night light “Magic Mushrooms - a lighted decoration”. Well, on the eve of the New Year, I decided to print a couple of pieces for gifts. Undoubtedly, this review would not have existed if I had not finished finishing off that model. More precisely, I printed several new parts and one to replace the used one - namely the back cover.
Unfortunately, in the original model the lid is made somehow stupidly and not only does it close awkwardly, but it also doesn’t hold well, moreover, there’s no way to put a holder for batteries in it. And so that it wouldn’t dangle or fall through, I printed a couple of 5x10x1mm plates that I glued with dichloroethane from the inside of the case so that the lid wouldn’t rotate. In addition, since my LEDs are highly directional, I printed caps for them from transparent plastic that diffuse the light.
These LEDs can be powered by 2 or 3 AA/AAA batteries. I actually checked both options - everything works, but at 2V it’s already difficult. But I don't think that these lights will be turned on so often and run for a long time that this will become a problem.
When developing the cover, I was guided by holders for 3 * AAA batteries purchased offline, and switches that came from China by mistake
My models are posted here: yadi.sk/d/KLTZkkDeN5xPpw
Well, actually, let’s start making a night light. Printing details:
The plates are already glued into the case, they are visible in the hole at the top and bottom. The lid rests on them; they prevent it from turning on the protrusions that are inserted into the grooves. The lid turned out funny, “surprised boy” is called The colors are a little wrong, there is something brown-carrot, browner than in the photo, I would, of course, like something even more natural, but that’s okay. However, I had a crazy idea to print hats from red plastic. Or you could also print them from white.
LED caps:
Regarding printing: don’t ask me about printer settings, I’m still completely green. And settings may be needed there, in particular when printing small caps. It is usually recommended to experiment with retract. But it is not exactly. In short, if you decide to print, start your experiments with small heads, the rest is no problem. the legs are printed without supports, the stump is printed upside down with supports. I also printed the cover with supports, but you can probably try without it. Now the worst part: in small hats I poked into every hole with a thin soldering iron, because there were “cobwebs” everywhere. I probably need to set up a retractor, and maybe something else, but I didn’t have enough time.
We glue the stems of the mushrooms to the stump with Chinese snot using a heat gun (I also wrote about the correct gun with a valve), it may be necessary to bore the holes and select the location so that the caps do not overlap too much in space. You can pre-fix it with a soldering iron.
Next we solder the wires to the LEDs. The thinner and softer the wires, the better. We observe the polarity so as not to get confused later. We leave the LED leads somewhere around 3-5mm; after soldering, we stretch heat shrink onto one.
To connect all the wires into a pile inside the stump, I used a thin strip of 2-sided fiberglass. We solder the positives on one side, the negatives of the diodes on the other, then connect them to the battery via a switch. The switch, by the way, is attached to the lid by melting the pins.
Don’t pay attention to the batteries, for testing I plugged in something cheap from a fixed price.
Well, the result:
As you can see, the LEDs do not (and are not required to) work strictly synchronously, so after some time they become desynchronized, which is only beneficial. A nice feature is the fact that you don’t have to worry about the print quality of most of the details, because this only adds texture, which is very appropriate here. Theoretically, you can add a touch switch, a lithium battery and USB charging, but this is up to everyone to decide for themselves.
Personally, I'm more than pleased with the result. I recommend these LEDs for such crafts, and a 3D printer for such crafts. I have an Ender 3, if that’s the case.
How and with what to paint a chandelier yourself at home?
Rating 4.75 (2 Votes)
| In this article, we'll show you how easy it is to give an old chandelier new life with a coat of paint. Of all the items in the home, lamps and chandeliers seem to go out of style faster than anything else. Unfortunately, beautiful, high-quality lamps can be quite expensive, so it is not always practical to buy new lamps to change the style. However, you can update the lighting fixtures in your home with the help of paint and imagination, and make sure that the old chandelier fits well into the new interior after renovating the room. Even a well-deserved and middle-aged chandelier can find new life under a layer of fresh paint and look stylish and modern. |
What do you need to paint a chandelier yourself?
Primer – you can use either acrylic primer or metal primer Acrylic spray paints – choose the colors you want to paint your scooter in advance. Now there is a huge selection of colors and shades of paint, there are paints with special effects - metallic, mother-of-pearl, fluorescent, hammer and others. Acrylic transparent varnish - it will protect the paint from damage, and will also add depth to the color and shine of the new coating of the chandelier. Respirator and gloves for protection during operating time Solvent for degreasing the surface of the chandelier before painting (you can use white spirit, kerosene or special degreasing compounds) Cloth napkins or just dry, clean cotton rags Masking tape and paper or covering film Screwdrivers and other tools to remove removable parts from the chandelier before painting
Preparing the chandelier for painting
| Step 1 It is better to organize your workplace outdoors. You will need to hang the chandelier from something, such as a string rope, a wall bar, a branch, or the garage ceiling. Cover the floor under your work area with something to prevent paint drops from staining the surface. Step 2 You need to remove all the light bulbs and other removable parts of the chandelier. If some elements that you do not want to paint cannot be removed, hide them with masking tape or plastic film. Step 3 It is necessary to thoroughly clean the chandelier, remove all dust, cobwebs, dirt and other contaminants, of course, if you do not want to permanently imprint them under the paint. Start by wiping the entire chandelier with a dry cloth. If there are parts that need more cleaning, use a damp cloth and a mild detergent to clean. Let the chandelier dry completely. |
Step 4 It is advisable to degrease the surface to be painted using acetone, kerosene, white spirit and any special degreaser.
Chandelier painting process
| Step 5 For best results, prime the surfaces using an aerosol primer before painting. Applying it from a spray can in broad strokes from top to bottom. It is better to apply several thin coats than one thick coat of primer. Keep the can at a distance of 15-20 cm from the chandelier. If you try to spray from a shorter distance, the primer may bleed. If this happens, allow the primer to dry completely, sand out any smudges with fine sandpaper, and re-prime. Step 6 Hopefully you have already chosen the right paint. Today, any craftsman has access to aerosol paints of completely different colors and shades, paints with special effects - metallic, pearlescent, fluorescent, etc. |
Before starting work, shake the paint can thoroughly so that it is well mixed and has an even consistency. Apply spray paint using sweeping movements, trying to paint from top to bottom to avoid smudges.
| Step 7 You need to paint the surface in 2-3 layers, each time allowing the previous layer to dry thoroughly. 20-30 minutes is enough for this. Determine the number of paint layers yourself, “by eye”. If you look at the result and you want to apply another layer to get a deeper and richer color - don’t be shy, feel free to paint more. Step 8 This is an optional step. If you want to further protect the painted surface of your light fixture or chandelier, as well as add more depth and shine to the color, you can apply an acrylic spray varnish to your scooter. Varnish drying time 1-2 hours |
Step 9 After making sure that the paint and varnish have completely dried (usually it takes 2-3 hours for final drying) and the chandelier has stopped sticking, remove all the masking tape and protective film. Assemble the chandelier by attaching all the removed parts and light bulbs. Install a freshly painted chandelier in your home.
If you followed the proposed technology and were creative in painting, then you will enjoy not only the painting process, but also the result you got!
How to properly dim a night light bulb
Dimming a light bulb is a simple procedure if you choose the right dimming agent. Colored tsapon lacquer is perfect for this procedure. You can also darken it using nail polish. In order to simply reduce the brightness of the light, it is enough to use any neutral color. Blue colors are best for a night light.
You need to select a product depending on the type of product. For incandescent lamps, the substance must be heat-resistant, and the surface should not be darkened too much, as this can lead to overheating inside the lamp.
Method 3 - PVA glue
For cooking you need to prepare the following items:
- PVA glue;
- ink for inkjet printers, or other water-soluble inks;
- shallow container;
- brush.
Important! Can only be used on moderately hot elements.
Preparing the paint:
- Pour glue into a container.
- Add coloring pigment in a 1:1 ratio (50 ml of glue requires 50 ml of paint).
- Mix well with a brush.
- Apply to the light bulb and dry.
Important! Prepare separately all the necessary shades so that you can paint the light bulbs blue, red, green or any other color.
Solutions
Regular paint is not suitable for painting a lamp. Still, there are a number of solutions that can help solve the problem.
Ballpoint pen paste
To make a light bulb, for example, blue, you can use regular ballpoint pen paste.
You can do this as follows:
- Remove the tip containing the ball from the rod.
- Blow out the rod. This will help you extract the paste onto a paper sheet.
- Hold the lamp by the base and rub the paste onto the bulb.
In one of the Soviet technical magazines, the following method was proposed: dilute the paste in acetone, and apply the resulting liquid to the flask with a brush. This option is good because it allows you to control the saturation of the paint. However, keep in mind that liquid paint is difficult to apply on a smooth glass surface.
Advice! Instead of acetone, you can use other types of solvents (cologne or ethyl alcohol).
Varnish
The light bulb can be painted using regular quick-drying nail polish. However, it should be remembered that the varnish can withstand temperatures up to 200 degrees, and then it begins to flow.
Only economy lamps or low power incandescent lamps can be varnished. The varnish is applied with the brush included with the tube. A cotton swab will do.
Advice! Clear varnish creates a layer with good adhesion. Paste from a ballpoint pen is already applied on top.
PVA
Moderately heated light bulbs are treated with PVA glue. The principle is the same as described above when it came to colorless varnish - creating a layer on which the dye will adhere well.
After the glue has dried, the surface is painted with ballpoint pen paste, inkjet printer ink or any water-soluble pigment.
Note! After drying, white PVA glue becomes transparent.
Auto enamel
Automotive enamel is also suitable for painting light bulbs. Car enamels are packaged in aerosol cans. Like varnish, car enamel retains its performance characteristics at temperatures up to 200 degrees Celsius.
The enamel is applied from a distance of 30 - 50 centimeters. The paint layer should not be too thick, as in this case the bulb will lose its transparency.
Stained glass paints
Stained glass paints are used to paint light bulbs. In order to make the right decision about which colors can be used to paint a light bulb and which ones cannot, you should know that only water-soluble dyes are suitable for firing.
Such paints do not ignite when heated. Increasing the temperature only strengthens the coating. The only significant drawback of stained glass paints is their high cost. A small tube (50 grams) costs an average of 200 – 250 rubles.
Tsaponlak
To give the light bulb color, tsaponlak is suitable. This substance is sold in radio stores. Tsaponlak was originally designed to protect tracks and soldering from short circuits.
Tsaponlak contains the following components:
- nitrocellulose,
- organic solvent,
- dye to add color to parts (optional).
Tsaponlak has a certain heat resistance, since the temperature of the parts during their operation reaches 150 degrees. The disadvantage of tsaponlak is the limited choice of color.
The varnish does not contain a dye, and therefore the color will have to be created through other components. For example, to get a red lamp, you will need transparent zaponlak and red paste from a ballpoint pen. The procedure for staining with paste is the same as described above.
Note! Using tsaponlak you can paint the lamp not only red, but also green. Zelenka is not suitable for giving the light bulb the appropriate color, since this medical preparation practically does not linger on the glass.
Organosilicon
Organosilicon-based paints and varnishes are used to impart color to coatings that are operated at elevated temperatures.
Organosilicon paints are the most resistant to heat and can withstand up to 600 degrees Celsius. Thanks to this, silicone retains its performance characteristics even on the hottest light bulbs.
To obtain a transparent coating, the composition must be diluted. The required solvent is always indicated on the container. For example, for the Russian brand KO-813 you will need solvent No. 646. Solvent or xylene will do.
In a home workshop, the choice is limited. As a rule, it all comes down to creating a base, onto which dye is then applied.
A more expensive option is stained glass or silicone paint, but the quality of the coating will be higher.
Difficulties in painting at home
Among the main problems of dyeing at home are:
- difficulties in selecting a dye for a specific lamp;
- inability to properly treat the surface before painting;
- lack of specialized tools.
If you don’t have the desire or free time to study the nuances of painting, then you can simply purchase a ready-made painted lamp in a store. To choose the right paint, you need to familiarize yourself with the table of lamp temperatures depending on the type and power:
| Type | Surface temperature |
| Incandescent lamp, 25 watt | 100 C |
| Incandescent light bulb, 75 watt | 250 C |
| Energy saving | 100 C |
| LED | 40-50 C |
High-power halogen lamps have the highest surface temperature, so it is impossible to paint them at home without special preparation. If you need to do quick coloring, then using improvised means you can get an acceptable result. High-quality painting requires more careful preparation and the use of wear-resistant paints.
Share link:
How to paint a light bulb: options for different colors
In order to successfully change the original color of a light bulb to another and maintain its working properties, you need to carefully approach the issue of choosing paint. As we have already learned, we need one that can withstand the heating temperature of the lighting fixture without melting, drying out, or becoming cracked. If you paint with simple paint, it can end unpredictably.
When choosing a dye, first of all think about what the final result should be. This is the only way to find a suitable paint option that will not only paint over the glass, but also not spoil the result.
Nail polish
Since the time of our grandmothers, nail polish has been used to make garlands for the Christmas tree. In those years there was not much choice; they used ordinary incandescent lamps and repainted them with varnish. Very comfortably. The varnish has many different color shades. If you want, make the light bulb green, but if you want, make it gradient.
There are other advantages to this women's paint product:
- has excellent adhesion, lies evenly on the surface, does not form streaks, does not crack or chip when heated;
- can be used at temperatures up to two hundred degrees;
- if applied in a thick layer, it lies evenly and has no unevenness, which is clearly visible when the light is on.
Attention! But do not forget that varnish can only be used for those lighting fixtures that cannot heat up more than two hundred degrees. Otherwise, the varnish coating will melt and flow.
This varnish can be used as a base if it is colorless. Thanks to its unique adhesion, it interacts well with other types of dyes.
Ballpoint pen paste
As a rule, in most cases the lamps are painted blue. The method is very simple and inexpensive. You don't even need to buy anything. All you need to do is take a ballpoint pen refill.
It is easy to extract dye from the rod:
- take pliers and pull the tip out of the rod - there will be no obstacle for the dye, and it can flow out of the rod;
- to speed up the process, take and blow into one end of the rod, while holding the other over a piece of paper or over some container where you can collect all the paste;
- We hold the light bulb by the base and paint the entire surface with a brush.
As soon as the first layer has dried, you can repeat the procedure, thereby achieving a more uniform coloring.
Reference. To make painting easier, you can add a few drops of solvent into the paste. True, in this form the paint will stick worse to the flask, constantly tending to flow down.
Tsaponlak
The main purpose is to coat the internal parts of various devices to prevent overheating, as well as possible short circuits. Inside radio-electronic devices, the heating temperature can easily reach one hundred and fifty degrees, so this varnish can safely be used to paint light bulbs that heat up to no more than two hundred degrees.
Since parts often have different color markings, there is plenty to choose from in terms of color scheme
Reference. Even if you only have colorless varnish at your disposal, no one forbids mixing it with the same ballpoint pen paste. The varnish fits perfectly on the surface of the lamp, while remaining heat-resistant.
Automotive enamel
Car enamel can also be used quite successfully to repaint light bulbs. You just need to remember one nuance. The applied layer is quite dense, since the purpose of the enamel is to hide various scratches. This imposes some requirements on the careful use of the dye.
Enamel can be used to paint light bulbs that heat up to a maximum of two hundred degrees. Exceeding this thermal threshold will cause the coating to melt.
The aerosol can should be kept no closer than forty centimeters from the surface. There is no need to continuously press the button - it is better to do this in small doses. You should not apply the coating twice, otherwise the surface will be covered with a dense and opaque layer of paint.
Reference. The obvious advantage of automotive dyes is their wide color range. You can choose any shade of color, be it pearlescent or metallic.
Organosilicon
This product works great even with lamps that get very hot. It can withstand up to six hundred degrees. This means that it can “coexist” perfectly with halogen lamps.
Before application, it must be diluted with a solvent. Then it will be evenly distributed over the entire glass surface. But it is usually used as a protective agent. First they cover the lamp with it, and only then, on top of it, apply regular dye.
Stained glass paints
You can also use stained glass paints, although not all of them. To repaint light bulbs, you need to choose a dye that is soluble in water and requires further firing. Such paints are not afraid of any heat, and the more the glass heats up, the stronger they become.
Their only drawback is the cost. One bottle of fifty milligrams costs about three hundred rubles.
Method 4 - Auto enamel
Automotive enamels are sold in aerosol cans. Everything here is quite simple; you don’t need a lot of time and effort to paint a light bulb. Need to:
- Buy balloons with the desired colors.
- Spray paint on the light bulbs at a distance of 30-40 cm.
- Dry.
Advantages of this method:
- suitable for light bulbs with bulb temperatures up to 200°C;
- easy to use;
- dries quickly.
Important! Do not apply too thick a layer of paint, it can make the bulb opaque and the light bulb simply will not shine.
Method 5 - Stained glass paints
These are special paints for creating designs on glass. They come in different types. In our case, we need water-soluble ones for firing. When heated, they do not burn, but on the contrary, they become more transparent. Accordingly, a light bulb painted using this method will last longer and the coloring will be brighter.
Important! The only drawback of this product is the price.
The application technology is also not complicated:
- Mix the paint in the bottle.
- Apply with a brush or padding pad.
- Dry.
( 1 rating, average 5 out of 5 )
How to paint a light bulb at home
The easiest way is to use colored pen paste. Simply remove the tip and blow the contents of the wand onto the light bulb. For better application, mix the paste with alcohol. Instead of alcohol, you can use PVA glue and dilute it with multi-colored ink.
Nail polish is suitable for painting low-power light bulbs. Apply it with a brush or cotton swab. The second option is more convenient, since it leaves no gaps or streaks and the varnish is quickly and evenly distributed over the surface.
Simple gouache is used to cover light bulbs more for decoration than for color lighting, since after 15-30 minutes it hardens and stops transmitting light. Paint a gouache light bulb as an experiment, and then move on to other options.
Remember: the more layers, the richer the shade.
Are you wondering how to paint light bulbs different colors without having multi-colored varnishes? Use water-soluble stained glass paints for firing. They are durable and do not emit a strong odor. The downside is the high price.
Spray cans of car enamel lying around in the garage onto regular light bulbs. It is better to paint outside. Don't forget to wear gloves and hold the can at a distance of 30-40 cm.