When freshly cut wood is left exposed to rain and sun, its texture develops a beautiful silvery patina. If you want to speed up the process and artificially age wood, in this article we'll share five ways you can do it (and another trick to make wood look old) on pine or cedar. You can make some of the compositions yourself, while others will need to be purchased at hardware stores.
How to age wood Brushing wood
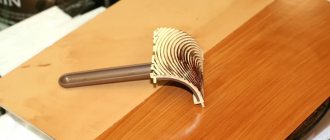
The term brushing comes from the English word “brush”, which translated into Russian means “brush”.
Otherwise, this technique is called wood texturing, that is, using a brush, the wood is given a texture or relief, which is characteristic of old wooden products. At the initial stage of brushing, it is necessary to remove soft fibers from solid wood. This can be done by several methods - light aging involves creating a barely noticeable roughness on the surface of the wood, or rough (deep) aging, in which the irregularities can have a depth of up to 2-3 mm.
Larger parts, for example, ceiling beams or wooden posts, can even be pre-processed using an ax - you can make notches, trim the edges, but don’t be afraid to spoil anything - after all, no one knows what should happen in the end except you. This treatment allows you to give the product a deep surface microrelief, the depth of unevenness in which will be up to 2 cm.
Also, when wood ages, the fate and “traces” that appear over time from the “work” of various bugs are necessary. Before finishing, they can be imitated with a drill or drill. In addition, you can apply such simple threaded elements as, for example, braids - in the end you will get a Scandinavian-style product.
List of sources
- koffkindom.ru
- lkmprom.ru
- hagga.ru
Do-it-yourself wood brushing
If you really want, you can make artificially aged wood yourself:
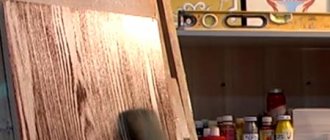
- The selected workpiece needs to be slightly moistened, this will eliminate the release of wood dust during work. First, the workpiece is processed with a hard metal brush. Its rigidity is selected experimentally. It is necessary that the brush removes soft surface fibers well, but does not disturb the structure of hard fibers. The movement of the brush attached to the grinding machine or grinder is carried out in the direction of the fibers. The rotation speed is also pre-selected on the sample; for each wood the speed can vary significantly. When working manually, there are no problems with selecting the rotation speed of the brush, but the process of preparing wood becomes significantly more complicated and lengthened.
- After using a wire brush, use abrasive bristles. Using this attachment or brush, all fiber fragments and roughness are removed. At this stage, using a chisel, you can further add various indentations and grooves. They can be given the appearance of natural cracks in wood.
- In the future, final polishing is necessary, this is usually done using a brush with sisal bristles. You can use sandpaper by hand. At this stage it is necessary to achieve perfect polishing of the entire surface.
- The part acquires a special decorative appearance if it is tinted, painted, or gilded at the final stages. Stain is often used. Impregnation with stain and its quick removal allows you to paint areas with the softest fibers, while the hard ones are practically not stained.
- Painting with gold or silver paint gives the wood an original look. When applying the dye, particles of coloring pigment get clogged into microcracks, which ensures the appearance of glare in sunny weather. You can use different dyes for painting, but they must be designed for working with wood. After painting, it is recommended to polish the surface again, this will remove roughness from the product.
- At the last stage, you need to apply several layers of varnish. Before applying a layer of varnish, the previous one must dry well and it must also be polished.
With sufficient experience, the process of brushing wood and using special devices is not particularly difficult. At the same time, it is possible to produce the most exclusive products, ranging from wall shelves to cabinets and kitchen units.
This video will tell you how to age wood yourself:
Varieties of compositions and consistency
Water flows from the tank into the toilet: the main causes of breakdowns and how to fix them yourself.
Previously, mechanical action was used to artificially age the furniture, giving the furniture a noble antique look. Interior items were kept in rooms with high humidity, rubbed and scratched. Innovative methods allow you to achieve the desired effect in the shortest possible time and in various ways.
Patina for wood, depending on consistency, can be of the following types:
| Thick. | Paste-like compositions, base and finishing, oxidizing the surface being treated with the effect of gilding or rust. |
| Liquid. | Varnishes that are often used as a topcoat to achieve a yellow tint. |
| Dyes. | Patination with acrylic paints is used for relief and carved furniture made of natural wood, MDF and chipboard. The stain is only suitable for natural wood. |
stain
The easiest and most affordable way to make a patina on wood is to treat it with stain. It penetrates deeply into the wood and protects it from moisture, UV rays, mold, and pests. Varieties:
- Water stain does not require a solvent. This coating has an additional effect, because the wood fibers rise after processing, and the structure of the material becomes more visible. The composition allows you to give the product a shade of valuable wood.
- Alcohol stain is a solution of aniline dye in ethanol. In addition to being decorative, the coating has an antiseptic function. The composition dries too quickly, so it is used for small surfaces or applied with a spray bottle.
- Oil stain is coloring pigments dissolved in linseed oil. The substance evenly covers the wood, does not lift the fibers, but emphasizes the pattern of natural wood. Diluted with white spirit.
Stains can have different colors. With their help, it will be possible to imitate the gray or greenish coating that appears on the surface of an old tree. They are not used for processing MDF and chipboard, and are not combined with silver and gold plating or craquelure.
Wax
Water-based wax patina in the form of a paste and finishing vintage wax are popular as finishing coatings. Wax-based paints dry slowly and are easy to rub. They are used for processing relief and textured slabs, cracks to obtain the effect of gilding, silvering, and bronze coating.
Wax pastes are made by mixing natural wax with a metallic pigment. They have good adhesion to wood and plastic, which is used to laminate MDF.
The colorless wax composition leaves a pearlescent sheen on the surface. Wax is used to retouch, restore and decorate old furniture. The composition is applied with a cotton rag or brush, rubbed in, and then polished with a rag, removing excess. The wax coating dries within 24 hours.
Acrylic
Acrylic paints for patination are suitable for processing natural wood, laminated MDF or chipboard sheets. They come in a variety of shades with individual effects. Acrylic paints imitate gray, beige, green and blue patina, rust, darkening, and fading. You can patina with acrylic the entire slab or only the relief decorative elements, monograms, and frames. For this purpose, paint with a gilded or blackened effect is used.
Surface treatment is possible in the following way. Base paint of the selected color is applied to the entire area of the product or only to the protruding parts. Excess is removed with rags. If necessary, apply another layer, shade in places and allow to dry completely. Use sandpaper to create abrasions and fix them with varnish.
Bitumen
Bitumen is used for aging, painting, and giving patina effects. It consists of concrete polymer, turpentine or white spirit. Bitumen can also be water-based. The substance has a special consistency, which greatly simplifies its application. If desired, you can get not only a thin coating of gilding, but also active gilding. You can darken the recesses of the threads and monograms with black or brown bitumen. The substance is applicable in the craquelure technique.
It is applied with a swab or brush, dried at room temperature for 6 hours or using a hair dryer. Then coated with shellac.
It is also possible to patina wood using bitumen wax. It is used in the gilding process to dull the shine and give the gilding a touch of antiquity. Wax-based bitumen is applied with a cotton swab. Dries within 24 hours.
Provence, shabby chic and vintage in design
Many popular modern design styles are characterized by the use of worn and shabby objects and details in the interior, pastel tones and romantic decorative elements.
Did you know? Every year, for their needs, people cut down about 15 billion trees of the entire green fund of the planet, while replenishing it with only 5 billion new seedlings.
Provence
This style was first discussed in the 19th century by the French living in the province of the same name. Their traditions, intertwined with everyday peasant chores and southern nature, became the basis for the development of a new direction in design.
Provencal houses were distinguished by their elegance and simultaneous simplicity, with a reverent attitude towards the things of their ancestors. It was these family heirlooms that became the personification of the spirit of southern France.
- predominance of white and all shades of beige;
- fragments artificially faded in the sun;
- multi-colored palette in decor, accessories (flower patterns, stripes, pastoral and checkered patterns are often found);
- many elements made of wood in decoration;
- artificially worn ceramic tiles (chips, untreated stone, brick, ethnic);
- porcelain dishes, forged mirror frames, textile napkins and tablecloths;
- lighting items with elements of forging, cotton and linen;
- lathed panoramic windows;
- rustic furniture of classic shapes with elements of wood, forging and wickerwork.
Did you know? The tallest tree in the world is considered to be the sequoia from California. Its trunk has grown to a height of 115 meters, and its diameter reaches 8 m.
Shabby chic
It represents a completely new direction in interior design. It originated in Great Britain about 30 years ago.
Its basis is the characteristic British restraint, conservatism, frugality and passion for everything that is old but of good quality.
- lack of white tones;
- the prevalence of pale shades: blue, pink, lavender, yellow and milky;
- bright contrasting colors;
- using ceramic tiles to look like weathered painted wood, wild stone or plaster, as well as with small floral patterns;
- on the white plastered ceiling there is classical stucco molding in the tone of gold leaf, as well as bleached fragments of the ceiling;
- wood and metal textures that imitate aging;
- The interior items used are mainly restored antiques, textiles, artificially aged photo frames, antique candelabra, fresh flowers, porcelain dolls and figurines of angels;
- the lighting contains crystal, forging, fabric lampshades and ancient pendants;
- restored furniture made of expensive wood, painted forged metal parts.
Did you know? In the United States of America, all crafts made before 1830 are classified as antiques, in Canada - before 1847, and in the UK - before 1917.
Vintage
It was invented by the French, laying the fundamental foundations from the uniqueness and emphasized originality of ancient worn-out interior items.
Initially, this was the name for wine aged for many years, but over time a whole design style was formed.
Its main feature is the use of antique items, which must accurately correspond to the fashion trends of their era.
- prevailing white, beige and milky shades, as well as contrasting shades - burgundy, green, graphite, purple;
- drawings with flowers and vegetation;
- artificially made flaws;
- flooring made of wood, marble or ceramics, but always with a worn effect;
- not overloaded in decor (only valuable antique objects, photographs, mirrors, paintings, candelabra are used in doses);
- stucco molding in a classic style;
- use of natural materials, forged elements, crystal, linen, wool;
- the spirit of restraint and elegance present in the interior design;
- antique furniture made of wood and wrought metal.
Important! For artificial aging, lumber from the following wood species is recommended: pine, spruce, oak, ash, larch, walnut, wenge, doussia, metobo, kempas, merbau. The board may have knots and other flaws - this is even better
“Iron” vinegar to age wood: cheap, easy and fast!
Advantages of using wood stain and its main types
This method is perfect for cedar. Thanks to it, the wood will acquire a grayish tint and a touch of antiquity.
Soak some steel wool in white vinegar for a few hours or days - the longer it sits in the vinegar, the darker the stain you'll get as the wood ages. It is better to use steel wool of abrasiveness class 0000 (as in the photo) so that it breaks down even faster in vinegar. Apply iron vinegar using a brush and allow the surface to dry.
Experiment with the length of time you let the steel wool soak in vinegar. If you want a darker shade, apply black tea to the surface first, followed by iron vinegar.
Here's what the aged wood will look like before and after the process. The “after” photo shows cedar stained with iron vinegar 30 minutes after applying the composition.
Method 2: Use physical force
Old and worn wood looks like it has been through a lot in its life. This cannot be said about new wood, so we have to improvise when creating the surface relief we need.
A great way to give wood the necessary relief is to leave marks with any heavy objects at hand. The more varied the better.
You can use a hammer to make concave marks.
The threads from large self-tapping screws leave uniform marks.
Place a handful of self-tapping screws in a piece of fabric and beat your wooden board with this bag. As a result, you will receive all possible types of damage from heads, threads, and sharp ends of self-tapping screws.
A steel chain can be used for uneven damage. Fat chains leave color spots.
Benefits of brushing
Burnt wood for finishing: advantages and DIY production
In addition to the obvious decorative advantages, artificial aging of wood has other advantages.
Firing eliminates many of the defects of wood - blue discoloration, incipient rot, therefore it is recommended to treat such surfaces with fire at least once.
Knots, curls, curls - any defects in wood when brushing turn into advantages. In addition, the firing process compacts the surface, which increases wear resistance.
Burnt wood is not sharpened by insects, so burning has not only a decorative, but also a protective purpose. This method is recommended to treat gazebos, fences, and country benches.
Toning also further protects the surface. Paints, in addition to decorative properties, often have antiseptic characteristics.
Brushing provides an exclusive appearance and makes it possible to transform ordinary pine into an exotic species (for example, wenge). For those who love working with wood, brushing with your own hands brings incredible pleasure with an excellent aesthetic result.
Artificial aging and patination are successfully used to stylize furniture and walls. The resulting structure after mechanical processing may be different.
Step-by-step instructions on how to age wood
The simplest method of aging wood at home with your own hands involves using a regular wax candle and furniture paint. In this way, you can update any wooden products, giving them a unique antique look (Figure 1).
The step-by-step process of aging with a candle looks like this:
- First, decide on the base color of the future product. For example, you can use dark brown paint, which at the end of processing will show through the subsequent layers.
- To create a base coat, paint the piece in broad, random strokes without completely covering the wood. Let the paint dry completely.
- Now take the candle and, pressing it firmly, rub the surface in several different places. It makes no sense to follow a certain order, since this will lose all the charm of the decor.
- Next, you need to apply the next layer of paint, preferably a contrasting shade (for example, white). In this case, the entire product is painted over. As with the first coat, the coating must be allowed to dry.
- Next, take a rag and vigorously wipe the surface. In places where wax was applied, the second layer will lag behind the surface and a brown color will begin to show through.
Figure 1. The easiest way to age is with a wax candle.
You can stop there, but if you want to use more colors, the surface needs to be waxed again and another coat of paint applied. After it dries, rub the product again with a cloth.
If desired, the finished decorative element can be varnished. But this is not necessary, since over time the paint will gradually begin to lag behind and the effect of antiquity will only intensify.
Recommendations and tips
Now that we've looked at all 7 methods of painting wood with an antique effect, I'd like to highlight a few basic tips that you can apply to all methods:
- If the surface you are going to paint has been treated with sealant, wax or varnish, it would be best to sand it a little so that the new paint will adhere better.
- Don't be afraid to experiment; you can mix and match these techniques to create your own personal design style.
- first on a piece of wood or on less visible areas of furniture (such as the inside of a cabinet door to be painted) before moving on to more visible parts.
And remember that the main thing here is your desire! Good luck!
Method No. 1
Draw a dividing line with a pencil and randomly apply a “tree pattern”.
Using an angle chisel number 1, I roughly divided the base into two parts. We move the chisel along the line at an angle of 15-20 degrees.
Use chisels to select the wood pattern, moving along the marked lines. We use different sizes of chisels.
Keep in mind that a chisel is a fairly sharp tool! Follow safety precautions! Firstly, never place your hands in front of the chisel, and secondly, move the chisel along the workpiece “away from you”, do not point it in your direction!
Using a jamb knife we make chips and dents on the sides of the base.
We go over the entire relief with sandpaper, smoothing and “rounding” it. We use sandpaper number 240 and 400.
The result after sanding.
We create a black coating, simply “soot,” by holding the base over a lit candle
Important! Keep the base not above the top of the flame, but approximately in the middle, since the flame temperature is lower here. We don't need to burn the wood, just cover it with soot.
Remove excess soot using a cotton pad or dry cloth. Then use 240-grit sandpaper to remove the plaque from the protruding parts.
We cover our entire base with one layer of stain. I used a water-based stain in Oak color. Leave to dry for one hour.
Cover with stain
Protective and coloring impregnation ages the wood for decades. Tinting with stain looks beautiful both on its own and with other techniques. For example, with brushing.
You will need
- Water based stain.
- White spirit stain.
- Soft sponge.
- Primer.
- Antique wax.
Antique wax is a completely natural product. It contains three types of wax: mineral (mountain), animal (bee), vegetable (carnauba). Suitable for processing any wood. Waxing saturates wood well and has restorative and protective properties.
Sequencing
- Treat the item with a water-based stain.
- Take a soft sponge and wash off the impregnation without touching the edges and corners. This way it will look more prominent.
- After drying, apply a layer of white spirit stain. Leave overnight until completely dry.
- Prime the surface with a soft sponge or brush, filling all cracks.
- Wait until dry and use a brush to apply the antique wax.
Processing, painting, patination
Texturing wood is only half the battle. Brushing has the ultimate goal of visually highlighting the wood texture; most often, this is achieved by painting using special techniques.
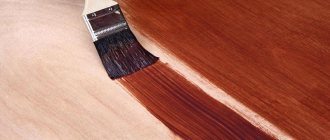
You need to make sure that the fiber selection is done well and the surface is ready for painting. For this purpose, water-based stains are used with a light tanning or cauterizing effect. Application should be done with a brush, carefully wiping along the fibers and monitoring the lifting of small fibers in the process. If such are present, the surface must be thoroughly dried and lightly treated again with a grinding brush, breaking off dried and hardened burrs.
Instead of a brush, it is convenient to use a soft sponge - the paint is distributed more evenly and without excess
When painting, most often the arrangement of tones repeats the play of light and shadow on irregularities: depressions are painted in a dark color, ridges in a light color. To do this, the surface is first opened with a richly dark varnish, and then wiped with a sponge or rag, removing the remaining varnish from the hard fibers, where it does not have time to be absorbed.
When working on a large surface, uniform coloring is achieved after complete drying of the dark dye and subsequent light processing with a petal disc with grit P400–800. When the bulges are highlighted, they are opened with colorless or light-colored parquet varnish.
Another coloring option offers inversion: the upper tier of the relief is planned to be dark, and the depressions are painted in a light tone. In this case, the surface is first tinted with dark polyurethane varnish and dried. This is followed by the application of a light opaque composition, the excess of which is removed with a rubber spatula to reveal the dark substrate on the ridges.
Brushing wood is its artificial aging
, produced carefully, painstakingly and sometimes taking a lot of time and effort. But looking at the end result, we can confidently say that it’s worth it. This is exactly the case when “old age” brings extraordinary joy and transformation! Creates coziness, comfort, harmony with nature.
Purchasing antiques, furniture, kitchen utensils, antique finishes, antiques, mirror and picture frames has always been an expensive and costly endeavor. Only collectors, celebrities and wealthy people could just buy a table from the last century, a baby's cradle, chairs, etc., paying huge sums of money.
But the years change, technologies change, but the craving for antique accessories and utensils remains unchanged. Now everyone can afford the luxury of living in an old Russian mansion, with cracked, seemingly shabby walls and beams, furniture from those times, wooden benches and a dining table made of natural aged wood. And all this thanks to the wood brushing process
We constantly feel a craving for something new, observing the natural, natural processes of aging wood, the visual end result, the demand for such items, people decided to achieve a faster process of extinction of the life of wood and invented their own technology of artificial aging with a fairly short period of time.
Photo 1. Regular larch planken wood
Photo 2. Aged planken wood grade BC (C)
Photo 3. Primer with pigment for brushed larch
Photo 4. Finish painting of brushed planken wood with varnish
So, why do you need wood brushing?
Currently, this is a fashion trend, with a lot of followers, with genuine envy and a desire to have such things in their homes. Designers are those representatives who do not limit their fantasies and ideas within certain limits. They create masterpieces of art, their appearance reminiscent of exotic varieties of trees, worth fabulous investments, but in fact these are quite affordable and ordinary materials for anyone who wants to buy them.
Wood brushing technologies are capable of any transformation and color from dark chocolate to gray-green
, as if covered with dust and mold from age and time, with visible veins and cracks, roughly hewn, with chips or eaten away by beetles, with gold embossing or silvering, with noticeable wood pores and even imitation of cobwebs, any tones and colors.
Brushing is a method of aging wood
Artificial aging is easily performed on softwood. It is distinguished by the presence of soft fibers in the surface layer. You can reveal the texture by removing some of the soft fibers using a brush with hard metal bristles (Fig. 1). By repeatedly moving along the fiber, it is easy to remove the soft component. Only structural rigid fragments will remain.
Rice. 1 Wire brush for brushing wood
It’s easy to treat one or two boards with a brush like this. If you need to harvest a certain amount of timber, you will have to use means of labor mechanization. An electric drill or an angle grinder (grinder) will help here. A mechanical radial brush is installed on them (Fig. 2).
Rice. 2 Mechanical brushes: a – for an electric drill; b – for an angle grinder (grinder)
Before brushing, all lumber should be planed. Many people think this requirement for preparation is unnecessary; in fact, craftsmen have always respected their work, as well as the people for whom they made pieces of furniture. Planed boards and bars were always used. Some carpenters were able to use an ax to give workpieces a look that other contemporaries would not be able to do even with the help of modern planes or machines.
The process is performed in the following sequence:
- The board (bar) is fixed on the work table (workbench). It is convenient to use a comb or a fixing wedge here;
- Turn on the power tool and move the brush along the fiber, moving towards the stop.
- When working, try not to apply too much pressure from above; the brush itself will select what it can remove from the surface.
After three or four passes, the result is examined. There is no need to overdo it here. Having obtained a depth of only 0.4...0.6 mm, you should stop. The process has begun. After a couple of days, the grooves will deepen on their own, as destruction has occurred in the wood structure. The visible effect can only be enhanced by subsequent treatment with varnishes or oils.
Rinse method
This method for creating the effect of old wood is suitable for elegant furniture in a rustic or Provence style. It is best used on damp wood.
Necessary materials:
Instructions:
Apply a coat of paint and let it dry for a few minutes (same as the previous method, so it's still tacky and not completely dry). After this, quickly rinse the wood with water, carefully wiping the surface with a rag. The goal is to wash off some of the paint on the surface
Leave to dry. That's all!
For example, a table painted soft green looks simply wonderful after using this method.
Bonus Trick: How to Create the Look of Aged Wood?
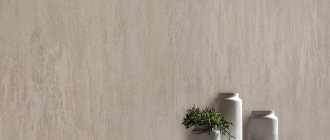
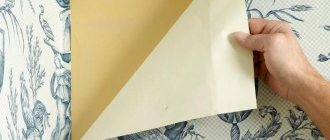
If you like the texture of clapboard walls, use self-adhesive wallpaper with the texture you need. They are easily removable and will not damage the wall surface, nor will they leave traces of glue.
Thanks to these tips, you can get a beautiful and noble texture of aged wood!
Subscribe to our newsletter so you don't miss the most interesting ideas! Just enter your e-mail in the form below
