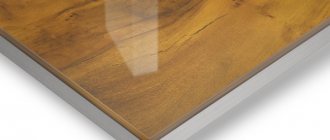
Wooden floors have always been valued for their beauty and naturalness. But the wooden surface itself is very fragile, it is subject to rapid abrasion, dents from heels and furniture, and dirt also quickly collects on it, which is difficult to wash. To make caring for a wooden floor easier, to protect it from wear and tear, and to highlight the beauty of the material, it is necessary to use a protective coating of varnish, oil or wax.
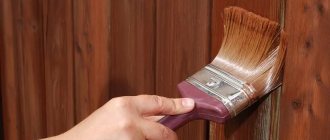
It is best to varnish a wooden floor. This coating will extend the life of the floor and reliably protect it from scratches, dents, and contamination. If necessary, the varnish can be removed (scraping the surface) and other processing can be performed. Varnish treatment should be carried out once every 8-10 years and you can do it yourself. You can learn more about how to varnish your floor yourself in the video provided at the end of the article.
Why do you need to varnish wood flooring?
Applying a composition of this type to a wooden floor is required due to the whimsical nature of the material itself, which requires additional protection for full and long-term operation. In many ways, opening wood with varnish helps improve technical qualities and protect it from a number of negative influences:
- Water protection. Moisture seeps deep into the wood and over a period of time it evaporates, as a result of which the dimensions of the material partially change. In these cases, the wood begins to dry out, and in the opposite situations, it begins to swell. If there is varnish on the surface of the floor covering, there is no change in the level of humidity inside the material.
- The wood exposed by it increases the resistance of floorboards to mechanical damage, including abrasive loads.
- To remove dirt from the floor surface, you have to spend less effort, since the varnish prevents the absorption of significant amounts of dirt.
- When opened with this composition, it is possible to emphasize the natural pattern of the wood. The top layer will keep the flooring in its original condition and prevent it from wearing out.
- Natural wood is very often damaged by various insects and microorganisms. Varnish reduces this danger to a minimum.
Note! When you open a wooden floor with varnish, its level of strength increases and the likelihood of scratches on its surface is eliminated.
Why is it necessary to varnish a wooden floor?
For a wooden covering to always look good, it is not enough to make it from high-quality wood, lay it correctly and sand it. Without a protective layer, it will not retain its fresh appearance and beauty for a long time - it will begin to fade, turn gray, crack, get dirty, and become covered with stains that are difficult to remove. And soon you will not be able to enjoy the pleasant shade and beautiful texture of wood.
All the disadvantages of this natural material, vulnerable to external influences, can be easily mitigated by using parquet varnish as a finishing coating. It performs several functions at once:
- protects against mold and mildew that colonize wood at high ambient humidity;
- prevents its damage by insects and small rodents;
- creates a film impermeable to water, thereby preventing swelling of wooden floor elements;
- forms a durable coating on the surface that is resistant to abrasion, mechanical loads, and pinpoint impacts;
- preserves the natural color of the wood or, in the case of using a tinted composition, gives it the desired shade;
Using varnish you can change the color of wood and imitate more expensive species Source moi-pol.ru
- enhances the contrast of the wood pattern, making the flooring more expressive and impressive.
Many covering paints have similar protective properties, but they hide the wood itself with its unique fiber patterns. Whereas water-based parquet varnish and other varnish coatings retain its natural appearance.
Types of varnish for wooden floors
Based on the type of solvent, all compositions are divided into water-soluble and organic-soluble. The latter have a pungent aroma when drying and are characterized by the presence of toxic substances. During the hardening of water-soluble varnishes, only water vapor evaporates from them with a small amount of components contained in the resins. However, a significant part of organic-based mixtures have higher strength, withstanding shocks and other mechanical influences.
Due to the fact that there are quite a large number of types of varnishes on the market, before giving preference to any particular composition, you should familiarize yourself with each of them in more detail.
Polyurethane
Considered to be the best option. These are what most experts recommend using. They are made on the basis of polyurethane resins, which give the varnish coating strength, elasticity, resistance to organic and inorganic acids, as well as to ultraviolet rays.
In addition, polyurethane compounds can withstand temperature fluctuations from -50 to +100°C, dry quickly and have a high degree of adhesion to any surface. Their main disadvantage is their significant cost.
Polyurethane-acrylic
They are cheaper than polyurethane varnishes, but also have less elasticity and strength. In view of this, acrylic is added to the composition to reduce cost, and due to lower technical indicators, the mixtures are the best option for rooms that are not subject to significant mechanical loads. Their advantage is better distribution of liquid over the surface compared to polyurethane varnishes.
Acrylic
Mixtures of this variety do not have too high resistance to wear and shock, but they have optimal elasticity and fluidity. Acrylic varnishes are quite affordable, and since they are made exclusively on a water basis, they do not contain any components harmful to health. In addition, during opening and drying there is no change in the texture and shade of the floor. The main disadvantage of these mixtures is their rather low resistance to moisture, which is why it is better to avoid their use in rooms with high levels of dampness or where the floor covering is regularly subjected to wet cleaning. The second disadvantage is the significant drying time.
Urethane
These varnishes have average abrasion resistance and are quite affordable. In many of their technical indicators, they are not much inferior to polyurethane-based mixtures. They are highly resistant to chemicals, abrasion and exposure to sunlight, so they do not cause fading. In addition, urethane varnishes are recommended for use in conditions of constant changes in temperature and moisture levels. They generally dry within 12 hours, but during this process they release toxins that are hazardous to health, which requires the use of a respirator during application.
Urethane-alkyd
These compositions have all the qualities of urethane varnishes, but due to the presence of alkyd resins, they also have high strength, moisture resistance and abrasion resistance.
The disadvantage of these mixtures is their higher cost.
Alkyd
Varnishes of this variety are mixtures containing alkyd resins and organic solvents, which ensure their environmental friendliness. They are used with hardeners, due to which their drying period is reduced from 3 days to 1 day. Alkyd varnishes withstand abrasion, have low elasticity and average resistance to impact. In addition, when used, most detergents and some acids are not capable of harming the floor covering painted with them, just like the sun's rays. The disadvantage of alkyd varnishes is the strong odor, when applying which you should wear a respirator, and then ensure that the room is fully ventilated until the mixture dries completely. In addition, due to the evaporation of solvents, the composition layer decreases.
Epoxy
These varnishes contain epoxy resins, hardeners, organic solvents and other additives. They are distinguished by high mechanical characteristics, but it should be taken into account that not only during their application, but also after opening the floor covering for 3-4 days, they release toxic substances that can harm health. Taking this into account, it is necessary to cover the floor while wearing a respirator, without which it is not recommended to stay in the room for the next few days after painting. Their other advantages are resistance to chemicals, high drying speed, resistance to moisture and affordable cost.
Urea-formaldehyde
One of the most affordable varnishes, characterized by high strength and resistance to external influences. Their main drawback is the presence of formaldehyde in the composition, which is hazardous to health and weathering of which occurs only after 4 days.
Alcohol
They are made on the basis of alcohol with the addition of sandarac and shellac resins. Due to the high rate of evaporation of the first and the slow dissolution of the second, the floor covering can be opened with a large number of layers of varnish without disturbing the damage previously applied. They are affordable, do not contain substances hazardous to health, and have an optimal level of adhesion. A floor covered with alcohol-based varnish has mechanical strength, but it is not able to fully protect the wood from moisture.
Oily
These mixtures contain vegetable oils, natural resins and organic solvents. Oil varnishes are used for the initial opening of floor coverings. After they dry, a durable film is formed on the surface of the wood, the color of which depends on the substances present, which is why it is brown and light yellow.
Oil-based varnishes are easy to sand, are fairly inexpensive, and also have high elasticity and resistance to moisture. The disadvantages include the need for a constant microclimate during drying and the duration of this process.
Floors
0 votes
+
Vote for!
—
Vote against!
Wooden flooring is the most popular today, because wood is a natural, environmentally friendly material that does not contain allergens, has excellent thermal characteristics and has a unique ability to absorb excess moisture from the room. To extend the life of your wood floor or refresh its worn surface, it is recommended to varnish it. Let's find out what varnish to coat a wooden floor with and how to do it correctly.
Choosing a varnish for a wooden floor
All varnishes for wooden floors are divided according to the type of solvent into water- and solvent-soluble. The latter are toxic and have a pungent odor when drying. During the drying process of the water-soluble composition, only water vapor comes out of it with a small amount of substances that are present in the resins. On the other hand, most solvent-soluble varnishes are highly resistant to mechanical stress - abrasion and impact.
According to the type of resin used, varnishes for wooden floors are divided as follows:
- Polyurethane varnishes, which are recognized by experts as the best. And the most expensive are water-soluble polyurethane varnishes. Polyurethane resins give the varnish coating strength and elasticity, while maintaining a high level of environmental friendliness.
- Polyurethane-acrylic varnishes are inferior to polyurethane varnishes in price, elasticity and strength. The acrylic component is introduced into their composition so that the consumer can use inexpensive varnish in rooms where there is no intense mechanical load. At the same time, it is worth indicating the better spreadability of such polyurethane-acrylic varnish in comparison with polyurethane.
- Acrylic varnishes are not particularly resistant to abrasion and impact, but they have moderate elasticity and good fluidity. The price of varnish for wooden floors based on acrylic resin is affordable. In addition, these compositions are only water-soluble, therefore they are highly environmentally friendly.
- Urethane varnishes have moderate abrasion resistance and are more affordable. In other parameters (elasticity, water resistance and impact resistance) they are almost as good as polyurethane ones. They are also recommended for use in conditions of frequent changes in temperature and humidity. Urethane varnishes do not glue the ends of parquet flooring and do not contribute to the occurrence of stress during compression and expansion of wood.
- Urethane-alkyd varnishes have all the properties of urethane paint compositions, but thanks to alkyd resins they also demonstrate good abrasion resistance and strength.
- Alkyd varnishes dry very quickly, are abrasion resistant, have average impact resistance and low elasticity.
- Epoxy varnishes are classified as acid-curing. They demonstrate high mechanical performance, but during drying they release toxins that are dangerous to humans. Work with epoxy paints only in a respirator with a special liner that absorbs organic fumes. The process of releasing toxins lasts about three days, so it is not recommended to stay indoors without personal protection.
- Urea-formaldehyde varnishes are another type of acid-curing composition. The presence of formaldehyde significantly reduces their environmental performance. Such varnishes are the most dangerous, and free formaldehyde disappears only after four days.
- Alcohol varnishes are made on an alcohol base. Natural sandarac resins and shellacs are dissolved in them. Due to the high rate of evaporation of alcohol and the low rate of dissolution of resins, many layers of such varnish can be applied to the floor without destroying the previous ones. The coating made from alcohol varnish is mechanically strong, with high gloss and good adhesion. But these coatings are characterized by low water resistance.
- Oil varnishes contain vegetable oils, resins of natural origin, as well as organic solvents. Oil varnishes are used for the primary coating of surfaces. After drying, the varnish leaves a hard film on the wood, the color of which, depending on the components, can be brown or light yellow.
Varnishes also differ in gloss level: they are high-gloss, semi-gloss and glossy, matte and semi-matte. The gloss level of the glossy varnish composition is 80-90%, so a wooden floor covered with such varnish shines like a mirror. Semi-gloss and semi-matte substances reflect less light from the surface.
When choosing a varnish for a wooden floor, it is also necessary to take into account the type of room in which the work will be carried out:
- In the bathroom and kitchen, it is advisable to use compounds that are not afraid of exposure to moisture - urethane, urethane-alkyd and polyurethane varnishes for wooden floors.
- For the living room, hall and wooden stairs you need to buy substances that are especially abrasion-resistant. These include acid-curing, organo- and water-soluble varnishes based on polyurethane resins.
- For children's rooms, water-soluble polyurethane varnishes and solvent-soluble polyurethane compositions with a shortened exposure period are intended, that is, they release toxins only during application and curing. Safe varnishes for children's rooms contain the designation “EN 71.3” on the packaging.
- At the dacha, it is advisable to use urethane-alkyd and urethane varnishes, which are highly elastic and retain their high properties even with significant fluctuations in wood size, which are caused by changes in temperature and humidity conditions.
- For areas with high operational load, urethane paint compositions with an anti-slip effect are used.
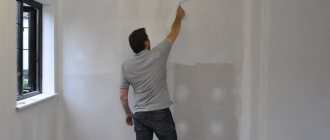
Preparing the surface for applying varnish
If you have a new wooden floor, that is, it has never been varnished before, then it does not need pre-treatment. But if your floor is made of soft and pliable spruce and pine wood, then pre-treating and sanding is a must, even for new floors.
Carry out preparatory activities in the following order:
- Remove furniture and other items from the premises.
- Inspect the floor surface for snags, knots, protruding nails and other sharp objects that could damage the sander and remove them.
- If some boards are very damaged, it is better to replace them with new ones.
- To seal thin cracks in wood, you can use a special putty, which is intended for wooden coatings.
- Fill nail holes and knot holes using a special mixture. For example, you can use a homemade paste made from wood glue and sawdust. Such products are applied in a circular motion using a special spatula and left to dry for a certain time.
- Softwood floors require removal of resin before applying varnish; for this you should use ordinary gasoline.
- If you are faced with a layer of protective wax, you will also have to remove it, because the wax contaminates the sanding belt very much. To avoid this, use a special product or white spirit.
Sanding a wooden floor
Before painting a wooden floor with varnish, you should sand the wood well using a belt sander, because various irregularities and splinters may remain on the surface. Mechanical sanding is also required to remove the top tarnish from the wood and give it a vibrant color.
It is recommended to proceed as follows:
- The floor is cleaned of dirt and old coatings with coarse sandpaper.
- Then replace the paper with medium-grain paper and carefully level the entire surface until the wood reaches its natural color.
- Give the floor a final sanding with a sander and fine-grit sandpaper.
- Corners and other places that are inaccessible to a grinder must be processed manually or using a special machine for corners and ends.
- After sanding, treat the surface of the wooden floor with an antiseptic. This procedure is not mandatory, but is recommended to protect the wood from insects, fungus and mold. The antiseptic dries in 24 hours.
- Also, the surface should be vacuumed, since microscopic waste remains on it after treatment, which can ruin the appearance of the floor after varnishing and create the effect of “grains of sand.”
- To completely get rid of dust, you can use an ordinary wet rag. It is better to give preference to microfiber, since this fabric does not leave dust at all - neither on a wet nor on a dry surface.
- You need to wash the floor with warm water, you can add detergent. First, wet a small area of the floor.
- If the tree has a purple tint, it means it contains tannin. In this case, it is necessary to wash the surface without detergent. Also, do not use detergents on chestnut and oak parquet. After cleaning your wood floor, rinse the surface with clean water several times.
Apply primer
Before covering a wooden floor with varnish, it is necessary to apply a primer impregnation - nitro varnish - to the surface of the wooden floor. Apply the primer with a brush that is 10 centimeters wide and 1-5 centimeters thick along the structure of the wood. Be careful not to miss any sections.
When using a primer, the following points must be taken into account:
- Wood that contains tannins, especially oak, darkens when in contact with polyurethane varnishes. To prevent this from happening, the oak parquet is first opened with a special cutting primer.
- A special primer, but with different properties, is also required for pre-treatment of unstable beech wood. Before covering a beech floor with water-soluble varnish, it should be treated with a primer that does not stick the edges of the slats.
- Exotic wood must be treated with a special primer before applying varnish, which neutralizes essential oils. Some species (Iroko and Lepacho) that contain inhibitors - substances that slow down the action of varnish hardeners - must be treated with a cutting primer designed specifically for heavy breeds.
Applying varnish to a wooden floor
Painting a wooden floor with varnish is carried out in accordance with the following instructions:
- Carry out work on painting a wooden floor with varnish when the air temperature in the room is from 12 to 25 degrees above zero. Only at this temperature will the composition dry well and not lose its decorative and protective properties.
- When choosing between the tools with which you can paint the floor with varnish - a roller, a spray gun, a brush, it is better to give preference to the latter solution, since the procedure for coating the floor with varnish has some peculiarities. It is recommended to use a brush that is soft, wide (100 millimeters), not shaggy and does not fade. Usually they are called “varnish brushes”.
- When applying varnish, you should always have a towel on hand to re-wipe individual boards before painting.
- Also take into account how you will leave the room. If this detail is not thought through, a lot of inconveniences will arise later, for example, when the only escape route will be through a freshly painted floor. If you paint the stairs, remember that it is recommended to varnish the steps one at a time, since otherwise you will not be able to walk on them until the varnish has dried.
- When applying varnish, remove your shoes, as clean bare feet leave the least amount of dust and marks on the surface.
- Before covering a wooden floor with varnish, first apply a thin layer of the composition to a small, inconspicuous area to check the shade of the selected substance on your parquet. Let it dry completely and only then proceed directly to applying varnish to the surface.
- If you do not plan to use a primer, it is recommended to apply the first coat with a diluted varnish, which is able to penetrate deep into the wood. To do this, add solvent to the solution in an amount of 1/3 to half of the varnish.
- Take a new brush (its size should be the same as when priming) and apply the first coat of varnish. It is recommended to apply it from the window towards the door, along the grain of the wood, thoroughly coating each board. It is customary to make strokes in a U-shaped motion so that the brush intersects with the freshly applied edges. Remember that there is no need to apply an excessively thick layer, as it will look quite sloppy.
- If you decide to use a roller when covering a wooden floor with varnish, then the movements must be made crosswise. Using crosswise movements you will apply the varnish, and lengthwise movements will smooth it out. Then the roller rises to ¾ of its width, and again the whole cycle is repeated.
- After application, allow the varnish to dry thoroughly. Each subsequent layer can be applied only after the previous one has completely dried. Different varnishes have their own drying time, which is indicated on the varnish label. Therefore, you need to read the instructions carefully.
- While waiting for the varnish to dry, so that the brush does not become unusable, store it in a separate container that contains solvent. You can do it differently: take a cloth, soak it well in the solvent and wrap the brush first in the cloth and then in the bag. If this is not done, the brush will dry out and become unusable before finishing the work.
- Immediately be prepared for the fact that after the first layer dries, some of the wood will “heave up” a little. To make the surface perfectly smooth, it is recommended to sand each layer of varnish except the last one. This is preferably done manually using fine-grained paper.
- After sanding the first layer of varnish, clean the surface from dust, thoroughly vacuum and wash the floor. When the floor is dry, you can apply a second coat of varnish. Wood species of different hardness require the application of different numbers of layers of paint composition. It is best to cover soft species (spruce and pine) with three layers, while others can be coated with two. In rooms with high traffic, it is also worth applying a third layer of paint composition.
- After applying a sufficient number of coats, the floor should be left to dry completely, the drying time is indicated on the label. For a few more days after the varnish has dried, try to move the furniture on the painted floor as little as possible.
- Even after applying the last coat of varnish, the floor will feel sticky. You can correct this problem by wiping down your freshly painted floors with soapy water. You can also use dishwashing liquid for this purpose.
Eliminating painting errors
Often when applying varnish to a wooden floor, problems occur when the layer does not dry. There may be several explanations. The first thing that comes to mind is that the composition is incorrectly selected (urethane oxide or alkyd varnish will not dry on teak), so you should increase the air temperature in the room to 20 degrees. You may also have added too little hardener to your two-part wood floor varnish, so sand off the applied layer. In case of insufficient access of fresh air to the room, it is worth increasing ventilation.
Whitish streaks may appear on the surface of a wooden floor, which indicates that moisture has condensed on the freshly applied varnish. In this case, the sagging should be treated with a solvent, and then re-varnished. Naturally, before applying, warm up the room and increase the temperature of the floor surface.
You can combat peeling in a small area by sanding. But if swelling of the varnish layer is observed over the entire surface, then the situation can only be saved by completely sanding off the paint and varnish.
Varnishing a wooden floor also implies such a problem as the formation of bubbles on its surface. To get rid of this, after applying the next layer, you need to run the tip of the brush over the board, and you will get rid of such bubbles.
Work after applying varnish
After completing all the work of covering the wooden floor with varnish, it is time to thoroughly wash your hands. To remove polish from your hands, you can use the same solvent that you used to dilute the polish before starting work. If you used white spirit, then you need to use it; if you used acetone, then wipe your hands with acetone.
Remember that acetone corrodes the skin of your hands more than white spirit. After wiping off all problem areas, simply wash your hands using washing powder. Naturally, after this you should apply cream to your hands.
To prevent the unpleasant smell of varnish from haunting you for a long period, the room should be well ventilated. To speed up this process, you can use a gas burner, which will help burn out the existing solvent vapors. It is enough to simply burn off the solvent vapors at one end of the room, which will significantly reduce their total amount.
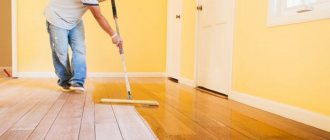
Thus, it is useful to know how to varnish a wooden floor. After applying varnish to a wooden floor, we will protect it from harmful external influences and preserve all the beauty of the wood. But remember that once or several times a year, if the varnish loses its shine, you should use the composition to revive the old coating. This substance does not require preliminary sanding, but it gives the floor a very good shine and hides cracks.
Choosing varnish according to the type of room
When selecting a composition for wood flooring, it is necessary to take into account the room in which it will be opened:
- In the bathroom and kitchen, it is better to give preference to mixtures that can withstand moisture. These include polyurethane, urethane-alkyd and urethane varnishes.
- For a children's room, it is necessary to choose polyurethane water-soluble and solvent-soluble compounds, since the toxins present in them are released only during the process of application and drying. Suitable mixtures are marked on the container with the corresponding “EN 71.3” designation.
- For the living room, hall and stairs made of wood, it is necessary to purchase compounds that can withstand abrasion. These include epoxy, urea-formaldehyde, as well as organosoluble and water-soluble mixtures based on polyurethane resins.
- At the dacha, it is optimal to resort to opening the wooden floor with urethane-alkyd and urethane varnishes, which are highly elastic, maintaining their own positive qualities even with significant differences in the size of the wood, which are formed when the temperature and moisture level changes.
- It is advisable to open areas with increased load with urethane varnishes that have an anti-slip effect.
Main stages of work
Varnishing work is carried out in 6 stages.
Stage 1. Cleaning
After sanding and sanding are completed, the parquet needs to be dust-free.
To do this, the surface is cleaned with a construction vacuum cleaner or wiped with a damp microfiber cloth.
Stage 2. Priming or tinting
Primers or tinting compounds are applied with a roller or brush with wide movements in one layer. Drying time is at least 24 hours.
Stage 3. Elimination of visible defects
If there are small cracks, fallen knots, dents and other damage, they need to be filled with ready-made parquet putty (Dulux, Sadolin) or you can purchase a liquid for preparing tinted putty (Lega Stucco, Vidaron) and mix it with fine sawdust.
The result will be a composition that will match the color of the parquet planks. Craftsmen use ordinary PF series varnishes or PVA glue for the same purposes. The latter melts during grinding and begins to stretch, which has an adverse effect on the sander.
After eliminating the defects, the putty must be sanded in a circular motion with fine-grained paper 320-440 units to eliminate roughness. Dust is removed with a damp cloth.
Stage 4. Applying 1 layer
Apply the first coat of varnish with a brush, roller or spatula in a thin layer and allow to dry for 24-48 hours.
Stage 5. Grinding
At this stage, small wood fibers that were picked up by a brush or roller during the application of varnish are removed.
Sand the surface by hand or with a belt sander, wipe with a damp cloth or clean the surface with an industrial vacuum cleaner.
Stage 6. Application of the second and third layers
Apply subsequent layers of varnish at intervals of 24-48 hours and leave until complete polymerization for 7-14 days. Foot traffic is allowed on the second or third day after varnishing.
Preparatory work
A new wooden floor that has not previously been varnished does not require pre-treatment. If the floor covering has already been painted with it, as well as in cases where it has not been previously treated and consists of spruce or pine, then preparatory work, which includes sanding, must be carried out without fail.
They must be carried out in the following sequence:
- The first step is to remove furniture and other objects from the room that are located on the floor or that could interfere with the work being carried out.
- Next, you need to inspect the floor covering for knots, loose nails or incompletely screwed in screws, as well as other elements that can lead to damage to the sandpaper or sanding machine during its use. If detected, they should be eliminated. In the case of fasteners, they must be finished off with a hammer or tightened with a screwdriver so that their heads are eventually slightly recessed into the floor covering.
- If some of the laid boards have significant damage, then the best solution is to replace them with new similar floorboards.
- To eliminate small cracks, you need to use a special wood putty.
- Next, it is necessary to hide the places where the boards are fixed with fasteners and knots with a similar composition.
In addition to it, you can prepare a paste yourself from wood sawdust and wood glue. These mixtures should be applied in a circular motion using a spatula. Afterwards you need to wait for the composition to completely harden. - Floor coverings made of coniferous wood must first be cleaned of resin before opening with varnish, for which you need to resort to using regular gasoline.
If the floor is additionally treated with wax to increase protection, then it must also be removed, since it leads to significant contamination of the sandpaper. To avoid this, you can resort to using a special composition or white spirit.
Next you need to sand the wooden floor. For this task, you need to resort to using a grinding machine, through which it will be possible to remove various irregularities and other defects from its surface. In addition, mechanical sanding should be carried out to remove the top faded shade from the wood, so that it can be refreshed.
The process itself is recommended to be performed as follows:
- The initial treatment of the floor, during which it is necessary to remove dirt and old coatings from its surface, should be done using coarse sandpaper.
- Next, it needs to be replaced with a medium-grain one, which will allow the wood to be leveled and give it its initial color.
- Upon completion, it is necessary to sand the floor with a grinding machine equipped with fine-grain sandpaper.
Note! Corners and other hard-to-reach areas should be passed by hand or using a special machine designed for ends and corners.
- After this, it is necessary to open the surface of the floor covering with an antiseptic composition. This step is not necessary, but thanks to it it will be possible to protect the tree from mold, mildew and insects. Complete absorption of the antiseptic occurs within 24 hours.
- In addition, the floor needs to be vacuumed, since after treatment small waste remains on it, which can cause a deterioration in its appearance, forming the effect of “grains of sand” on the surface.
- To completely remove dust, you can use a regular damp cloth. It is better to use microfiber as it removes debris from both wet and dry flooring.
- Washing the floor must be done with warm water with the addition of a detergent. The first step is to wipe a small area of the surface, and then proceed to wipe the rest.
Note! If the wood takes on a purple tint, this means the presence of tannin in its composition. In such a situation, it is necessary to exclude the addition of detergent. In addition, they should not be used when washing chestnut and oak parquet.
Upon completion, the floor covering must be wiped several times with a damp cloth and wait until it is completely dry before proceeding to the next steps.
Preparing the floor for varnishing
Consists of two parts: mechanical processing and primer.
Floor sanding
A smooth floor made of hard wood (oak, larch) does not require mechanical treatment. But in the Russian Federation, pine boards are most used. They need to be polished. Better - with a grinding machine, using successively coarse, medium and fine-grained sandpaper.
If you don’t have a grinding machine, you will have to do this manually.
For more information on how to repair a wooden floor, read the instructions on our website
Read about parquet care and restoration of parquet coverings at the following link:
“Which parquet is better?” — this article will introduce you to the properties of parquet flooring and the materials from which they are made
Before sanding, seal all holes from knots, nails, and thin cracks. Use a mixture of wood glue and wood dust for this.
Treat softwood boards with gasoline to remove resin. If the floors are old and there are traces of a protective wax coating on them, remove it with white spirit.
Removing old varnish
After sanding, remove dust from the floor with a vacuum cleaner. Otherwise, it will remain under the varnish and ruin the coating.
If you decide to wash the floor using chemical compounds, and the boards acquire a purple tint, it means that the wood contains tannin. Detergents cannot be used.
Opening the floor with a primer
Before varnishing a wooden floor, you must also cover it with a primer - nitro varnish. The primer should be applied with a brush 10 cm wide and 1-5 cm thick along the length of the wood structure, avoiding missing areas.
When opening the surface with a primer mixture, it is necessary to take into account the following nuances:
- If the wood contains tannins, which primarily applies to oak, due to which darkening occurs when interacting with polyurethane varnishes. To avoid this, it is necessary to pre-treat oak parquet with a special cutting primer.
- A special primer mixture, but with other qualities, must be used when preliminary opening the beech due to its instability. Before applying water-soluble varnish to a beech floor, it must be opened with a primer, which does not lead to gluing of the edges of the lamellas.
- Before opening, exotic wood should be varnished with a special primer mixture that paralyzes essential oils. Some of them (iroko and lepacho) contain inhibitors that slow down the action of the hardeners of the composition, which must be treated with a cutting primer, which is intended for heavy wood.
Primer
Before covering the surface of the floor with varnish with your own hands, it is worth treating it with a special primer.
Before covering the surface of the floor with varnish with your own hands, it is worth treating it with a special primer. Such treatment is not always necessary, but with its help you can emphasize the beauty of the material, protect the dies from getting varnish into the cracks between them, improve the adhesion of the varnish layer to the base, and ensure a more economical and even application of the finishing mixture.
Toning parquet with varnish, oil, stain and basic mistakes
Primer treatment should be carried out in the following cases:
- It is difficult to understand from the photo on the packaging whether the wood will change its color after applying the varnish composition. For example, tannins in oak wood can cause parquet flooring to darken after applying a polyurethane mixture.
- Beech floors should also be protected with a primer to prevent discolouration.
- In the photo on the Internet you can see how beautiful exotic breeds look under a layer of varnish. However, such wood contains a lot of essential oils, so they need to be neutralized using a primer.
- Also, such treatment will be needed for those species that contain substances that can slow down the hardening of the varnish mixture.
Applying varnish to a wooden floor
Opening the floor covering must be done as follows:
- It is necessary to varnish a wooden floor when the room temperature is within +12-25°C. Only in this range will the mixture be able to fully dry out and retain its own decorative and protective qualities.
- When choosing a tool, you can give preference to a roller, spray gun or paint brush. The latter option is more preferable, since opening the floor with varnish has a number of certain features. It is recommended to give preference to a soft brush about 10 cm wide, which does not fade. In most cases, they are appropriately called “varnish brushes.”
- During the application of the composition, there should be a towel nearby, with which it will be possible to repeatedly wipe the individual boards before opening it.
- In addition, before starting work, you should select the optimal painting sequence so that upon completion there is free access to the exit from the room.
- The application of varnish should be done barefoot with previously washed feet, since it is in this case that it is possible to leave a minimal amount of dust and marks on the surface.
- At the next stage, you first need to open a small, inconspicuous area of the surface with a layer of insignificant thickness to ensure that the selected shade is correct. Only after final drying can you begin further treatment of the floor with the mixture.
- If you plan to use a primer, then it is advisable to apply the first coat with a diluted varnish composition that can penetrate deep into the wood. To do this, add a solvent to the mixture in a ratio of 1:3 or 1:2 relative to the varnish.
- Next, you need to use a new brush, the dimensions of which should be similar to the one used when applying the primer, and cover the surface of the wooden floor with the first layer of varnish. It is advisable to apply it from the window towards the door along the length of the wood fibers, thoroughly treating each of the boards. Opening is usually done in a U-shaped motion so that the brush intersects with the freshly applied edges.
Note! It is necessary to avoid opening the floor with a layer that is too thick, since in this case it will not have an optimally neat appearance.
- Giving preference to a roller, it should be treated with varnish using cross-shaped movements. It is necessary to apply the composition with cross strokes, and to level it along the length.
Following this, the tool must be raised to ¾ of its width and the entire cycle must be repeated. - After opening the surface with varnish, you need to wait for it to dry completely before applying a second coat. For different formulations, it takes a different amount of time, which is indicated on the container label, which is why you should carefully read the instructions before use.
- To prevent the brush from becoming unusable while the varnish is drying, it must be placed in a separate container with poured solvent. There is also a second method: a rag must be moistened generously in solvent, which must be wrapped around the brush, and then wrapped in a bag. Without these steps, the tool will dry out and become unsuitable for further use ahead of time.
- After the first layer has hardened, the wood will partially “heave up” slightly. To give the surface an ideal smoothness, it is necessary to sand each coat of varnish, not taking into account the last one. This process is mainly done manually using fine-grit sandpaper.
- After sanding the first layer of varnish, remove dust from the surface, vacuum well and wash the floor covering. After the floor has dried, you can begin to open it with a second layer of varnish. Depending on the type of wood and its level of hardness, it is necessary to apply different numbers of layers of varnish. It is recommended to open spruce and pine three times, and in other cases it is optimal to apply 2 coatings. Application of the 3rd layer should also be carried out in rooms with increased traffic.
- Upon completion of painting the floor covering with the optimal number of layers, you need to wait for it to dry completely, the duration of which is indicated on the label of the container. For the next few days after this, it is advisable to avoid moving furniture items on the varnished floor.
- After the final coat of the flooring has been applied, it will still be sticky. To eliminate this defect, you need to wipe the floor with a soap solution.
For this task, you can resort to using liquid used for washing dishes.
Carrying out grinding work
Sanding the floor is a responsible job, the quality of which will determine how beautiful the surface will be and how long the varnish will last on this surface. Therefore, grinding cannot be neglected.
The main task of cleaning the floor is to remove the layer of wood that has absorbed many different contaminants. The main thing is to get to the living wood, and at the same time clean the surface so that there are no flaws on it.
Belt, disc and other types of grinding machines are suitable for grinding work.
Although grinding machines have high productivity, they leave part of the surface untreated (near the walls).
In such places, floors have to be processed manually, therefore:
- To begin with, in order to remove the main layer that has contaminants, install sandpaper with a grain size of 60-80 units on the machine.
- After this stage, the surface is cleaned. A similar operation is carried out after each grinding stage so that the quality of the surface finish can be determined.
- Then, sandpaper with 120-180 grits is installed on the machine and the floor is sanded again. The floor should be very smooth, and the wood should acquire a natural pattern and color. At the same time, you must not forget to treat those places where the machine could not reach.
- At the next stage, the floors are opened with an antiseptic, although this is not necessary. But since this will not damage, but will protect the wooden floor from the invasion of microorganisms, such impregnation should still be carried out.
- Finally, after the floor has completely dried, it is sanded with sandpaper with a grit of about 400 units.
- Before applying the varnish, the room is thoroughly cleaned using a vacuum cleaner. For greater reliability, the floor is wiped with a damp cloth, which will remove the smallest particles of dust.
- If you add detergent to the water, this will improve the quality of cleaning, but you need to remember that some types of wood can react with chemistry, then all the work will go down the drain.
- It is better to wipe the floor with clean water, but slowly, so that the cleaning is done well. In this case, you should use rags that cannot leave behind the slightest particles of lint. The best option in this case is to use microfiber, then you can rest assured about the quality.
Mistakes when varnishing a wooden floor
Quite often, when processing flooring with their own hands, novice craftsmen encounter a number of the following difficulties:
- Poor curing of varnish. In most cases, this problem occurs when the composition is incorrectly selected or if the optimal room temperature is not maintained during its application. When using a two-component mixture, slow hardening indicates a lack of hardener.
- Formation of whitish stains on a varnished floor. They indicate that moisture has penetrated into the composition due to increased dampness in the room.
- The appearance of air bubbles on the surface and swelling of the coating. These problems arise due to non-compliance with the technology of opening the floor with varnish. To eliminate them, after applying a new layer to the floor covering, you should run the edge of the brush along the floorboard in the places where they are present.
- Uneven coloring. This mistake is often made by craftsmen with insufficient experience, since some types of varnish harden in too limited a period of time, as a result of which a person without the appropriate skills does not have time to properly apply it to the floor surface.
Note! After completion of the opening of the floor covering composition, in order to eliminate the unpleasant odor from the room, it must be fully ventilated.
Having learned how to properly varnish a wooden floor, and following the correct sequence of work and important nuances in the process, you will be able to do the painting yourself properly and avoid a number of possible shortcomings that may be made and negatively affect the final result.
Video:
How to properly varnish parquet and what are the nuances involved?
Parquet varnishes are produced in a separate series and are characterized by increased resistance to abrasive and foot loads on the floor covering. That is why it is not recommended to use so-called yacht, universal and other types of varnishes.
Varnishes are available in 4 types:
- alkyd;
- urethane-alkyd;
- water-based (polyurethane-acrylic);
- polyurethane.
Please note that the most durable and wear-resistant are polyurethane varnishes.
Many manufacturers produce two-component polyurethane varnishes for parquet in professional series: for gyms, for retail spaces, etc. The safest are water-based, as they are practically odorless, and after use, tools can be washed with plain running water rather than with a solvent.
Alkyd and urethane-alkyd varnishes are cheaper and more resistant to abrasion than water-based ones. But since they are solvent-based and have a sharp, toxic odor, it is necessary to use personal protective equipment (respirators, gloves) when working.
All compositions are available in glossy, semi-matte and matte variations. The choice of varnish based on this parameter depends on your aesthetic perception and does not particularly affect the performance characteristics of the hardened coating.
Traditionally used alkyd and urethane-alkyd varnishes emit strong, unpleasant odors. They are diluted with solvents or solvents and are most often used for independent work.
The compositions are available in two variations: one-component and two-component (with a hardener). The first ones take longer to polymerize, the average drying time is at least 24 hours.
Conditions for the varnishing process:
- air temperature – from +15 to +25 °;
- relative humidity – not less than 60%;
- wood moisture content (measured with a hygrometer with a needle probe or a non-contact moisture meter): for small boards - no more than 10%, for large solid boards - up to 6%.
The last parameter is very important, since wood that is too damp can begin to shrink over time, the varnish coating will crack, and seams will appear between the planks. Such parquet is subject to complete restoration or replacement.
Varnishes should not be applied after applying oil or wax. Because of them, adhesion to the base is significantly deteriorated; accordingly, the coating simply does not “lay down” smoothly and beautifully.
So, how to varnish parquet correctly? The compositions are applied in 4 ways:
- Use a wide brush in a U-shaped motion. Varnishing in this way allows you to fairly evenly distribute the composition over the surface of the parquet, but at the same time it strongly raises the wood fibers, so between layers it is recommended to sand with fine-grained paper (from 200 to 600 units) or tape.
- Use a short-haired velor roller (up to 5 mm long) using crosswise movements. Since this tool picks up too much varnish, it is recommended to use special plastic paint trays. Just as in the case of a brush, intermediate sanding is necessary between layers to remove excess fibers.
- Use a sharp-edged stainless steel spatula using light S-shaped movements. This tool is very convenient for applying thick compounds, as it allows you to create a thin and uniform coating while cutting off raised fibers. Thus, intermediate sanding is not required, which significantly saves time, effort and money. In addition, three layers of varnish applied with a spatula are equivalent to one layer of composition applied with a roller.
- With a spray gun. The coating turns out to be quite thin, but the material consumption is considerable. In addition, it is difficult for an inexperienced master to ensure uniform application. The advantages of this method are the speed of work and easy cleaning of the tools. However, professionals prefer not to use spray bottles. In their opinion, it is very difficult to achieve a beautiful and durable coating with such a tool; a lot of experience is needed.
Each subsequent layer of varnish should be applied perpendicular to the previous one, that is, crosswise. This scheme provides a uniform, smooth coating.
What varnish should I use on the floor?
To make a final decision, it is recommended to compare all varnishes according to the necessary criteria. Criteria for choosing varnish:
- What will the space be used for?
- What load will be on the floor?
- Under what factors will the varnish coating be applied?
- Technological properties.
The floor should be varnished according to the manufacturer's recommendations. You can read them in the attached instructions.
Basically, varnishing is done immediately after sanding. Before this, a layer of primer is applied. Why is a primer layer necessary:
- A composition with water is used.
- The need to increase varnish adhesion.
- Preventing the sides of parquet boards from gluing together.
When the primer layer has dried, you can begin applying the varnish. Varnish can be applied using various tools, which affects the method. You cannot apply varnish a second time. Parquet can only be varnished once!
What to consider when choosing varnish
The main thing you need to pay attention to when choosing a paint coating is the scope of its application and operating conditions.
Place of application
Wooden floors can be used not only in the house, but also on the open terrace or in the gazebo. To finish them you need different parquet varnish. It is clear which one is better to choose to create a durable coating outside the walls of a warm house: it must be intended for outdoor use and have the appropriate mark on the packaging.
Varnish for exterior use Source gidpokraske.ru
Temperature
Not all varnishes can withstand exposure to negative temperatures or periodic temperature changes from plus to minus values. In such conditions, only frost-resistant compounds can maintain the strength and integrity of the coating. Therefore, even inside the house, if it is not heated in winter, varnish is used for external use.
Additional protective properties
Sometimes there are special requirements for the coating. For example, in conditions of constantly high humidity, wood must be protected from the appearance of fungus, and in rooms with a stove or fireplace - from accidental fire. There are varnishes on sale that contain antiseptic additives. You can reduce the risk of a fire from a coal falling out of the fireplace by treating the space in front of it with fire-retardant varnish.
Compositions with fire-bioprotective properties are more expensive than usual Source epkrt.ru
Loads
The main question about parquet varnish is: which one to choose for the living room, and which one for the kitchen or hallway. This depends on the functionality of the room and the load on the floor covering. In places with little traffic, the absence of heavy furniture and equipment that has to be moved, you can use coatings that are not the most resistant to mechanical stress.
But in the kitchen and hallway, children's playroom and living room, where dancing is often held, a wear-resistant floor varnish is needed. Otherwise, you will have to renew the coating too often.
The surface often suffers from walking on it in street shoes Source parketplanet.ru
Composition and properties
Any paint and varnish product, after complete drying, ceases to release harmful volatile substances into the environment that may be contained in it. This only happens when the surface is very hot. But not everyone has the opportunity to leave the house during repairs, and in such cases you should choose a parquet varnish that is quick-drying, odorless, and does not contain substances that can cause allergies.
You need to be especially careful when studying the composition of the product if you are going to varnish the floors yourself.
See also: Catalog of companies that specialize in finishing materials and related work
Color and texture
Varnishes are colorless and tinted, glossy and matte. There are even compounds with an anti-slip effect that include abrasive particles. All these decorative and operational features of the coating must be taken into account and correlated with the overall appearance of the interior or surrounding space.
It is better to select the color based on samples with dyes Source vs71.ru
Note! In stores, painting is usually done on a pine board. The selected varnish may look different on a different type of wood.
Wood species
Different wood species differ not only in color and pattern, they have different hardness, density, resistance to moisture and other influences. For example, larch, due to its dense structure and special properties, does not particularly need protection; it is enough to apply a decorative coating with average wear resistance. This could be a water-based acrylic floor varnish.
But pine and spruce wood is soft, so you need to create a durable, wear-resistant coating that can withstand mechanical loads well.
Particular attention should be paid to parquet flooring made of oak and exotic woods. The tannins and essential oils they contain can be released to the surface, forming unsightly dark spots. Before varnishing, such a floor is treated with a neutralizer or primer.
Primer for wood Source stroyfora.ru
Advice! It is recommended to pre-treat any hardwood with a transparent bioprotective primer with an antiseptic.
Preparation
Varnishing must be done in suitable conditions; for this you need to check:
- air temperature. The instructions for applying the varnish composition will indicate in what temperature range it can be applied. If the temperature goes beyond the maximum permissible range, this will certainly have a detrimental effect on the quality of work; the varnished layer will not be very strong and durable. Usually it is recommended to varnish at a temperature from +5 to +25 degrees;
- humidity. If aqualak, that is, a water-based solution, is applied to the floor, then there must be high air humidity. All other types of varnish are recommended to be applied at air humidity from 50% to 80%. If the humidity is too high, the drying and polymerization process will be disrupted, and as a result, the protective film will not be very durable. In addition, high humidity will negatively affect how long it takes for the varnish layer to dry;
- presence of drafts. It is necessary to ventilate the room if acid-curing mixtures are applied, and when varnishing with other solutions, the presence of drafts can impair the quality of the work performed.
Video description
This short video shows what alkyd varnish looks like on parquet:
Urethane
Inexpensive urethane varnishes have average resistance to stress, excellent elasticity, water-repellent and anti-slip properties. Suitable for kitchens, bathrooms, stairs, including street ones. They are rarely found in their “pure” form.
Acrylic-urethane and alkyd-urethane compositions, which combine the advantages of all resins included in the composition, have higher strength indicators. Water-dispersion mixtures with the addition of acrylic are chosen when you need a wear-resistant, moisture-resistant floor varnish, for interior use, and odorless. For example, for decorating a children's room or bedroom. Alkyd-urethane is also suitable for living rooms, but it takes time for the smell to dissipate.
Alkyd-urethane varnish for interior work Source marwin.kz
Epoxy
Epoxy varnishes are acid-curing substances with a high degree of toxicity, so you need to work with them using personal protective equipment, and only in well-ventilated or ventilated areas. After application, the smell lasts for quite a long time, up to three days, during which being in a room where the air is saturated with toxic substances is dangerous to health.
For those who need a quick-drying varnish for parquet, an epoxy composition is not suitable. It is more of an exterior decking coating that is exceptionally durable and resistant to moisture.
As a rule, epoxy varnishes are two-component compositions. After mixing the components, the solution must be applied immediately, as it sets quickly. For this reason, it is better to entrust work with such varnishes to professional painters.
Video description
How to mix and apply two-component varnishes, watch in the video:
Varnishes are classified according to the type of synthetic resins they contain, which are the base.
Acrylic
Acrylic floor varnish is odorless, quick-drying, as it is water-based. Its advantages are affordable price, ease of application, non-toxicity. But the moisture resistance and wear resistance of such compositions are low, they do not withstand abrasion and mechanical loads well, therefore they are recommended for use in dry rooms with little traffic - in bedrooms, offices, living rooms.
Advice! To prevent the water in the varnish from penetrating into the wood fibers and causing it to swell, it is advisable to prime the floor before decorative finishing with such means.
Acrylic parquet varnish Source vse-kraski.ru