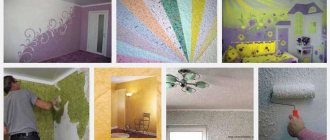
How to join wallpaper correctly
It is advisable to take into account certain nuances and follow the recommendations of specialists. Then you will get beautiful partitions with a homogeneous surface, on which it is difficult to find the connection lines of the rolled strips. In this case, it is necessary to take into account the characteristic features of different materials:
- single-layer paper ones are glued with an overlap, since after drying the paper “shrinks” slightly;
- vinyl wallpaper - end-to-end. When spreading the canvases, you need to give them time to soak in the glue a little (5-7 minutes);
- non-woven ones are attached end-to-end, and wallpaper glue is applied to the wall;
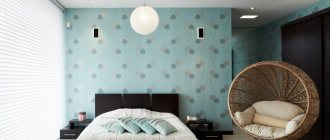
- When working with photo wallpaper, follow the manufacturer's instructions.
There are special subtleties when working with different textures, when it is necessary to join rolled sheets with stone, plaster, painted surfaces, and photo wallpaper.
What equipment will you need for your work?
To glue the roll material you will need:
- A device for applying primer to the wall surface, glue to the canvas or to the wall. This can be a fur or foam roller, a flute brush, a fly brush, or a brush brush.
- Tools for cutting wallpaper : sharp medium-sized metal scissors, a stationery knife with replaceable cassettes, a roller knife for trimming edges at the ends of the canvas.
- Products for smoothing strips of material : soft cloth approximately 1 m2, rubber or plastic elastic spatula, rubberized roller, brush with artificial or natural soft bristles.
- Testing and measuring devices for marking and determining the required length of the wallpaper: a cord the length of the room height, a 100-200 gram plumb line, a metal ruler and a steel angle for marking wallpaper, a roller with a lead marking the top line for installing the wallpaper.
- Auxiliary equipment for gluing walls over the entire height and working with canvases: a special or two-stage table for working with rolled material, a container or bath for diluting the adhesive, sandpaper, a spatula, a screwdriver, a rag for cleaning hands from glue, a water container, foam rubber sponge for removing excess glue.
Advice
It is best to first think through the nuances of wallpapering, prepare materials, equipment and tools. This will greatly facilitate the work and make the process quick.
In the corners
When decorating corners with wallpaper, the technology of gluing sheets overlapping is used. To get the perfect decor, the canvases of adjacent walls should overlap each other in the corner by about 1-2 cm. This margin will allow you to take into account the possible curvature of the partitions. Using a construction knife and a ruler, both sheets are cut. Then the top one is turned away a little and the excess part is taken out. Both edges are well lubricated with glue and pressed against the wall. If you have little experience in wallpapering, then you should start work from the least noticeable corner.
Professionals do not recommend sticking entire sheets of wallpaper in the inner corners, since there is a possibility of wrinkles forming when drying.
It is not advisable to join the wallpaper at the outer corner, as the edges can quickly peel off. When making a corner, cut the canvas so wide that the sheet covers the adjacent side by 2-2.5 cm. Carefully align the canvas, squeezing out bulges and smoothing out wrinkles. The next sheet is glued to the outer corner so that it covers the edge of the previous sheet by about 0.5-1 mm. The joints of the sheets on the outer corner are carefully smoothed with a rubber roller and spatula.
Wallpapering around switches and sockets
If the socket and switch have not yet been installed, then steps 1 and 2 can be skipped:
- De-energize the switch or socket, and then carefully remove it from the socket and disconnect the wire;
- Hide the wire in the socket so that it does not interfere with the pasting, having previously insulated it;
- Paste a piece of wallpaper over the hole for the switch or socket;
- Take a utility knife and make a circular cut along the outline of the hole;
- Carefully smooth out the wallpaper with a plastic spatula next to the hole.
Adjusting the pattern
It is impossible to single out the only correct scheme for how to combine wallpaper with a pattern, since the decor can be different. As a rule, the manufacturer indicates the joining option in the instructions for each roll:
- direct joining is used when working with canvases whose patterns are symmetrical. The same pattern is repeated over the entire surface of the rolled web. The smaller the design elements, the less waste is generated in the work;
- mixed joining involves shifting each subsequent strip by half the length of the repeat. When using floral wallpaper, there may be a lot of unused leftovers. Therefore, when purchasing, you must carefully calculate the required number of rolls, taking into account the parameters of the room;
- arbitrary joining assumes there is no need to follow the pattern. The roll is cut as needed. Even residents without experience in renovation work can decorate a room with such wallpaper. When gluing the first strip, it is important not to deviate from the vertical (it is recommended to draw an even line along the wall using a plumb line). When attaching the following canvases, you need to simultaneously monitor the alignment of the pattern and the junction of the strips.
Non-woven based wallpaper gluing technology
I would like to highlight general points that will help you understand the principle of wallpapering walls with non-woven wallpaper:
- Wallpaper strips are cut depending on the height of the wall and the margin for adjustment.
For example, if the wallpaper is monotonous (without adjustment), then we only need to take into account the height of the wall and the margin for trimming at the ceiling and floor (no more than 10 cm), and if the wallpaper has a pattern that requires adjustment, then accordingly we need to take into account the height of the wall, and a margin for fitting, and a margin for trimming. The margin for adjustment depends on the vertical pitch of the pattern; If you are afraid that you may incorrectly calculate the length of the strip required for fitting, then cut the wallpaper in place. That is, you need to glue the first strip, then unroll the roll, match the pattern on the roll with the already glued strip, make a mark and cut off the strip of wallpaper - Wallpaper glue is applied to the wall with a roller to an area slightly larger than the width of the wallpaper strip; it is more convenient to coat the corners with a brush;
- Wallpaper strips are glued end to end. The strip of wallpaper begins to be glued from top to bottom, slightly leading to the ceiling, and at the same time it is aligned either along a vertical drawn line (if this is the first strip on the wall) or along the edge of the already pasted strip of wallpaper;
- Then the wallpaper strip is smoothed out; air bubbles and excess glue must be expelled. Movements must be made from the center of the strip to its edges. For smoothing, use a plastic spatula, a dry, clean cloth or a wallpaper brush;
- The glue protruding from the wallpaper joint must be removed with a damp, clean cloth;
- The wallpaper joint must be carefully ironed; a special roller is used for this, but you can also use a plastic spatula;
- Excess wallpaper on top and bottom is trimmed with a utility knife using a metal spatula.
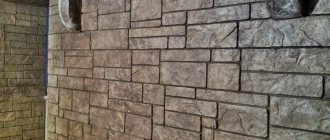
Joining with tiles or decorative stone
Most often, problems arise at the junction of materials that differ not only in texture, but also in layer thickness. Professionals recommend two ways to solve the problem:
- First of all, the main decor is laid out from tiles or stone. Covering elements that will form a figured edge are applied to the wall, and a thin line (pencil) is used to mark the boundary of the masonry. Then wallpaper is pasted onto the wall, covering the pencil line. The surface is left to dry for a day. Then you can glue tiles with a curved edge, extending onto the wallpaper. Since the overlap is not wide, you don’t have to worry about the stone coming off;
- First of all, wallpaper is glued to the border with tile or stonework. The excess part of the canvas is cut off. After about a day, the surfaces are reliably dry and you can begin fixing the decorative tile covering (on top of a part of the wallpaper 1-2 cm wide).
How to connect materials is determined by the quality of the wall. It is believed that when decorating a plasterboard surface, tiles are first laid and then wallpaper is pasted.
Docking with door slopes
High-quality wallpapering is only possible with careful alignment of the door openings. The main point that you need to pay attention to is the exact fit of the roll at the corner. The main canvas from the wall is folded over the opening, cutting off the excess and leaving a margin of about 1.5 cm. A strip of wallpaper is glued to the narrow part with an overlap.
To make the joint line less noticeable, two coating sheets are cut along a wavy line. The entire opening is covered in the same way.
Docking photo wallpaper
A wide variety of materials and companies allows you to find expensive or cheap photo wallpapers. Manufacturers usually write on the packaging recommendations for gluing the canvases. If the pattern of the fragments is precisely adjusted, then the sheets are glued end-to-end. In cheaper versions of photo wallpaper, the elements are overlapped (no more than 2 mm).
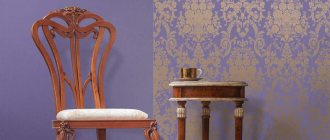
Joining combined wallpaper
Among the decoration of a room with materials of different patterns and shades, three methods of combination can be distinguished:
- the walls are divided horizontally. With this option, most often the border is decorated with special inserts (decorative borders). The canvases are glued end-to-end;
- An interesting room decor is obtained by vertically alternating stripes of different wallpapers. If the connection lines are vertical, then the panels are glued end-to-end. Sometimes the border can be wavy. At the same time, they practice attaching wallpaper overlapping (to the width of the bends). Then, with a sharp knife, two canvases are cut simultaneously along the zigzag line. This design technique is appropriate to use when gluing materials of the same texture (the best option is wallpaper from the same manufacturer);
- an extraordinary patchwork combination involves fixing the wallpaper with an overlap. This decoration option looks original when choosing companion paintings (decorated in the same style).
Combining wallpaper is a very exciting process. To ensure that the result of the repair does not disappoint, it is recommended to select materials that differ only in shade or pattern.
Possible problems when joining wallpaper
The possibility of divergence of the canvases at the joints cannot be ruled out. This is the most common problem that can appear after the decorative coating has dried. There may be several reasons:
- uneven wall surface;
- when gluing the wallpaper under pressure, it “stretched”, and when it dried, it “shrunk”, the seam came apart;
- poor-quality cleaning of the wall from dust and previous coatings. Sometimes the lack of primer also leads to the edges of the canvases peeling off;
- the surface of the wall or the edge of the wallpaper is poorly coated with glue.
Some shortcomings appear immediately, they can be corrected during the process of gluing the strip (not enough glue). But sometimes unpleasant moments appear after the canvases dry. If a flaw appears at the bottom of the wall and is covered by furniture or appliances, then the owners can “turn a blind eye” to the flaw.
But it often happens that the problem needs to be solved radically. There are a couple of options for how to join the canvases:
- If the edges of the wallpaper have simply peeled off, then fixing the defect is very simple. Using a thin brush, carefully smear the edges of the canvases, press them well against the wall using a rubber roller, and you can lightly dry the joint area being repaired with a hairdryer;
- If a narrow gap appears between the canvases (the wallpaper has come apart), the problem is eliminated with “cosmetic” means. If the wallpaper is bright, then select a sealant of a similar color. When working with white wallpaper, you can use putty. Naturally, the seam will be noticeable upon close and careful examination. This is due to the different structures of materials (sealant, wallpaper, putty);
- Large enough gaps simply cannot be masked. The best option for eliminating the defect is gluing it with a thin strip of wallpaper. This technique requires accuracy and patience, because the work is almost like jewelry. But if you don’t rush, you can make the joints of the wallpaper with the ribbon almost invisible.
If there are several “serious” cracks in different places on the wall, designers advise using an original technique to eliminate the defect - attaching decorative strips (cord, border, special sticker for joints).
Pasting walls is not a difficult task, even beginners can do it. It is recommended to start renovations from a small off-central room.
Useful tips
Joining wallpaper has its own subtleties that must be taken into account if you want to be guaranteed to get a high-quality end result of your efforts.
Let's consider the main points of this process.
Wallpapering
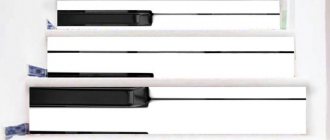
- There are two types of joining - butt and overlap . Thick wallpapers - vinyl, fiberglass, etc. - are glued end to end. Only thin paper wallpaper can be glued with an overlap - only in this case the seam will not stand out too much;
- To avoid peeling and bending of the edges, wallpaper joint tape is used, which increases the degree of adhesion (sticking) of the surface and reinforces the joint area . To do this, simply stick the tape onto the joint and wait until it dries;
- To prevent the joints between the strips from opening, you need to carefully coat the edges with glue;
- After joining, you need to roll the seams with a rubber roller so that the edges fit as tightly as possible, thereby significantly reducing the likelihood of their peeling ;
Rolling seams with a roller
- In some cases, after joining the paper wallpaper, the precisely fitted seams diverge - this is due to the fact that they were “stretched” during gluing . Since the paper is impregnated with an adhesive before gluing, it is easy to stretch it on the wall, and after drying it takes its shape and therefore the seams separate. To avoid this, you do not need to stretch the wallpaper across the wall - it should lie as it is;
- If you need to connect cut edges, which are already uneven by definition, you should glue the strips overlapping. While the glue is still wet, use a sharp utility knife to cut through the joint. Thus, you get a perfectly adjusted connection, which can have almost any structure, and not just vertical, as in standard cases;
Wallpaper trimming scheme
- Before gluing wallpaper, it is necessary to close the windows and doors, as well as turn off the heating appliances, air conditioners, fans and central heating, since drafts and uneven heating will inevitably cause the seams between the strips to diverge.