Simulation of the oxidation process
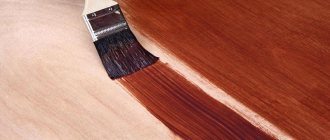
On wood, patina paint imitates the oxidation of certain metals. The result is a bronze color, which enhances the effect of antiquity.
- The varnish composition is applied. It helps to increase the wear resistance of wood.
- When the varnish dries, the second patina paint is applied. It should not be applied massively.
- After 40 minutes, the dried layer is processed with sandpaper.
- Dust is removed with a cloth.
- A transparent varnish is applied.
A type of patina for wood surfaces
| Compound | Description of material |
| Acrylic patina | Water-soluble, slow-drying paint. Odorless material. A large palette of shades is on sale. It lies on the surface easily and is used to emphasize relief. |
| Wax-patina | The consistency is thick, with a pearlescent luster. The material is applied with a brush, and the cracks are painted with a sponge. After rubbing, the wood takes on an antique appearance. |
| Bitumen-patina | Dark brown dye. Tree shading option. A brush is used for application. Grouting is done with cloth. |
| Oil composition of patina | Paste consistency. Brush or cloth are the application tools. Most often used. |
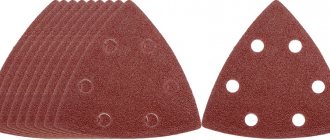
Brushing technology
Brushed wood
During the work you will need:
- hand plane;
- chisel or small hatchet;
- steel brush;
- Angle grinder with brush attachments;
- sandpaper, coarse and fine;
- paint brushes;
- dense sponge;
- tinting antiseptic for wood (for example, Pinotex);
- white azure;
- soft bristle brush.
Wood brushing machine with two support rollers
Brushes for three-stage wood processing
Necessary materials
Cordless drill/driver
Rough cleaning should be done with a steel bristled nozzle, but for finishing, nylon and copper are better suited. There is a special attachment called “Piranha”. It is a polymer-abrasive brush that can effectively remove soft fibers from the surface and leave hard ones.
Piranha brush
The wood should be dense, strong, not damp. Resinous boards should also not be taken, as the resin makes processing difficult. The presence of knots is welcome, as they make the design more pronounced and decorative. If you have no experience in such work, take a small piece of unplaned board or timber, up to half a meter long.
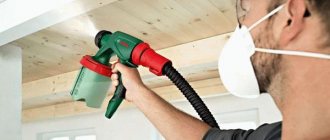
Wood processing
During such work, a lot of fine dust is always generated, so it is best to do it in the fresh air. If the weather does not allow it, take care of the possibility of ventilating the room and be sure to prepare a protective mask or at least goggles.
Wood processing with a plane
Step 2. Using a chisel or the corner of an ax, you need to make chaotic chips across the entire surface, shallow and shapeless, to give the material a rougher appearance.
Step 3. Now you need to remove the soft fibers with a wire brush. The brush should only be moved along the grain, pressing the tool firmly against the board.
Brushing
This is what wood looks like after brushing with a wire brush.
This is what it looks like after intermediate sanding with a polymer brush.
And this is how it looks after final sanding and polishing with a sisal brush
Step 4. When the relief begins to appear, the hand brush is replaced with an angle grinder with a metal brush, and work continues. The nozzle should be positioned perpendicular to the surface being treated, movements should be made strictly along the fibers. If you don’t need too rough a texture, immediately take a Piranha brush or a nylon-bristle attachment and do not press too hard on the tool while working. Go around the perimeter of wormholes and knots in the tree to emphasize the contours.
Wood processing
Process the ends of the board
Step 6. Now the material needs to be given color. To do this, the surface is first coated with Pinotex primer, which is applied with a brush along the grain. You can use both stain and dark azure - any coating with color that will not hide the texture.
The photo shows an example of the coloring composition used
Step 7. Having applied the composition to the workpiece, give it a few minutes to absorb, and then carefully wipe off the top layer with a sponge. There is no need to rub hard, just smoothly move it 2-3 times along the fibers. After this, all the recesses will remain darker than the protruding edges, and the relief will appear more clearly.
Avoid drips
A distinctive feature of good quality stains is that they reveal the texture of wood
Rub the composition into the workpiece
After drying, the painted surface looks like this:
Then there are two options: leave this color and cover the wood with a transparent varnish, or add another layer and give the material the appearance of old bleached wood. The second option is suitable for processing elements in the Provence style. To do this, you need to wait until the impregnation is completely dry and apply a very thin layer of white glaze with a brush. After it has dried, the wood is lightly sanded with the finest sandpaper, cleaned of dust and coated with colorless varnish.
Do-it-yourself aging of wood
This method is also used: after brushing, the workpiece is covered with a dense layer of white glaze, dried and brushed again with a metal brush, but now not so intensively. Finally, a layer of clear varnish is applied.
Applying white paint
Brush sanding
Brush sanding
Aged wood, well-emphasized ax grooves
Stains
Painting process
The lining is painted using a special technology. It lies in the fact that you need to move the brush or roller continuously from top to bottom, so you will get an evenly painted surface without drips or streaks.
It is also worth noting that the pressure on the brush or roller should be the same throughout its entire length.
Applying a second layer of white paint to the paneling
You cannot apply a brush with paint several times in one place because this will lead to uneven coloring of the surface of the lining. The brush should only be half full of paint, maximum, and no more. You need to paint in a thin layer and several times.
Important! Applying the second layer is possible only after the first layer has completely dried.
In order to paint the entire surface of the lining evenly and accurately, you need to purchase several types of brushes in order to paint hard-to-reach places well. The door trim is the most difficult to paint, so this area needs to be given special attention. To properly paint hard-to-reach places, it is better to watch the entire process on a training video.
If the lining is adjacent to glass or panels, it is necessary to cover the surface near them with masking tape. After painting, we simply remove it from the surface. The entire painting process requires care and precision. If this does not apply to you, then turn for help to the craftsmen who will quickly and efficiently paint the lining.
Careful and thorough painting of the panels leads to the desired result.
Selecting a pre-treatment agent
A separate category consists of impregnations, which are necessary to improve the structure and durability of wooden elements.
Such mixtures include:
Drying oil. It is applied to protect the base from any harmful influences. It is better to lay several layers to achieve deep penetration. Can be used before oil paints to reduce their consumption.
The oil is ideal for processing wood indoors with temperature changes and high humidity.
Special antiseptics. Protect from microorganisms and insects, prevent rotting.
Fire-retardant composition for wood Phenilax
Choosing a way to paint antique wood
To give a wooden surface an antique look with your own hands, various techniques are used.
To give a wooden surface an antique look with your own hands, various techniques are used. Each requires specific types of paints. Correctly selected compositions allow you to achieve the desired effect and obtain products that are not inferior in appearance to real antiques. Important! Regardless of the antique painting method chosen, the surface is prepared. Most often, this is a simple stripping that allows you to emphasize the design.
Puttying is not required, since aging involves highlighting defects, not masking.
External use of aged wood
Country-style finishing also allows for the use of aged wood: the cladding itself, shutters, entrance doors, as well as decorative elements.
Railings, steps, support pillars at the porch - all this can also be made using the described wood processing methods. After practicing on small pieces, you will be able to handle any surface without much effort. Of course, large-volume elements, such as house trim, are not so easy to process manually, but there are special machines on sale for this purpose. The most important thing is to have the desire, and then everything will definitely work out.
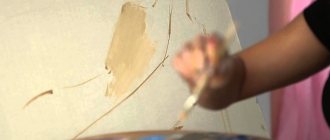
No. 3 Painting method using a candle
Worn white paint, through which in some places you can see the wood itself in its natural color, is wonderful when restoring antique furniture or creating new ones, but in the same style.
In the photo below you can see an example of such painting of wood with wonderful designer pens laid out on it.
Instructions:
Take a clean wooden board (no matter sanded or not) and a candle. Rub the candles onto the surface of the wood in several places
You need to press quite hard on the candle so that a clear trace of wax or paraffin remains on the wood. After this, paint the wood with white paint and let it dry completely. Wipe the dry painted surface with a rag, applying some pressure. In those places where there was a trace of a candle, the paint will come off the surface.
Below is an example of a white wood floor painted using this method. It is worth noting that when using this, it is better to apply a layer of protective varnish on top of the paint for more durable use.
Painting the chest of drawers white
Painting brown furniture white can often be tricky. However, choosing the right paint can make the task much easier. In this case, a white furniture paint with a high degree of opacity, such as phthalic or repair paint, is best. However, choosing paint is not everything. What is important is what the furniture was previously covered with. Painting black furniture white with stain can be quite difficult - the product sticks tightly to the wood and is difficult to remove. Regardless of what the equipment was previously coated with, it is a good idea to get rid of the previously applied layers. How to paint black furniture white also determines the material. Laminate or MDF boards will require more work and maintenance. However, a very opaque paint is always a good answer to how to paint dark furniture white.
No. 2 Paint filling method
This method works best on unsanded wood with a slightly rough surface (such as a wooden fence). With its help, wood can be given a rustic look and an antique effect.
- Clean the wood with soapy water and a brush and leave to dry.
- If your paint is too rich, thin it with thinner.
- After this, pour some paint onto the wood surface, and then take a scraper and spread the paint over the wood.
On an unsanded, that is, not completely flat, wooden surface, the paint layer will not be the same everywhere. A little more paint will flow along the depressions and less on the bulges, that is, in some places the white color will be more saturated, and in others more transparent, which will create the effect of antiquity.
You can see the result of painting a wall using this method above.
Acrylic paint
If, for example, you need to paint a cabinet white, acrylic paint is one of the most popular solutions. Behind its popularity is the fact that it can be successfully used even outdoors. Acrylic paint is also suitable for a child's room - it is safe and has a subtle aroma. White furniture painted with this paint can have different finishes: glossy, semi-matte and matte. It is highly resistant to external factors. Unfortunately, repainting furniture white with this paint does not protect it from mechanical damage - this measure is not very durable. Acrylic paint can also be used, for example, to paint plywood white. The big advantage of these paints is that the solvent for them is water.
Thermal aging
Unsafe way. It involves burning wood, so the rules must be followed: the absence of flammable substances near the processing site. The best place is an open space in the air.
Aging stages:
- Place the workpiece vertically. Alternatively, place it on a surface that is covered with non-flammable material. The work is carried out using a gas torch. You need to move the tool from top to bottom. Do not delay it for long so that you can give it the desired texture. Only the top fibers of the wood, no more than 3 mm deep, should be charred. This way the texture will be preserved.
- Wait until the material cools down, remove the carbon deposits manually or with a grinder. The degree of purification is determined individually.
- Sand the lumber. The movements should not be too strong so as not to destroy the results of decoration.
When aged, a unique color is obtained, alternating black and natural areas. After the material has been artificially aged, it is not necessary to paint; varnishing is sufficient.
Aftercare
After finishing decorating with the effect of aging wood, it is important to follow the recommendations of specialists. Properly aged items do not require complex care
Dry cleaning with a vacuum cleaner once a month is enough, as well as wiping the most contaminated areas with a damp cloth. To enhance shine, additionally coat with glossy varnish or use special furniture polishing products. Leather inserts and furniture nails with copper heads require impregnation with special compounds. Sanded wood with stain without painting can be treated with mastic or wax-based polish. Additional preservation of the product will significantly extend its service life and help protect it from the destructive effects of temperature changes and high humidity. Rub the wax surface with a soft rag or flannel mitten. Tabletops, handrails of sofas or armchairs (other surfaces of intensive shock absorption) require additional treatment with protective varnish
It is important that its base is compatible with the previous coating. For example, acrylic composition cannot be applied to nitro varnish, they react. A tabletop with a mosaic pattern can be additionally covered with flexible glass and the ends treated with silicone sealant.
Furniture care
Care will help you avoid many mistakes.
Very often on the Internet you can find negative reviews about the painting compounds used. Some complain about significantly exceeded drying time, and manufacturers respond by assuring that this cannot happen. It's all in the instructions! It needs to be carefully studied and information extracted that will save you from unreasonable spending.
An example is special waxes that need to be diluted in water and used in dry rooms. Mainly for processing doors, ceilings and panels. The second layer is applied every other day. Rubbing the surface to add shine is allowed only after a week. By purchasing a different brand of material, you can save time twice as much.
Advantages of painting wood while maintaining texture:
- Destruction of pests that negatively affect the product.
- Prevention of the development of mold, fungi and rot.
- Painting prevents the development of cracks in the wood.
- Protection from moisture.
- Safety for people living in the house.
- Nice appearance.
The downside is that the coatings are not very resistant to aggressive liquids and fire. In most cases the material is flammable. But there are brands that do not have these disadvantages. The question is the price, which is always high for higher quality materials.
Painting furniture white - chalk paint
If you're looking for a sleek and unique way to paint old furniture white , you might want to consider chalk paint. Recently it has become very popular due to its stylish matte finish. It is also very easy to apply. It is also an ecological answer to the question of how to paint wooden furniture white - its composition is based on water, chalk powder and natural pigments. It does not have a sharp suffocating odor. However, the biggest disadvantage of painting old furniture white with chalk paint is its low durability and the need for several coats. It is not resistant to mechanical damage or contact with liquids. To avoid scratches and extend service life, white furniture can be coated with clear varnish or special wax.
How to paint wood-effect doors with white paint yourself
Does your old door not look the same anymore? Don’t despair, you can easily restore it yourself, without significant financial investments.
In this case, simply painting the surface is used, after which the appearance will be improved, you can also use a template that will give an ordinary door a wooden look. But before you start painting the surface, you need to know what kind of painting material is suitable, and then find out how to paint wood-like doors.
Paint selection
Based on what exactly will be done with the door, you need to choose the right way to paint the door. In this case, there may be two methods of doing the work:
| Door design method: | Materials used: |
| Highlighting wood texture: | In this case, it is better to paint the surface with clear varnish, oil impregnations or stain, and also use tinting mixtures. |
| Complete removal of the old door surface pattern and application of a new one: | If you need to create a new design that will imitate wood, then the paint should be wood-like, based on an acrylic, polyurethane or oil composition. |
How to paint a door with your own hands (video)
Surface preparation
Having selected the necessary materials for painting wood-look doors with enamel, you will need to prepare the surface, and then apply a drawing of the structure of the wooden fibers. It is always necessary to prepare the surface by removing old paint or varnish, using a grinder or sandpaper.
To paint interior doors Canadian wood, as well as other types, you need to bring the surface to perfect condition. To do this, use a sander or sandpaper with small or medium grain. If there are cracks, holes or other flaws, it is necessary to additionally putty the surface using a wood compound. This condition is mandatory, but when using transparent varnish, the color of the putty should match the color of the wood itself. When the mixture dries and hardens, it must be sanded. After which the preparation is completed and you can proceed to coloring.
It should be immediately noted that an imitated wood pattern can be applied to almost any material. This could be a metal entrance, plastic or plastic, on a steel sheet, etc. the main difference lies in surface preparation.
Painting the door
Door painting is carried out using the following technology:
- White fabric dye is used and the surface is completely painted.
- After this, you need to cover the material with liquid soap. Before you paint a white wood-look door with your own hands, you will need to leave the canvas for the base layer to dry. As a rule, the drying time is indicated in the instructions.
- Next, you need to use dark enamel and cover the surface with it to create curls like wood fibers, while the liquid soap is washed off. After the work, the dissolved enamel dries and makes the necessary pattern.
An interior passage made from real wood is expensive, so you need to consider the option of creating an imitation on plywood. In this case, you will need an additional brush. With its help, the fabric is “combed” along the soft fibers. After which you can paint the surface in any color from white to dark. Next, the applied dye will spread and create the desired texture, which will resemble real fiber.
For plywood, it is better to use several shades at once, as this will allow you to create the desired pattern. When the enamel is dry, the plywood is sanded. You can see how to paint a steel door to look like wood in the video, although airbrushing can also be used.
In conclusion, based on the information described, it should be noted that creating an imitation of wood fiber allows you to emphasize home comfort. Despite the different materials, there are still general requirements; the main rule is the choice of suitable materials for the job. For example, if you just need to emphasize the fibers of real wood, then it will be enough to use impregnations. When using varnish as a finishing material, use stain, but not drying oil.
You also need to remember that many materials perfectly absorb paints and varnishes, so it may be necessary to treat the surface in 2-3 layers. It is recommended to use the color “Alder” for interior doors; a Canadian door is perfect for it. If the interior is dark, then it is better to use the color “Venga”.
Choosing paint
When the time comes to choose a paint, a number of questions arise about how and what to paint with, and the difficulty of choosing a composition to coat the surface. The variety of types and types of paints is confusing to anyone who is faced with such a choice for the first time.
To choose the right paint, you need to know some features of each of them:
- White paint for oil-based lining dries quite quickly, which is its advantage over other analogues. Agree, this criterion is very important if the process of painting panels is carried out directly in the house and not on the street;
Advice! If you decide to paint the ceiling, then the best option for this would be aqualak.
- Acrylic paint does not spread, which is very convenient when painting lining. The disadvantage of this type of paint is its low resistance to peeling;
- Water-based paints are in greater demand than others, because their price is much lower than all other analogues, although such paint does not have particularly positive characteristics.
Photo of translucent white lining
The advantage of translucent paints is that they allow the natural pattern to remain visible. If you want to create a natural interior and preserve the texture of the panels, then this paint is just for you.
In general, if you like a natural pattern, translucent paint is right for you, but if you want a bright style, paints of any colors and shades of your choice.
Types of artificial aging of wood
The vintage, original look of doors can be achieved in several ways. Below, they are listed in order of increasing effort and cost. The operating algorithm is also described. So:
Thermal method or firing. The process will require a blowtorch and a rough brush to age the wood. The intensity of the impact is determined by the master himself - as a result, you can get clearly expressed natural wood patterns or barely visible ones. After firing, the surface of the canvas is sanded with coarse sandpaper in different places to create the appearance of heterogeneity. The door for this method of aging should be massive, made of planks. The fittings are appropriate - massive steel handles and hinges, possibly forged.
How to do it right:
The old door is cleared of layers of paint. Use a hairdryer or solvent. The canvas is carefully sanded, the boards are knocked down so that there are no gaps. Before aging a tree with your own hands, it’s a good idea to impregnate the wood with all kinds of protection - fire retardant, moisture-retaining compound. Existing cracks are left - they will add even more color. The hinges and handles are removed. The method takes little time and is safe if you have the skills to work with the tool.
Blackening. The effect is achieved by rubbing shoe polish, stain or a strong manganese solution into the cleaned fabric. Pigmentation lingers on annual rings, cuts, knots and thus, antique wooden doors are obtained, the effect of an opening darkened with age is achieved. In addition, the latter composition helps to disinfect the canvas if traces of mold or mildew are detected during cleaning.
How to do it right:
Everything ingenious is simple! To obtain antique doors, a previously cleaned surface with a solvent and a spatula is covered with black ink, and then the shoe polish melted to a liquid state is rubbed with a brush. You need to rub it hard
This method has a drawback - it is important to ventilate the removed door leaf for a week - the smell is unpleasant
// ]]>
Bark beetle traces. They represent paths from the movement of the larva. You can create them on antique doors with your own hands using bent nails. Having laid them out on the surface, hammer them in with a hammer, leaving dents over the entire area.
It is important to free the rods from the caps to create a complete imitation. After work, the canvas is sanded with fine sandpaper, making sure that the chip dust gets a little into the grooves. Next, varnish
Next, coat with varnish.
Aging: traces of bark beetle
Creating the effect of dilapidation and wear
Artificially giving wood a shabby and dilapidated look is called brushing. The production uses sandblasting, during which soft fibers are removed from the top layer, causing the structure of the wood to become more pronounced.
When processing antique wood in a similar way with your own hands, the surface is first covered with matte acrylic paint. After it dries, abrasions are formed using a metal sponge or sandpaper, while individual areas can be affected more intensely to obtain a more natural look. The product is cleaned and a second coat of paint is applied.
At the end of the processing, it makes sense to go over the wood with a fine-grained abrasive tool.
Without using paint, you can achieve the effect of antiquity by painting wood with stain. This special material stains the wood by penetrating into its outer layer.
During absorption, the stain colors the wood in its natural color, while emphasizing the texture. There are also colorless compositions that perform exclusively protective functions.
The stain is applied with a cotton-gauze swab - a piece of cotton wool is wrapped in folded gauze. The composition is poured into the cotton wool so that it saturates it, but does not leak out when you press the tampon. Then the stain is rubbed over the entire surface. The process is repeated several times.
Sandpaper creates abrasions on the treated surface. The result is a natural wooden plane with pronounced texture and wear, characteristic of antique interior items.
Painting wooden furniture white with phthalic paint
When searching for answers to questions like how to paint furniture white , many people discover that the paint is mysteriously called phthalic or alkyd paint. They differ from acrylic ones in their oil content. Due to their properties they are very popular. This is a great option for people wondering how to paint lacquered furniture white . Its adhesion means it can also be used on MDF or chipboard. The paint creates an elastic, durable, uniform surface. Painting a chest of drawers white with this paint is quite simple. However, this paint also has its drawbacks. The composition includes a solvent - gasoline, as well as resin. As a result, the furniture takes a long time to dry and emits a characteristic odor for some time. Furniture painted white with this paint will be beautiful, but after painting it should dry in a well-ventilated area.
Preparing for coloring
Before painting a clapboard ceiling with dark stain or any other coloring agent, you need to carefully prepare the base. The old ceiling covered with clapboard is cleaned of dust, dirt and other small debris. If you have painted lining on the ceiling and the paint layer does not adhere firmly to the base, then it is better to remove it. To do this, use a spatula or sandpaper. You can also use a sander.
After this, carefully inspect the surface for various defects. If there are damaged slats, they need to be replaced. Small cracks and cracks can be filled with wood putty.
When the putty has dried, sand the surface using sandpaper or a sander. This is necessary to eliminate minor irregularities in the area where the putty is applied. After this, the surface is dusted and treated with a primer. The composition is applied with a brush or roller in two layers. Before applying the second layer, the first layer must be completely dry.
Tools and materials
To paint a lining ceiling you will need the following tools and materials:
- roller or brush with a long handle;
- a set of spatulas of different widths;
- tray for paint and primer;
- sandpaper or sander;
- antiseptic impregnation;
- ladder;
- putty;
- primer composition;
- paint that matches the color;
- water bucket;
- metal brush;
- masking tape;
- polyethylene film;
- a rag to remove dust from the surface.
To paint the surface of a eurolining ceiling, it is better to use a brush, because it is inconvenient to paint all the recesses between the individual elements with a roller. And to work on a ceiling surface covered with Shtil clapboard, you can use a roller. This is due to the fact that there are practically no gaps between the boards and the entire surface of the ceiling is even and smooth.
Painting technology
Now let's look at how to paint a lining ceiling white or any other shade.
We carry out the work in the following sequence:
- If at the preliminary stage you did not remove pieces of furniture from the premises, then this needs to be done now. It is better to cover the floor with plastic film to protect against accidental ingress of paint.
- After this, we cover the top of the wall surface with masking tape to protect the finish from staining.
- Pour the paint into the tray after mixing it well in the jar. Using a brush, we paint hard-to-reach areas at the junction of the wall and ceiling surfaces, as well as the ceiling behind the water supply and heating risers.
- After this we work with a roller. Dip the tool into a tray of paint and roll the roller along the ribbed inclined surface of the tray to squeeze out excess paint.
- We begin to paint the ceiling with a roller. We paint the first layer in the direction perpendicular to the window opening in the room. We make forward-return movements with the tool, but in no case chaotic. If the surface is poorly painted in the seams between the boards, go over there with a narrow brush.
- After the first layer of paint has dried, we paint the ceiling again with a roller, but move the tool along the window. We also paint hard-to-reach areas with a brush.
What paint should I use to paint furniture white?
The type of paint you choose to paint your furniture white will determine the effect you will achieve. Paints differ in finish, coating and durability, for example.
The most popular solutions include specially designed paints: acrylic, phthalic or alkyd and chalk. Usually, in the case of a white shade, varnishes or stains are avoided, which give a natural effect. However, with their help you can get a very light shade of the material. If you are wondering how to paint wooden furniture white with a durable finish, paints are a better choice. Some of them keep the tree structure visible.
Preparing for aging furniture (antique painting)
Remove handles and other fittings from furniture. If the furniture is polished, remove the polish with a special compound from a hardware store, following all safety rules and instructions on the packaging.
If the furniture is painted, then the old paint should be sanded until smooth (if this does not contradict your main idea, see the effects of antique painting below). If the furniture has not been painted, then you need to remove with fine sandpaper the top layer of dirt, grease and everything else that has fallen onto the surface of the furniture over many years of use (use a respirator to protect your respiratory tract from dust and ventilate the room well).
All dust should be thoroughly vacuumed from the corners, then wipe the furniture with a damp cloth and let it dry. If the surface of the wood is too greasy, wash the furniture with soapy water and let it dry.
We don't need furniture putty. The idea of the project is precisely the effect of aging, (slight) wear of furniture, so we want to emphasize defects in the surface of the wood, and not disguise them with putty.
Chalk paints for the effect of aged furniture are produced in a wide range of fashionable blurred
To age wood and paint antique furniture, Arina recommends using special chalk paints for home creative projects (these are produced under the brands Autentico, Annie Sloan, etc.).
Chalk paints for the effect of aged furniture are produced in a wide range of fashionable blurred (as if faded with time) shades. Chalk paints can be used on a variety of surfaces (including clay and even plastic!), and no pre-treatment of the surface is required at all.
If you don't have chalk paint, use regular water-based matte residential wall and ceiling paint (NOT bathroom or kitchen paint!) from any hardware store. When using such paint, it is better to first prime the surface of the wood with a water-soluble primer (primer).
A universal (2 in 1) primer prevents natural oils from the wood from seeping onto the surface of the base paint and promotes better adhesion of the paint to the surface of the furniture. To paint antique furniture, it is better to use a paint roller rather than a brush. Before starting work, protect the surrounding area with plastic film; it is even better to work outside.
Painting wood white - what do you need to remember?
The basic answer to the question of how to paint old furniture white: slowly and carefully. This will give you an elegant effect similar to new furniture. If it is important to you how to paint black furniture white, you need to remember that you cannot neglect the preparation process. Thanks to this, you can achieve your goal of updating your furniture. Although the basic principles are always the same, it is necessary to remember that painting plywood furniture white is different from, for example, painting wenge furniture white. The selection of resources is also important. What paint you choose to paint your furniture will determine the overall result. Let's not forget about safety - take care of your own protective measures and prepare your workplace well.