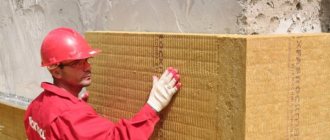
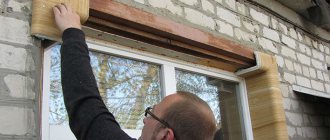
Installation of internal thermal insulation has a noticeable effect on reducing the volume of the room, so it is done in the absence of other options. The list of the most popular wall and ceiling insulation includes several types of panel extruded polystyrene foam.
The material has low thermal conductivity, is characterized by simple installation and durability, and its minimal weight does not create loads on the insulated structures.
The strength of such insulation is sufficient for applying plaster decor.
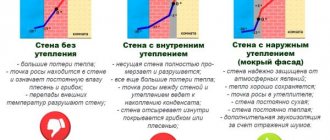
Insulation of walls outside and inside - which is better?
In most cases, when insulating walls, preference is given to the method of insulating from the outside.
Advantages of the method:
- protection of the load-bearing wall from external factors;
- ensuring the preservation of living space;
- no condensation;
- heat is retained well inside the room.
The inconvenience of insulation is that you have to adapt to weather conditions during work and this is the only nuance that should be taken into account with this method of insulation.
When insulating the walls of a room internally, the main negative indicator of the method is the reduction in living space.
In addition, other characteristics of the internal insulation method may influence the decision on the insulation method:
- risk of condensation inside the room;
- walls from the outside are exposed to atmospheric phenomena, leading to destruction.
The most suitable method of insulating walls is from the outside. But when they are made of carved timber, or the external design of the walls does not allow applying a thermal insulation layer, then the only way to insulate the walls is internal insulation.
Comparison of insulation methods
Penoplex - advantages and disadvantages
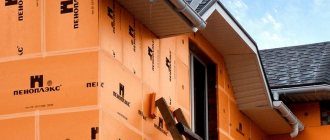
Penoplex is one of the most common insulation materials, which can be used to insulate roofs, walls, floors, balconies and even saunas.
This is extruded polystyrene foam, it is produced by compressing granules of the substance under thermal conditions, foaming, extruding using an extruder and forming the final shape.
Properties that characterize penoplex on the positive side are:
- low thermal conductivity;
- lightness of the material;
- environmental friendliness;
- waterproof;
- vapor tightness;
- good sound insulation properties;
- strength;
- can be installed in places with large temperature differences;
- durability.
Installing penoplex is quite simple: in addition to the convenience of the shape (slab), the material is perfectly cut with scissors, does not crumble or break.
Penoplex has few disadvantages:
- crumbles when exposed to sunlight, so the material should not be left unprotected for a long time;
- susceptible to rodents;
- quite expensive, so this aspect can also be considered a disadvantage, but the quality pays for its positive characteristics.
Despite the fact that the manufacturer characterizes penoplex as a non-flammable material, in practice the opposite has been experimentally proven.
Material Information
Penoplex is not afraid of liquids and effectively retains heat.
Penoplex is the same extruded polystyrene of a synthetic nature. This polymer insulation is produced in various thicknesses with the following properties:
- helps to effectively retain heat;
- has good mechanical strength and provides a strong base for plaster and putty;
- has high-quality sound insulation;
- does not absorb liquid;
- resists the emergence of harmful microorganisms.
The disadvantages of the material are its toxicity and rather high price, so it is unlikely that you will be able to save money on it.
Types of penoplex
According to technical characteristics and scope of application, penoplex is classified:
- penoplex “C” (wall). Application: insulation of basement floors, walls, partitions;
- penoplex "F" (foundation). Application: insulation of foundations, ground floors, basements;
- penoplex “K” (roof). Application: roofing of any structure;
- penoplex with the designation “Comfort”. Application: private buildings, loggias.
- penoplex 45. Density from 35 to 47 kg/m³. Application: insulation of industrial buildings, runways, railways and highways.
IMPORTANT!
Temperature changes (from freezing to thawing) do not affect the properties of the material, regardless of what type it is.
In addition, based on application indicators, you can decide on the purchase of one or another type of panel.
Internal insulation wall cake
A wall pie is a collection of materials laid in a certain order that are necessary to ensure a comfortable indoor environment.
The pie, the insulation for which is penoplex, consists of the following layers:
- interior wall;
- counter rack;
- waterproofing layer;
- OSB boards;
- penoplex;
- sheathing;
- vapor barrier film;
- finishing materials (plasterboard, OSB, putty).
wall pie
For insulating surfaces made of brick, foam blocks or concrete buildings, a pie with penoplex insulation looks a little different:
- interior wall;
- vapor barrier;
- adhesive solution;
- penoplex;
- reinforcing mesh;
- adhesive solution;
- finishing materials (plasterboard, putty).
NOTE!
When insulating from the inside, the likelihood of dew point formation, and, as a result, condensation, is high, so it is recommended to lay a vapor barrier layer.
There is no need for these layers of cake if the structure is additionally insulated from the outside.
How to calculate the thickness of penoplex for high-quality insulation
In order to accurately determine the required thickness of extruded polystyrene foam, you should take into account the material of the wall that needs to be insulated, its thickness, and the features of the finishing.
Thermal resistance is calculated. The data is determined based on SNiP readings for a specific region. So, for the central region this figure is close to 3.
The thermal resistance of each layer of the cake is different, so it is determined by adding the indicators of each layer and their thickness.
According to the formula, the thermal conductivity coefficient is determined as follows:
P=R/K, where R is the layer thickness, K is thermal conductivity.
Each material has its own thermal conductivity.
Calculation of penoplex thickness
After determining the values of the coefficients of all layers from the regional indicator (in our case it is equal to 3), the sum of all coefficients should be subtracted. This results in the thickness of the insulation layer.
IMPORTANT!
As a rule, penoplex up to 30 mm thick is used for internal thermal insulation.
The manufacturer recommends using “Wall” penoplex for interior finishing.
Tools and materials for work
To properly organize work with penoplex, you must have certain tools and materials. Some expensive tools can be rented.
To cover the walls with polystyrene in an apartment you will need:
- foam boards
- special glue;
- penetrating primer;
- plaster mixtures, mesh, putty;
- materials depending on finishing;
- dowels with dish-shaped caps to fix the slabs;
- perforator with a nozzle - a chisel;
- drill and glue mixer;
- notched spatulas and graters;
- knife;
- sandpaper;
- finishing tools.
If you have all the necessary materials and tools, you can safely begin insulating your walls with penoplex yourself.
Preparing the wall surface
Before installing the insulation, surfaces should be prepared. The nature of the work is determined by the surface:
- made of brick (foam blocks). If there was wallpaper or other decorative materials on the wall, they must be removed, the wall cleaned, the surface leveled and plastered. Before and after applying the plaster, treat with a deeply penetrating antifungal primer;
- from logs or timber. Seal the cracks with caulking and treat the wall with an antiseptic.
After the preparatory work, proceed with the installation of insulation.
Preparing the walls
Fastening methods
Surfaces made of different materials can be insulated in different ways. The process of covering a building includes several steps:
- surface preparation;
- insulation fastening;
- finishing.
In order to perform high-quality thermal insulation, penoplex should be installed correctly. First, the starting bar is screwed strictly horizontally. The bottom row of insulation is laid on it.
It is recommended to install a factory additional element (perforated, metal). You need to buy a strip that matches the width of the insulation and the required number of corners.
Before installing penoplex, a horizontal level is drawn along the walls of the building. The starting bar is screwed to the line. It holds the insulation and maintains the “geometry” of the installation.
Do you need vapor barrier and waterproofing under penoplex from the inside?
The question of the need for vapor barrier and waterproofing is of great importance, since the quality of the wall, the microclimate in the room, and the preservation of dryness and heat depend on the correct laying of the layers of the wall cake, especially when the insulation is carried out with waterproof and vapor-proof penoplex.
With internal insulation using extruded polystyrene foam, the need for a vapor barrier layer arises when thermal insulation is not provided externally.
For walls made of brick (concrete), a vapor barrier must be installed. But if the house is made of wood or other “breathing” materials, except beams, then this is not necessary.
If penoplex is installed using the frame method (in a timber house), that is, a sheathing is installed, then in this case both a waterproofing layer and a vapor barrier should be installed.
Vapor barrier of walls
When installing the vapor barrier layer, it should be installed on the correct side . It must be secured to the posts with a stapler, and the overlap must be insulated with tape.
In frame houses, a vapor barrier under penoplex is installed on the sheathing or studs of the wall frame. If waterproofing is installed on a timber house, it must be secured to the counter-battens with overlapping brackets. Insulate joints with tape. Then the OSB board is attached and the installation of sheathing and insulation is carried out.
Installation of sheathing
For the sheathing, beams with a cross section of 5x5 cm are taken, and it should be taken into account that the width of the board should be equal to the width of the slab.
The lower profile is pre-attached. The bars are nailed with self-tapping screws.
The vertical posts are fastened in such a way that the width of the slab fits tightly into the opening between the beams.
In this step, the sheathing is installed around the entire perimeter of the wall.
It is recommended to make the lathing from wood, but you can also use a metal profile.
All elements of wooden sheathing should be treated with an antiseptic to prevent the formation of mold and mildew.
After installing the sheathing, begin installing the insulation.
Methods for attaching insulation to the wall
Penoplex can be attached to the wall in several ways:
- on the dowel . Fastener with a large head. Used to increase the adhesion of the insulation to the wall, especially if installation of additional materials on the insulation is provided;
- on glue . They are applied pointwise to the slabs and glued to the wall treated with an adhesive composition. You should carefully choose the adhesive solution, as some substances destroy the insulation;
- on polyurethane foam . Foam can be an additional fastening of panels when fastening them with dowels;
- self-tapping screws Not a very suitable method, since when they are located inside the wall, cold bridges are formed, which reduces the thermal insulation properties of the material.
Fastening with dowels
The most common method of fastening is installation with an adhesive composition and fastening with dowels , which ensures the greatest adhesion and fastening strength.
Carrying out insulation work with your own hands
- The surface to be insulated must be pre-treated with a deeply penetrating primer. This will remove excess moisture, strengthen the surface and “beat down” dust, which can complicate the process.
- The adhesive solution should not be prepared in advance. The mixture is mixed in strict accordance with the manufacturer's instructions immediately before applying insulation to the slab.
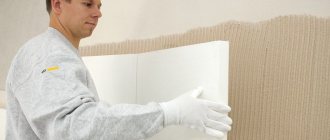
- The glue is leveled with a special spatula with teeth, the insulation is laid on the wall surface with a force that allows it to be pressed tightly. Leveling is done by level.
- The drying process lasts about 12 hours, after which they begin to install additional fasteners for the foam - umbrella-type dowels. Their length should slightly exceed the thickness of the slab itself. Installation of dowels is carried out in pre-drilled holes, which in their parameters correspond to the dimensions of the fastening elements.
- A “fungus” is mounted into the hole slightly below the surface of the insulation, into which a nail made of metal or plastic is then placed. The second option is preferable because the plastic does not corrode.
- The fixed slabs are covered with a thin layer of cement-based plaster or an adhesive mixture, into which a special mesh is embedded. Another option is to secure it with dowels directly to the insulation and plaster it afterwards.
- As a finishing touch, you can apply any type of decorative plaster, wallpaper or lay tiles.
Thermal insulation of load-bearing concrete walls or partitions from the inside should be carried out only if such work cannot be carried out from the outside. A layer of insulation will reduce the usable living space. But if mold has appeared in the corners of the house and there is a smell of dampness, especially in the basement or attic, this may be a good reason to insulate the home in this way.
How to fix insulation to the wall?
Attaching penoplex to the wall surface can be done in different ways:
- Dowels are a type of fastener with an impressive head. Promotes better adhesion of the slab to the wall surface. This is especially true if other materials will be installed on top of the insulation;
- Glue - applied to the insulation in spots, on the wall - on a larger scale. The choice of adhesive solution should be taken seriously; there are options that contribute to the destruction of the insulation. Therefore, the choice should be made on those that are intended specifically for penoplex.
- Polyurethane foam - the substance will additionally secure panels mounted on dowels.
- Self-tapping screws - this method is not very suitable, since it contributes to the formation of “cold bridges” in the wall, thus reducing the insulating properties of the material used.
The most popular is glue-based fastening, with additional reinforcement using dowels. This mount has excellent adhesion and a high degree of strength.
The process of applying plaster and finishing work
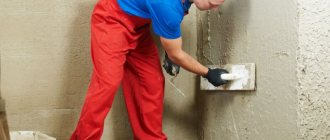
After the insulation boards are fixed, you need to thoroughly level the surface of the walls, which will then be covered with a layer of final finishing. The easiest way to plaster is penoplex.
The work is carried out in the following order:
- A special mesh made of fiberglass is attached over the insulation boards.
- A layer of plaster of a few millimeters is applied to it to level the wall.
- After the first layer has dried, the plaster is reapplied in an amount sufficient to cover the rough structure of the insulation.
- Plaster is applied using a wide spatula. It is better to do this work right away, since with gradual application, interlayer seams may appear that will be difficult to hide.
- Then the wall is floated, after which it is puttied for applying paint or another type of finish.
Penoplex wall insulation technology
Penoplex should be attached to the prepared wall in stages. Installation is carried out from the bottom corner:
- before applying the adhesive solution to the insulation, you should walk over its surface with a needle roller to ensure its roughness;
- if a glue plus dowels fastening method is provided, then holes should be made for the dowels and on the material;
- apply a layer of glue to the wall;
- then glue is applied pointwise to the panel (in the center and in the corners) or with a snake;
- to prevent the formation of cold paths, the holes for the dowels should be sealed with polyurethane foam;
- the panel is tightly applied to the wall, sealant is applied to the sections to connect with the next sheet;
- secured with dowels;
- sheets are stacked in a cross pattern;
- the joints of the panels are sealed with foam, and then, after drying, the excess is cut off;
- Plasterboard sheathing is carried out.
If large gaps form at the joints, they can be sealed with pieces of material.
In this case, polyurethane foam can cause the formation of cracks, so its use is not recommended.
Fastening panels
Application of special glue
Cross fastening
Thus, it is possible to insulate the house from the inside efficiently and practically without loss of space. You just need to take into account the structural features and nuances of installation of extruded polystyrene foam.
General information
Previously, foam plastic and glass wool were used for such work. From the point of view of reliability, moisture resistance and heat-saving properties, there are no complaints about these materials. But glass wool contains harmful substances that, if inhaled, can cause an allergic reaction or poisoning. Extruded polystyrene foam developed in Russia is safe for health and easy to use.
There are products from different manufacturers on the market.
Preference should be given to brands whose names are associated with high-quality and reliable building materials.
The influence of production technology on harmful properties
During the creation process, expanded polystyrene is subjected to melting and chemical treatment. It acquires a dense, solid structure and loses its negative properties, i.e. stops releasing any harmful fumes into the air.
Unlike glass wool and low-grade foam, the material obtained as a result of extrusion is environmentally friendly and can be used in rooms where small children or allergy sufferers live.
