Mixtures for manual and machine use
Gypsum plasters are also distinguished by the method of their application. According to this criterion, two types of compositions are classified: for manual and machine application.
Mixtures of the first type are distinguished by a large number of chemical additives, since their main task is to provide optimal time for manual production of the batch. Adding chemicals to the composition allows you to increase the time for the solution to start setting to 40-60 minutes. Thus, in just 4-5 hours a full cycle of work on the external or internal finishing of buildings and premises can be completed.
Gypsum facade plaster - an environmentally friendly coating for a residential building
Gypsum plasters intended for machine application have different tasks. These compositions should have a longer setting period (from 1.5 to 2 hours), since the master needs to process a significant amount of surfaces during this time. The work is carried out in two stages: applying a plaster mixture to the wall with a special gun and leveling this layer. The long period of setting of the composition ensures that the master will have time to complete the full cycle of tasks required by the technology.
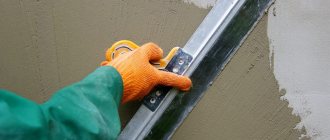
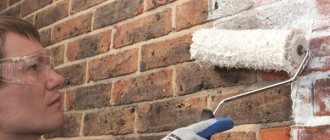
Plastering walls by machine
Mechanical plaster
The gypsum composition is fed into the gun through hoses connected to a specialized machine for preparing wet plaster from a dry mixture. For better mixing and to ensure unimpeded passage of the solution through the hose system, fractionated sand (crushed to particles of a certain cross-section) is added to the mixture.
Clearing the form
After the completed procedures, when the tiles are completely ready, you should clean the work area yourself and clean the mold. To do this, you can use a dry cloth or sponge. Carefully wipe all corners and place the mold in a dry, dark place. It is not allowed for the uniform to be in sub-zero temperatures or in the sun.
If there are white traces left in the form after the tiles, then you can pour concrete into it and leave it to harden. When the concrete pebble is removed, all the white residue is left behind.
The process of removing finished gypsum tiles from the mold. Following the sequence, you can make individual gypsum tiles, which will subsequently decorate the interior of the house and create the desired atmosphere. Creating tiles is a simple process. Making a mold yourself sometimes saves money, because silicone with additives for the mold costs significantly less than the mold itself. Installing gypsum tiles on the wall will be quick and simple. The final work will delight not only the owners of the house, but also the guests. But, if there is a desire to produce a certain decorative stone, then the form is purchased on the market.
Plastering work in winter
Is it really possible to plaster a wall in winter? Those with central heating are in luck. But what if you need to plaster in an unheated room or on the street? We answer questions that are popular among beginners.
For conventional mixtures, the optimal temperatures are +18 – +20°C. Therefore, if it is possible to warm up the room, this is the best option, since it will be possible not only to use conventional compounds, but also to maintain optimal conditions both for setting the composition and for gaining strength. A more difficult case is facade plastering.
Rotgypsum standard gypsum plaster
Gypsum plaster dry mixture Rotgips-Standard is used for high-quality manual leveling of ceilings and walls of various surfaces - plastered bases, concrete, gas and foam concrete, brick. It can also be used to prepare the surface for subsequent finishing with materials such as putty compounds, wallpapering, laying ceramic tiles, and paneling. It is used for rooms with normal humidity during interior decoration, including bathrooms and kitchens of residential buildings.
The plaster mixture is plastic and has high adhesion. The thickness of the applied layer can vary from 8 to 30 mm. The prepared solution can be used within 40 minutes. No additional puttying is required. The main purpose of the mixture is to roughly level the walls for tiles and wallpaper. According to environmental protection and safety requirements, the plaster mixture does not release harmful chemical substances into the environment. Based on the effective specific activity of radionuclides, it belongs to the first class.
Properties of the Rotgips-Standard plaster mixture
Preparing the surface for plastering with Rotgips-Standard mixture
The surface must be dry and durable, free from remnants of masonry mortar, paint, and dust. Steel parts must be treated with anti-corrosion materials. If necessary, it is possible to install beacon profiles. For highly absorbent surfaces, pre-treatment with a primer is required.
What is better to choose - gypsum or cement variety?
Whether to choose a gypsum or cement variety depends on the operating conditions of the coating:
- Cement-based mixtures are used where maximum strength and good resistance to humidity and temperature changes are needed. This includes facade work, wall cladding in bathrooms and catering rooms. The cement variety has less elasticity, but greater resistance to mechanical damage. Indoors it is more often used for rough leveling, followed by the application of more plastic materials.
- The gypsum version is hygroscopic, even with the moisture-resistant characteristics declared by the manufacturer. It is best used inside rooms with normal conditions. These are living rooms in houses, office premises, kindergartens, schools and hospitals. The mixture is easier to apply and dries faster than cement. The gypsum variety allows the walls to “breathe” and remove excess moisture, which creates a healthy microclimate in the room.
When properly mixed and applied, the plaster meets all the stated characteristics on the packaging. It is easy to install and creates a perfectly flat base for wallpapering or painting.
Cement variety
Gypsum plaster is a universal material. You can carry out the entire range of work on leveling walls and ceilings with your own hands, without involving a hired team. The mixture allows you to create perfectly smooth walls or give them any texture, color and completely change the interior design.
Share in the comments if you have ever worked with gypsum and what impressions you had.
Features of gypsum plaster
Modern plaster mixtures come in two types: cement-based and gypsum-based. The former are traditionally used for external and internal decoration of non-residential and residential premises. But with the advent of gypsum mixtures, priority was given to them. The reason is the numerous advantages of these materials.
The only reason for using cement-sand compositions is a high level of air humidity. The fact is that gypsum material is hygroscopic, and under the influence of moisture it gradually collapses. Special additives are added to mixtures intended for facade work to increase the moisture resistance of gypsum. But the use of such plaster has its own nuances.
If you plan to decorate the facade with artificial stone or porcelain stoneware, you cannot use gypsum composition as a binder. To lay this finishing material, only cement-based solutions are used.
Technical parameters of Rotgypsum plaster
Rotgips plaster has a certificate of compliance with Russian standards, and is produced in accordance with TU 5745-003-48420415-2015. The technical characteristics of Rotgips plaster allow it to be used for work in dry and damp rooms, when using special primers. Dry mixture Rotgips is intended for manual plastering of ceilings and walls made of various materials.
It has good adhesion to materials such as concrete, aerated concrete, brick, as well as previously plastered surfaces that have sufficient strength. The material is economical - the consumption of Rotgypsum plaster is approximately 8 kg per square meter with a thickness of 10 mm. Consumption per 1 m² depends on the size of the unevenness being sealed. Plastering walls with Rotgypsum over beacons in several layers allows you to eliminate fairly large irregularities.
The beginning of setting from the moment of mixing is about an hour. This time is enough for a professional plasterer to produce a whole bag of the mixture - the dry mixture is packaged in 30 kg bags.
Tools and materials for the production of gypsum tiles
To produce gypsum tiles with your own hands, you will need a room in which there will be an optimal air temperature (+15, +20 degrees), as well as minimal humidity (dry room). To produce tiles at home you need:
- Form. It can be silicone or polyurethane.
- Ingredients for gypsum mixture.
- Perfectly flat table. This should be done using a building level.
- Plastic container for mixing ingredients.
- Special paint of the desired tile color.
- Acrylic based varnish, matt.
- Brush. It can be a small construction one for painting the entire surface of the tile. Art brush size 3 or 4 for fine sketching.
- An ordinary spatula.
Materials you should purchase are G10 gypsum and slaked lime or citric acid.
The benefits of making tiles yourself
Gypsum tiles can be used to finish:
- Slopes. After installing the windows, during repair work, the slopes on plasterboard windows are decorated with gypsum tiles.
- Fireplace. A plasterboard fireplace is covered with gypsum tiles to give naturalness and originality.
- A flight of plasterboard stairs is lined with gypsum tiles to create the interior of the house.
- Doorways are decorated with gypsum tiles.
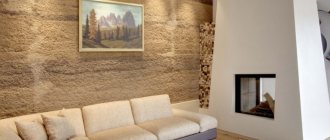
- Walls in a room, in a living room, in a hall. Laying gypsum tiles under the brick, highlighting significant places, for example, the wall on which the TV is installed.
- Columns and niches made of plasterboard. Finishing occurs to accent the background of the overall interior.
Benefits of making tiles yourself:
- to make tiles you will not need a lot of space, as well as drywall tools;
- it is possible to produce tiles without using a vibrating table;
- The manufacturing technique is easy. It will be understood by a person making tiles for the first time;
- painting the tiles is done independently;
- All materials for tiles do not have a high cost, which makes the manufacturing process enjoyable.
Rotgypsum plastering technology
The technology for carrying out plastering work using a solution prepared from the dry Rotgypsum plaster mixture does not differ from the work performed with other gypsum-based materials. To create favorable conditions for work, it is necessary to provide a solid foundation. To do this, before applying the plaster, the surface to be treated must be cleaned, removing all spilled areas. After this, treat with a primer to remove dust and improve adhesion.
There are some practical techniques for plastering with Rotgypsum that allow you to achieve excellent results:
- Application of a plaster layer of increased thickness. The minimum thickness of the plaster layer created by Rotgypsum is 6 mm. Maximum thickness – up to 50 mm. If it is necessary to apply thicker layers, the material is applied in several stages. To apply the next layer, it is necessary to make notches on the previous layer to create better adhesion. This can be done using a comb - a notched spatula. Before applying the second layer, the surface should also be coated with a primer.
- Possibility of using plaster for gluing wallpaper without additional putty. Most often, the surface leveled with plaster is puttied with a thin layer of putty before applying decorative coatings. But when plastered with Rotgypsum, you can prepare the walls for wallpapering and painting without additional puttying. This allows you to significantly save on the purchase of materials - you do not need to purchase finishing putty, as well as on payment for work.
To do this, 20 minutes after trimming the irregularities remaining from the rule, moisten the surface generously with water and rub it in with a sponge grater. After this, finally smooth the resulting plaster milk using a metal trowel. The resulting surface is sufficiently even for gluing wallpaper without applying finishing putty.
- Painting over the plaster layer. If painting is chosen as a decorative coating, then the smoothed surface obtained in the manner described above is once again moistened with a large amount of water, and again smoothed with a metal spatula - trowel. This method allows you to obtain a perfectly smooth, glossy surface suitable for high-quality painting.
- Using plaster as a decorative coating. In addition to creating a basis for the subsequent application of decorative coatings, Rotgips plaster itself can also be successfully used as a decorative coating - creating a textured textured surface. To do this, before the surface hardens, it must be processed using special tools that create texture.
Is it worth choosing Rotgyps?
The choice of material for plastering work depends on the preferences of the master. You should not rely on reviews from other users, because they are both positive and negative. Some craftsmen complain that it is necessary to eliminate cracks using Rotgypsum. After plastering with Rotgypsum, surface microcracks may actually occur. But they are not “living” - they do not penetrate into the depth of the layer and do not affect the strength of the plaster layer. For gluing tiles and wallpaper, the presence of microcracks does not affect the quality of finishing work.
"Rotgypsum" (plaster). Description, types, application
Technology of plastering walls with gypsum plaster: 8 stages
The simplicity of the process allows you to cover the surfaces of the walls with the solution yourself, but you need to know the stages of preparation and follow the technology, which will ensure a high-quality coating.
Working with gypsum plaster does not take much time and is not labor intensive, but the process must be carried out in accordance with building regulations (SNiP), which regulate application methods.
Types of coatings that are made using different types of mixtures:
- Rough, or starting finishing. Apply to walls made of brick, block or concrete before finishing. At the maximum layer thickness declared by the manufacturer, a plaster mesh is used. Permissible deviations from beacons are 3-5 mm per 1 sq. m.
- The finish is of average quality. A mixture with fine-grained filler is used. Apply to walls and ceilings before decorative cladding and putty. Permissible horizontal and vertical deviations are 2-3 mm per 1 sq. m.
- High quality finish. Apply to prepared surfaces with a composition made from a powder mixture. In this case, no puttying is required; you can start painting or wallpapering. Permissible deviations are 1-2 mm per 1 square. m.
Depending on the required quality of cladding, plaster is selected that will meet the requirements. The installation steps, regardless of the type of plaster used, remain the same.
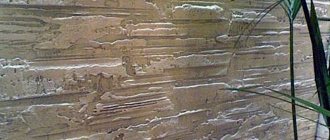
Depending on the type of finishing coating, the finish can be rough, medium quality or high quality
Stage 1. Surface preparation
This step is necessary to prevent peeling and cracking during drying, which increases the service life of the coating.
Procedure:
- Cleaning the walls and ceiling from the flaking old layer, if there was one. It is necessary to clean all areas that have peeling elements.
- Filling large chips and cracks with polyurethane foam, covering with cement mortar or starting plaster and drying.
If installation is carried out on new walls, they must be cleaned of dirt and grease stains and dusted. To do this, the surface is washed with water and dried.
Stage 2. Priming
Priming is a mandatory process required before applying gypsum plaster to the wall.
It is carried out in 1-2 passes, depending on the porosity and water absorption of the wall. If the walls are made of brick, concrete, or there is old plaster that holds up well, then one treatment is enough. For foam blocks and other porous substrates, it is necessary to do priming in two passes, with intermediate drying.
Priming the walls
Stage 3. Installation of beacons
To install the system, use a building level to achieve a perfectly flat surface. You can use a wooden strip as beacons:
- At a distance of 10-20 cm from the corners, a rail is installed along the height of the wall. It is recommended to fix the beacons along the length of the wall in increments of 1.0-1.5 m.
- The upper edge of the lath will determine the plane of the future plaster.
As beacons, you can use self-tapping screws onto which the cord is pulled:
- Holes are drilled and self-tapping screws are screwed in at intervals of 50-70 cm, the heads of which will be the top point of the covering.
- A thin cord, fishing line or rope is stretched between the fastening elements.
- The stretched cord determines the thickness of the finish.
Installation of beacons on walls
Stage 4. Applying the solution
Novice craftsmen working with cement plasters do not know how to properly plaster with gypsum compounds and make technical mistakes that have to be corrected with putty.
Laying can be done in two ways, which are determined by the thickness of the coating:
- Typically, laying on the wall is carried out in one go, if there is no need for complete leveling, and the differences in unevenness do not exceed 50 mm.
- If the walls have severe pits and bulges, the maximum layer is required. Then the installation is carried out in two passes, this is rough and finishing cladding.
The process of applying the gypsum variety:
- Begin to apply plaster from below the corner of the wall.
- If laying is carried out along beacons with a layer thickness of 10 mm or more, the plaster is applied with a trowel by throwing it onto the base at equal intervals.
- If the thickness of the coating does not exceed 10 mm and a beaconless method of application is used, it is spread using a spatula or “falcon” with leveling the surface.
The lifespan of the plaster mixture is short, so it is necessary to dilute enough solution to have time to apply it to the surface, smooth it and trim it. Otherwise, when the mixture dries, the unevenness will have to be sanded mechanically.
Application with a trowel
Stage 5. Alignment
Leveling the walls with gypsum plaster is done using an h-shaped rule and a float, in one go, until the plaster begins to dry:
- The tool is carried from bottom to top along the beacons, avoiding excessive pressure.
- Next, obvious irregularities are trimmed using the trapezoidal rule.
- The result should be a smooth surface without bulges or depressions.
Alignment by rule
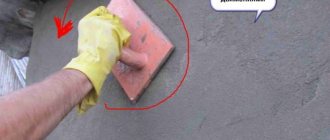
Stage 6. Grouting and glossing
Grouting using the dry or wet method is carried out to remove minor defects. After this stage, no puttying is required.
The glossing method is carried out with a metal or plastic float immediately after laying the gypsum plaster, while it is still wet. The tool is moistened with water or primer and passed over the surface with soft circular movements.
Grouting gypsum plaster with your own hands is carried out using a dried mixture in the same way as glossing, but using this method creates more dust and requires constant moistening of the walls and ceiling.
Grout
Stage 7. Drying
The drying process of the coating should occur under natural conditions:
- The optimal drying temperature for the coating is +5-25 degrees.
- There should be no drafts, temperature changes or humidity in the room.
- In winter, after plastering the walls, you need to close the doors tightly and prevent air flow into the room, while the drying time can increase to 14 days.
In the summer, it is necessary to prevent sunlight from reaching the surface and after 3-7 days the wall will be ready for decorative finishing.
Stage 8. Painting
Any paint based on acrylic, oil, glue and latex will do. The closest type to gypsum in terms of internal characteristics is water-based paint.
First you need to apply the primer in 2-3 passes with intermediate drying. This is how dust is removed, which increases the adhesion of paint to plaster.
When performing the finishing coating, you need to measure the humidity of the wall; it should not exceed 1%.
Primer before painting
Composition and types of gypsum plaster
Mixtures of this type are based on an environmentally friendly binder – gypsum. In addition to it, the composition includes various fillers and modifying additives that provide the plaster with plasticity and high adhesion (adhesion) to any surface, smooth or rough.
Water-soluble polymers necessary to improve the performance characteristics of the coating come to the Russian market from Europe. Water-soluble pigments included in mixtures for facade work, most often produced domestically. Ground sand and polymers are used as filler.
Depending on the cross-section of the granules of these ingredients, three types of gypsum-based plaster mixtures are classified:
- fine-grained;
- medium grain;
- coarse-grained.
Types of gypsum plaster
Fine-grained mixtures contain crushed sand, so this plaster is more fragile. This determines the rule for its application: the layer thickness should not exceed 8 mm. Otherwise, after drying, cracks may appear on the wall.
For interior work, medium-grain gypsum plaster is most in demand. It can be applied in a layer whose thickness does not exceed 5 cm. Coarse-grained and medium-grained mixtures are used for finishing facades. Compositions with coarse filler can be applied in a layer up to 8 cm thick.
Types of gypsum material
The products are manufactured in three types, which determines the permissible thickness and smoothness of the coating, as well as the scope of application.
Types of mixtures and their applications:
- Coarse-grained is used as a starting plaster. It is used for leveling large defects on walls and ceilings, potholes on slopes of windows and doors, and as a base for finishing. The permissible thickness for applying gypsum plaster is 80 mm.
- Medium-grained is used for grouting gypsum board joints and correcting medium-sized defects. Can be applied up to 50 mm thick.
- Fine-grained is used for finishing cladding after starting or rough leveling. Apply with a thickness of 5-10 mm. When applied, it forms a smooth and even surface.
Coarse gypsum mixture
Plaster is also classified according to the installation method:
- mechanical spraying using special stations and pneumatic devices
- for manual application.
When plastering walls with a maximum permissible thickness of 50-80 mm, a decorative or finishing coating is applied to the reinforcing construction mesh. This will prevent cracking and peeling of the plaster.
Which one is better to choose?
Depending on the purpose of use, it is necessary to pay attention to the composition of the plaster:
- To repair large chips and potholes, large horizontal differences in walls, it is necessary to purchase compounds with coarse filler.
- When eliminating cracks and small wall cladding, a medium-grain structure is required.
- The final cladding is carried out with solutions containing the finest fraction of filler, then the surface is smooth and does not require grouting or puttying.
Features of various manufacturers
When choosing a manufacturer, you should be based on the mechanical properties of the plaster and the conditions of its use.
What you should pay attention to when choosing:
- The material must meet the requirements for application conditions.
- Study the composition: if the presence of plasticizers exceeds 30% of the total volume of dry matter, it is plaster for machine laying.
- For interior work under normal operating conditions, manufacturers recommend using universal gypsum plasters.
- Cost may also influence your choice. Plasters from imported manufacturers can cost 50% more than domestic ones, but the stated technical characteristics will be the same.
Most imported and domestic manufacturers produce products that meet the declared parameters.
Selection rules
The cost of production of domestic enterprises is significantly lower than that of foreign ones. But this does not mean that gypsum plaster mixtures from Russian manufacturers are of low quality. Most often, there is not much difference in the technical and operational characteristics of products from different companies. There is a slight difference in the compositions and percentages of ingredients.
How to choose high-quality gypsum plaster
The quality of gypsum plaster is determined by the amount of additives it contains. If this figure exceeds 30% of the total volume of the mixture, manual application will be difficult. The reason is that a significant amount of additives reduces the adhesion of the plaster, so during the application process it will slide off the wall. Such mixtures are best used for work using special machines. In this case, the plaster will be “driven” into the surface of the wall, thanks to the pressure of the jet from the gun.
Features of using gypsum plaster for facade work
Gypsum has a high coefficient of water absorption, so compositions based on it will inevitably be hygroscopic. Thanks to polymer additives and mineral plasticizers, it was possible to increase the level of moisture resistance and frost resistance of plaster mixtures. However, this is not enough for a complete finishing of facades using gypsum compounds. To use these materials, additional protection of the walls from moisture is required.
Gypsum plaster can be used for exterior work only as an intermediate layer, provided that the facing layer has good vapor permeability. For this reason, despite all the advantages of gypsum compositions, they are rarely used for finishing facades.
Bolars - facade plaster
Mixtures for external use, in addition to the main binder, must include additives such as gypsum polymer or GPCV (gypsum-cement-pozzolanic binder). In this case, the gypsum plaster will acquire properties that ensure proper resistance to adverse environmental influences. But all manufacturers of gypsum-based compositions warn that their products are intended only for interior decoration. This is another reason for uncertainty about the suitability of gypsum plaster for facade work. However, for regions with a dry climate, facade mixtures can be used without fear.
Founds gypswell
Use for outdoor use and wet areas
Manufacturers clearly state the conditions of use on the packaging of the dry mixture. The gypsum variety is hygroscopic, and it is not advisable to use it under conditions of temperature changes and high humidity. The material is rarely used for leveling facades; this requires high costs for protection from the influence of external factors.
Gypsum plaster in the bathroom requires preliminary application of a deep penetration primer in 3-5 passes. The cost and labor intensity of the process is unprofitable.
It is allowed to use gypsum plaster in rooms with a short-term increase in humidity up to 75%. In this case, the composition should contain antifungal drugs and a high content of plasticizers.
Manufacturers produce moisture-resistant plaster, which is recommended for use in kitchens, dining rooms and toilets, without combining them with bathtubs and showers.
Also, some foreign manufacturers offer gypsum plaster for outdoor use, but the service life of the coating has not been determined. We do not recommend experimenting.
We work with rotgypsum blogs poremontu.ru
Hello, dear repairmen!
Today I want to share my experience of leveling ceilings and walls with dry gypsum mixture. There are many of them on the market, they are represented by different brands. These are Knauf, Ekogips, Rotband, Rotgips and many similar brands.
I specifically used Rotgips; in my opinion, this brand has already become popular.
When I did the plaster, its price was 270 rubles. per bag, the price of the finished solution was about 5 rubles. Now the price has risen to 290, but I still consider it optimal for primary processing.
I noticed that if the walls are being finished with wallpaper, then with the right approach, finishing putty is not required. Just 15-20 minutes after application, smooth it with a hard façade spatula, preferably made of stainless steel, soaked in water. The surface is very good.
But you still can’t do without sanding. Sanding by hand is difficult; I use a vibration-type surface sander with a dust collector. Very comfortably.
If the wall is to be painted, then as a finishing putty I use oil putty with the addition of acrylic. If the rotgypsum is applied correctly, there is practically no need to sand after applying the finishing sanding, if only to slightly knock down the wave somewhere.
You can plaster directly onto the brick with rotgypsum, this is what I did on the loggia, I decided to make it into the “living part” of the apartment. I installed electricity and installed a plastic stained glass window. The result was, although not large, a very neat room. In summer it is very pleasant to work with a laptop, because the view from the window is simply inspiring.
Rotgypsum is very convenient for leveling ceilings, I mean the depressions between the slabs. Lightweight, durable, with good adhesion. A hundred points will be given to sand mixtures. When I was leveling the slabs in my apartment, I first tried the sand mixture, but then gave up. Throwing ceilings is not an easy task, but here you don’t need to throw anything, you carefully apply it with a spatula in several layers. There is practically no loss of material.
When working with gypsum plaster, you need to prepare the correct amount of solution, because after about twenty minutes, it begins to “plasticize.” It is highly undesirable to add water, since the chemical reaction has already taken place.
If I have such an opportunity, there is always some reserve for this case. For example, an unwalled strobe under an electrical wire. And so, when plastering surfaces, I “automatically” seal up grooves, or any holes under pipes, etc.
I find this material very convenient; I only use it to repair walls.
Quality
A lot depends on the quality of this type of plaster. Quality, first of all, affects the performance of the plaster. The consumption of the mixture per square meter even depends on it. The duration and ease of work, as well as the quality of the surface itself, depend on the quality. Only good quality will ensure the strength and durability of the facade coating.
First of all, the quality depends on the gypsum itself and its chemical additives. And if the gypsum is more or less the same, then each manufacturer’s additives are different.
Some may be domestic, others are imported from abroad. When choosing, you should pay attention to this and purchase products only from proven and well-established manufacturers.
Then the operation after plastering will be long. If you have any doubts when purchasing, it is better to play it safe.
You can take a small package of gypsum plaster from a certain manufacturer and try it out. If you like it and it suits all the parameters, then you can use the mixture for the entire scope of work.
There are manufacturers who are constantly testing newer mixtures and recommending them. They understand that a lot depends on the quality of gypsum plaster, so they try to create a composition that will be the best.
The finished surface and the complexity of the plastering work depend on it. When choosing plaster, you should pay attention to its quality and shelf life. This will protect you from problems in further work with it and will ensure smooth and beautiful walls without flaws.
It’s better not to save money and pay attention to the composition. This will make it easier to understand the quality, and it will become clear what to expect from working with this mixture.
Application
Although gypsum types of plaster are most often used for interior finishing work, there is also facade plaster. Modern developments in the construction field with materials and tools have made it possible to create more durable and high-quality types of gypsum plaster.
They are suitable for not too humid climatic conditions and make the facade of the house original. They are quite durable, and their use does not cause the coating to quickly fall off or swell from moisture.
Gypsum plaster can be applied in a thick layer. This allows you to hide most of the wall's flaws: cracks, chips and even small holes. The surface level will be leveled, the wall will be perfect and ready for final decorative finishing.
All walls of the building do not have to be plastered with gypsum plaster. These could be some parts of the facade to give a textured pattern or highlight.
Plastering is often combined with other types of facade finishing. This can be stone, decorative brick, tile, etc. This allows you to focus on some part of the facade, highlight it, or completely transform the appearance of the building.
Working with gypsum plaster is quite simple. It is elastic, lays flat, and almost even a beginner can handle it.
Before working with it, you need to make sure that the base is dry and there are no substances that can reduce the “tenacity” of the plaster. The optimal temperature for work is from 5 to 30°.
You must always remember that the mixture must be well mixed (without lumps) and sufficiently viscous. Gypsum plaster should be used within about an hour after its preparation. Therefore, you should not mix a huge amount of the mixture at once.
Ready gypsum plaster is diluted with water. The amount of mixture and water is indicated on the package. If the solution turns out to be thick, then just add a little water and bring it to the desired consistency.
When the solution turns out to be too liquid, you can add a mixture or simply put a regular brick into the liquid mixture. In a few minutes it will easily absorb excess moisture.