Paint chandelier shades
Contents
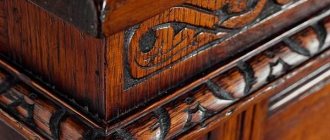
Your old chandelier has served you faithfully for many years, but has long since lost its presentability, become unfashionable, the paint on it has become dilapidated, has it ceased to please your eye? Of course, you can buy a new lamp, but it is not a fact that you will be completely satisfied with it in terms of price and external design. The quality of modern lighting devices is often disappointing - they are much inferior to the old technology that has been proven over the years. In such a situation, you can try to update the lamp, for example, you can paint the shades for the chandelier yourself. How to do this correctly, what tools and materials to use will be described in this article.
Updating an old chandelier with paint
What options are there for updating a chandelier? There are many ways, you can paint or update lampshades, create a new or refresh an old lampshade, make something completely new from an old lamp. Painting means updating the base color, painting glass, plastic or ceramic shades.
Important! It is better to paint in several layers and fix the finished work with varnish.
Benefits of coloring:
- You can choose any shade, taking into account individual preferences and tastes, the color scheme that prevails in the existing interior.
- As soon as you get bored with the new color, you can easily repaint the lampshades again.
- If the result does not suit you, then you can simply throw away the old chandelier. But this is already a last resort.
What materials are needed for painting?
Today, there are many options for coloring compositions that can be used to bring your idea to life.
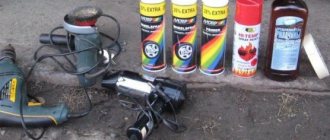
You will need the following materials and equipment for work:
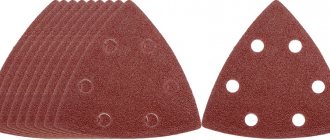
- Primer. You can use an acrylic primer or a primer specifically designed for metal surfaces.
- Aerosol acrylic paints. The choice of shades and colors of these compositions is simply huge; you can find even the most unusual variation.
- Transparent acrylic varnish. It allows you to protect the paint from various damages, gives the new color depth, and the coating will begin to shimmer and shine beautifully.
- Gloves and respirator. Their use is mandatory when performing such procedures, because your health is at stake.
- Solvent. You will need it to degrease the surface of the lampshades before painting.
- Clean dry cotton rags or cloth napkins.
- Screwdrivers. Useful for removing all removable parts from the chandelier.
How to prepare a chandelier for painting?
Of course, before you paint the chandelier shades with your own hands, they need to be prepared. It is better to organize the workplace outdoors.
Do the following:
- Hang the chandelier on some kind of hook, or stretch a rope - you can use a children's wall bars, the ceiling in a gazebo, or a branch.
- Cover the floor directly below the work area with something to prevent it from getting stained by drops of paint.
- Remove all light bulbs and removable parts from your chandelier. If any element that you do not plan to paint cannot be removed, then simply cover it with plastic film or masking tape.
- Clean the chandelier carefully, remove cobwebs, dust, dirt, and any contaminants so that they do not remain forever under the paint layer. First, wipe it with a dry cloth. Wash parts that require more thorough cleaning with a damp cloth and mild detergent. Let it dry completely.
- The entire surface should be degreased, for example, with kerosene or acetone.
Painting a chandelier
Painting a chandelier from a spray can is actually very easy, the main thing is to strictly follow the recommendations of specialists and instructions.
Perform staining according to this scheme:
- To get an ideal result, immediately before applying paint, treat the surface with an aerosol primer. It is recommended to apply it from top to bottom with broad strokes directly from the can. It is better to apply several thin layers.
Important! The can must be kept at a distance of 20 cm from the structure, otherwise the primer will begin to leak. If this happens, first let it dry completely, then sand off the smudges with fine sandpaper and prime it again.
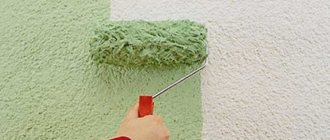
- Before painting, shake the paint can thoroughly so that it is thoroughly mixed inside and has the ideal consistency. Apply it with sweeping movements, paint from top to bottom so that no smudges form.
- Paint the surface in several layers, allowing each layer to dry thoroughly before applying the next layer. Modern compositions dry in 20-30 minutes. Determine the number of layers yourself. If you evaluate the result and understand that one more layer is not enough to obtain a more saturated and deep color, then feel free to take up the spray can and apply paint again.
- To protect the painted surface and add shine and depth to the color, apply an acrylic varnish on top. It must dry for at least 2 hours.
- Make sure that the paint and varnish are completely dry, the chandelier is no longer sticky, remove the protective film or masking tape.
- Reassemble the product and return all removed light bulbs and parts. Install an updated chandelier in your home.
If you understand how to paint a chandelier, strictly follow the proposed scheme, and approach the work creatively, then the result will surprise you, and the process itself will bring a lot of positive emotions and pleasure.
Options for updating lampshades
Lampshades preserved in excellent condition can be brought to life using various decorative techniques. The choice of a specific option depends on what materials you have at hand, your imagination and preferences.
The following materials can be used to decorate lampshades:
- Beads, beads.
- Lace.
- Ribbons, fringe, braid.
- Feathers and furs.
- Ready-made butterflies and artificial flowers.
- Paper napkins, petals, scraps of fabric.
- Wire.
- Decorative chains.
- Laces and yarn.
Take the old lampshade as a basis, then work according to one of the proposed schemes, selecting suitable materials for decoration.
Important! You can completely cover the base with decorations or lay out some kind of pattern or ornament.
New lampshade for lampshade made of yarn:
- For work, prepare yarn and PVA glue.
- Then inflate the balloon to the required size, pour some glue into a small container.
- Pass each strand of yarn through a bowl of glue, then wrap it tightly around the ball.
Important! Make sure the winding is even on all sides.
- Let the structure dry, then pierce the ball and remove it from the resulting fabric lampshade.
- Decorate the lampshade with bright ribbons, beads or fringe.
Original wire lampshade
Build a frame from wire, cover it with the selected material, for example, wicker, fabric or paper. The main thing here is not to forget about fire safety, so give preference to raw materials that are resistant to high temperatures. Decorate the lampshade with painting or other decorative elements.
Video material
You now know how to paint a chandelier with your own hands, refine an old lampshade or create a new one, so don’t even doubt that you will be able to revive your old lighting fixtures. The renewal process itself is a fun and creative activity. The main thing is to show your creative thinking to the maximum. Naturally, it doesn’t hurt to get acquainted with ready-made ideas that have long been brought to life.
Share on social media networks:
serviceyard.net
Options for updating lampshades
Lampshades preserved in excellent condition can be brought to life using various decorative techniques. The choice of a specific option depends on what materials you have at hand, your imagination and preferences.
The following materials can be used to decorate lampshades:
- Beads, beads.
- Lace.
- Ribbons, fringe, braid.
- Feathers and furs.
- Ready-made butterflies and artificial flowers.
- Paper napkins, petals, scraps of fabric.
- Wire.
- Decorative chains.
- Laces and yarn.
Take the old lampshade as a basis, then work according to one of the proposed schemes, selecting suitable materials for decoration.
Important! You can completely cover the base with decorations or lay out some kind of pattern or ornament.
New lampshade for lampshade made of yarn:
- For work, prepare yarn and PVA glue.
- Then inflate the balloon to the required size, pour some glue into a small container.
- Pass each strand of yarn through a bowl of glue, then wrap it tightly around the ball.
Important! Make sure the winding is even on all sides.
- Let the structure dry, then pierce the ball and remove it from the resulting fabric lampshade.
- Decorate the lampshade with bright ribbons, beads or fringe.
Original wire lampshade
Build a frame from wire, cover it with the selected material, for example, wicker, fabric or paper. The main thing here is not to forget about fire safety, so give preference to raw materials that are resistant to high temperatures. Decorate the lampshade with painting or other decorative elements.
How and with what to paint a chandelier yourself at home?
What do you need to paint a chandelier yourself?
Primer
– you can use either acrylic primer or metal primer
Acrylic spray paints – choose the colors you want to paint your scooter in advance. Now there is a huge selection of colors and shades of paint, there are paints with special effects - metallic, mother-of-pearl, fluorescent, hammer and others. Acrylic transparent varnish - it will protect the paint from damage, and will also add depth to the color and shine of the new coating of the chandelier. Respirator and gloves for protection during operating time Solvent for degreasing the surface of the chandelier before painting (you can use white spirit, kerosene or special degreasing compounds) Cloth napkins or just dry, clean cotton rags Masking tape and paper or covering film Screwdrivers and other tools to remove removable parts from the chandelier before painting
Preparing the chandelier for painting
| Step 1 It is better to organize your workplace outdoors. You will need to hang the chandelier from something, such as a string rope, a wall bar, a branch, or the garage ceiling. Cover the floor under your work area with something to prevent paint drops from staining the surface. Step 2 You need to remove all the light bulbs and other removable parts of the chandelier. If some elements that you do not want to paint cannot be removed, hide them with masking tape or plastic film. Step 3 It is necessary to thoroughly clean the chandelier, remove all dust, cobwebs, dirt and other contaminants, of course, if you do not want to permanently imprint them under the paint. Start by wiping the entire chandelier with a dry cloth. If there are parts that need more cleaning, use a damp cloth and a mild detergent to clean. Let the chandelier dry completely. |
Step 4 It is advisable to degrease the surface to be painted using acetone, kerosene, white spirit and any special degreaser.
Chandelier painting process
| Step 5 For best results, prime the surfaces using an aerosol primer before painting. Applying it from a spray can in broad strokes from top to bottom. It is better to apply several thin coats than one thick coat of primer. Keep the can at a distance of 15-20 cm from the chandelier. If you try to spray from a shorter distance, the primer may bleed. If this happens, allow the primer to dry completely, sand out any smudges with fine sandpaper, and re-prime. Step 6 Hopefully you have already chosen the right paint. Today, any craftsman has access to aerosol paints of completely different colors and shades, paints with special effects - metallic, pearlescent, fluorescent, etc. |
Before starting work, shake the paint can thoroughly so that it is well mixed and has an even consistency. Apply spray paint using sweeping movements, trying to paint from top to bottom to avoid smudges.
| Step 7 You need to paint the surface in 2-3 layers, each time allowing the previous layer to dry thoroughly. 20-30 minutes is enough for this. Determine the number of paint layers yourself, “by eye”. If you look at the result and you want to apply another layer to get a deeper and richer color - don’t be shy, feel free to paint more. Step 8 This is an optional step. If you want to further protect the painted surface of your light fixture or chandelier, as well as add more depth and shine to the color, you can apply an acrylic spray varnish to your scooter. Varnish drying time 1-2 hours |
Step 9 After making sure that the paint and varnish have completely dried (usually it takes 2-3 hours for final drying) and the chandelier has stopped sticking, remove all the masking tape and protective film. Assemble the chandelier by attaching all the removed parts and light bulbs. Install a freshly painted chandelier in your home.
If you followed the proposed technology and were creative in painting, then you will enjoy not only the painting process, but also the result you got!
samokraska.ru
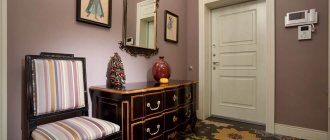
New life for an old chandelier
If the good old and beloved chandelier can no longer be revived in its usual role, try to use it in a new way. For example, from an old hanging chandelier you can quite successfully make a flower pot for your country house. To do this, secure flower pots in place of light bulbs and shades, fill them with soil and plant flowering plants. This design can be used to decorate an open terrace of a country house or a balcony.
In general, the process of updating an old chandelier is quite a creative and exciting activity. The main thing is not to be shy to show your creative thinking. Well, it doesn’t hurt to get acquainted with the ideas that have already been thought up and implemented. Fortunately, today we have the world wide web and the rich experience of self-taught colleagues at our service. So, study and dare!
The result exceeded all my expectations! One got the impression that this was a completely different lampshade, cast from black plastic! I painted it in two layers, about 15-20 minutes apart. The paint is excellent, I recommend it to everyone!
Guys, hello everyone! Today I talked about reupholstering the ceiling, then we will talk about the navigation lamp. Since the ceiling was covered in black material, something had to be done with the lampshade. I decided to paint it. First, I took it off and brought it home.
Disassembled and thoroughly degreased with solvent.
I bought some black paint for the plastic in advance.
And, crossing my fingers, I started painting. I’ve never done this before, and, to be honest, I was a little afraid of ruining the lampshade!))) But, thank God, everything went just fine!
The result exceeded all my expectations! One got the impression that this was a completely different lampshade, cast from black plastic! I painted it in two layers, about 15-20 minutes apart. The paint is excellent, I recommend it to everyone!
Now comes the sun visors!
PVA glue is a good base for applying any coloring matter. If a high-quality result is required, it is recommended to create a layer of PVA before applying paint. Next, you can color the light bulb with ballpoint pen paste or special ink.
In order to change the color of a product, it is recommended to use highly effective painting methods. The best solution is to use specialized paint, which is created specifically for painting glass objects.
Ballpoint pen paste
If you don’t have time to find special paint, you can use ballpoint pen paste. To carry out staining using this method, you must perform the following steps:
- Take the stick with the paste.
- Remove the tip and extract the paste.
- Using a brush, apply the paste to the light bulb.
You can use either a blue or any other pen as a source of paint. The final result will depend on the amount of paste applied. It is worth understanding that using only ink from a ballpoint pen you will not be able to perfectly darken the product.
Nail polish
Using nail polish, low-power light bulbs are painted that do not heat up very much (the temperature during operation does not exceed 100 degrees C). The varnish has pronounced adhesion and durability. It can also be used to paint the entire surface evenly. You can use varnishes of any color, from yellow to red and green. Clear varnishes can be used as a base for other colorants. After applying the varnish, any other paint will adhere much better and with higher quality to the surface of the light bulb.
PVA glue is a good base for applying any coloring matter. If a high-quality result is required, it is recommended to create a layer of PVA before applying paint. Next, you can color the light bulb with ballpoint pen paste or special ink.
Auto enamel
Automotive enamel is a specialized paint that is sold in the form of an aerosol. Its advantages are good adhesion, convenience, high application speed and durability. Auto enamel is applied in a thin layer to achieve the desired darkening effect. You can find paint of any color on the market without any problems. Application is carried out from a distance of 30-50 cm. Before this, the spray can is thoroughly shaken. It is important to make the layer thin so that the glass of the light bulb does not lose its transparency. If the layer is too thick, light will not pass through it.
Stained glass paints
Stained glass paints are created specifically for painting glass objects. With their help, you can give the glass the desired color while maintaining its transparency. To change the color of a light bulb, water-soluble stained glass paints are used that can withstand high temperatures. The paints are sold in tubes. Substances must be applied in strict accordance with the instructions. You will first need to prepare the surface by cleaning and degreasing it. To give the light bulb a special look, purchase fluorescent paints with sparkles.
Tsaponlak
Tsaponlak is a varnish that is used to coat metal products and microcircuits to protect them from negative external influences. It is possible to purchase both transparent and colored tsaponlac. Using a colored liquid, you can try to paint a light bulb. The advantage of this varnish is resistance to high temperatures and wear resistance. The downside is the small selection of colors (only red and green tsaponlaki are available for selection).
Organosilicon
Organosilicon paints are characterized by extremely high heat resistance. They can be applied to coatings, which will subsequently heat up to temperatures above 500-600 degrees C. Organosilicon is used to color powerful light bulbs, which become very hot during operation. Before staining, it is recommended to dilute the dye with a solvent, otherwise the glass will be darkened too much. You need to act based on the instructions for the specific silicone-based paint.
How and with what to paint a chandelier yourself at home?
What do you need to paint a chandelier yourself?
Primer – you can use either acrylic primer or metal primer Acrylic spray paints – choose the colors you want to paint your scooter in advance. Now there is a huge selection of colors and shades of paint, there are paints with special effects - metallic, mother-of-pearl, fluorescent, hammer and others. Acrylic transparent varnish - it will protect the paint from damage, and will also add depth to the color and shine of the new coating of the chandelier. Respirator and gloves for protection during operating time Solvent for degreasing the surface of the chandelier before painting (you can use white spirit, kerosene or special degreasing compounds) Cloth napkins or just dry, clean cotton rags Masking tape and paper or covering film Screwdrivers and other tools to remove removable parts from the chandelier before painting
Preparing the chandelier for painting
| Step 1 It is better to organize your workplace outdoors. You will need to hang the chandelier from something, such as a string rope, a wall bar, a branch, or the garage ceiling. Cover the floor under your work area with something to prevent paint drops from staining the surface. Step 2 You need to remove all the light bulbs and other removable parts of the chandelier. If some elements that you do not want to paint cannot be removed, hide them with masking tape or plastic film. Step 3 It is necessary to thoroughly clean the chandelier, remove all dust, cobwebs, dirt and other contaminants, of course, if you do not want to permanently imprint them under the paint. Start by wiping the entire chandelier with a dry cloth. If there are parts that need more cleaning, use a damp cloth and a mild detergent to clean. Let the chandelier dry completely. |
Step 4 It is advisable to degrease the surface to be painted using acetone, kerosene, white spirit and any special degreaser.
Chandelier painting process
| Step 5 For best results, prime the surfaces using an aerosol primer before painting. Applying it from a spray can in broad strokes from top to bottom. It is better to apply several thin coats than one thick coat of primer. Keep the can at a distance of 15-20 cm from the chandelier. If you try to spray from a shorter distance, the primer may bleed. If this happens, allow the primer to dry completely, sand out any smudges with fine sandpaper, and re-prime. Step 6 Hopefully you have already chosen the right paint. Today, any craftsman has access to aerosol paints of completely different colors and shades, paints with special effects - metallic, pearlescent, fluorescent, etc. |
Before starting work, shake the paint can thoroughly so that it is well mixed and has an even consistency. Apply spray paint using sweeping movements, trying to paint from top to bottom to avoid smudges.
| Step 7 You need to paint the surface in 2-3 layers, each time allowing the previous layer to dry thoroughly. 20-30 minutes is enough for this. Determine the number of paint layers yourself, “by eye”. If you look at the result and you want to apply another layer to get a deeper and richer color - don’t be shy, feel free to paint more. Step 8 This is an optional step. If you want to further protect the painted surface of your light fixture or chandelier, as well as add more depth and shine to the color, you can apply an acrylic spray varnish to your scooter. Varnish drying time 1-2 hours |
Step 9 After making sure that the paint and varnish have completely dried (usually it takes 2-3 hours for final drying) and the chandelier has stopped sticking, remove all the masking tape and protective film. Assemble the chandelier by attaching all the removed parts and light bulbs. Install a freshly painted chandelier in your home.
If you followed the proposed technology and were creative in painting, then you will enjoy not only the painting process, but also the result you got!
samokraska.ru
How to prepare a chandelier for painting?
Of course, before you paint the chandelier shades with your own hands, they need to be prepared. It is better to organize the workplace outdoors.
Do the following:
- Hang the chandelier on some kind of hook, or stretch a rope - you can use a children's wall bars, the ceiling in a gazebo, or a branch.
- Cover the floor directly below the work area with something to prevent it from getting stained by drops of paint.
- Remove all light bulbs and removable parts from your chandelier. If any element that you do not plan to paint cannot be removed, then simply cover it with plastic film or masking tape.
- Clean the chandelier carefully, remove cobwebs, dust, dirt, and any contaminants so that they do not remain forever under the paint layer. First, wipe it with a dry cloth. Wash parts that require more thorough cleaning with a damp cloth and mild detergent. Let it dry completely.
- The entire surface should be degreased, for example, with kerosene or acetone.
How to repaint a chandelier base | mama-knowet.com
This master class will be useful for those who want to make a complete upgrade or simply change the color of the base of their chandelier.
It happens, after all, that a chandelier fits the interior perfectly in many ways, but the color of the base is not the same. This is exactly the case for me. We bought two pendants and matched them to an existing chandelier. In the store it seemed to me that the color of the fittings was the same, but at home, when we put the chandelier and pendant together, it turned out that the pendant had a gray-bluish “color”, and the chandelier was gray-brown.
And the painting texture of pendant chandeliers is rougher.
It was decided to repaint the chandelier. To do this, we use ordinary acrylic enamel from a hardware store, the colors are light brown and black from the same place. We will paint using a brush and a foam sponge, like many people use to wash dishes.
You will also need a container in which it is convenient to dilute the paint. It could be a jar. It is convenient to use small plastic containers with several compartments, then the paint can be diluted in stages, transferring it in the required quantity from one compartment to another. I will show such a container below.
We disassemble the chandelier, remove the shade and unscrew the light bulb
Using a brush, paint the base completely white. At the same time, the gray shows through a little, but this is not a big deal; subsequent layers of paint will cover it up.
Let the chandelier dry for a couple of hours. Then we dilute the paint of the desired color, adding colors. Mine is grey-brownish. First, I add light brown and a little black to the white paint.
We cut a piece of a convenient size from the washcloth, dip it in paint (very little paint) and bale it on paper, a piece of untreated wood, plywood (any surface that absorbs paint well), until we see such a pattern from the washcloth as we would like to have on the chandelier. The less paint remains on the washcloth, the more “sprayed” the pattern becomes.
On a test piece of plywood, the color seemed gray to me, but when I painted the chandelier with it, it turned out to have a distinct brown tint. It's not scary. I add more black dye to my paint and paint over the top a second time.
In places where I need to darken the color, I go over it with a washcloth a couple of times. To make the drawing smaller, I “bale” it with an almost dry washcloth with a minimum of paint.
I’m trying it on with the standard chandelier. I think I got the color right. Only the texture turned out to be not as blurry as it should be.
We will correct the situation. I dilute the white paint with water to such an extent that the washcloth leaves translucent traces on the sampler.
I go over the painted base with this paint. This was before:
And this is after one layer. The pattern has become more uniform, but one layer is not enough.
I do the same with the base.
After drying, I apply a second layer.
And the third, fragmentarily, in places where it is needed.
Here is my plastic box, which I wrote about above. It is convenient to dilute paint in it.
I treat the base with a large number of layers to lighten it and bring it closer to the appearance of the base of the standard chandelier.
After the paint has dried well (this is a couple of hours, but it’s better to wait a day), the chandelier can be assembled. Subsequently, the base can be washed, the paint is not afraid of water.
Here's what I got.
And this is the chandelier whose color I imitated. I think it turned out the same.
Now I will not have dissonance and my soul will be calm about this) We install the pendant in its place, and it will hang above the table.
The distance to the chandelier is a couple of meters, but the differences in color would be clearly visible.
The tiles against which the pendant hangs are somewhat reminiscent of the pattern on its fittings. Why was this suspension chosen?
On a white ceiling, the base looks darker than it appeared during painting.
We have two hangers. From the room they look like this:
I'm happy with the result. Everything is simple, besides, cheap and cheerful. In this way you can repaint any old chandelier and breathe new life into it.
I hope my experience will be useful to you. Thank you for your attention!
mama-knowet.com
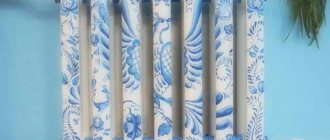
How to beautifully paint an old chandelier?
Saving is only one of the reasons for refusing to completely replace an old chandelier. If the item is made conscientiously and fits perfectly into the interior of the room, then it can be given a new life by painting. By making small changes to the color scheme, you can not only refresh an item with which many memories are associated, but also make it exclusive. The most popular finishing options for traditionally shaped chandeliers are country and Provence styles, as well as painting them in gold or bronze.
Country style originated in North America. It reflected the life of farmers and the simple decoration of their homes. Popular materials for country music are wood, ceramics, forged metal, rough textiles, cords and ropes. To decorate chandeliers in country style, you can use all shades of brown and beige, as well as metallic colors without glitter.
If the frame is made of metal, then it is enough to “age” it by covering it with a dark-colored varnish suitable for metal surfaces. Coarse chains, ropes and textured fabrics made from natural materials can be used as additional decorative elements. Country-style chandelier shades are usually painted beige or brown, but you can leave them transparent.
Antique - bronze, gold
To imitate antique forging, you will need a metallic coloring composition. Depending on the task at hand, it can be the color of bronze, as well as various variations of silver and gold.
Suitable types of coatings:
- paint “Bosny No. 351”, shade “gold” (matte darkened gold);
- acrylic quick-drying composition “Viksen”, universal enamel “metallic” (light aged gold);
- paint “Bosny KT No. 181” “coper gold” (shiny golden color with a reddish tint);
- enamel “Bosny KT No. 182” “brass gold” (mirror shine with a hint of brass);
- metallic enamel “Kudo” (light matte gold);
- decorative paint “Siana” (rose gold).
How to paint a lampshade using spray products from Maxi Color and Dupli-Color
13.03.2015
What unites long winter twilights, cool spring evenings, stuffy summer nights and rainy autumn grayness? Of course, a cup of aromatic tea, a comfortable chair and a couple of chapters from a good book before bed. However, there is something missing in this description: there is not that cozy and muted “warm” light that can only be created by a floor lamp with the right lampshade, which you can either buy or create with your own hands.
Stage one: create
What will you need?
Strong and durable PVA glue, a skein of strong knitting threads, a small container, a balloon.
Pour PVA glue into a suitable container and lower the threads there. Then we inflate the balloon and begin to wrap it as tightly as possible with threads soaked in adhesive. We leave the resulting structure overnight, and in the morning we pierce the ball and remove its shell from the frozen rigid frame.
Stage two: paint
What will you need?
Aerosol paints, a prepared workplace and some free time.
The future lampshade can be painted in completely different ways, in accordance with personal preferences and interior features. Some owners prefer muted colors, while others, on the contrary, tend to choose the brightest paint possible. We did both options: for the dark color we chose green spray paint from Maxi Color, and the bright lampshades were painted using Dupli-Color Aqua in a rich blue color.
Before use, we thoroughly shook the paint cans for several minutes, and then carefully removed the special protective seals that were located under the caps. The paint was sprayed in 3 layers, carefully and sparingly, from a distance of 30 cm from the surface. Before applying each new layer, wait until the previous one had partially dried. At room temperature, the paint completely hardened within a couple of hours.
Important:
The special composition of Dupli-Color Aqua aerosol paint allows you to easily wash it off with ordinary water within half an hour after application. Therefore, if necessary, you can quickly correct any errors or even completely remove the coating if its color does not match the original idea.
Stage three: exploit
We place the lampshade on the lamp. To create the best effect, we recommend using frosted light bulbs, which diffuse the light and create a cozy atmosphere.
hammer.com.ua
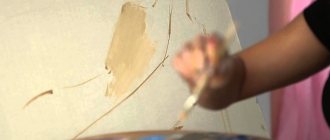
Restoration of an old lampshade | DIY master class
Very often during repairs there is simply no money left for such little things as a new lamp.
Therefore, today we will try to transform the old lampshade so that it fits well into the updated interior. Three walls in the room are covered with plain wallpaper, and the central one is covered with patterned wallpaper. We will focus on this when restoring our lamp. For work we will need: a lampshade, scissors, PVA glue, watercolor paints or gouache, a brush, pieces of wallpaper, colorless varnish in a can, remnants of wallpaper. 1. Wash and wipe the lampshade dry, ridding it of accumulated dust and dirt.
2. From the remnants of wallpaper that we used to cover the central wall, cut out the fragments you like. You can use any other fragments or drawing that you like. In addition, if you want the main background to be not white, but have a different color, then it must first be repainted in the desired color. This is easy to do using spray paint.
3. Soak the fragments of the design in water for several minutes. When they are well saturated with water, carefully remove the bottom part of the paper.
4. Using PVA glue, glue each fragment to the lampshade. We do this very carefully, trying to avoid the formation of wrinkles in the drawing and carefully expelling air bubbles.
5. Wait for the glued parts to dry well.
6. Carefully wipe off any glue drips from the lampshade.
7. Squeeze a little PVA glue into a small container and add red paint to it (you can use several shades). This method allows the paint to adhere well to the lampshade.
8. Using a brush, draw fancy curls and let the paint dry. If the drawing turns out to be pale, then you can apply one or more additional layers of paint.
9. We cover our lampshade with colorless varnish. Please note that when the lampshade is heated, the varnish may give off an unpleasant odor at first. Therefore, I recommend that in the first days you ventilate the premises well and do not close the window.
sdelaysam-svoimirukami.ru
DIY chandelier - how to paint a chandelier | My Sweet Home
DIY chandelier - how to paint a chandelier
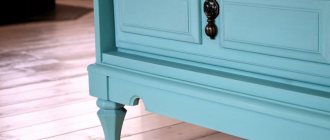
You can paint an old metal chandelier with your own hands and it will find a new life. Look how cool the chandelier looks after painting it lavender! Metal can be painted in three ways - alkyd enamel, acrylic paint and spray enamel.
Alkyd enamel will stick to metal better than others, but it will just have to be applied in several layers - I checked this when I painted my chandelier with my own hands. In addition, alkyd enamel smells very unpleasant and you cannot paint it in your apartment - otherwise you will have to move out for several days.
Artistic acrylic applies well, but it is not durable, so the paint will have to be varnished on top. Using a spray can is the fastest way to paint a chandelier, but you need to cover everything around with paper or newspapers so as not to stain anything else.
So choose for yourself which of the presented ways to paint your chandelier. But in any case, no matter what paint you choose, your new chandelier will look much better than the old one!
Updating an old chandelier with paint
What options are there for updating a chandelier? There are many ways, you can paint it white and gold or update the shades, create a new or refresh an old lampshade, make something completely new from an old lamp. Painting means updating the base color, painting glass, plastic or ceramic shades.
Important! It is better to paint in several layers and fix the finished work with varnish.
- You can choose any shade, taking into account individual preferences and tastes, the color scheme that prevails in the existing interior.
- As soon as you get bored with the new color, you can easily repaint the lampshades again.
- If the result does not suit you, then you can simply throw away the old chandelier. But this is already a last resort.